Our front, side, and back yards needed restoring after our garage was converted into an ADU. I took the opportunity to restore the landscaping, build a couple benches and tables, and build two decks. It was a super fun experience, and this post shares the journey and costs.
Priorities and planning
In 2022 and 2023, we converted the front yard lawn into drought tolerant landscaping, built a side entrance to the backyard, and built a patio in the backyard.

Back then, we had prioritized the following:
- Low maintenance landscaping with low watering needs
- Dedicated entryway to the backyard, in case the driveway was inaccessible
- More “destination” spots outdoors, with a sense of indoor/outdoor living
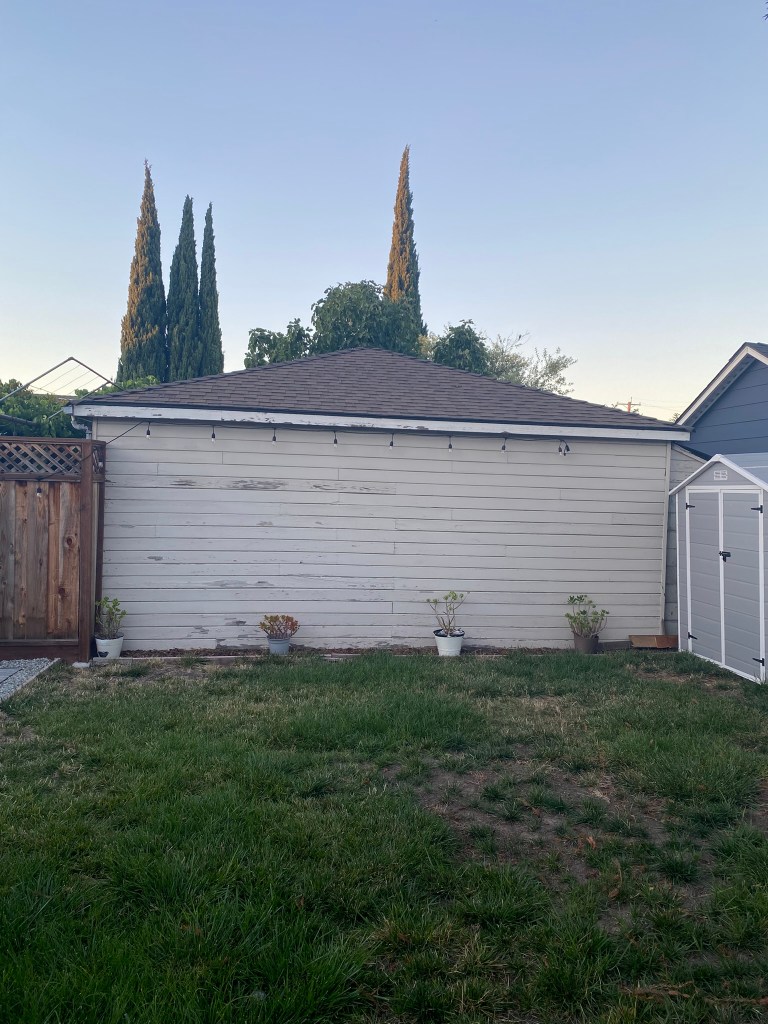
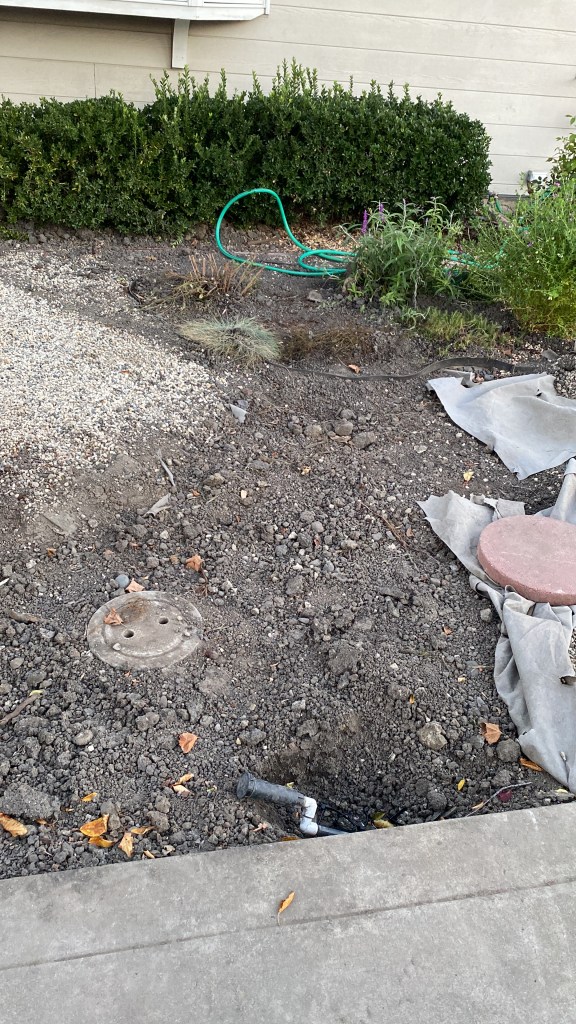
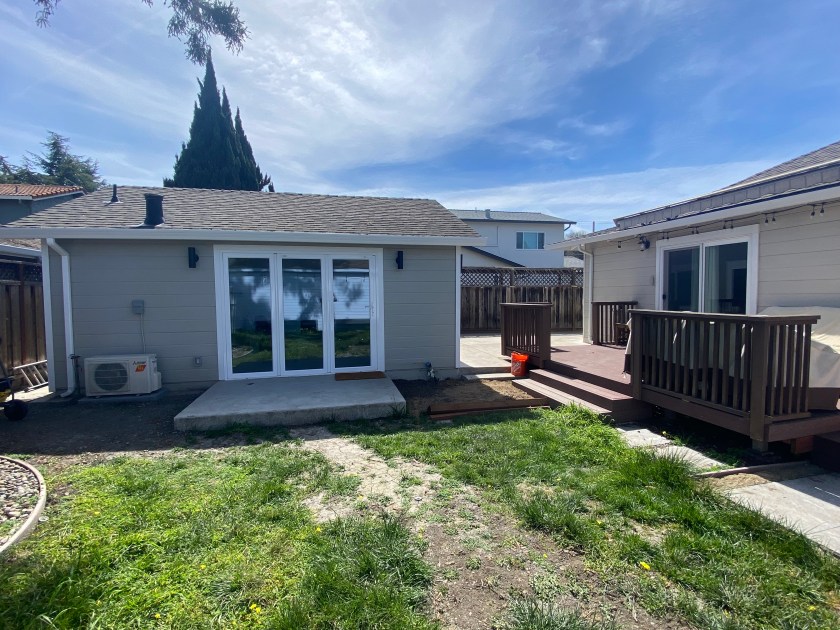
Unfortunately, in order to connect the water and sewage lines to the ADU, the general contractors dug through everything we worked on. Here’s what things looked like by the time the contractors finished plumbing and had backfilled the dirt.
I began planning how to restore everything. I also wanted to makeadditional improvements. The things that were top of mind were:
- Minimize weeds in the front yard, side yard, and patio
- Benches as a new gathering spot in the grass
- Decks. Create natural “flow” from the house to the backyard
1. Minimize weeding
Over one year had gone by since we finished the front, side, and back yards. During that time that passed, weeds became prevalent in areas where I hadn’t laid down landscape fabric. I learned the consequences of being lazy, and wanted to add landscape fabric down this time around.
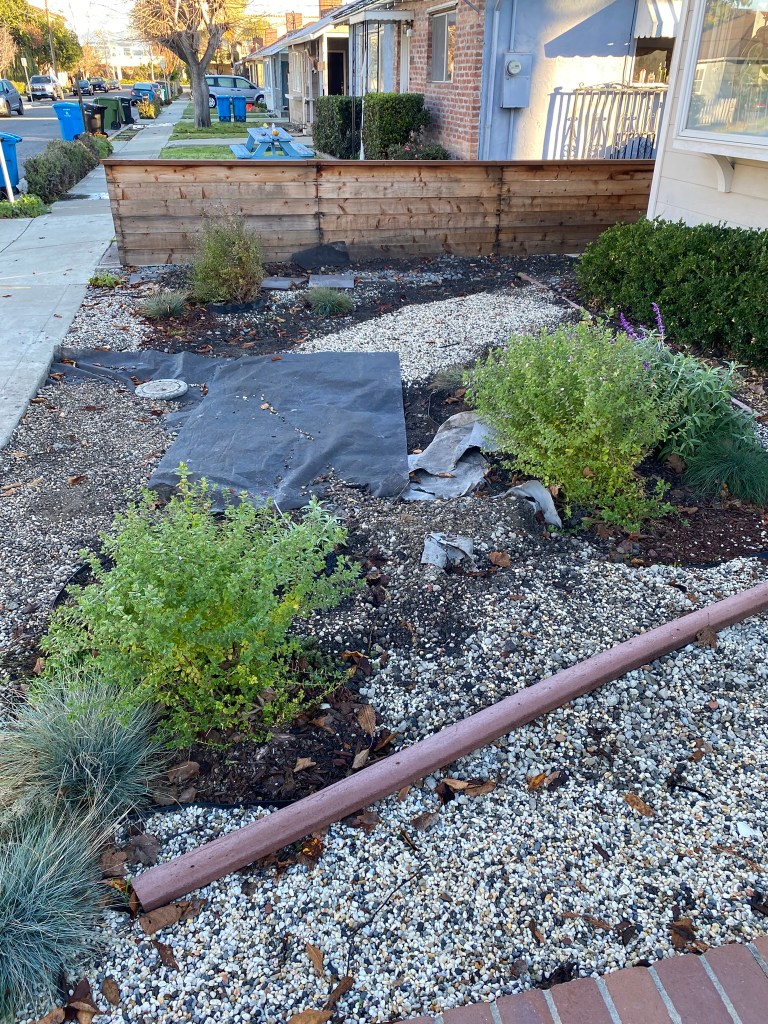
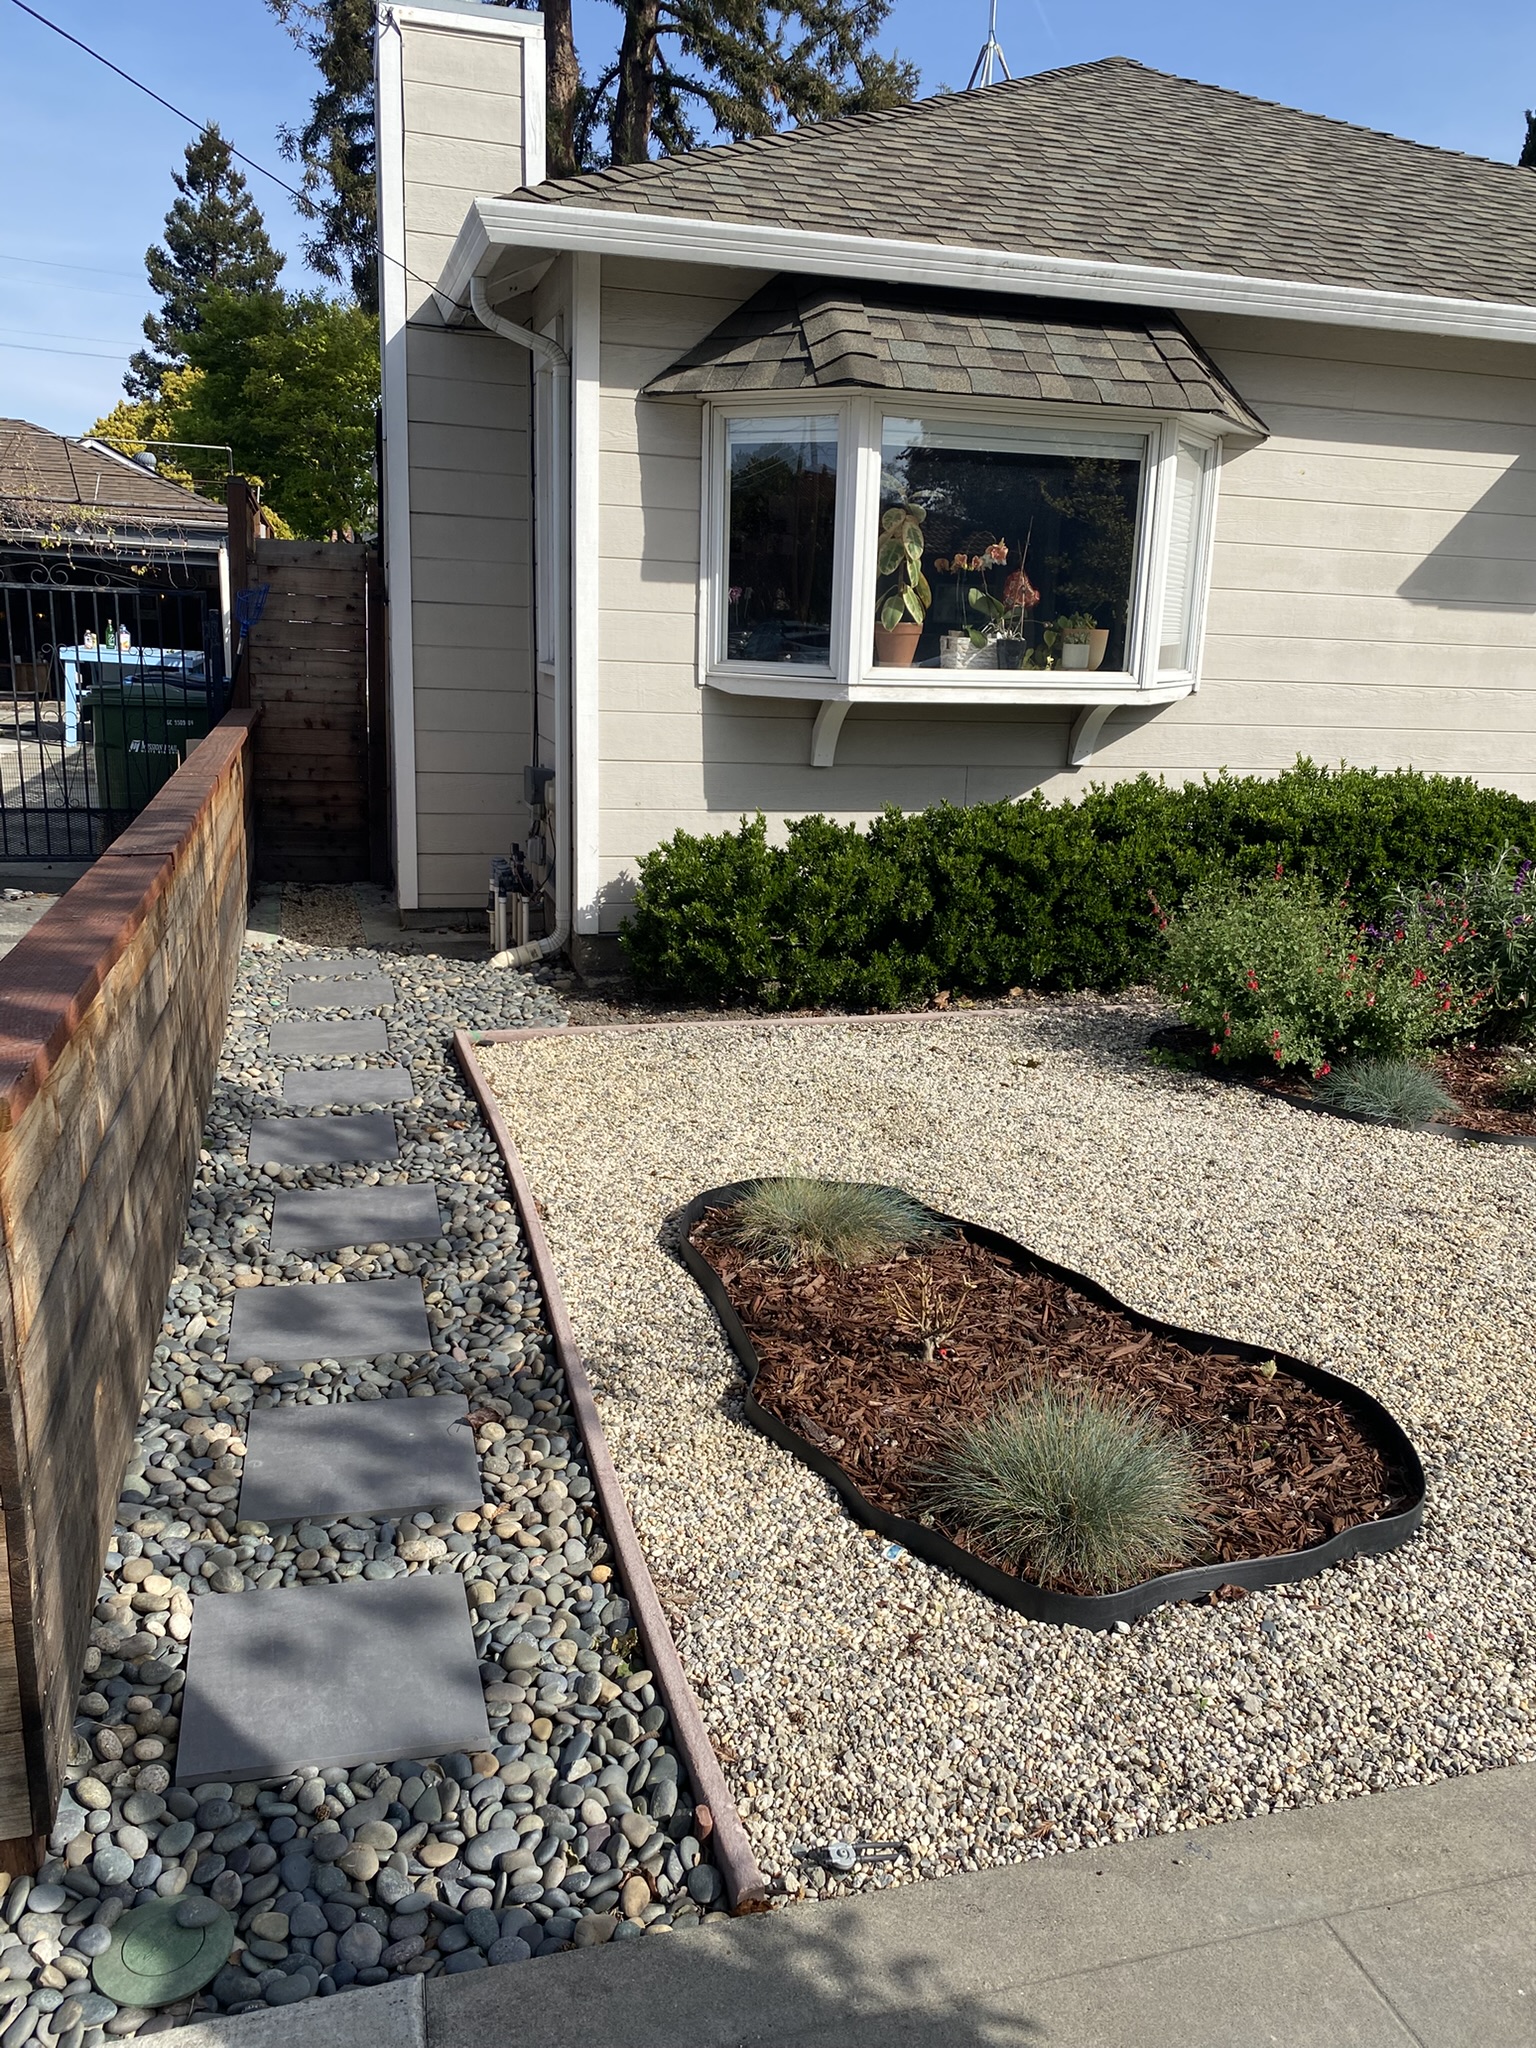
First came the front yard, and site preparation was a pain in the ass. I manually separated dirt, small pebbles, and river rocks from each other. The more efficient but costlier method would have been to just toss everything, then buy new river rocks and pebbles to pour down. But it didn’t sit well with me to throw away perfectly good materials, so I separated everything and hosed it down.

Once all the pavers and rocks were separated, I put down two layers of landscape fabric and put in the edging. The remaining step was easy: place the pavers back in and pour in the different rocks on each side.
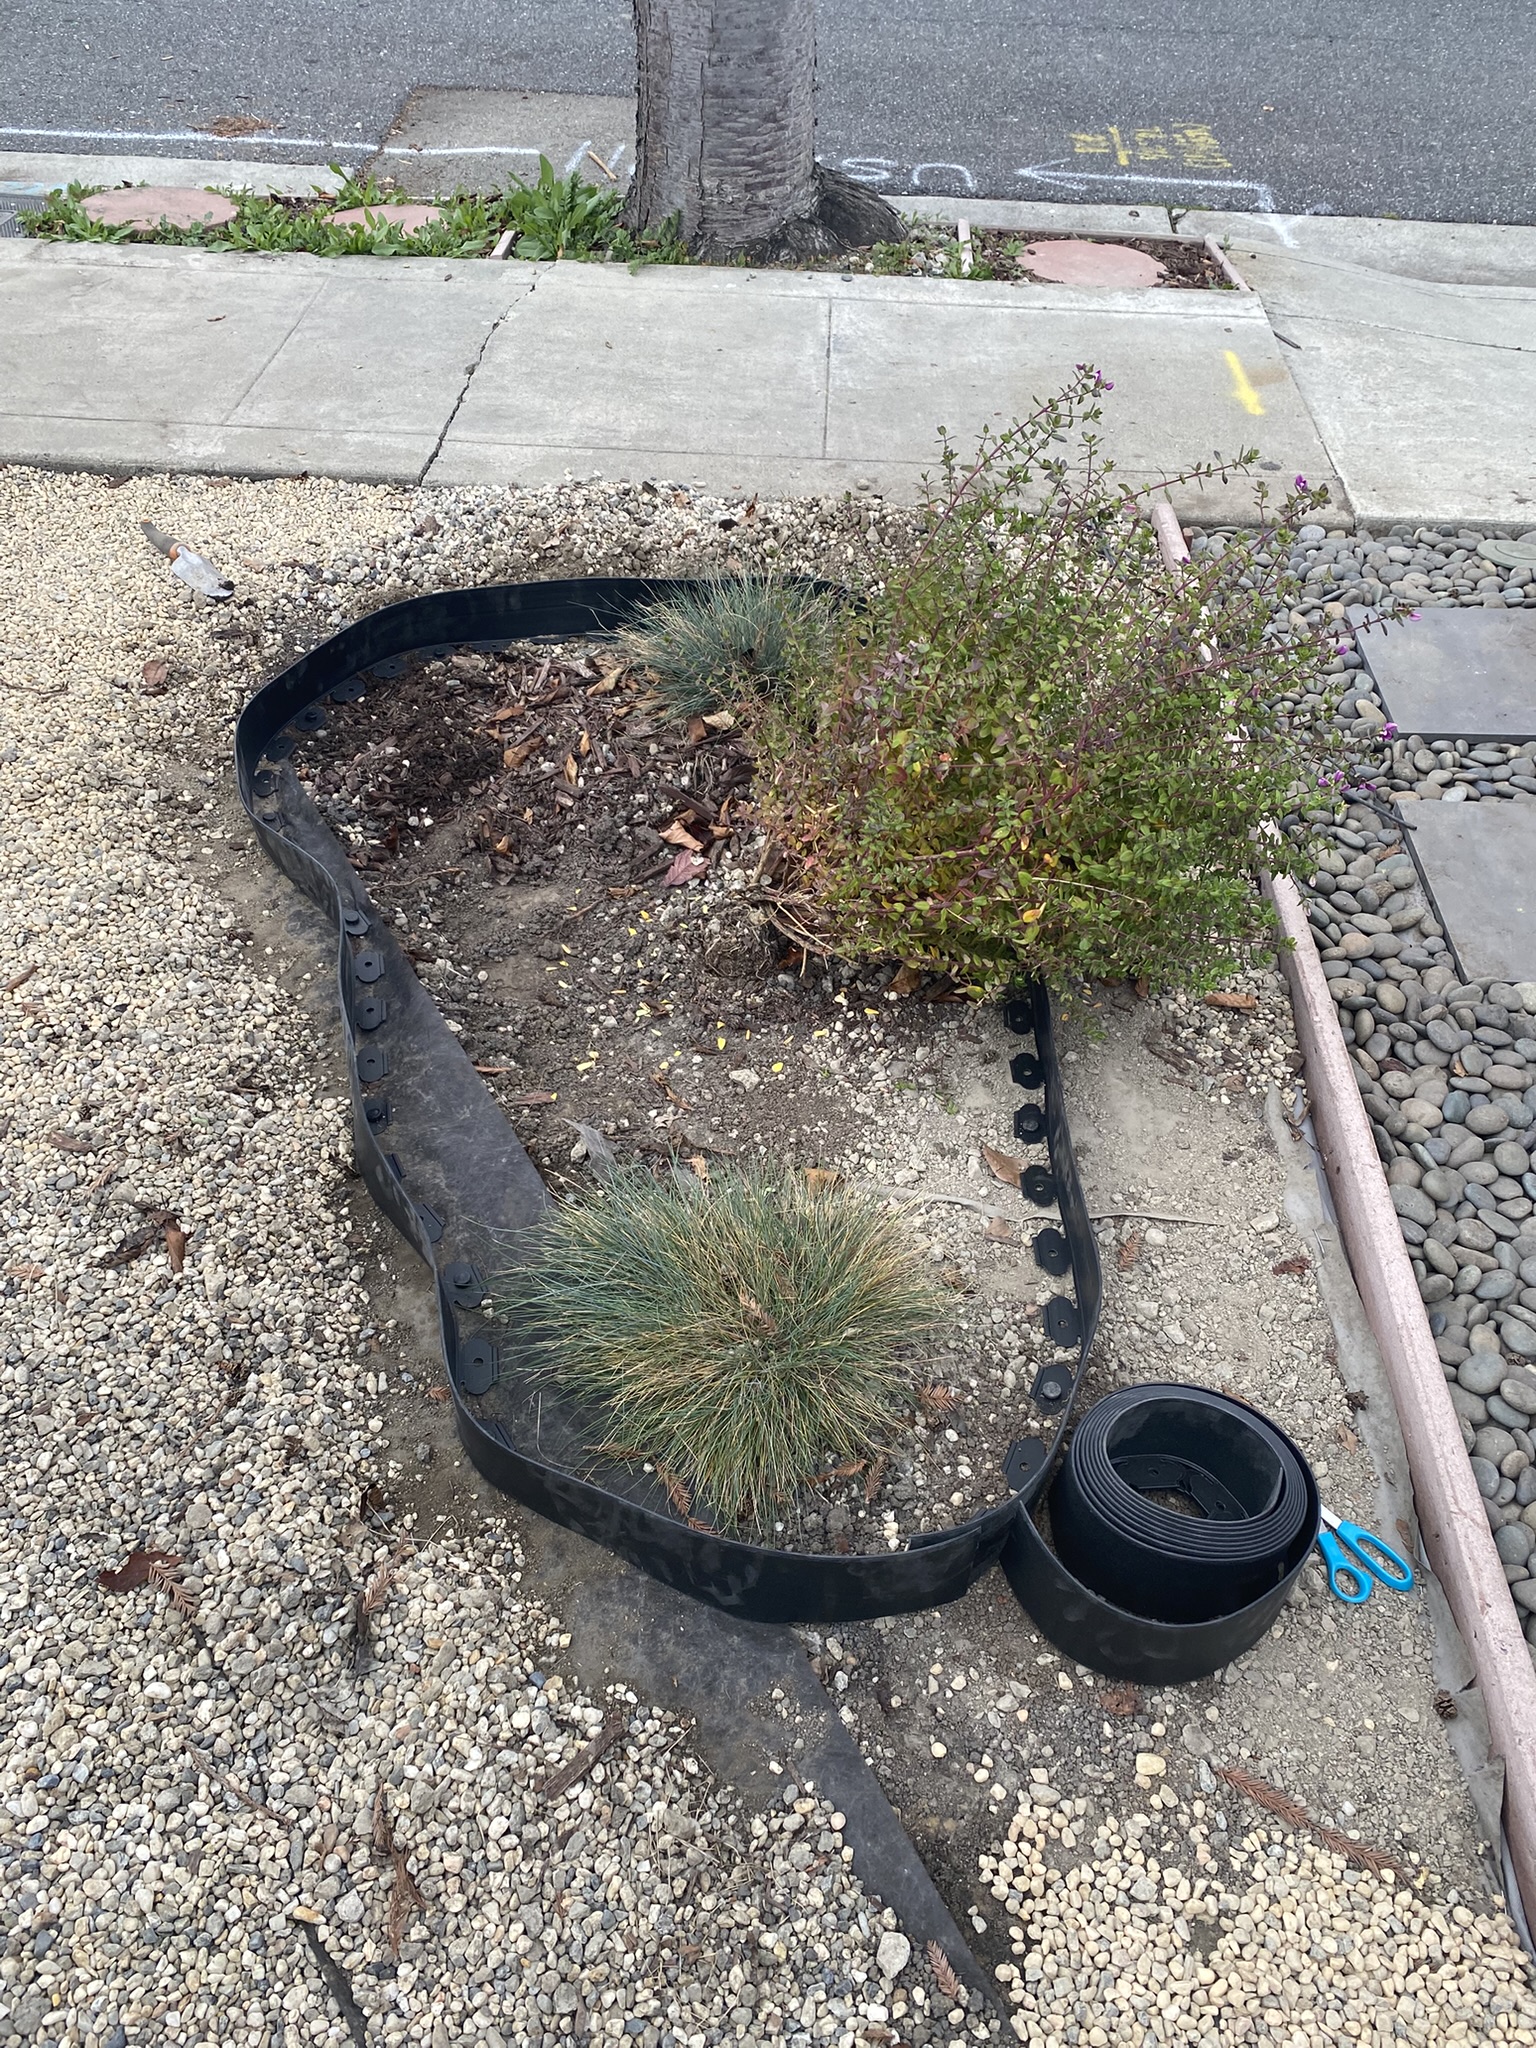
Next, the contractors had also all but destroyed one of the mulch beds. I had to install new edging and put in a couple new plants.
A few weeks later of doing hours here and there, the front yard was restored! Only time will tell if the landscape fabric will significantly reduce weed growth, but hoping I was diligent enough this time.
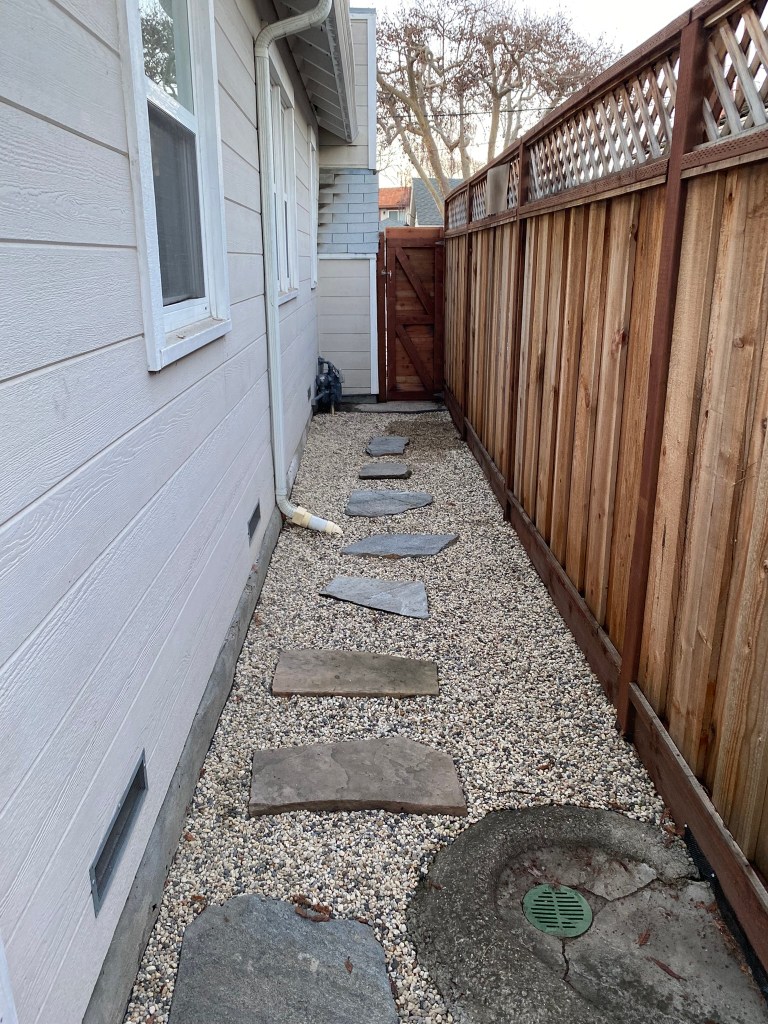
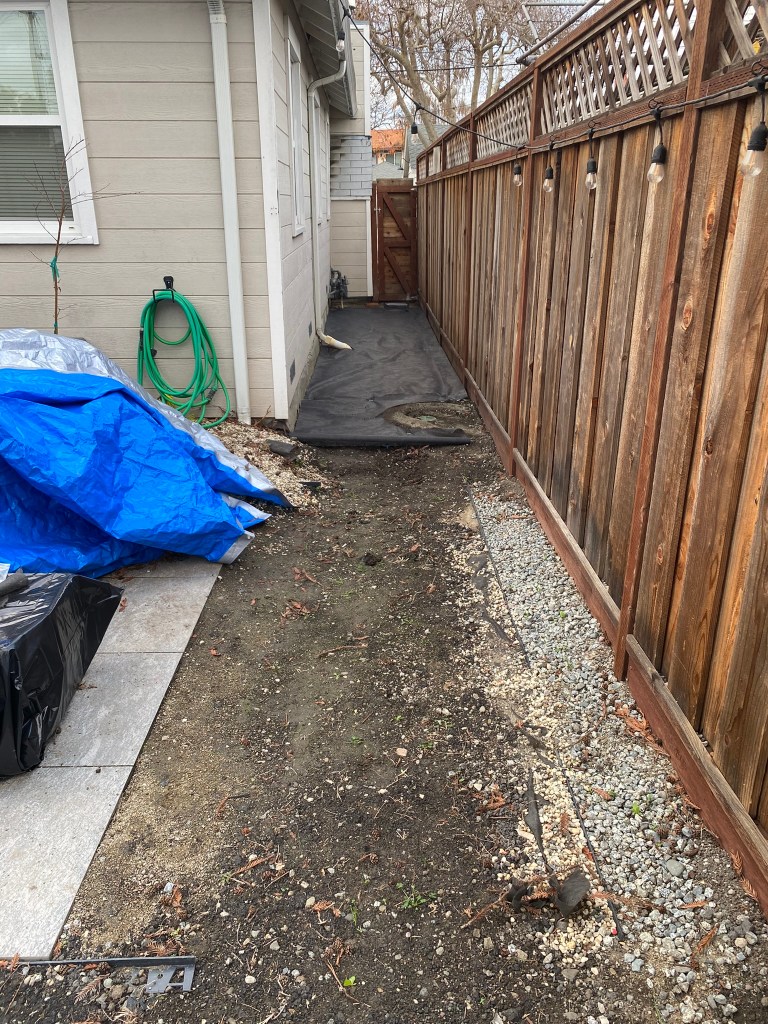
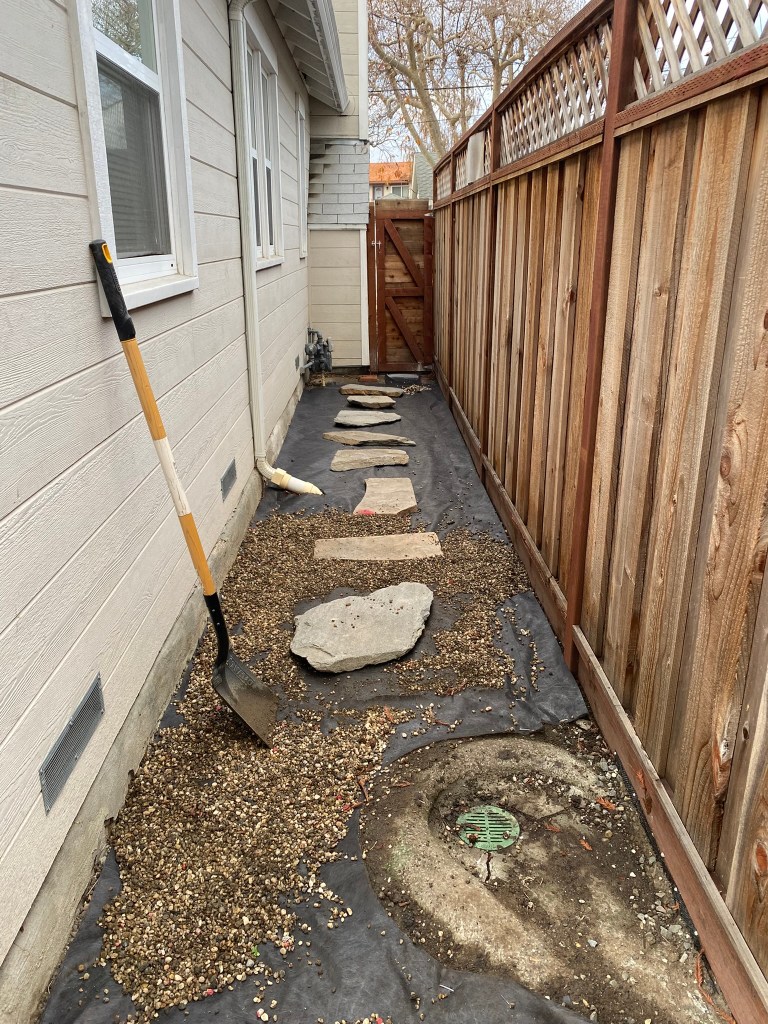
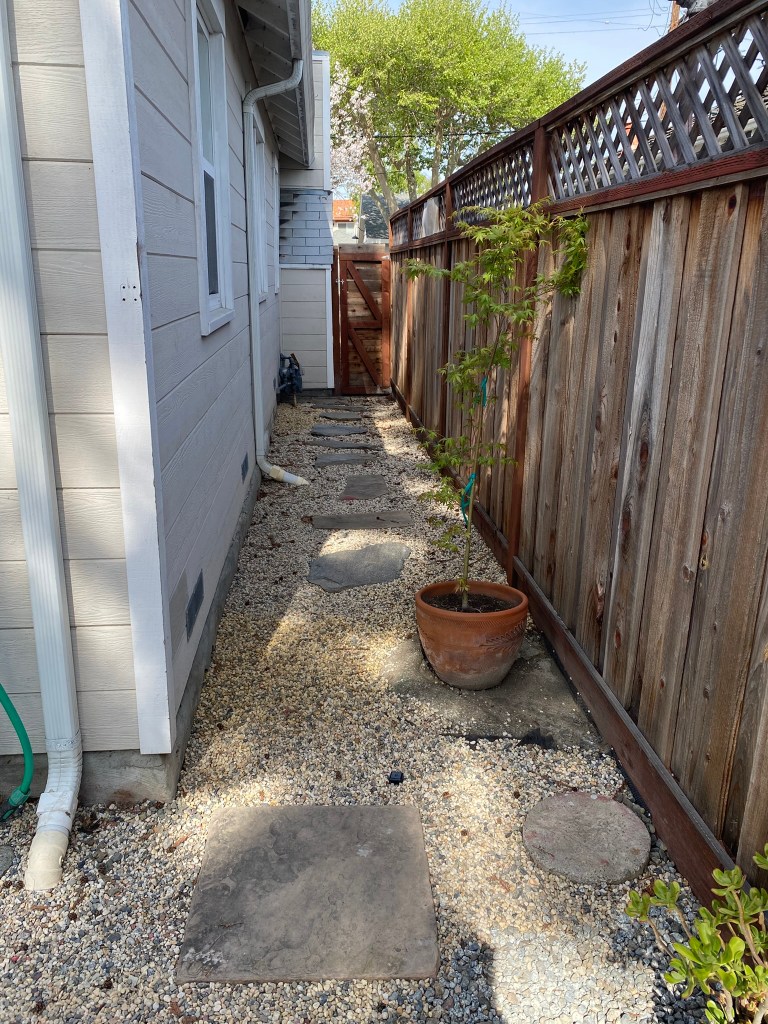
Restoring the side yard was the easiest project. I had asked the general contractors to keep all the pebbles, which they stacked on top of a tarp in the back yard. I applied three new layers of landscape fabric, positioned the flagstone steps, then shoveled the pebbles back into place.
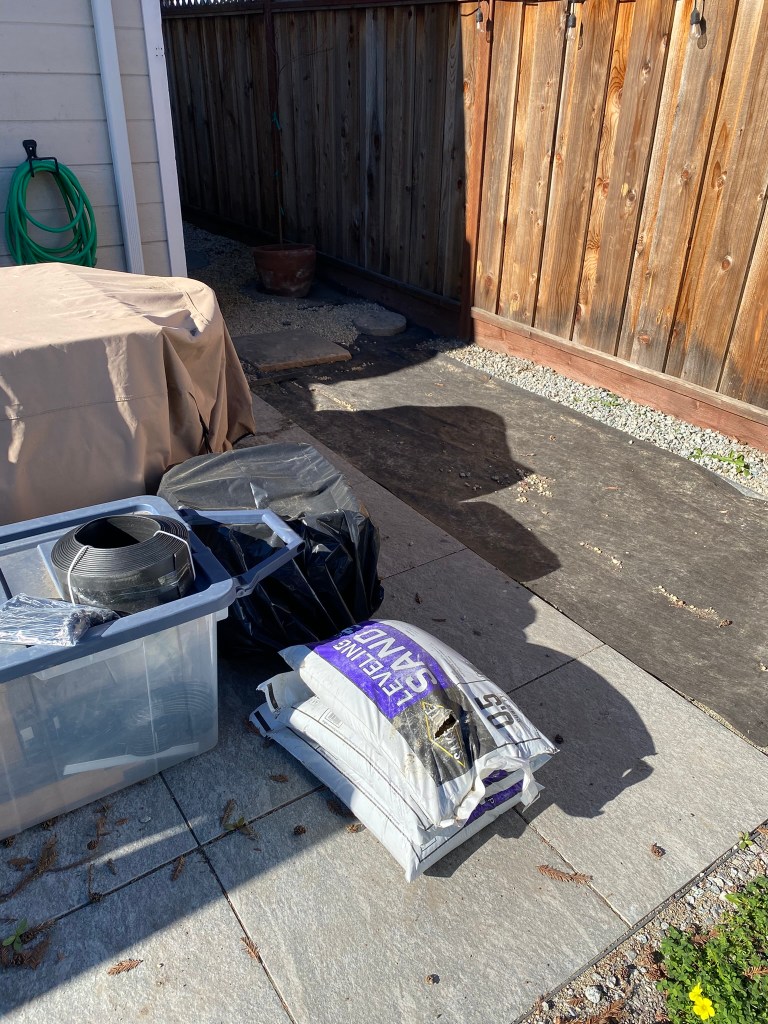
The patio, just like the first installation, was the biggest pain in the ass to restore. I bought 7 new bags of leveling sand (over 3 separate Home Depot trips due to terrible estimating) to level the ground. With my mom’s help, we fine tuned the pavers until they were level. Even though there were only 10 pavers, we spent many hours repeating this sequence:
- Put paver in
- Step on paver and observe movement
- Guess where more sand is needed
- Take paver out
- Add in more sand
- Level sand
- Put paver back in
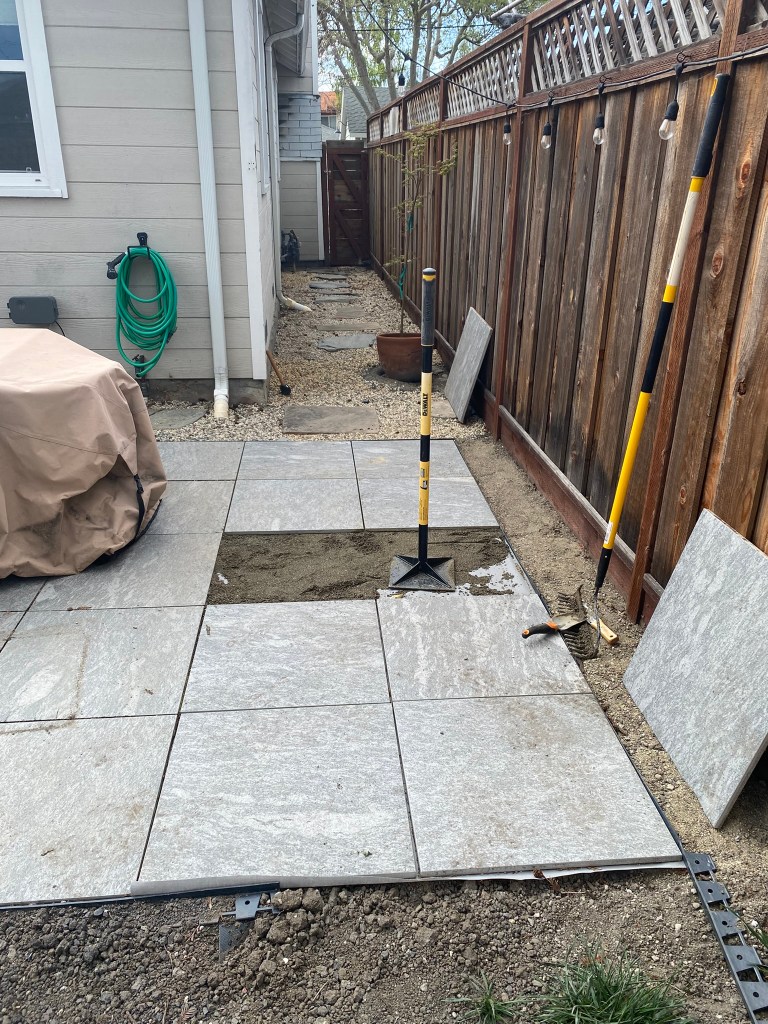
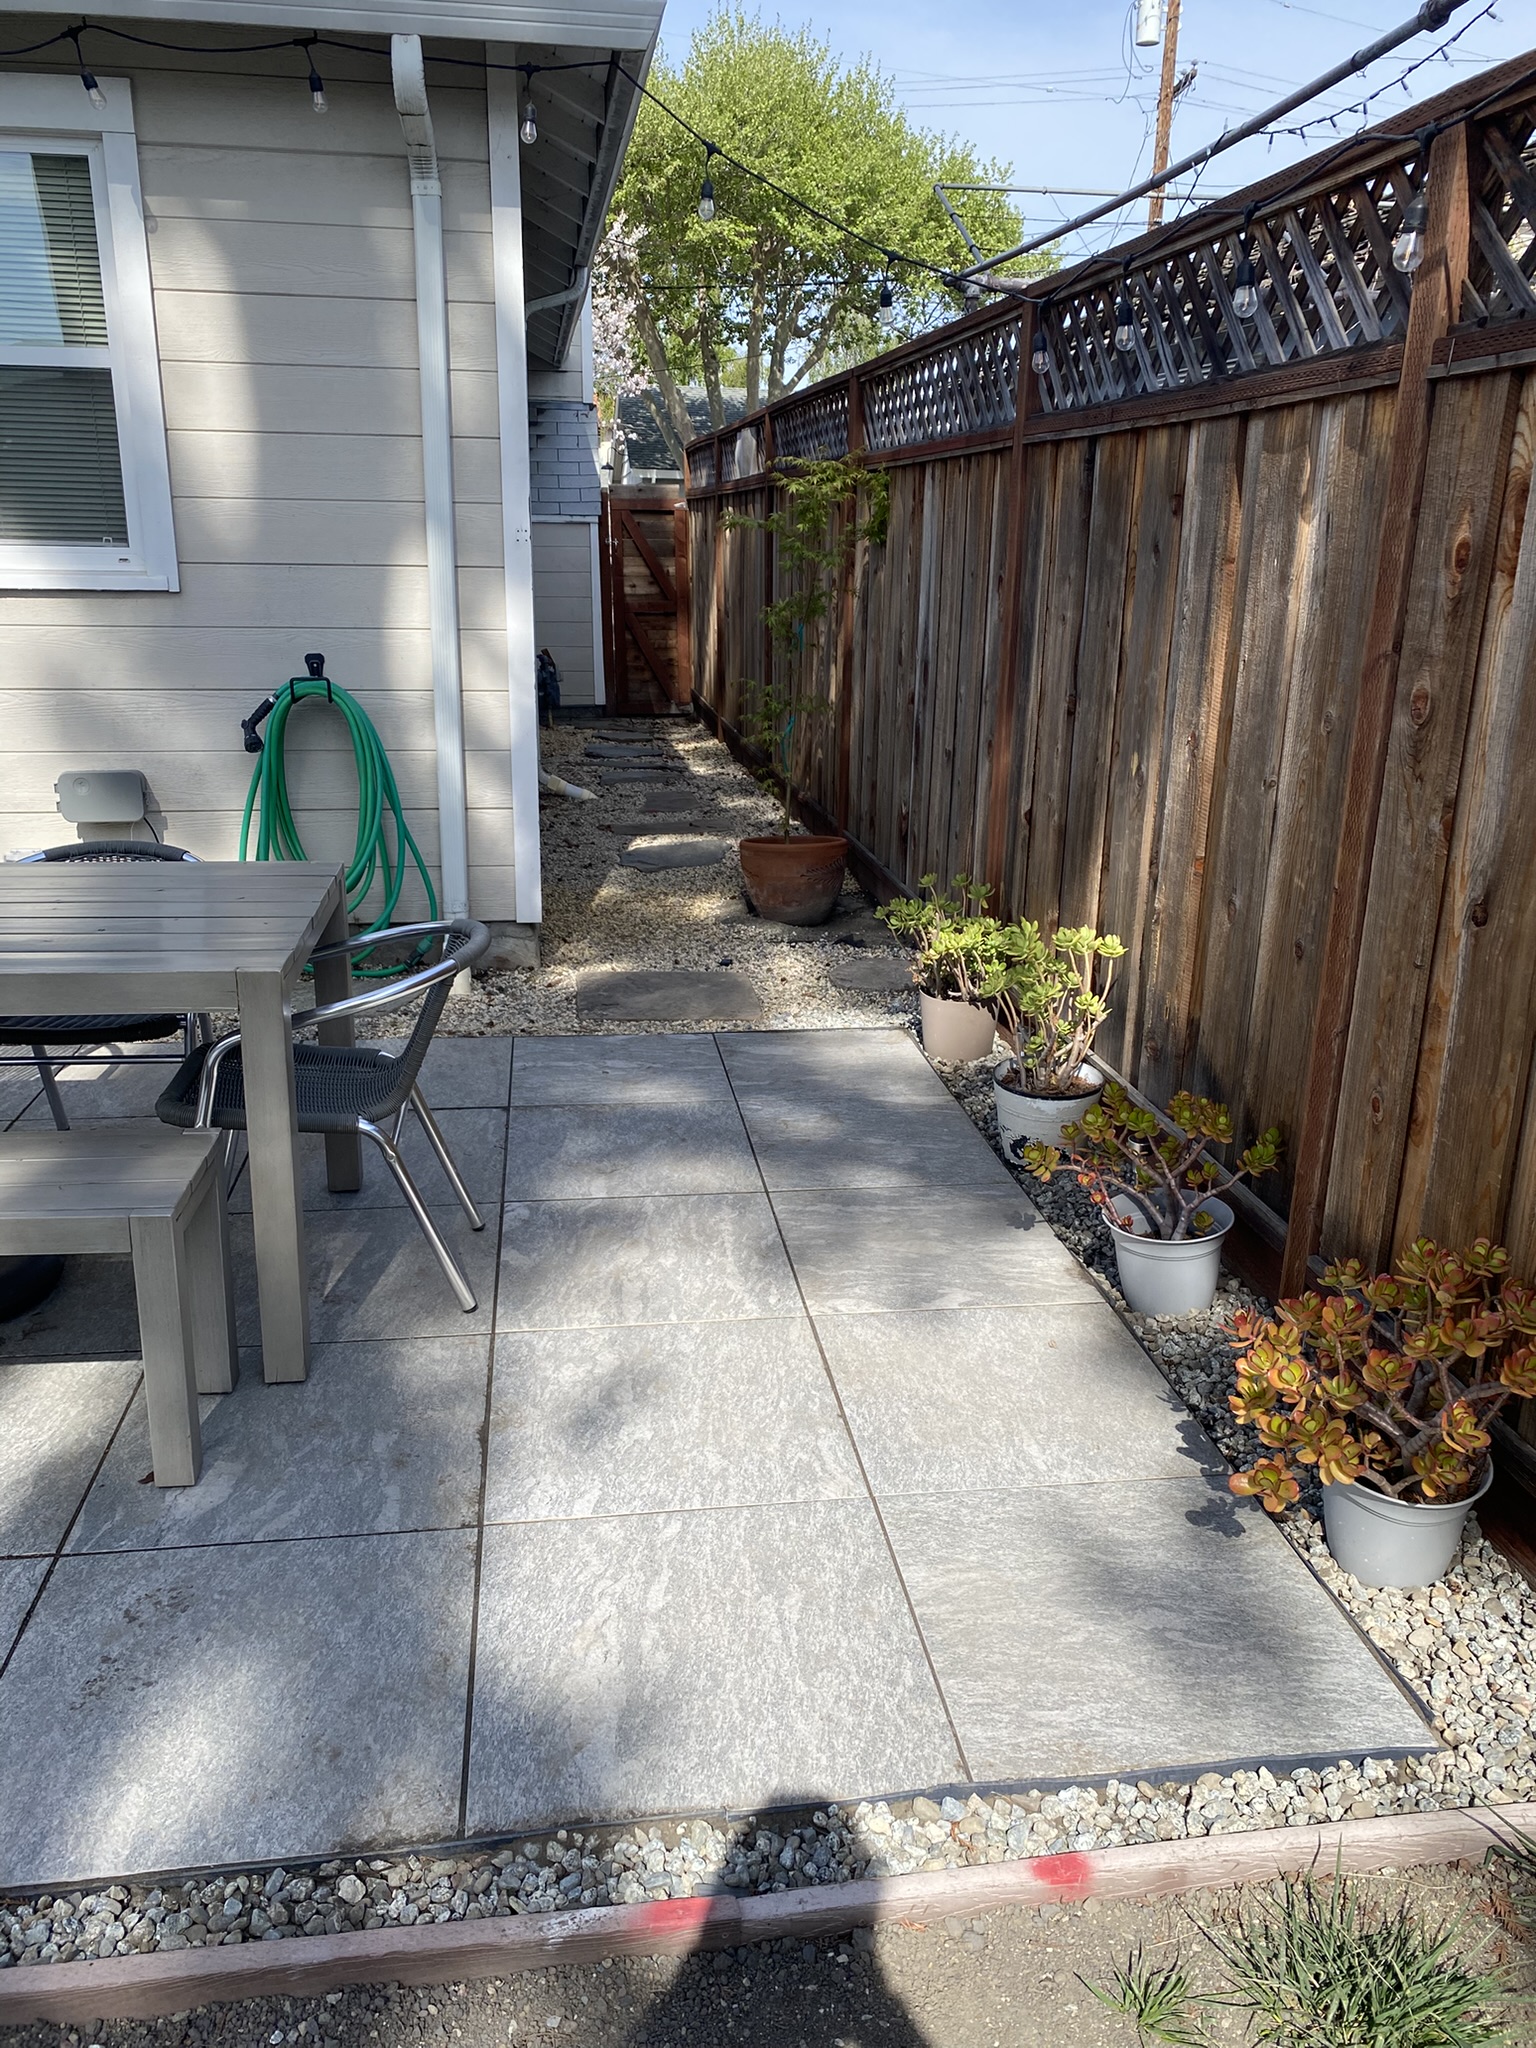
The pavers were sealed when none of them had any movement. The landscape edging was then restored with rocks filling the gaps, and plants put into place. Front yard, side yard, and patio finally restored!
2. Benches
Enough restoration nonsense, let’s move onto something more fun!
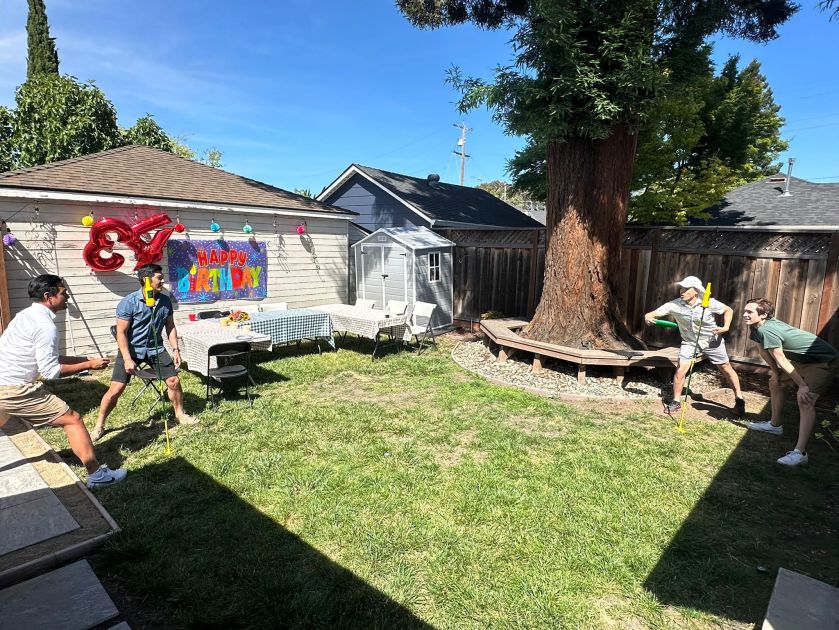
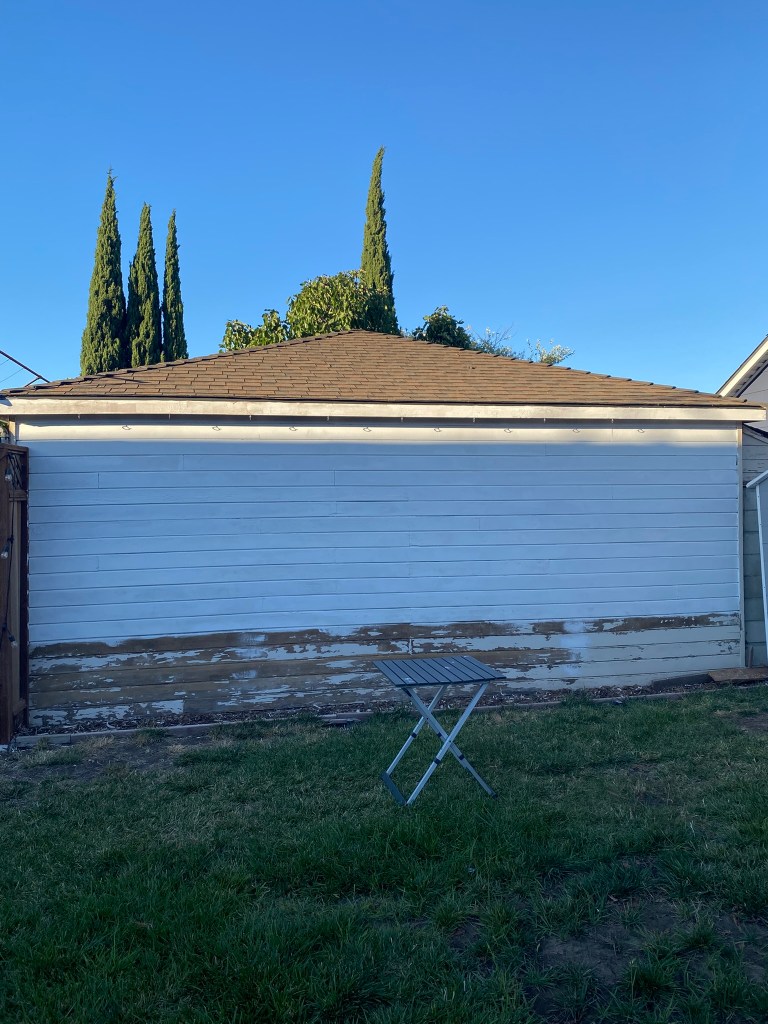
So back in June 2024, we hosted some friends in the backyard. The patio wasn’t big enough, so foldable tables and chairs were put onto the lawn near my neighbor’s garage – which is also the property line. The neighbor’s garage had experienced wear and tear, so decorations were put up in an attempt to hide the otherwise ugly backdrop. Afterward, we played some lawn games, and I found myself wondering where cups and drinks would go if the tables weren’t there.
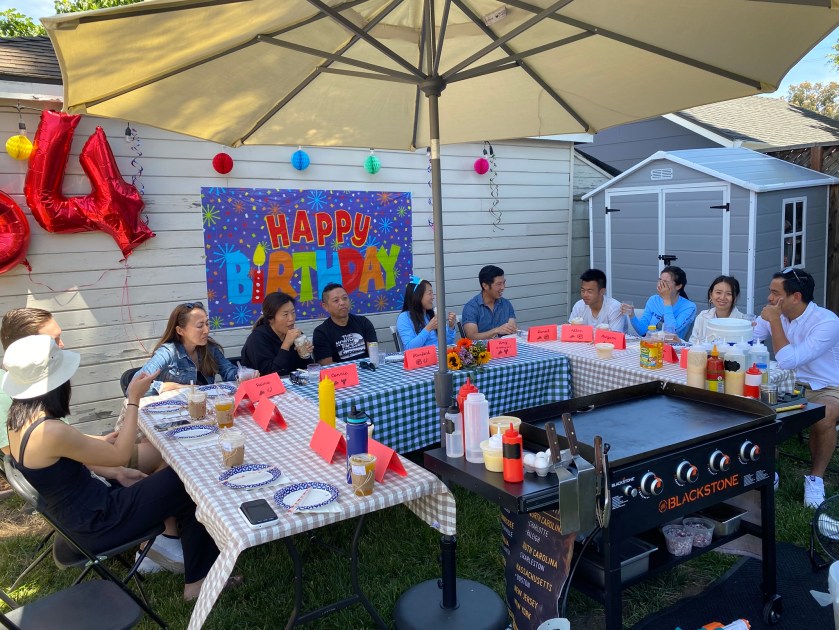
This event served as the primary motivation to repaint the wall and build dedicated seating area beneath. I took measurements and created simple drawings of the final product.
And per usual, shopped for materials in our sedan.

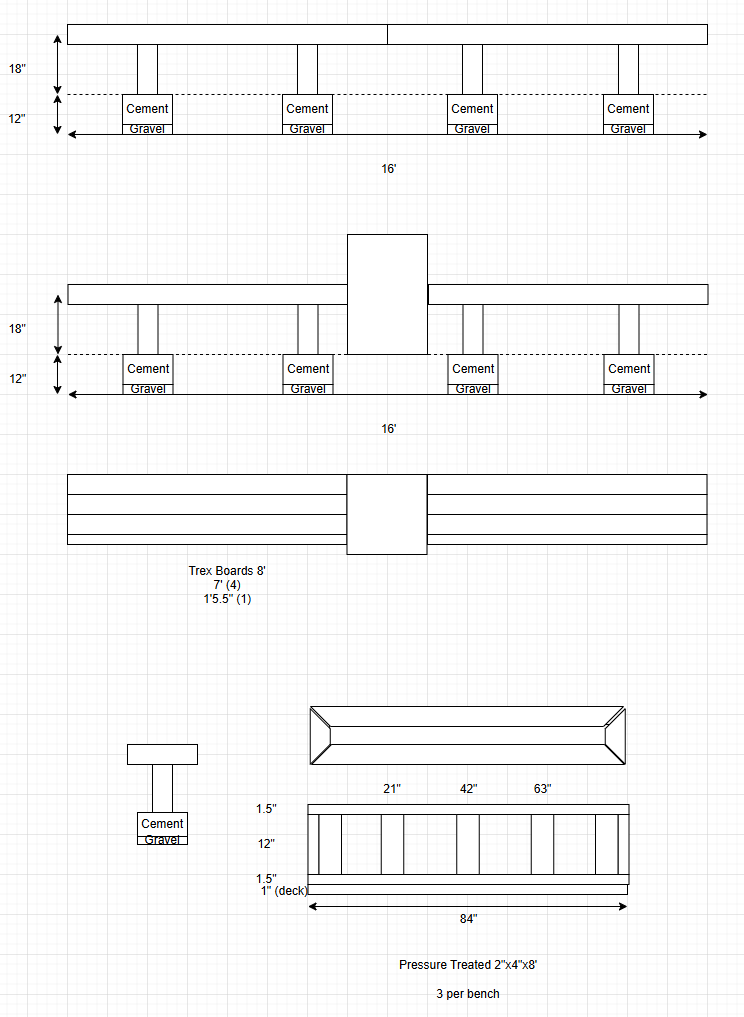
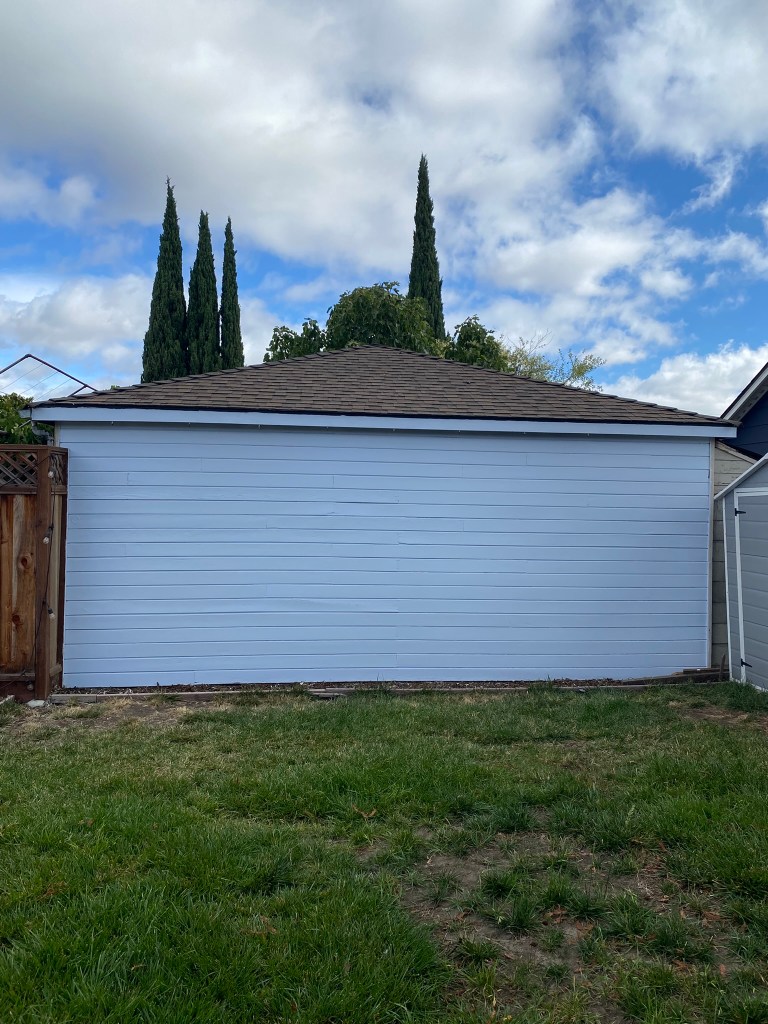
And then work began. The wall came first: strip old paint; add one coat of primer; then two new coatings of paint.


It was my first time stripping paint, and I hope it’s the last. It was messy, and wearing the mask for hours was highly uncomfortable. A small price to pay for protection.
What was way more fun was building the benches. Having already built deck steps before, I had a good understanding of the process. I also bought a used miter saw from Facebook Marketplace for $50 to simplify cutting. Within a couple working sessions, the decks were pretty much built, including steel plate reinforcements throughout the frame.
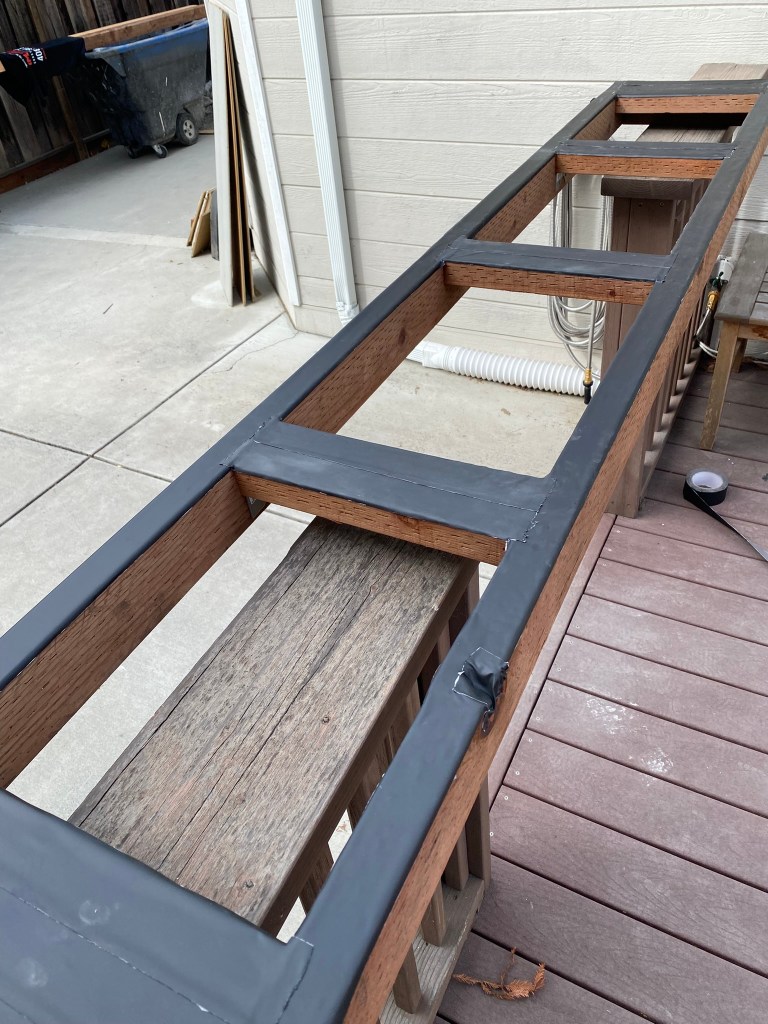

Next, I measured exactly where to dig holes to put the bench legs into. I had designed the benches to sit on two legs rather than four. Digging 12-13″ was fairly easy, but the benches were incredibly heavy and difficult to move. I had fully assembled them together since I didn’t know how else to ensure the benches would be level in the ground. I added gravel to the bottom of each hole, deadlifted the benches in, leveled them, and poured the concrete in. Benches done!


We enjoyed the benches for some time as we tried to figure out how to build the table in between. We eventually committed to a retractable table against an accent wall that was part décor, part dart board for entertainment. I used AI to render some visuals for inspiration.


Several months after building in the benches, we finally built the table and accent wall in ~3 hours. At first I thought the wall looked weird because the two benches were far bigger, and it was off center relative to the garage, but I’ve grown used to it now and suspect nobody cares as much as me.

In total, the wall and benches cost $760. The biggest expense were the deck boards. I went with a more durable model backed with a 50 year warranty to ensure we’d not worry about its longevity.

3. Decks
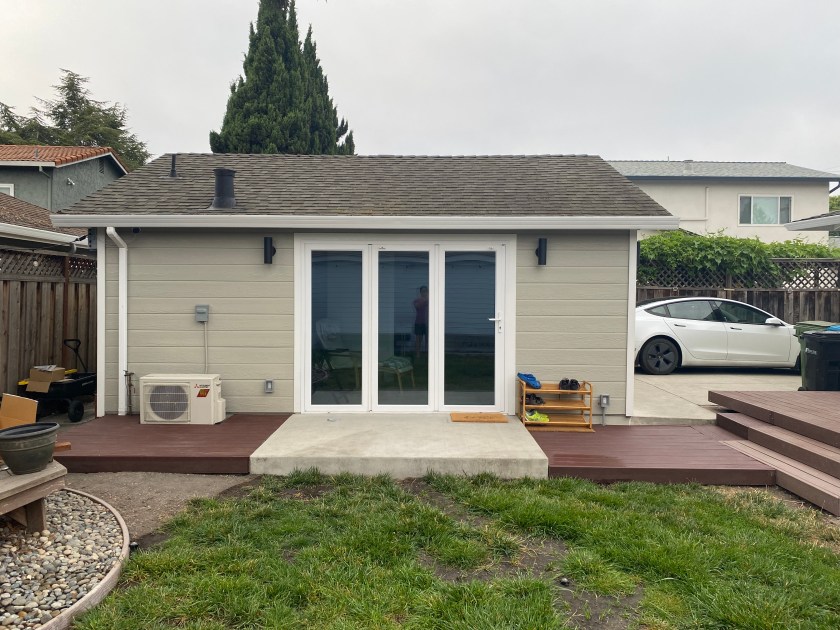
With the ADU having finished completion, the last major project was to create a natural “flow” that would” inspire” people – ourselves included – to “gravitate” to the new “destination”. Yeah, I totally watched too many YouTube landscaping channels and picked up on their language. I kept trying to imagine what would be the best experience. More concrete? Another deck? A planter box? Dimensions? Color?
But first things first. My main gripe was the existing deck rails. It felt like a barrier that divided two buildings, so I wanted it gone.

The challenge was the steep drop from the deck to floor, should the rail be removed. While the ADU was under construction, I asked the general contractors for an estimate to fill in that gap with concrete. They gave me a “f*#k you” quote of $3,200, so I was quite motivated to DIY.
I eventually settled on a composite deck. I wanted the deck to match the color of concrete, but Bonita firmly rejected that idea. She suggested matching the color with the existing deck, to which I reluctantly agreed (spoiler: she was right about the color, and she is right about most things in general).
Per usual, I took measurements, designed a simple layout, planned how the deck joists would be built, and calculated material quantities.
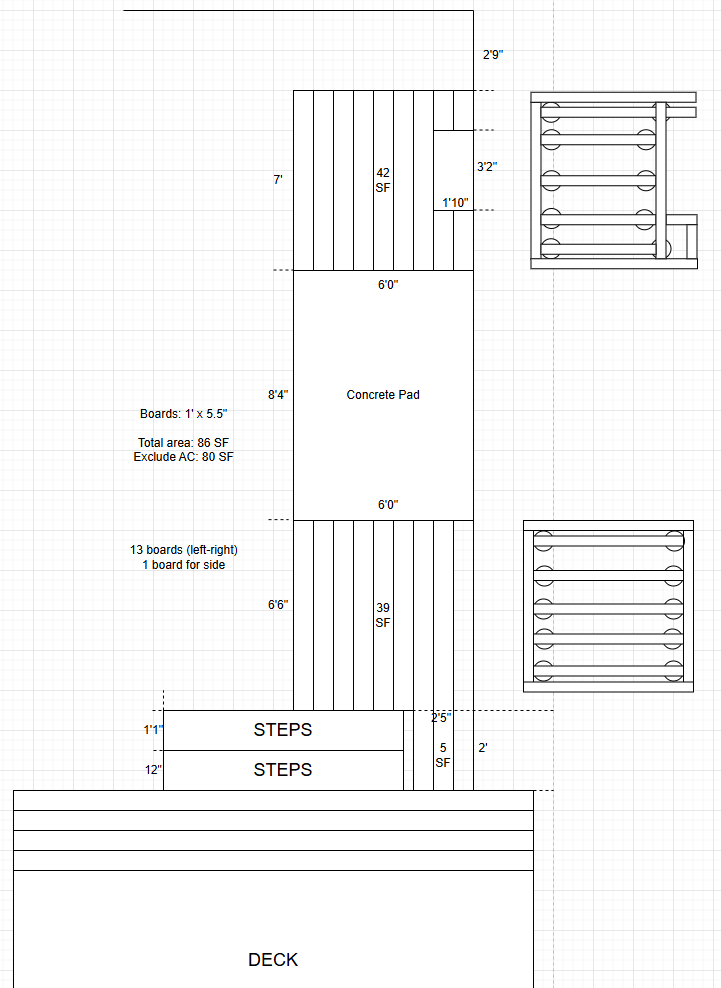
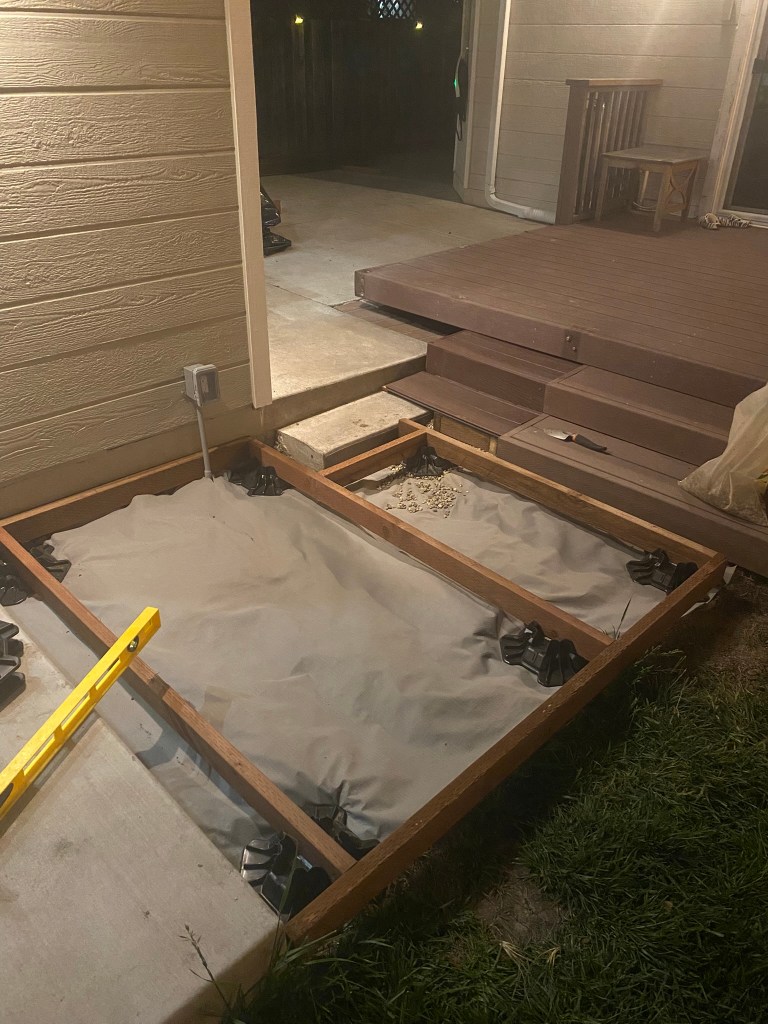
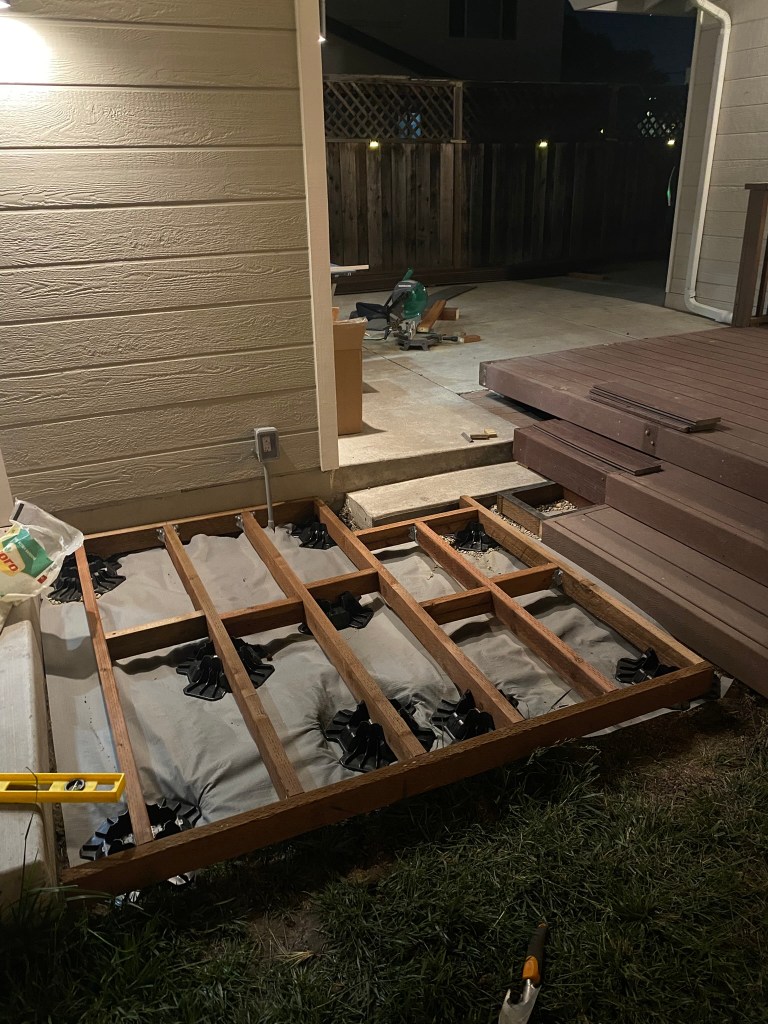
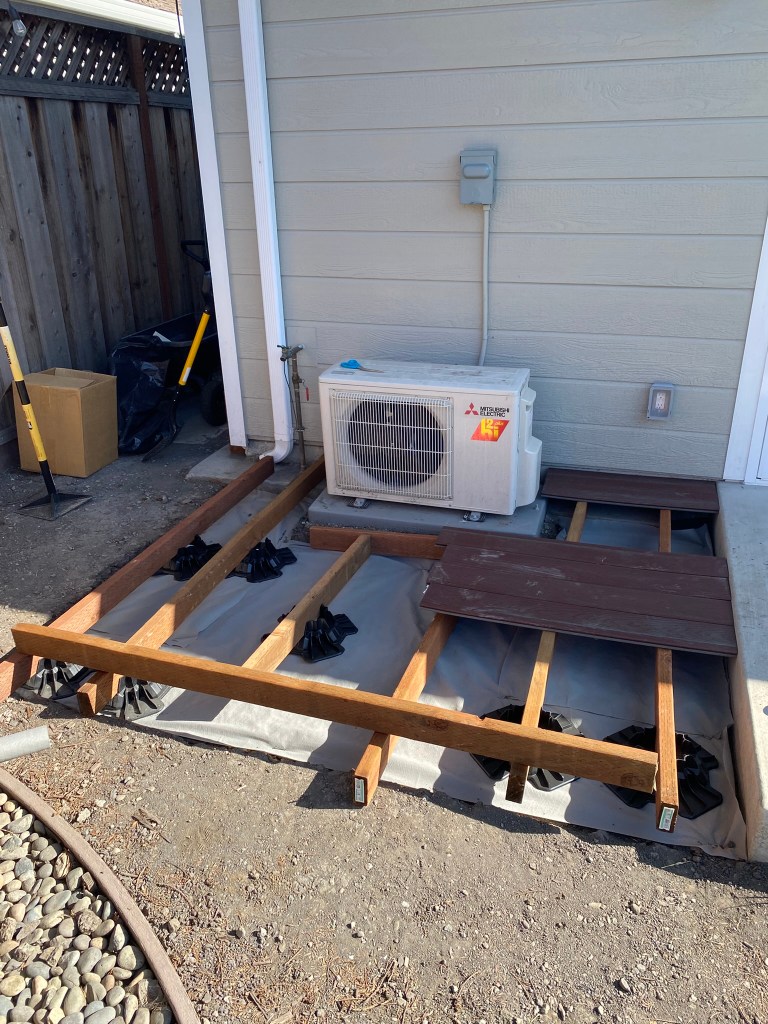
Here’s what things looked looked like right before work began.
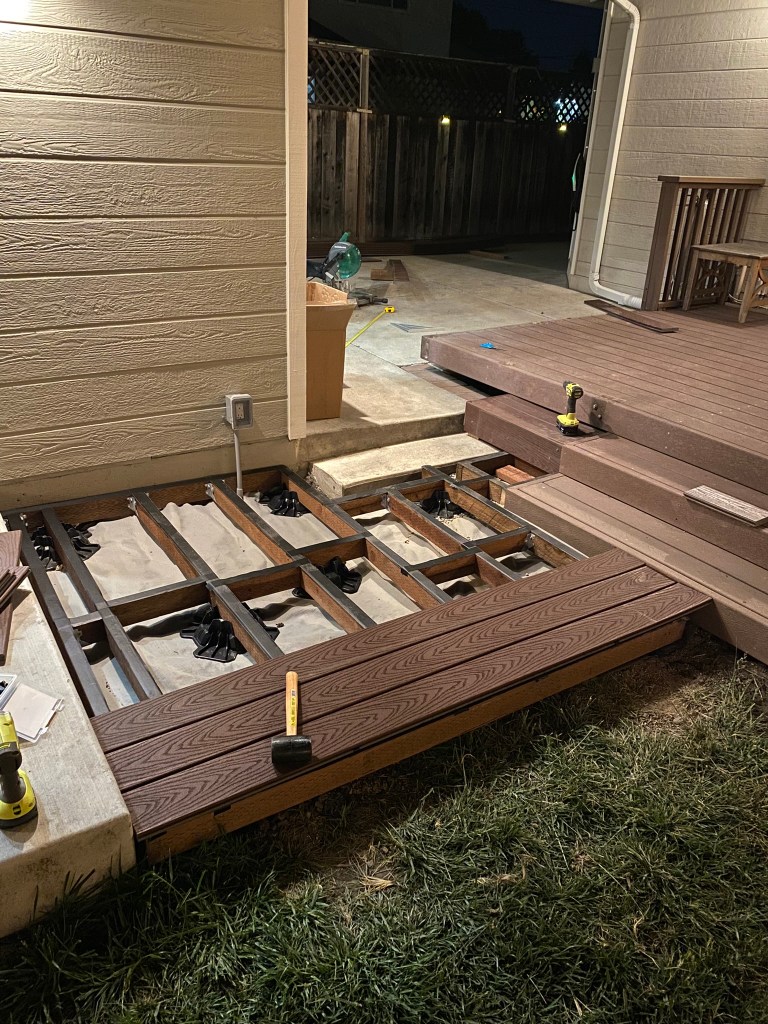
With CC’s wake windows becoming longer, the only time I was able to put in work was after she went to bed at 8pm. The first few evenings were spent taking the rails off, removing dirt, and leveling the ground.

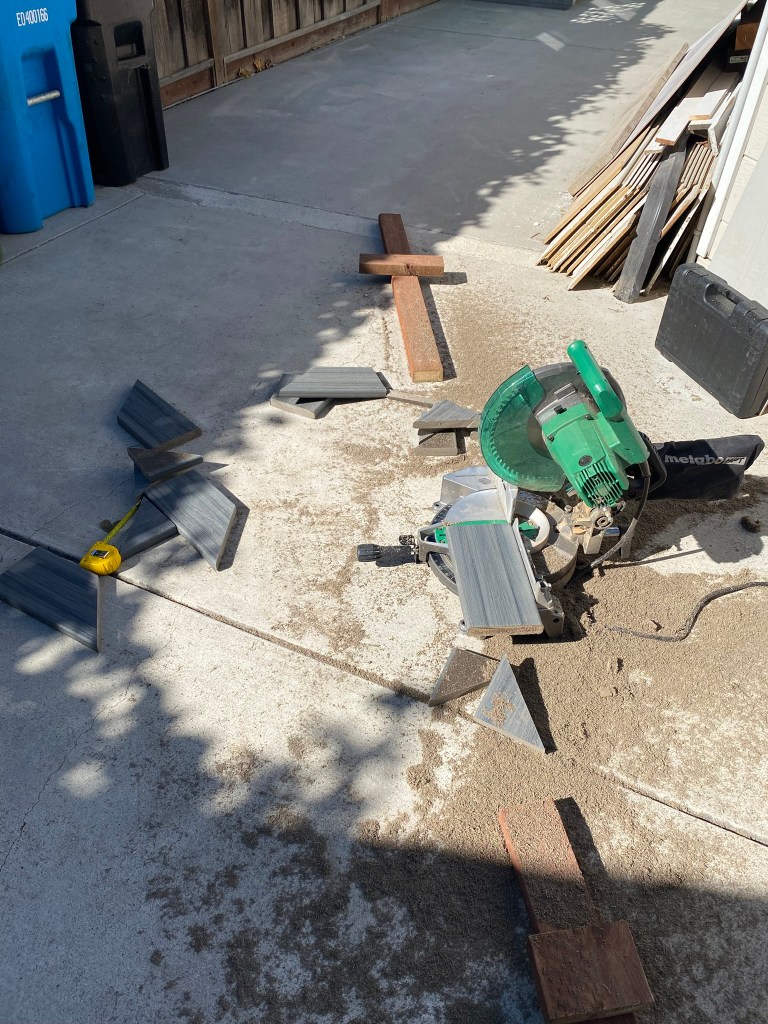
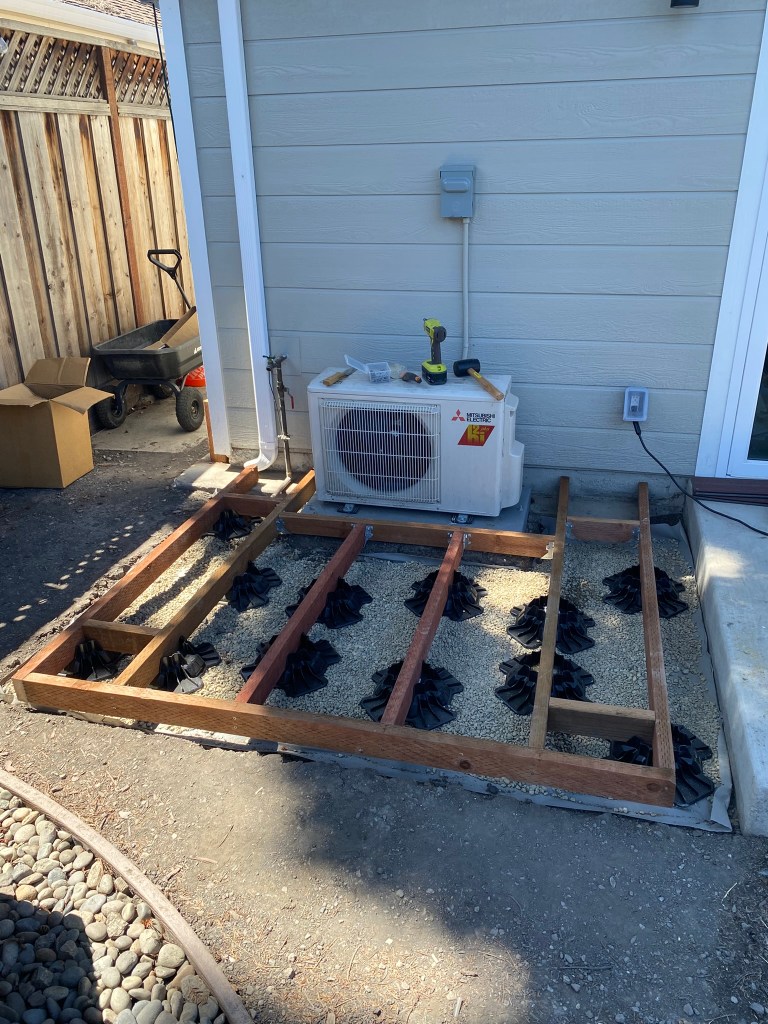
I then built a fairly complicated frame that would hold two steps. I cut the deck boards to size and assembled the steps. The design was hard because of the existing concrete step, but I figured it out eventually.


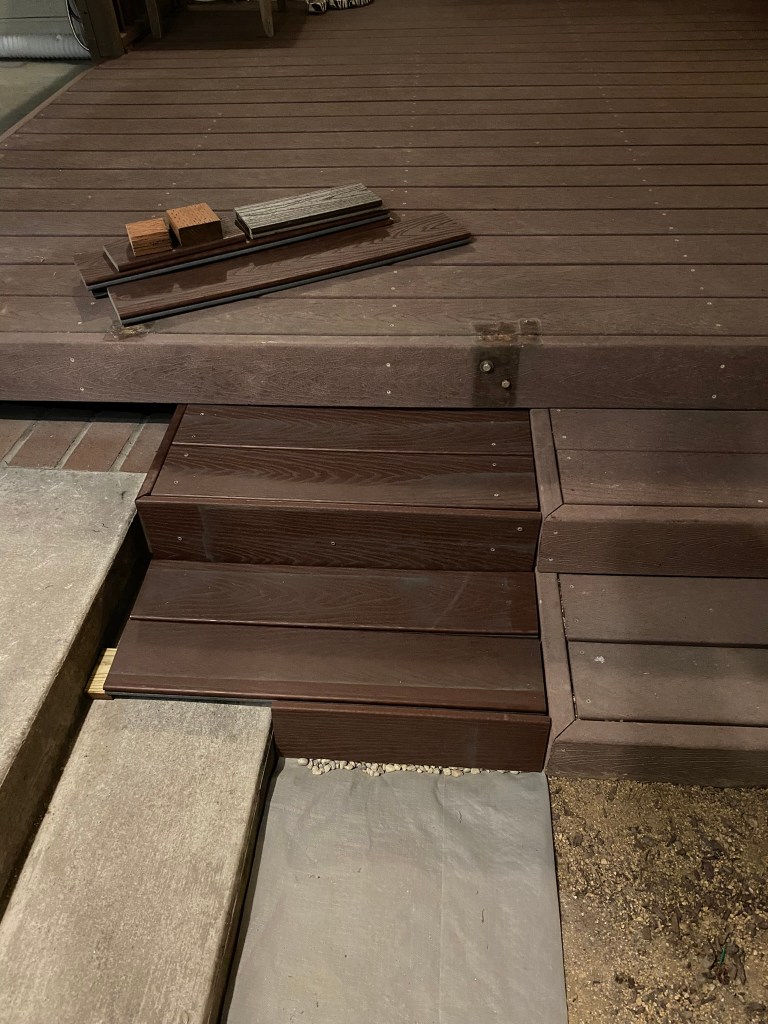
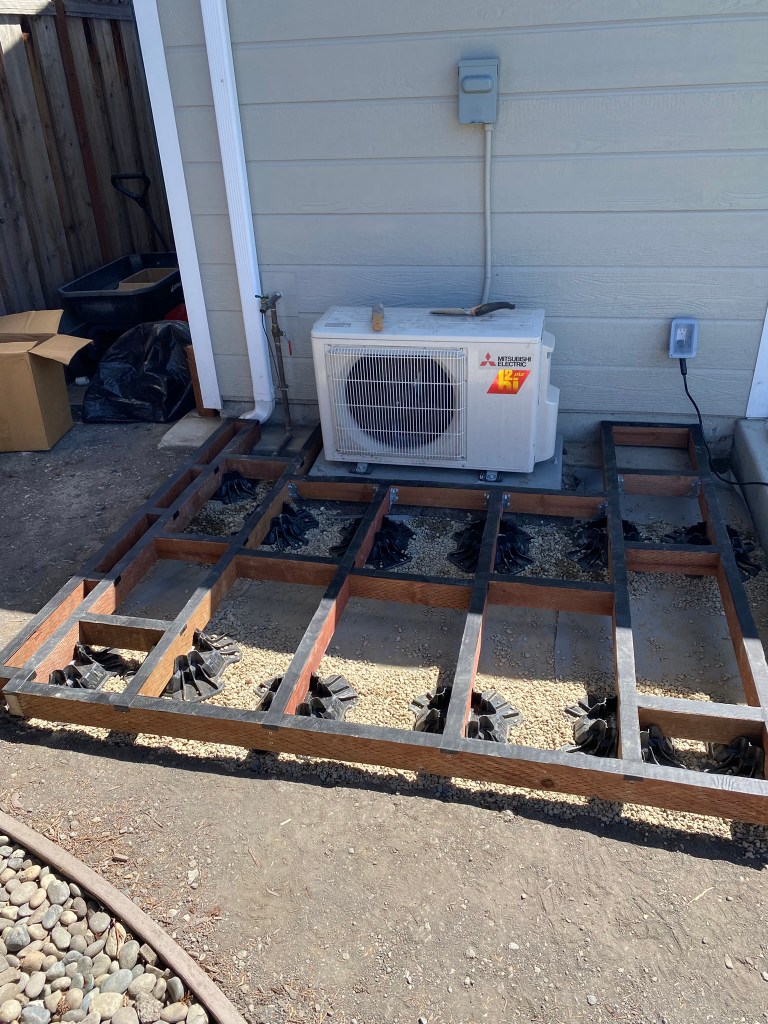
The concrete step also made it harder than expected to construct the frame. I settled on two rectangular frames that were interconnected. Once that was in place, adding and reinforcing the joists was super fun and straight forward.

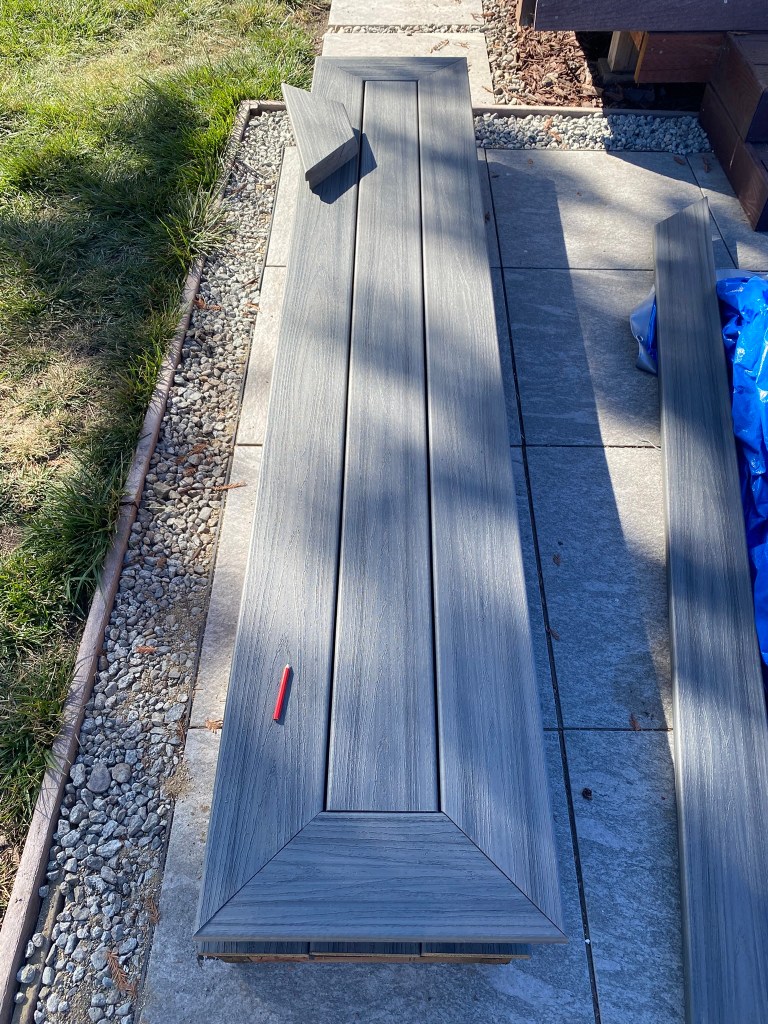
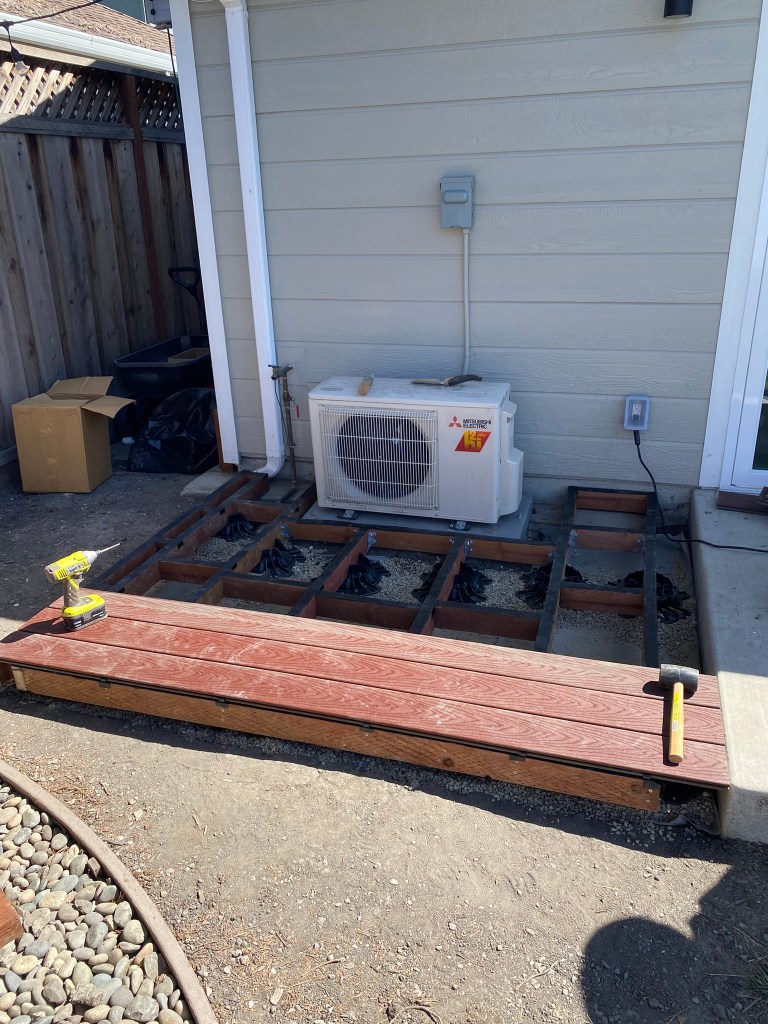
I then cut the deck boards and began screwing them onto the joists. I wanted to go with hidden fasteners so that the deck would not show any screws. This process took several hours. Moving, positioning, and cutting 16′ long deck boards was physically exhausting, not to mention the struggles of holding the boards in position while screwing them in. It took about 6.5 hours to screw 13 boards into place. My biggest cheerleader CC helped give me the strength to overcome the challenge, and together we got it done.
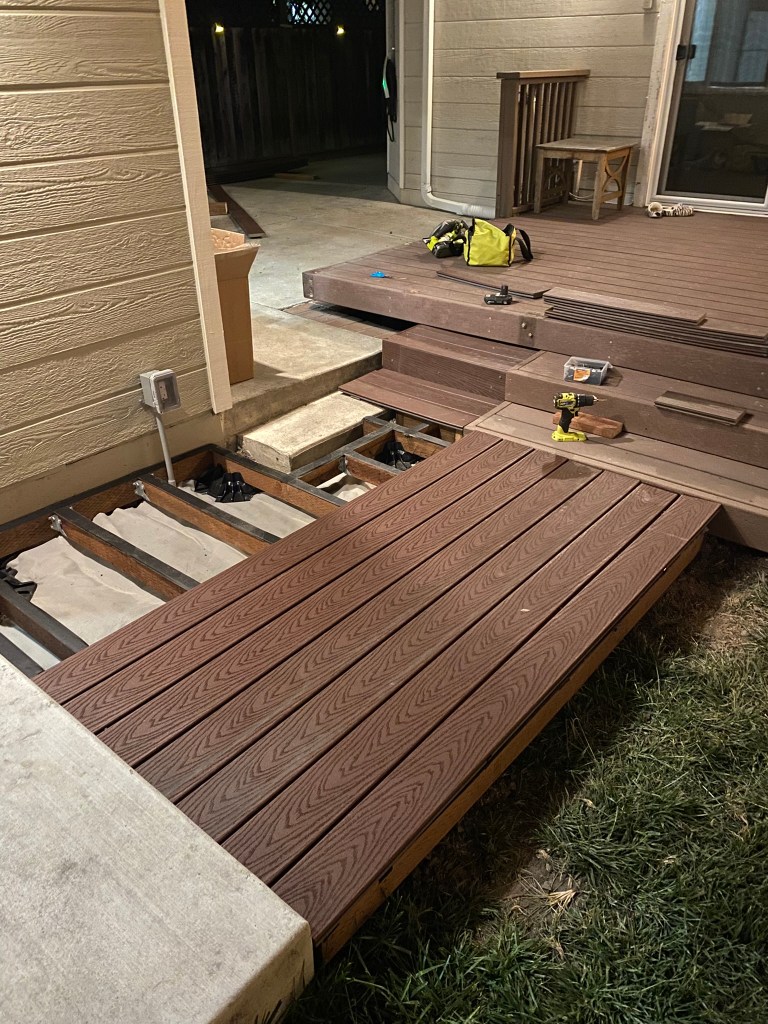
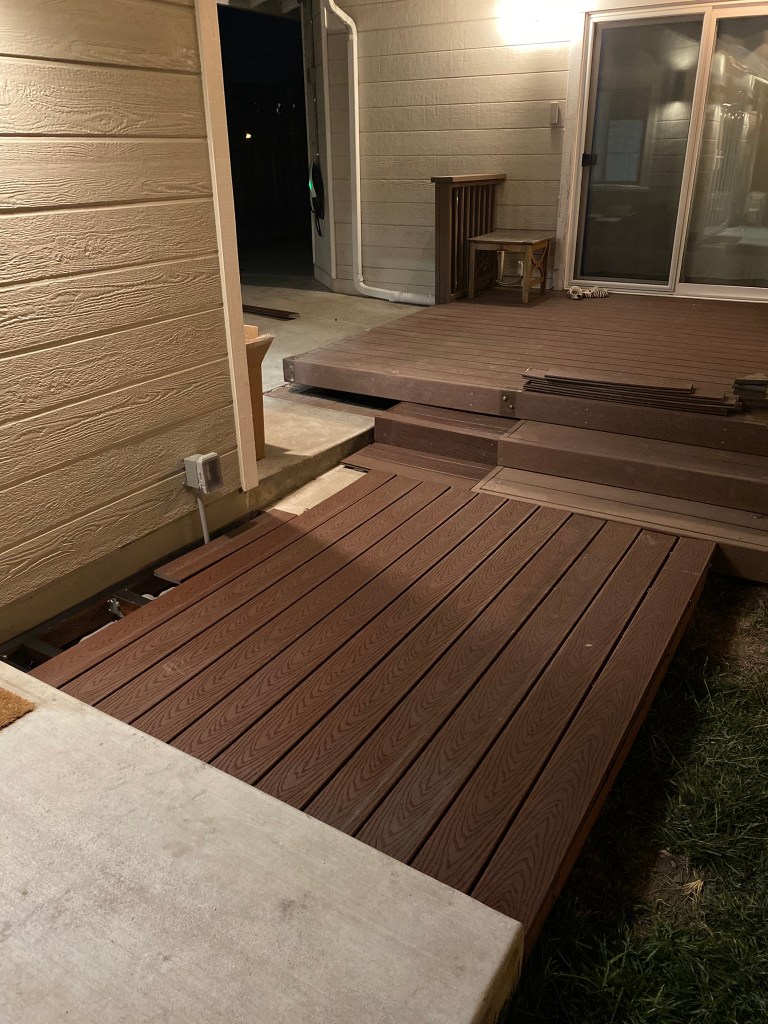
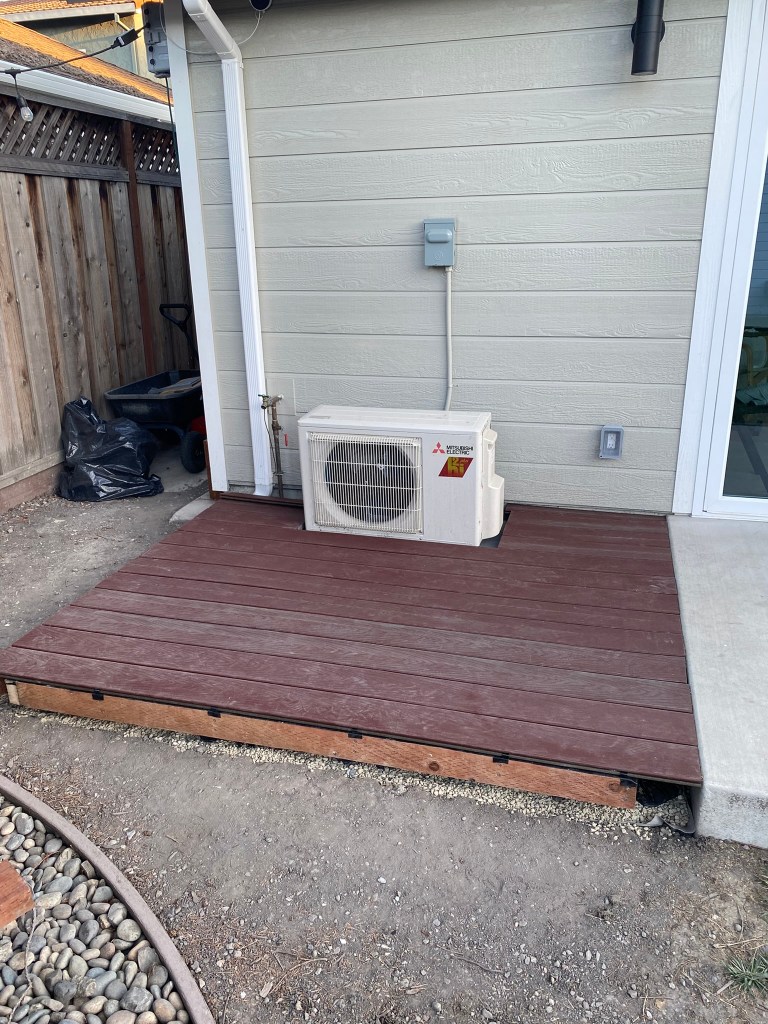
And alas, the end result of the first deck.

In total, removing the rails and building the deck took 6 consecutive nights. Each night I started work at 8pm and stopped between 11-11:30pm. The last night I worked past midnight. I estimate this deck took 19 hours to build.
I needed a break before building the second deck, so I waited 2 months until my parents were visiting, so that my mom (who loves DIY) and I could build it together.
My mom was a beast. Once she came, over the course of two weeks she spent a few minutes before sunset digging up and recycling the dirt. Once she finished, we leveled the ground, applied landscape fabric, and gathered the materials.

On July 5, we spent the whole day building. Work started at 8:30am. We followed the same exact process as the first deck. By 7:57pm we had nearly finished, and that included a lunch break, a Home Depot trip, afternoon desserts, and dinner.
My mom’s help more than doubled the speed compared to building alone. It was so easy carrying the wood, cutting the wood, and screwing things. And it was overall so fun to build it together.
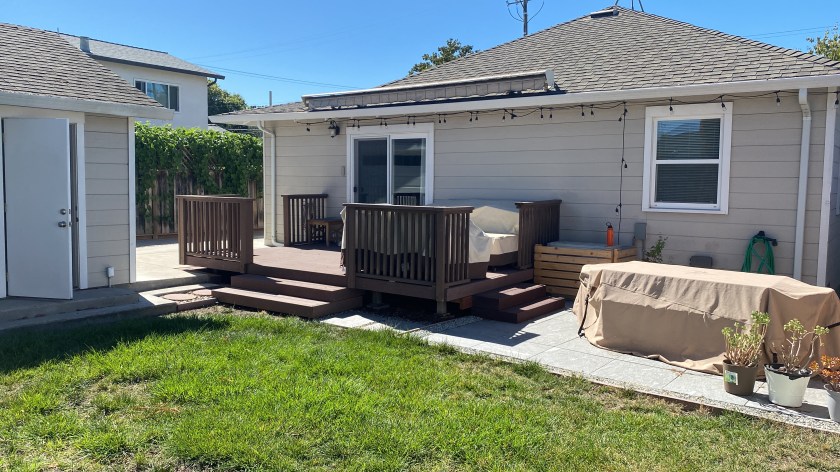
Here’s what the final deck looked like, including the fascia that my dad helped with.
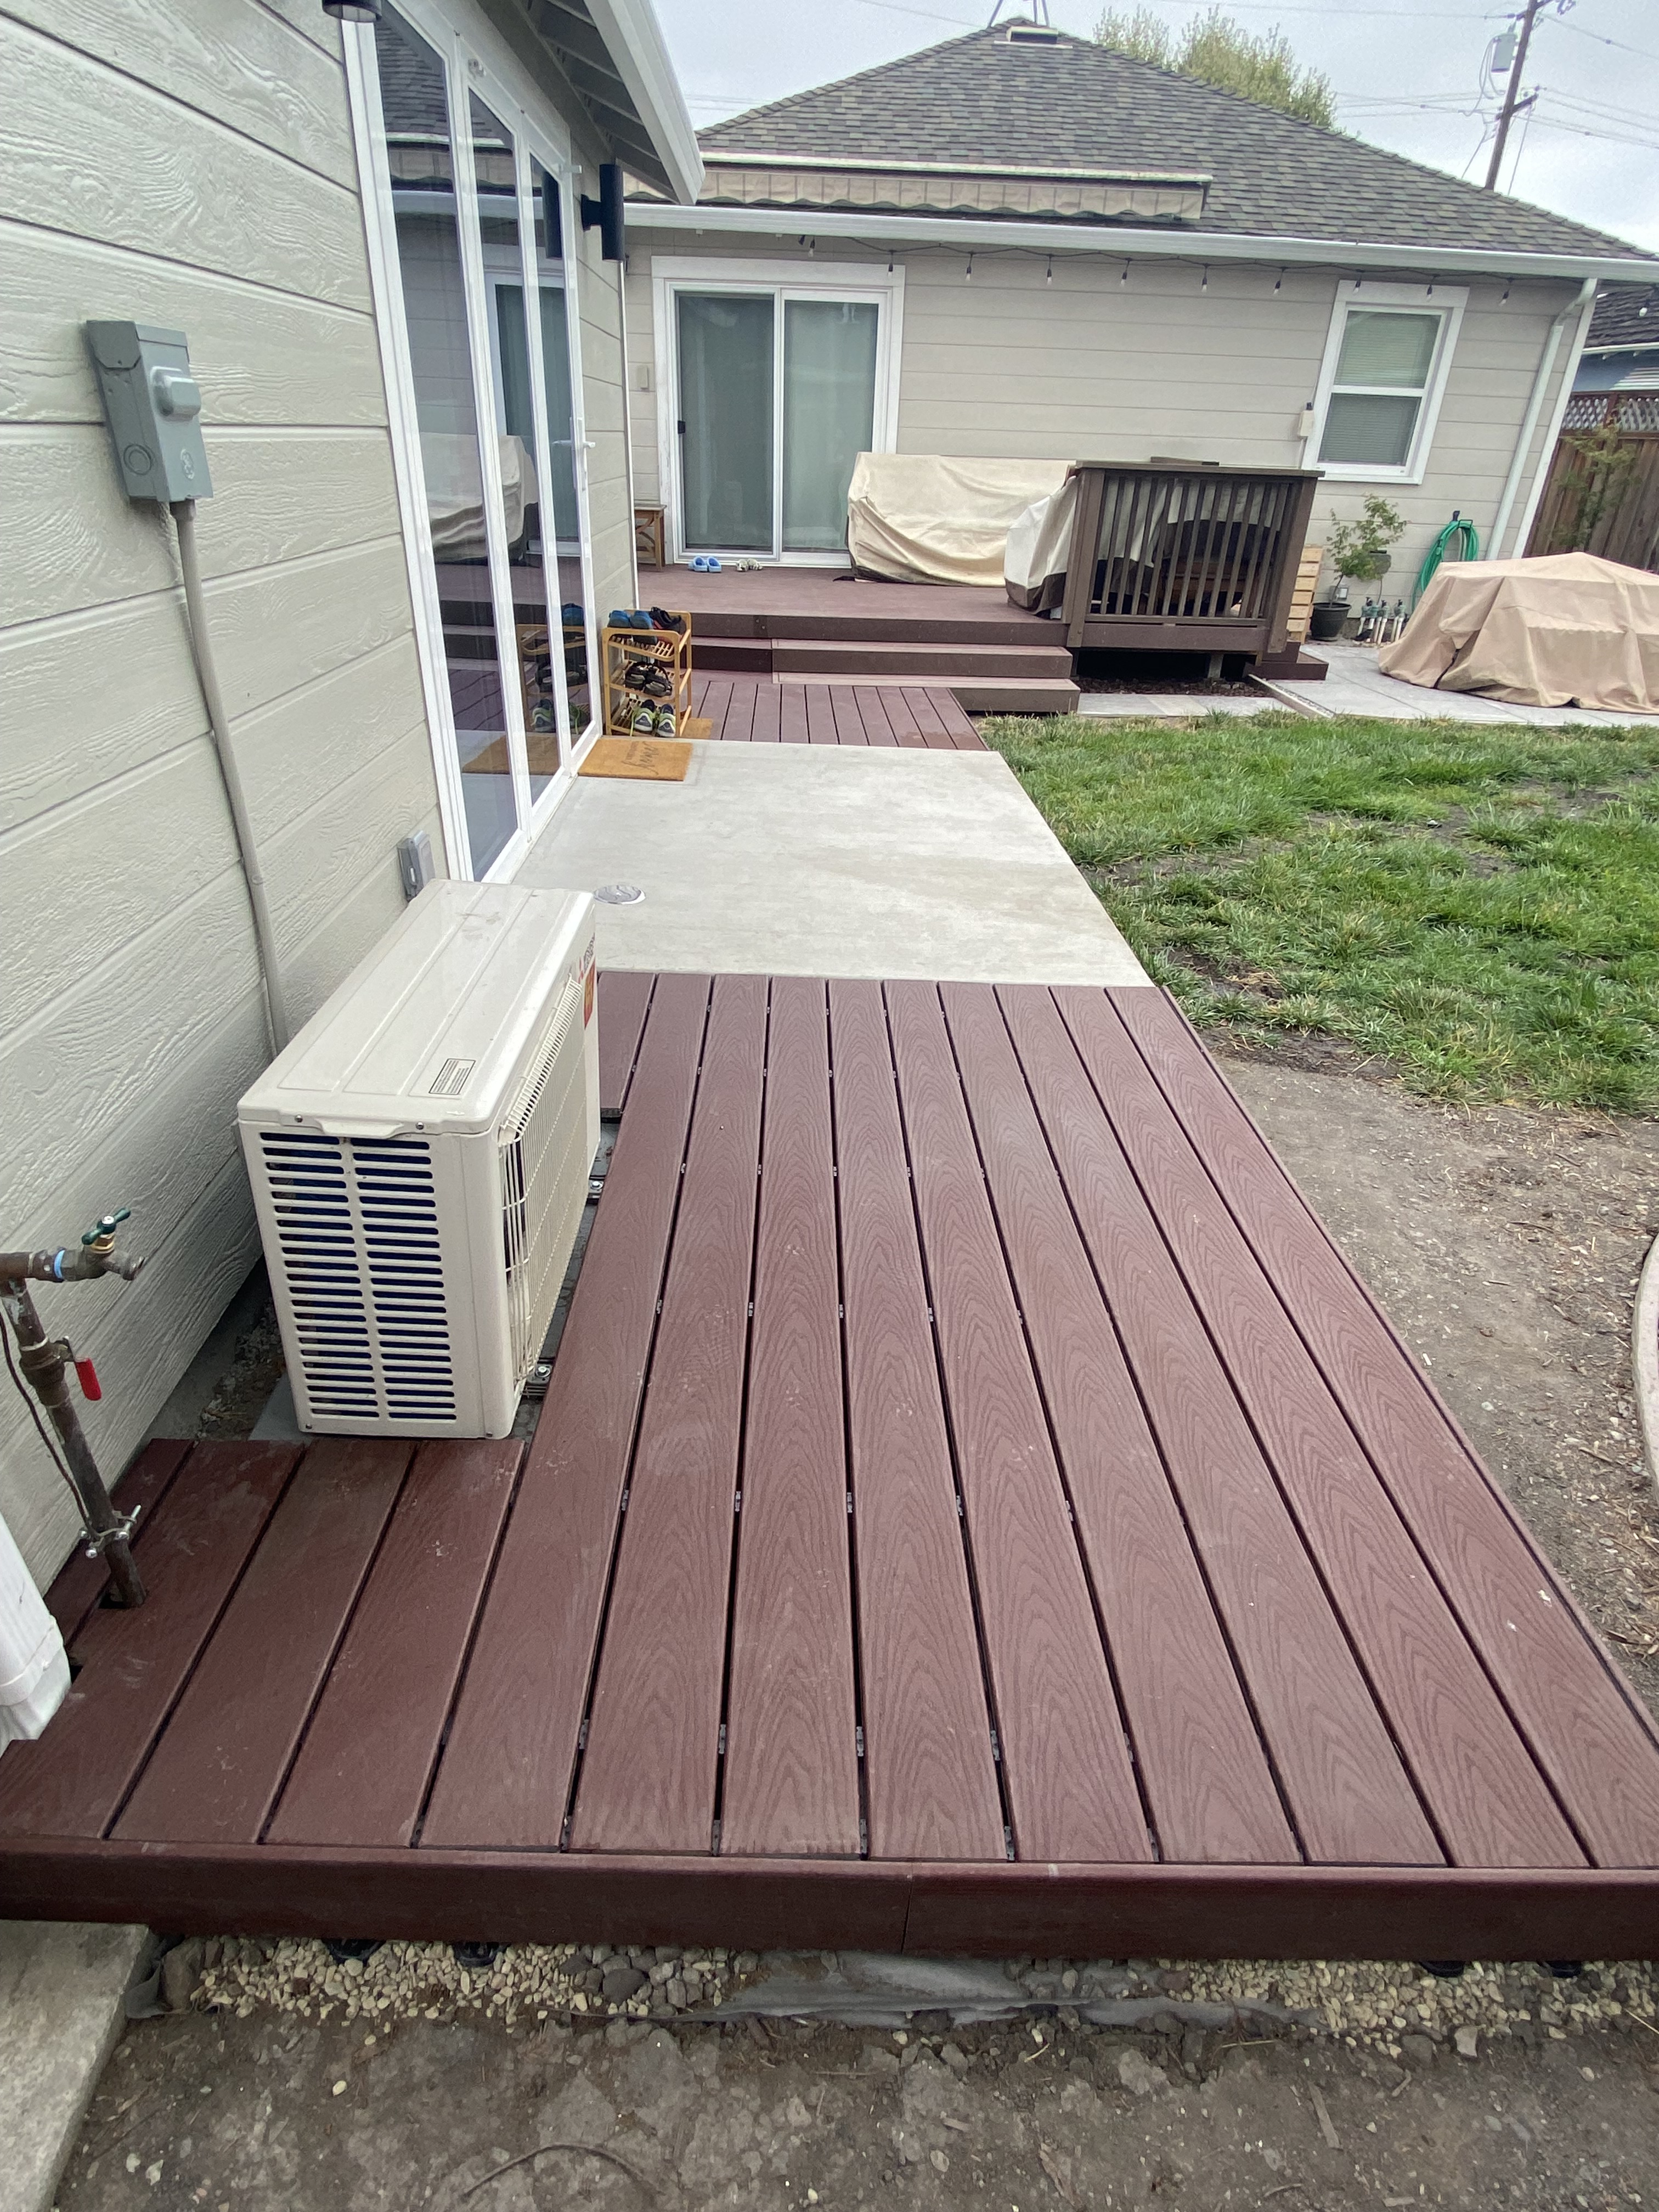
And the view of the two decks from the grass.

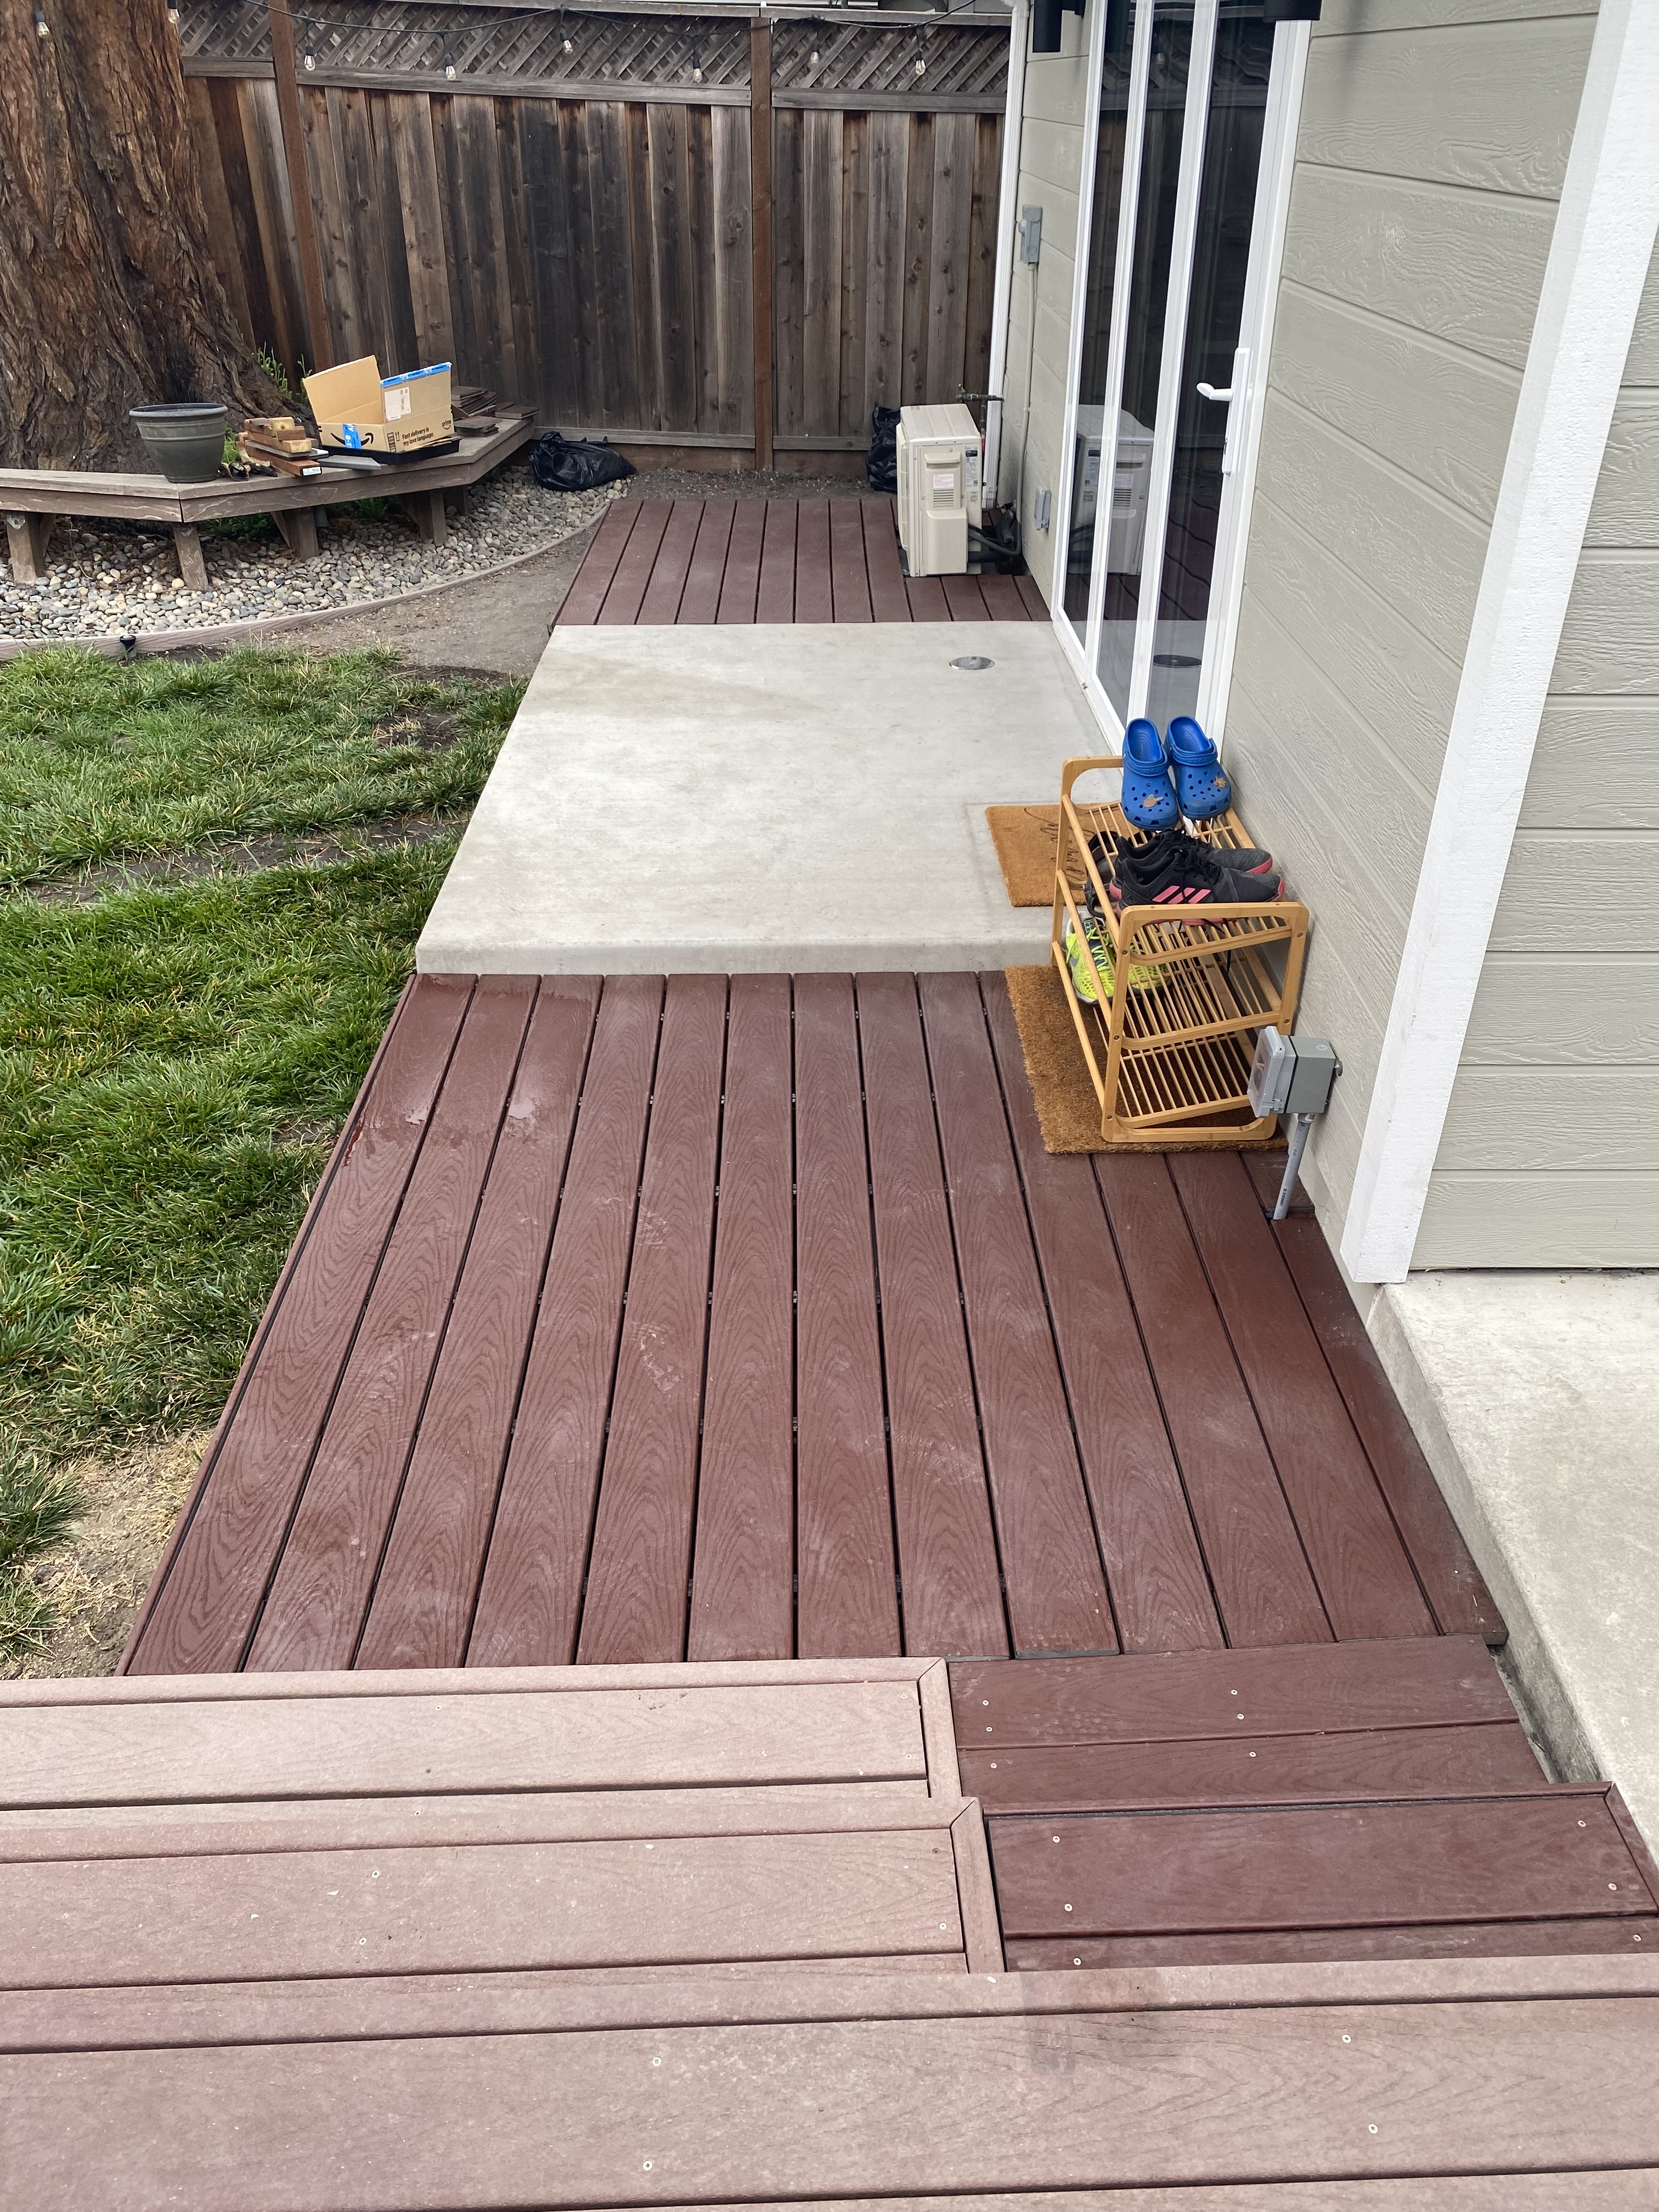
And from the main deck.
These two decks were incredibly fun to build, and the problems were fun to solve. I felt the two decks made the ADU feel connected, and it made the backyard feel intentionally designed. Indoor/outdoor living unlocked.
In total, the two decks cost $1,739.
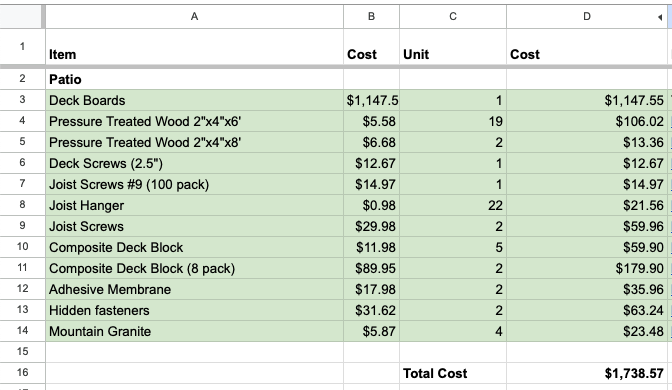
Per usual, the deck boards were by far the largest expense. My greatest surprise was seeing that the screws cost >$150. I assumed it would be cheap.
Final thoughts
With the completion of the deck, there really isn’t any major DIY house project left to do. I’m somewhat saddened that there isn’t something big to work on, but my parents advised, “Now you can relax and use this space to watch CC grow up!”
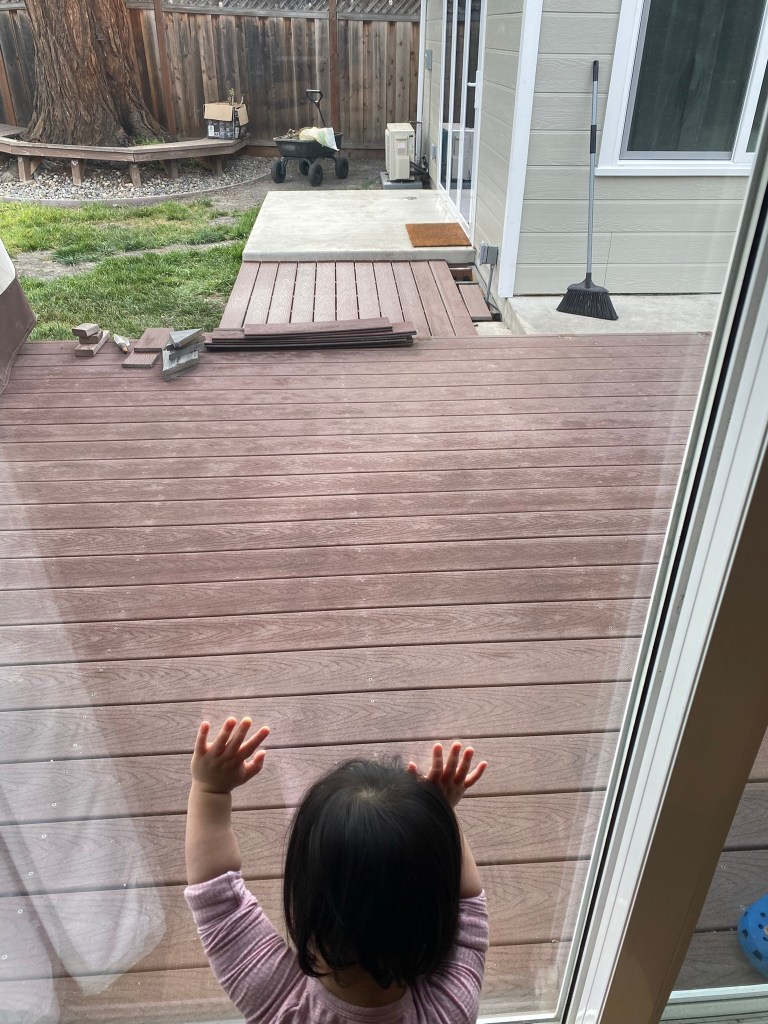
I’ve taken that advice to heart. Since completing the projects, we’ve spent many moments just enjoying the space. Meals on the patio; tea on the benches; and chasing after CC on the decks and grass. I feel a sense of joy and pride that our daughter is learning how to walk, run, and climb in a space that we built, and that she appears genuinely happy doing so.
Other things I look forward to are more gatherings of family and friends. Bonita’s extended family often get together for the holidays and special occasions, with 3-4 households taking turns hosting. I believe we’re ready to be added into the rotation and look forward to the experience!
Lastly, I need to give a special thanks to my mom. She was of tremendous help with the patio, table, and decks. Not only that, she took out all the weeds in the grass, AND transplanted a bunch of grass over the line of dirt above the water and sewage lines, so that the grass would replenish faster. Thank you mom!
