I recently replaced the lawn in the front yard with drought tolerant plants. The total out-of-pocket cost of the project was $536.81. Here was our entire process from start to finish, along with cost breakdown.

1. The reason to convert the yard
Since moving in, we never watered or maintained the lawn. The grass was all dead and an eye sore.

I learned about a government rebate program offered to a bunch of Silicon Valley cities. The program pays homeowners to replace their grass with drought tolerant plants. The requirements were pretty simple: plants at their mature size must comprise 50% or more of the converted area, and everything else can be organic mulch like tree bark or inorganic mulch such as rocks. The rebate program is managed by Valley Water, and we were given $4 per square foot converted. A surveyor measured our lawn at 423 square feet, so we were eligible for a $1,692 rebate.
I was already tired of looking at our ugly dead lawn, and the rebate was enough to motivate me to finally take action. I wanted to do everything ourselves to keep costs low while using the opportunity to learn about landscaping, gardening, and irrigation.
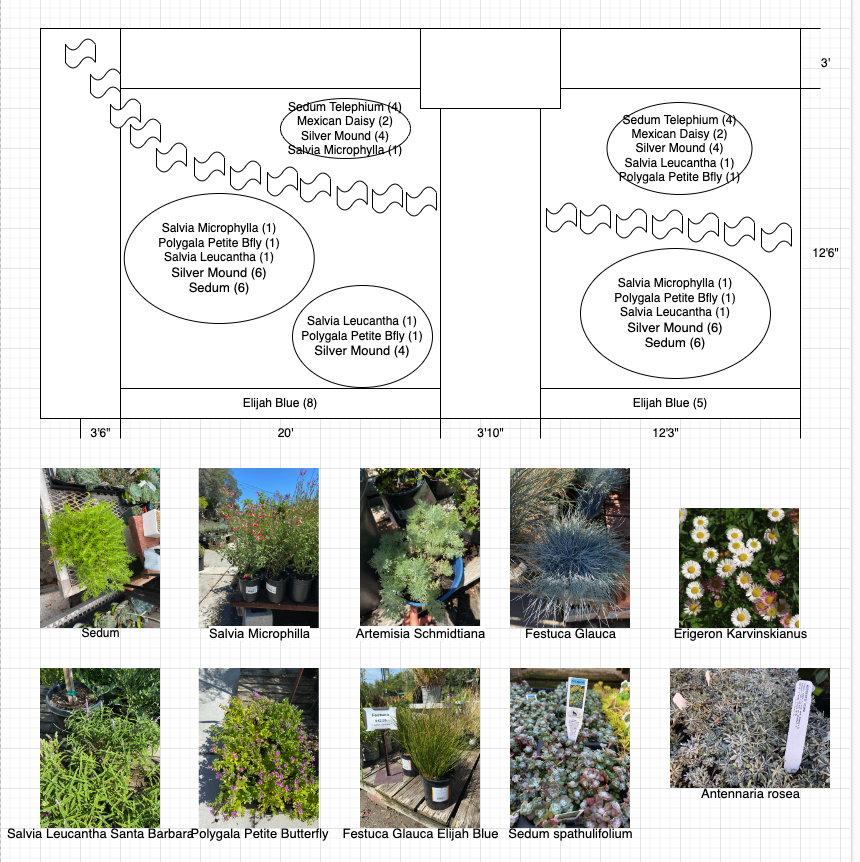
2. Design and plant selection
Bonita and I visited several local nurseries and learned about the types of plants that were classified as drought friendly. I measured our lawn dimensions and we made a simple design of what we wanted the lawn to look like.
The nurseries we visited were:
- SummerWinds Nursery, Cupertino
- Yamagami’s Garden Center, Cupertino
- SummerWinds Nursery, Campbell
- Almaden Valley Nursery, San Jose
3. Removing the grass and dirt
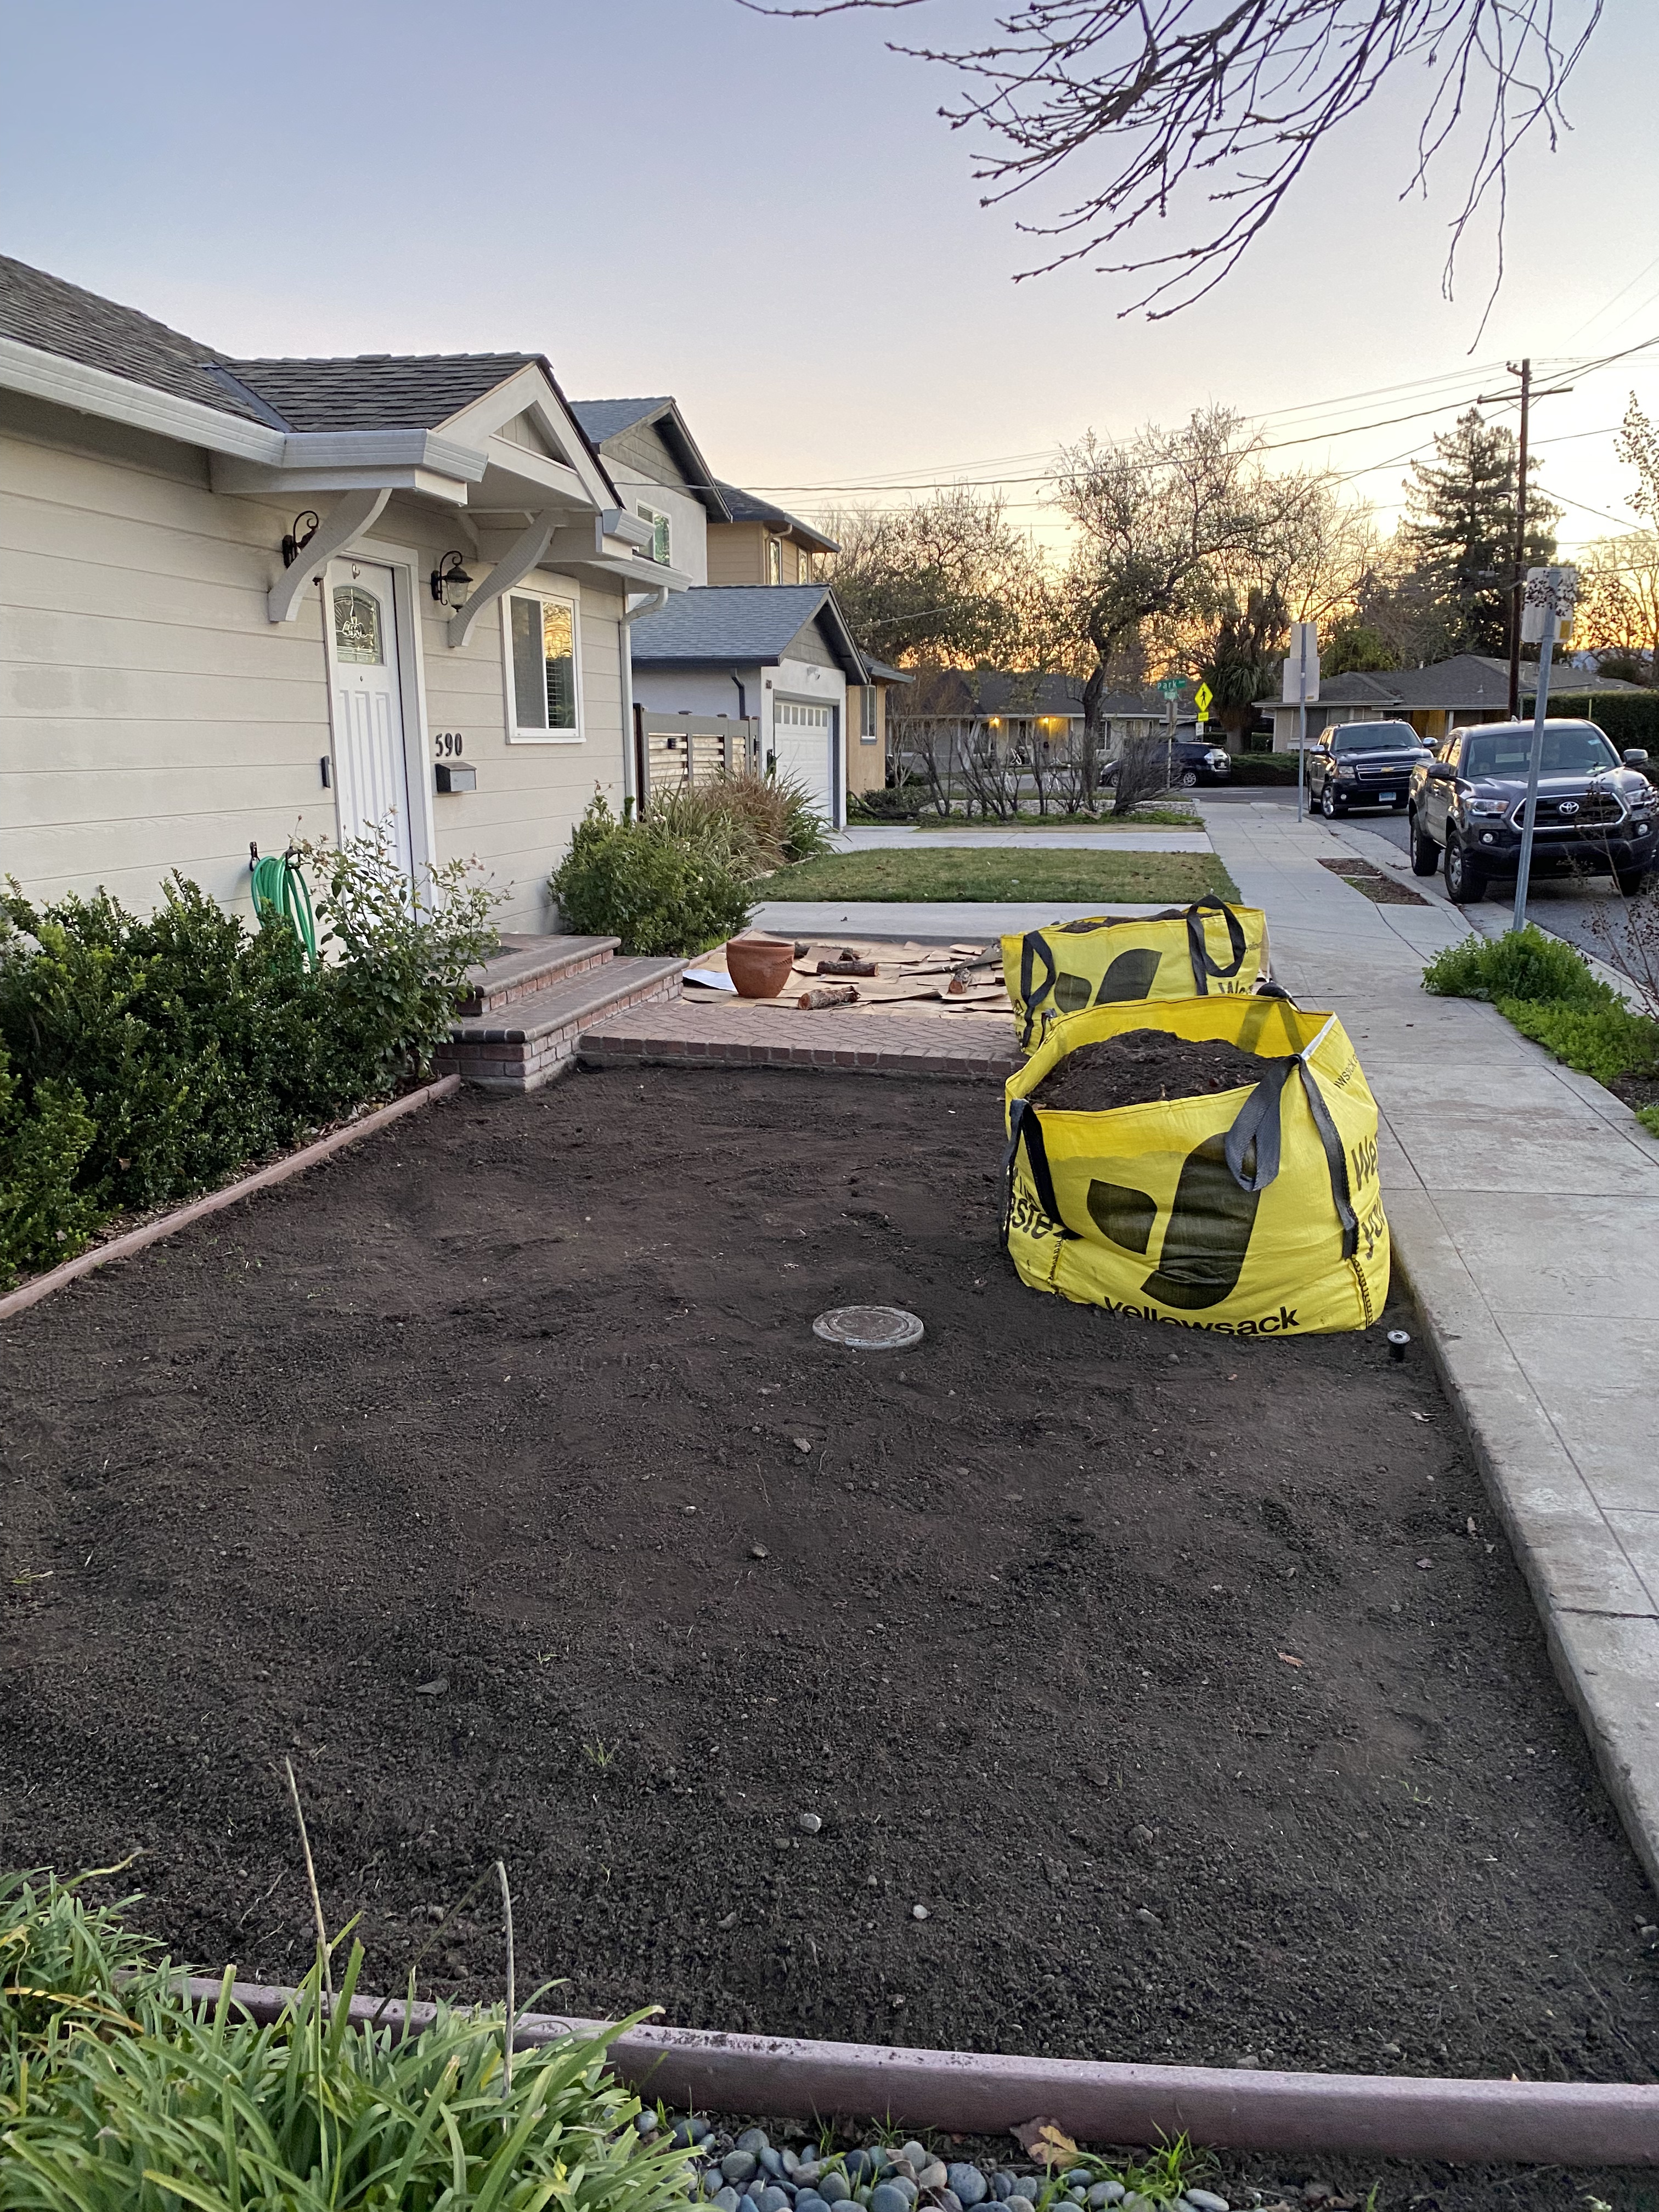
Removing dirt was by far the most labor intensive process. It probably took 12 hours over the course of weeks. I highly recommend recruiting friends to help and bribing them with dinner.
I found a service called Yellowsack that provides 1 cubic yard bags (about 3,000 pounds) to fill with dirt. When the bags were filled, the company picked up the bag on-site with a hydraulic crane. We removed about 4 inches of dirt, which amazingly filled three entire bags. That’s 9,000 pounds!
With the dirt removed, I used a tamper to flatten the ground, then temporarily covered the dirt with cardboard boxes to smother some weeds.
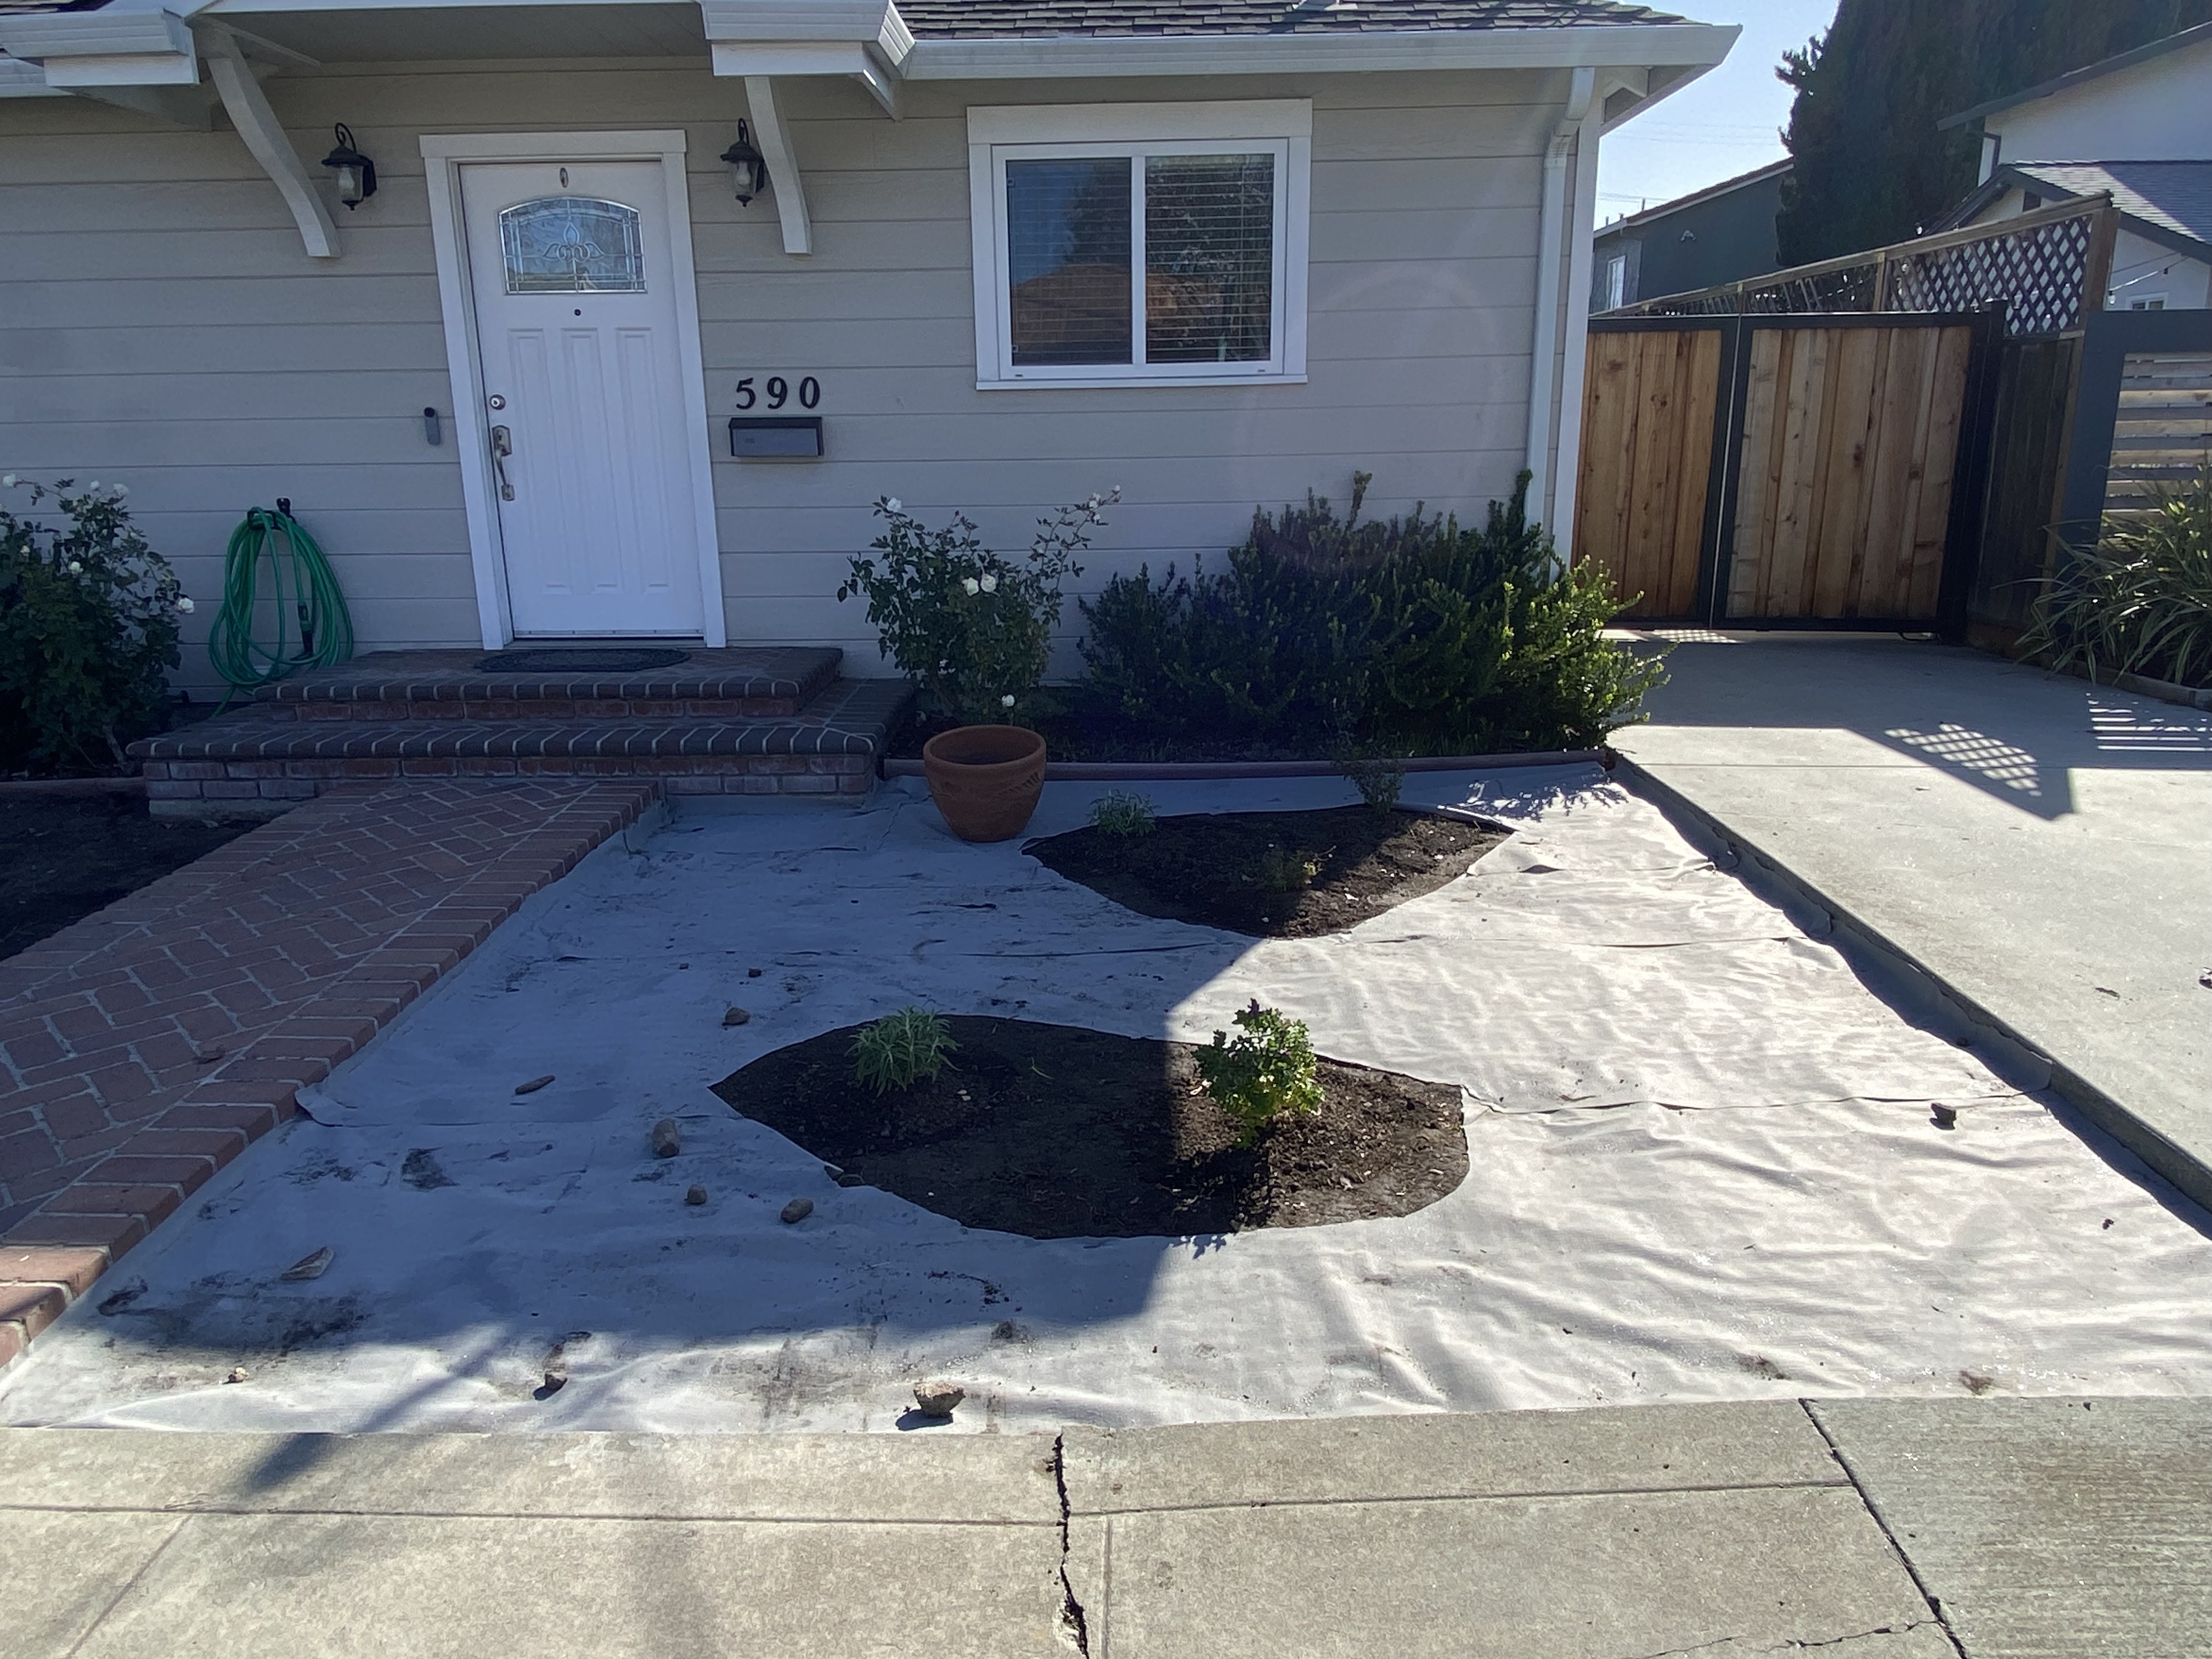
4. Landscape Fabric
I then placed porous landscape fabric. The sprinkler heads were in the way, and the odd shape near the porch made things trickier. I had to make some interesting cuts with a box cutter and used plenty of garden staples to secure the fabric in place.
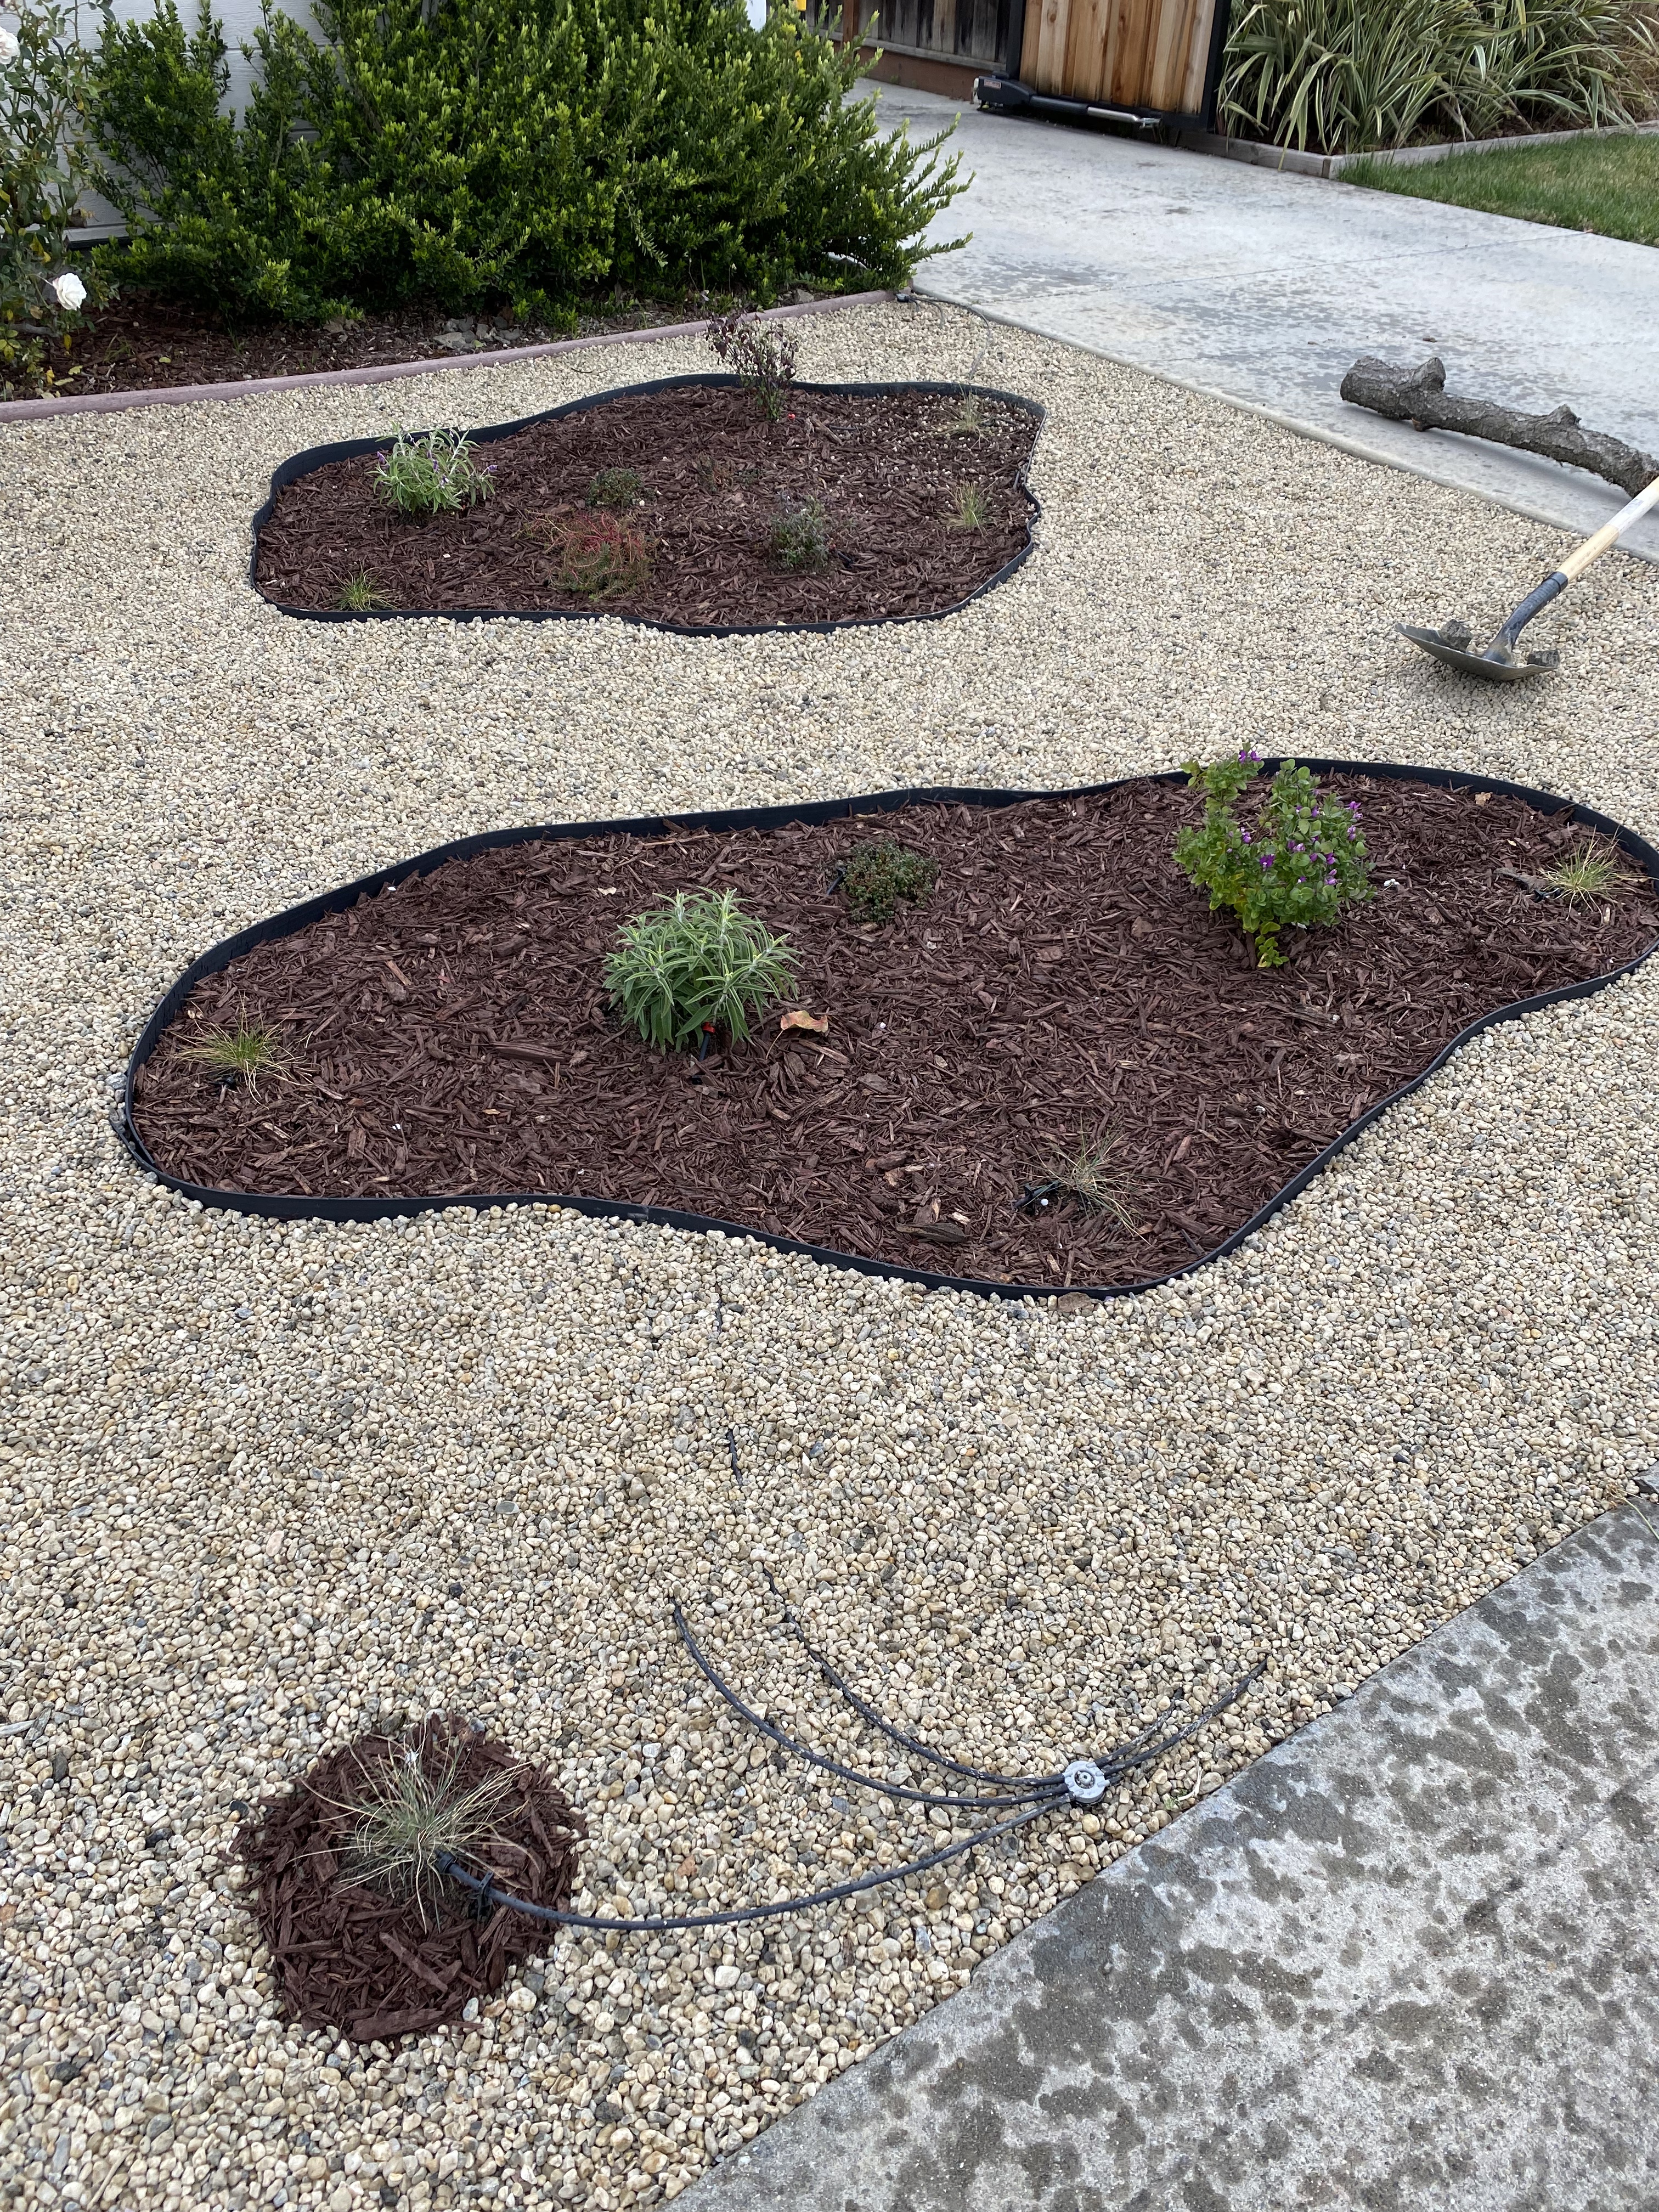
5. Planting and edging
This is where things started to become really fun. Bonita and I dug holes for the plants, mixed 50% of the dirt with 50% planting mix in a bin, placed the plants back in, and watered them plentifully.
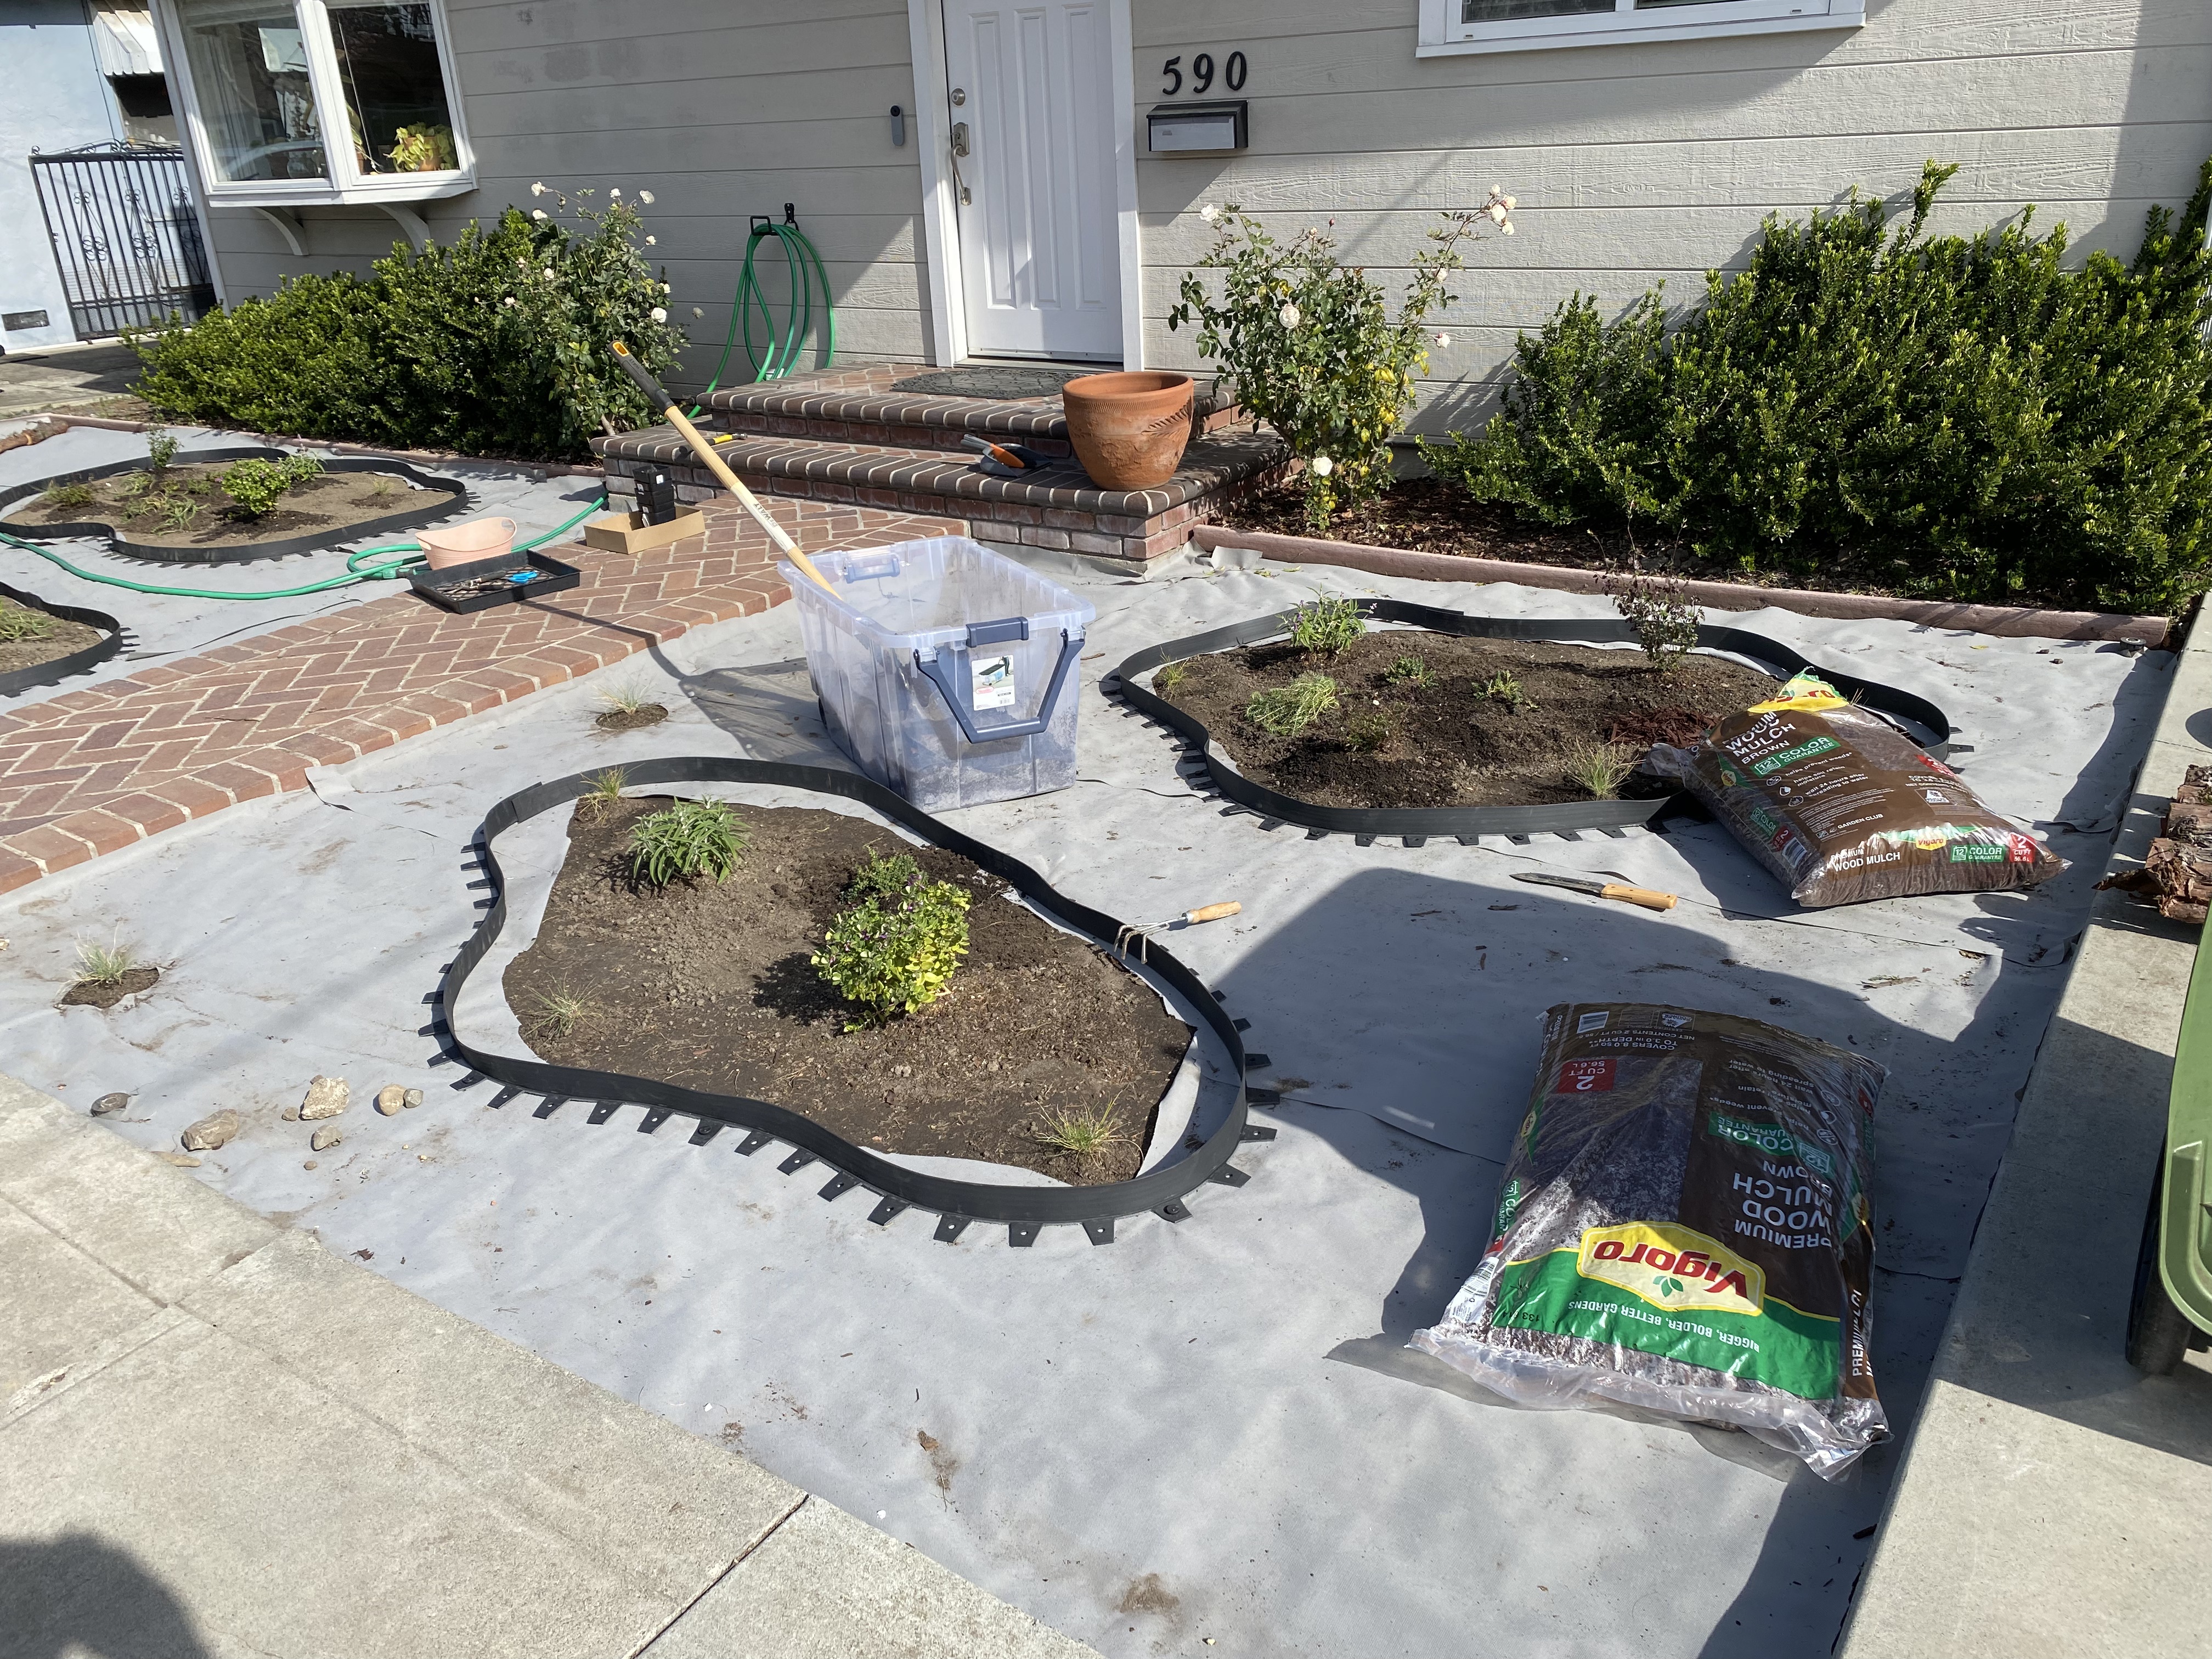
We placed landscape edging around the groups of plants. I was grateful for Bonita for challenging me to form interesting shapes with the edging; I was prepared to create perfect circles and ellipses which would have looked too boring.
We then filled the groups of plants with mulch, leaving about 1″ of space around the base of each plant.
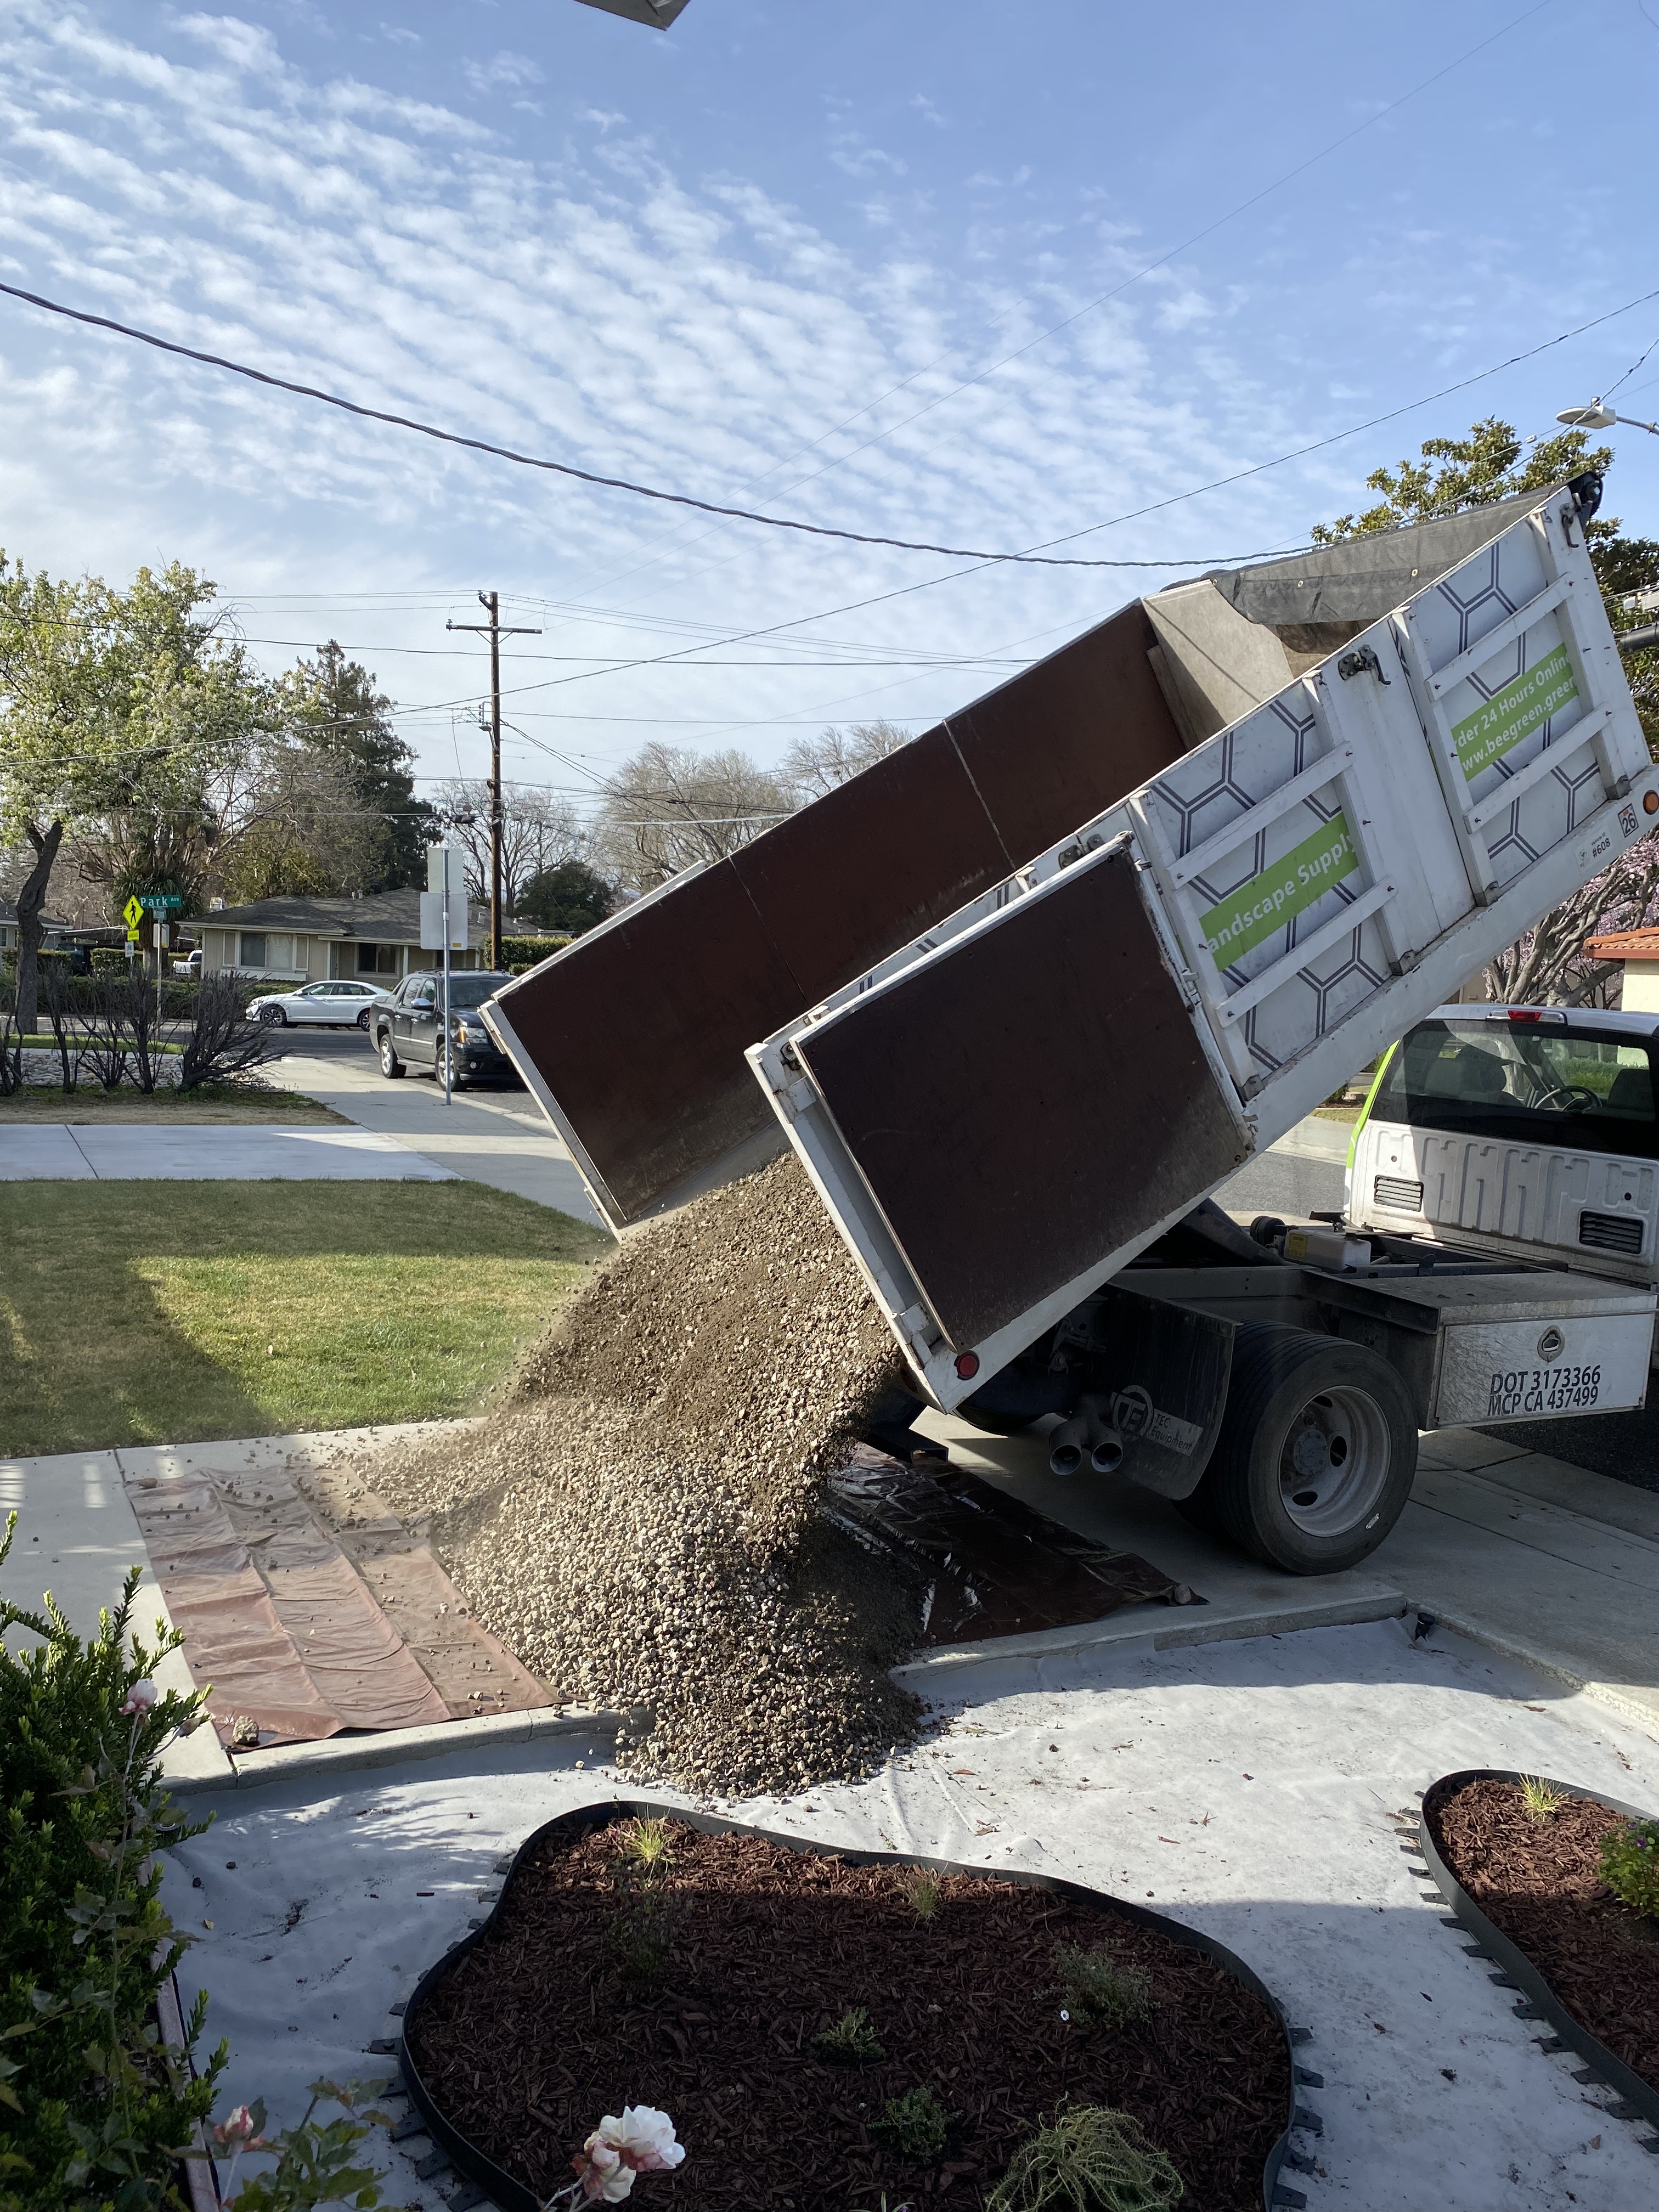
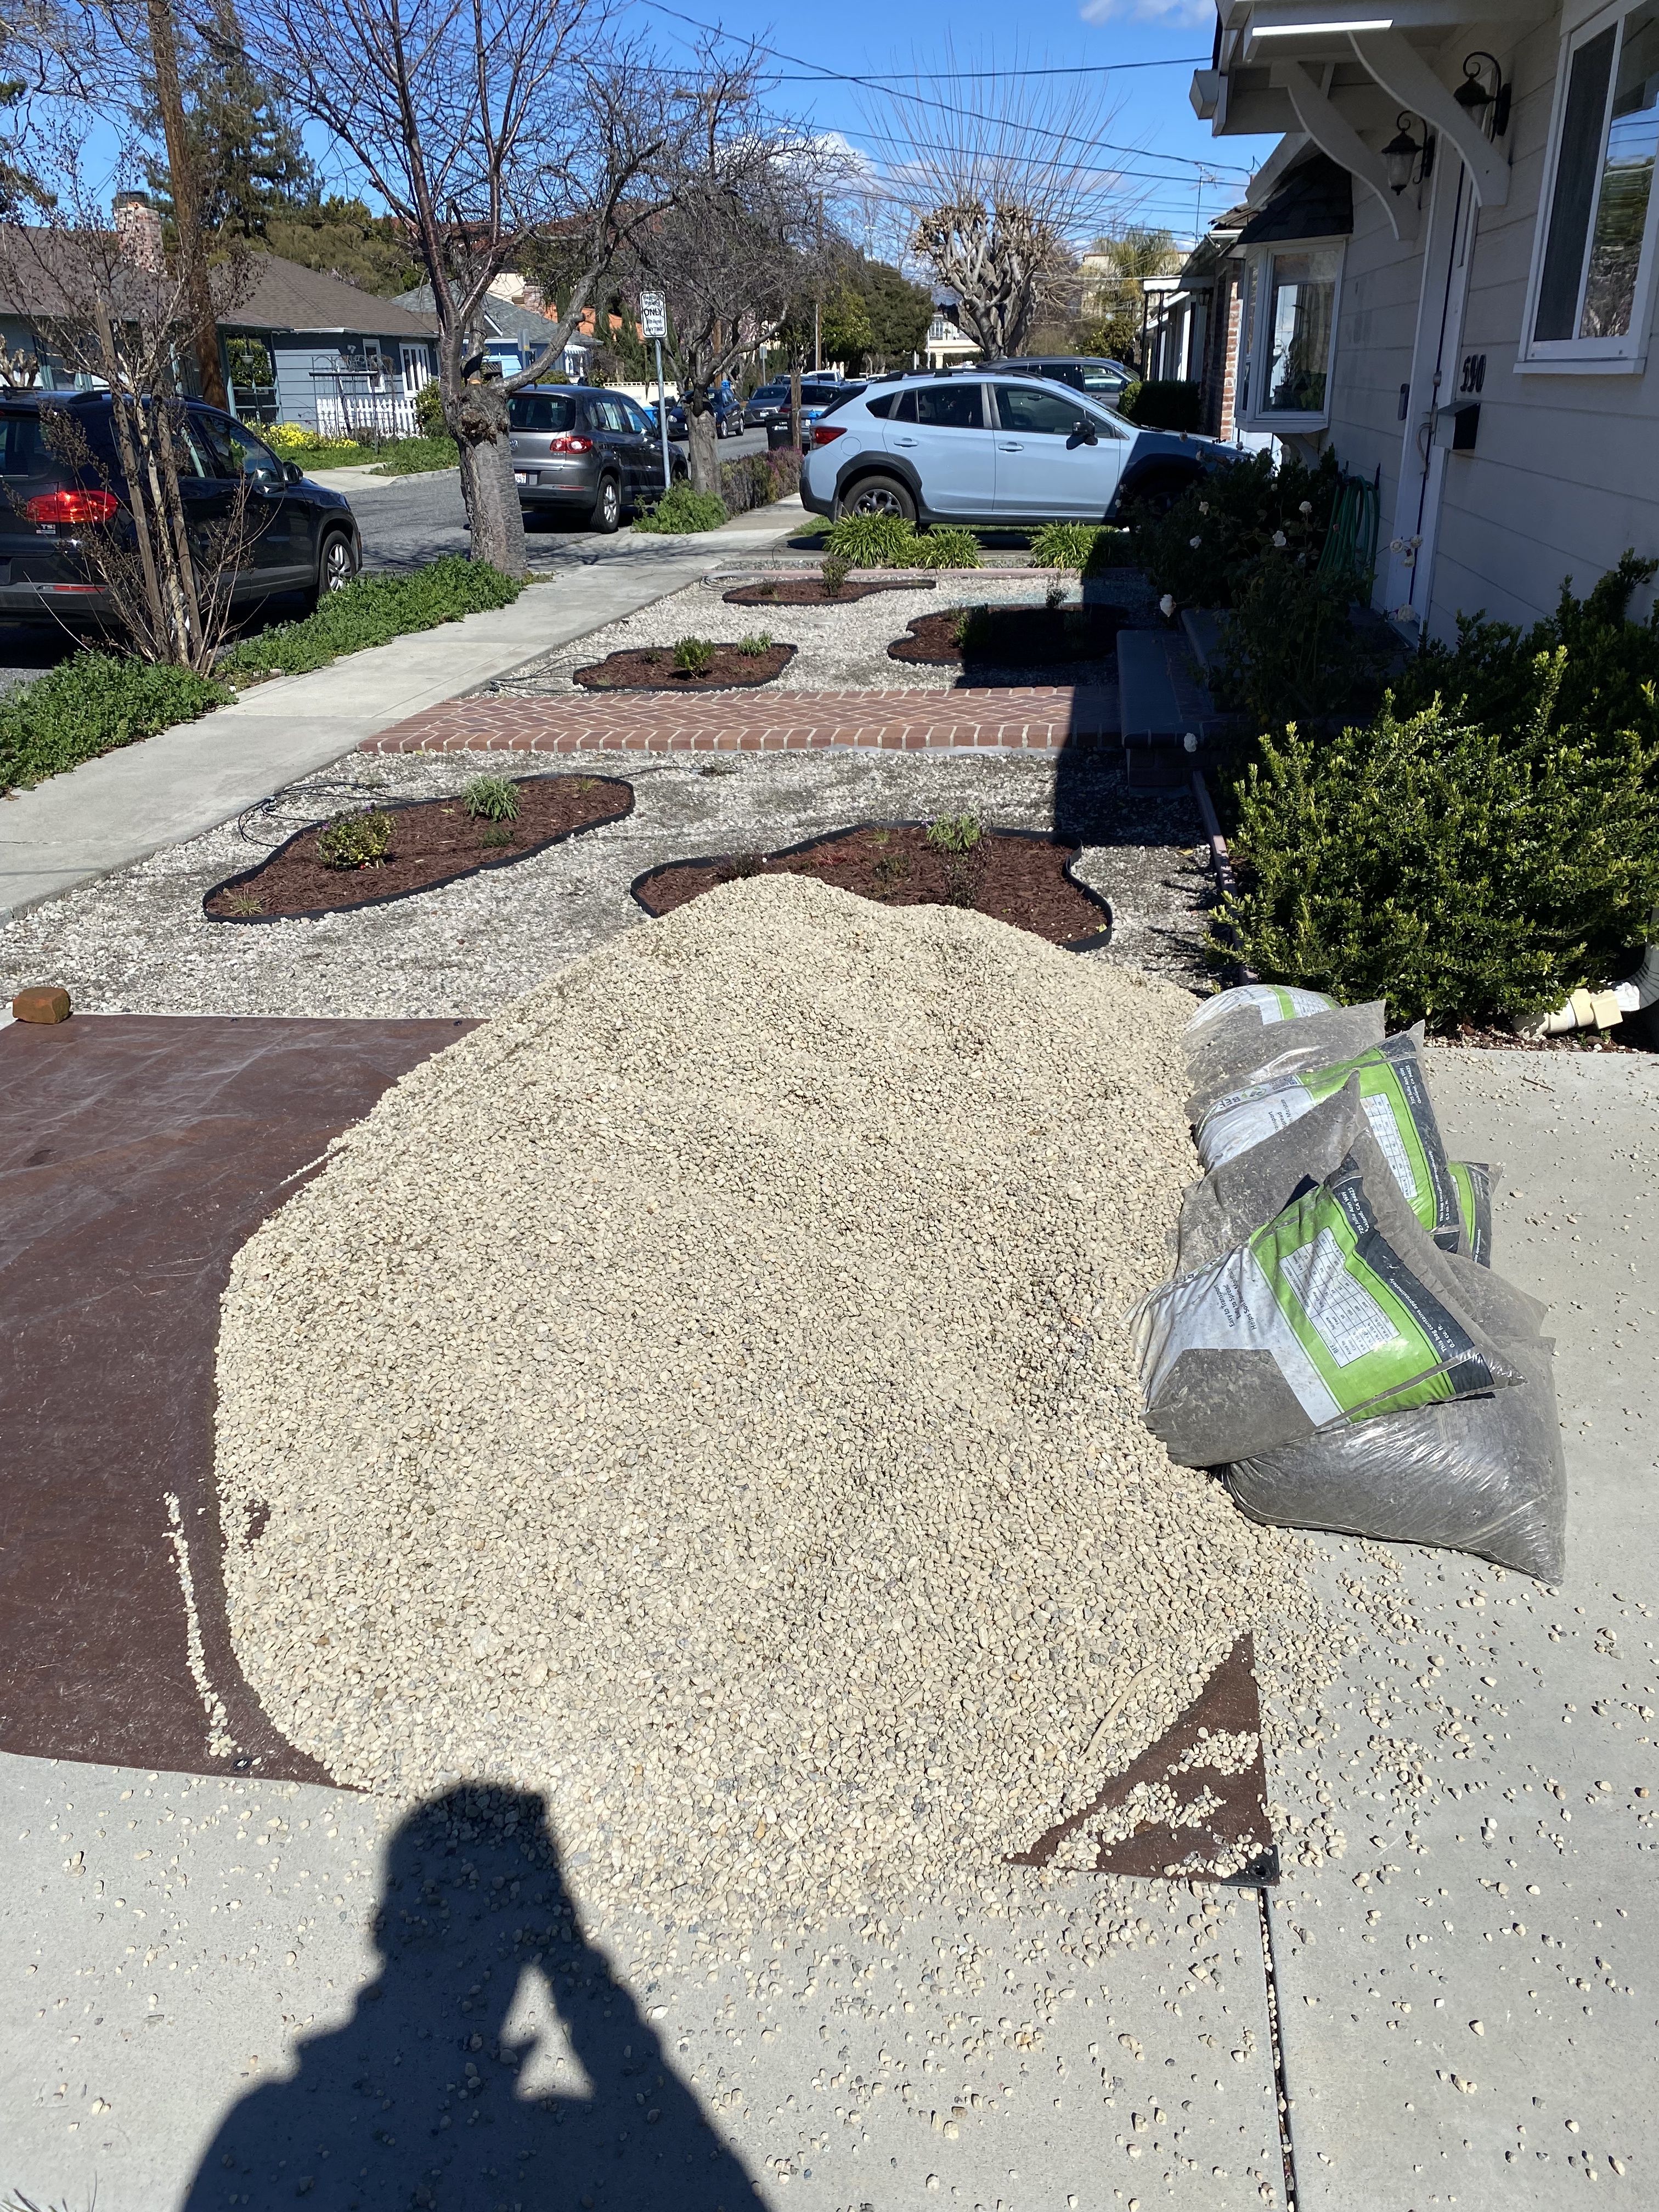
6. Gravel
With all the plants in place, it was time to fill the rest of the space with rocks. Bonita found a company called BeeGreen that delivers recycled gravel for just $29 per cubic yard. The gravel served as our “base” to fill about 2 inches of space. They dropped the gravel off on our driveway.
I was able to distribute the gravel in about 3 hours.
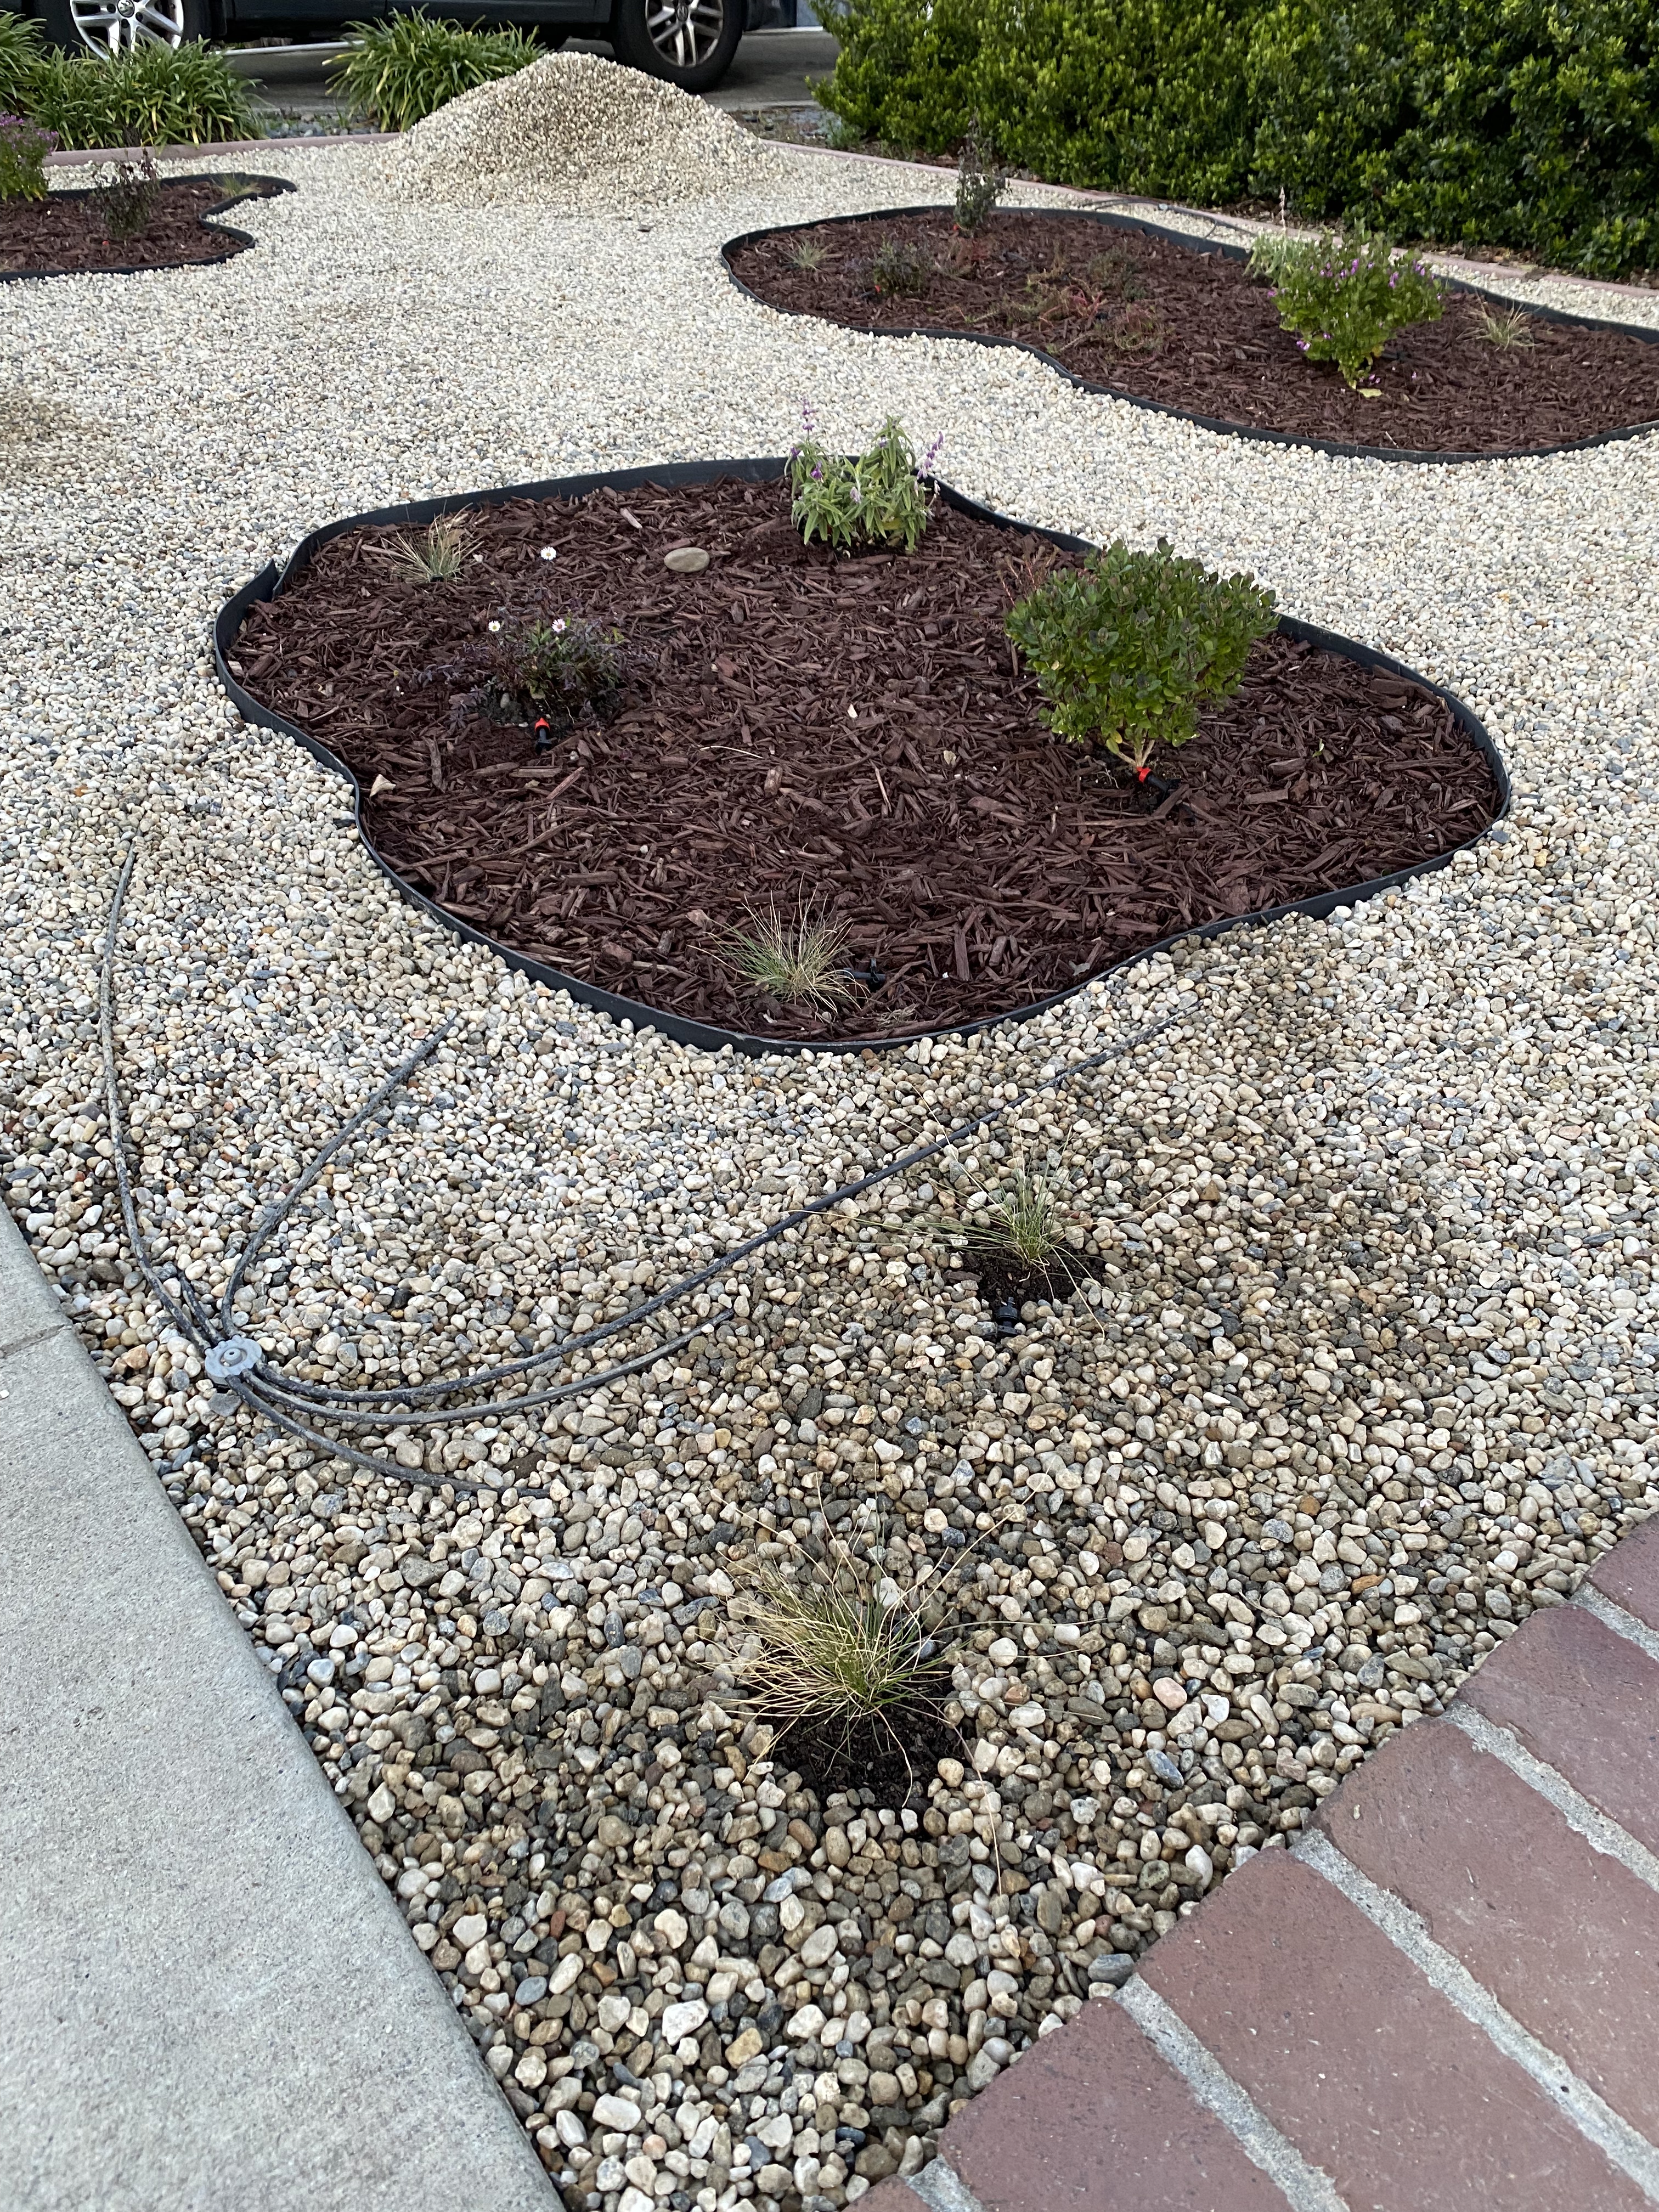
7. Drip Irrigation
This was another super fun part. I spent some time researching and planing the drip irrigation setup and learned that, because we already have irrigation pipes and sprinkler heads in place, there are drip products that leverage existing infrastructure. All I needed to do was replace sprinkler heads with a drip manifold, then cap off unused sprinkler heads. The main thing to consider is that sprinkler systems have high water pressure – usually 60 psi. Drip systems cannot handle such pressure and will break, and thus the drip manifold must have a built-in pressure regulator that reduces pressure to 30 psi.
With the manifold in place, I spent a bunch of time connecting 1/4″ drip tubing from the manifold to the plants. I drilled through the landscape edging and planned to cover most of the tubing with rocks and mulch to give the garden a simple look.
8. Decorative Stone
I was pleased with BeeGreen and used them again for decorative stones. We chose a product called Yuba Stone.
I bought a garden cart, which made transporting the stones really easy, but this process still took a few hours.
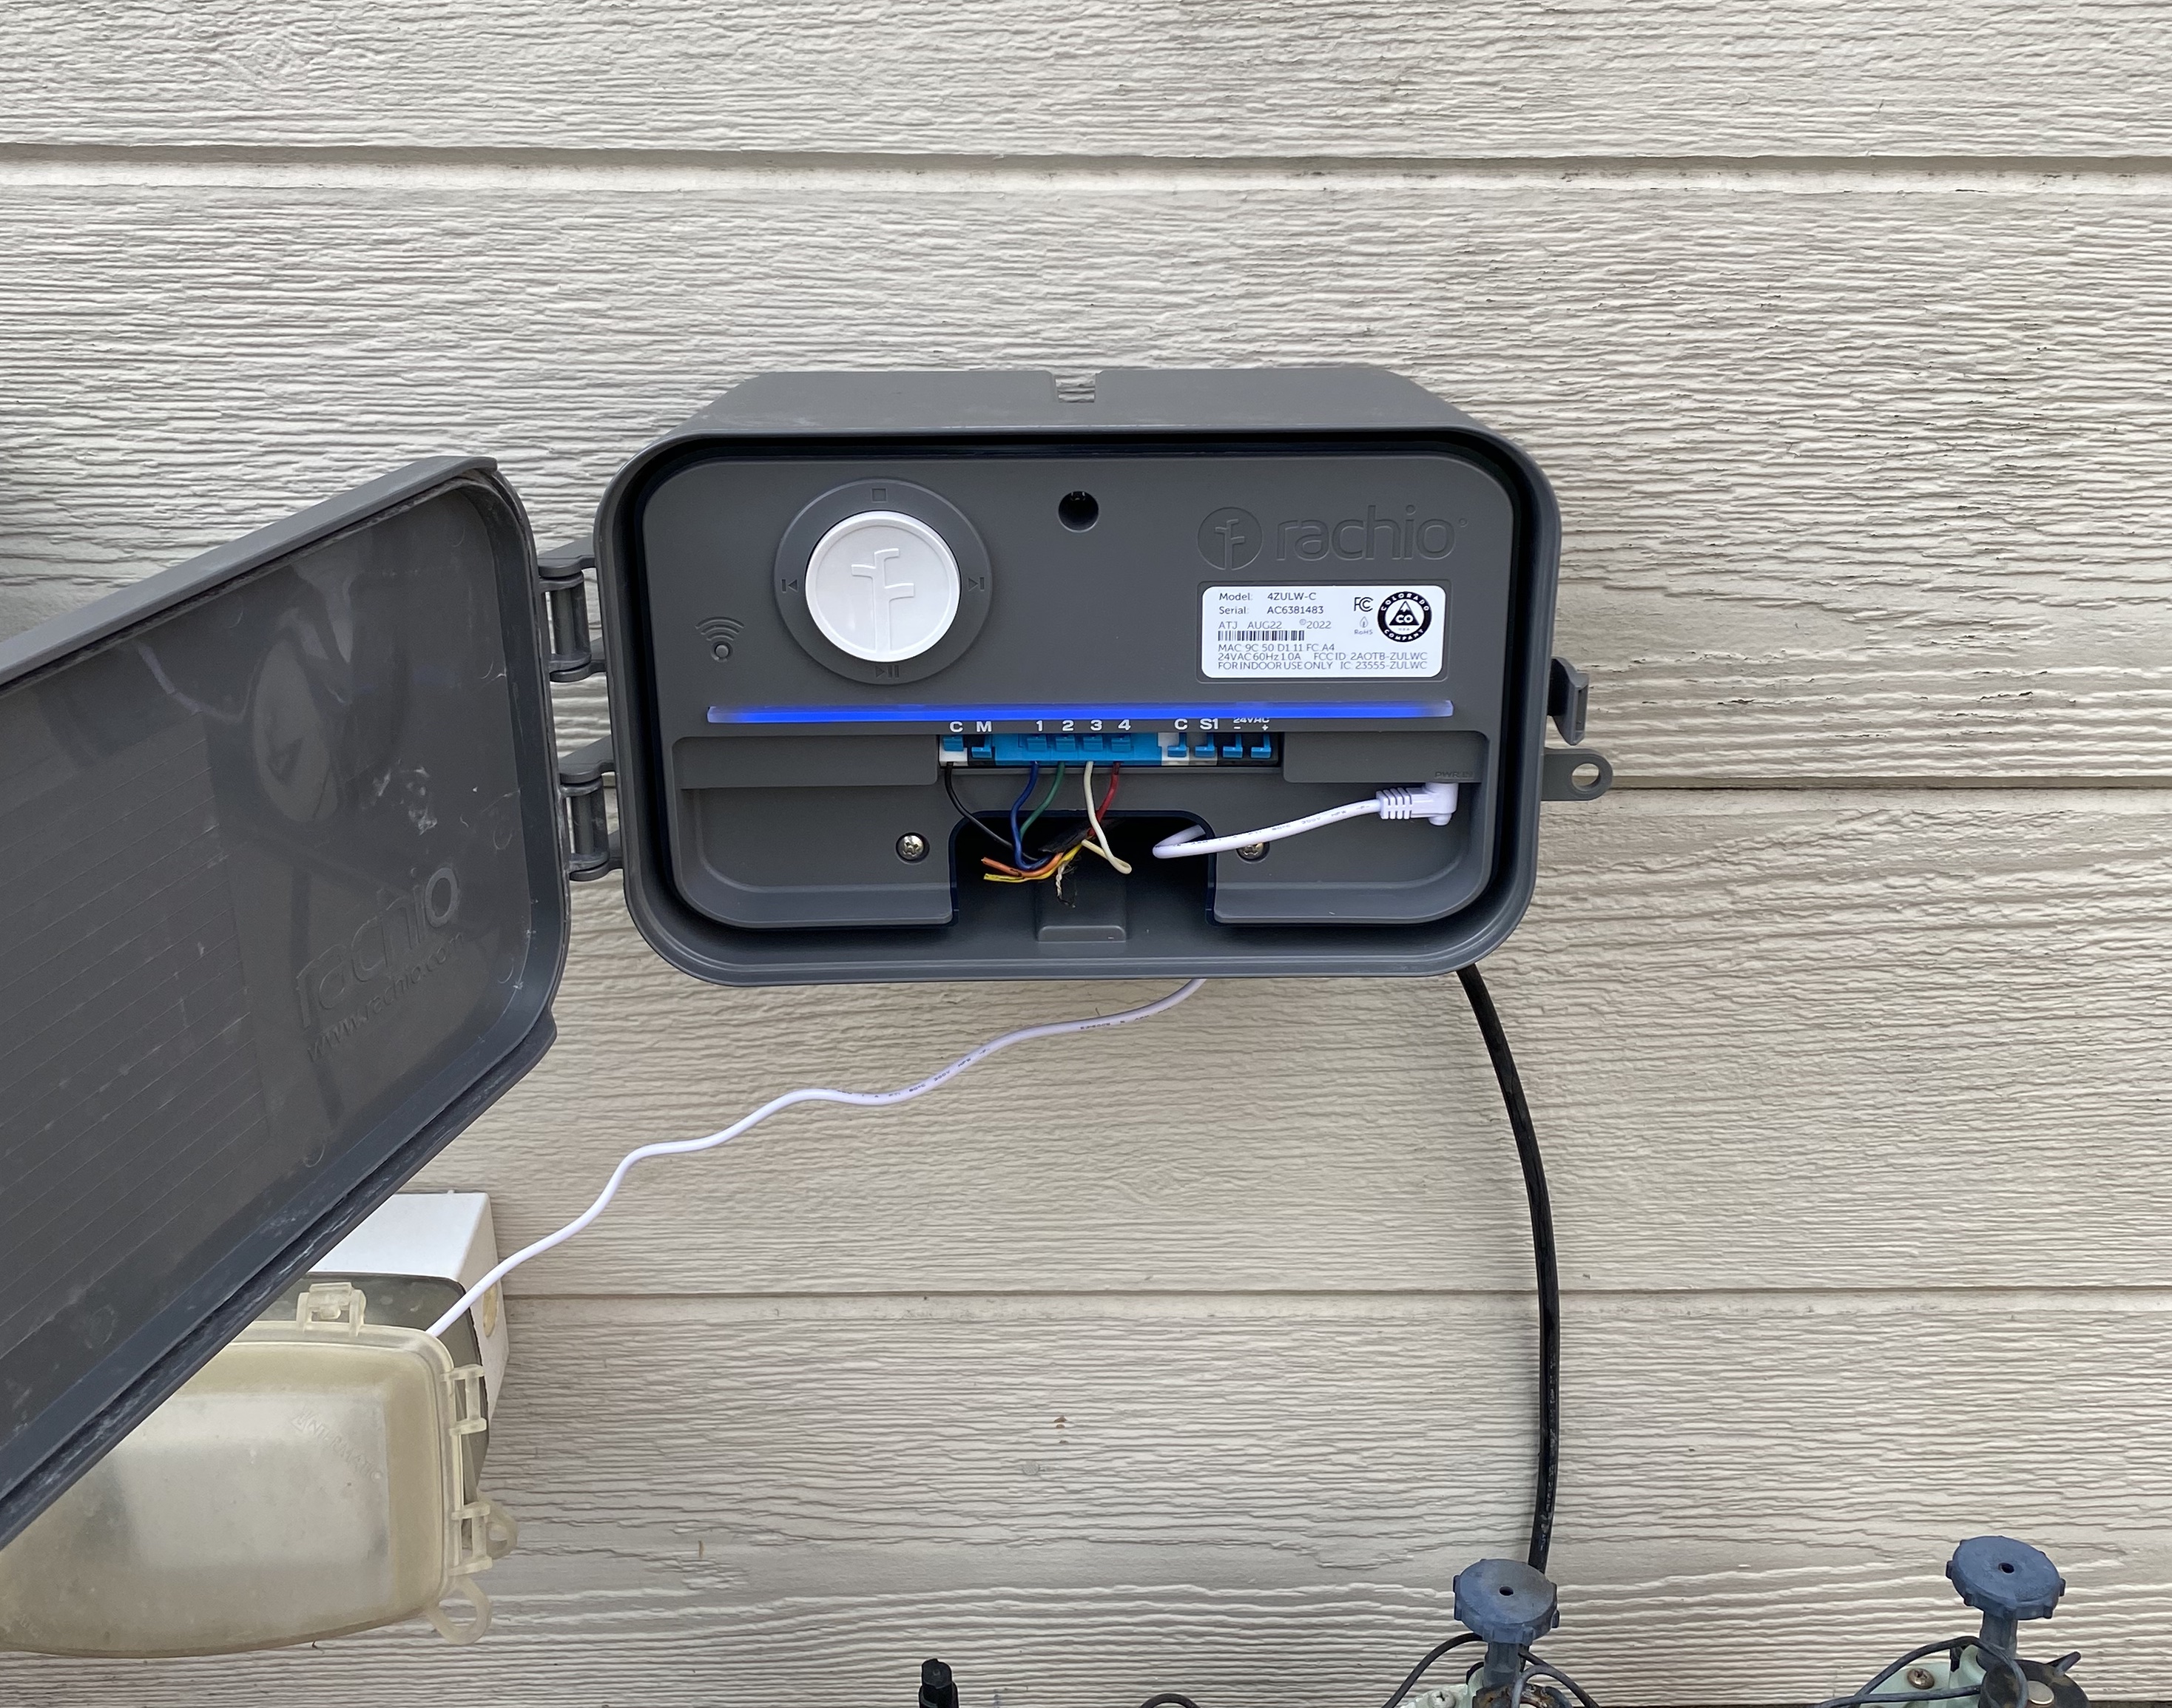
9. Automated Watering
One of our goals was to minimize ongoing maintenance. I am lazy and do not want to remember to water the plants. So I researched smart irrigation controllers that adjust watering based on inclement weather and seasonality. I ended up choosing a Rachio 3, which does all of the above and much more on a nifty app. Installation instructions were provided and easy – this took me less than one hour. Just remember to turn off the outlet on the electricity panel before installing the system.
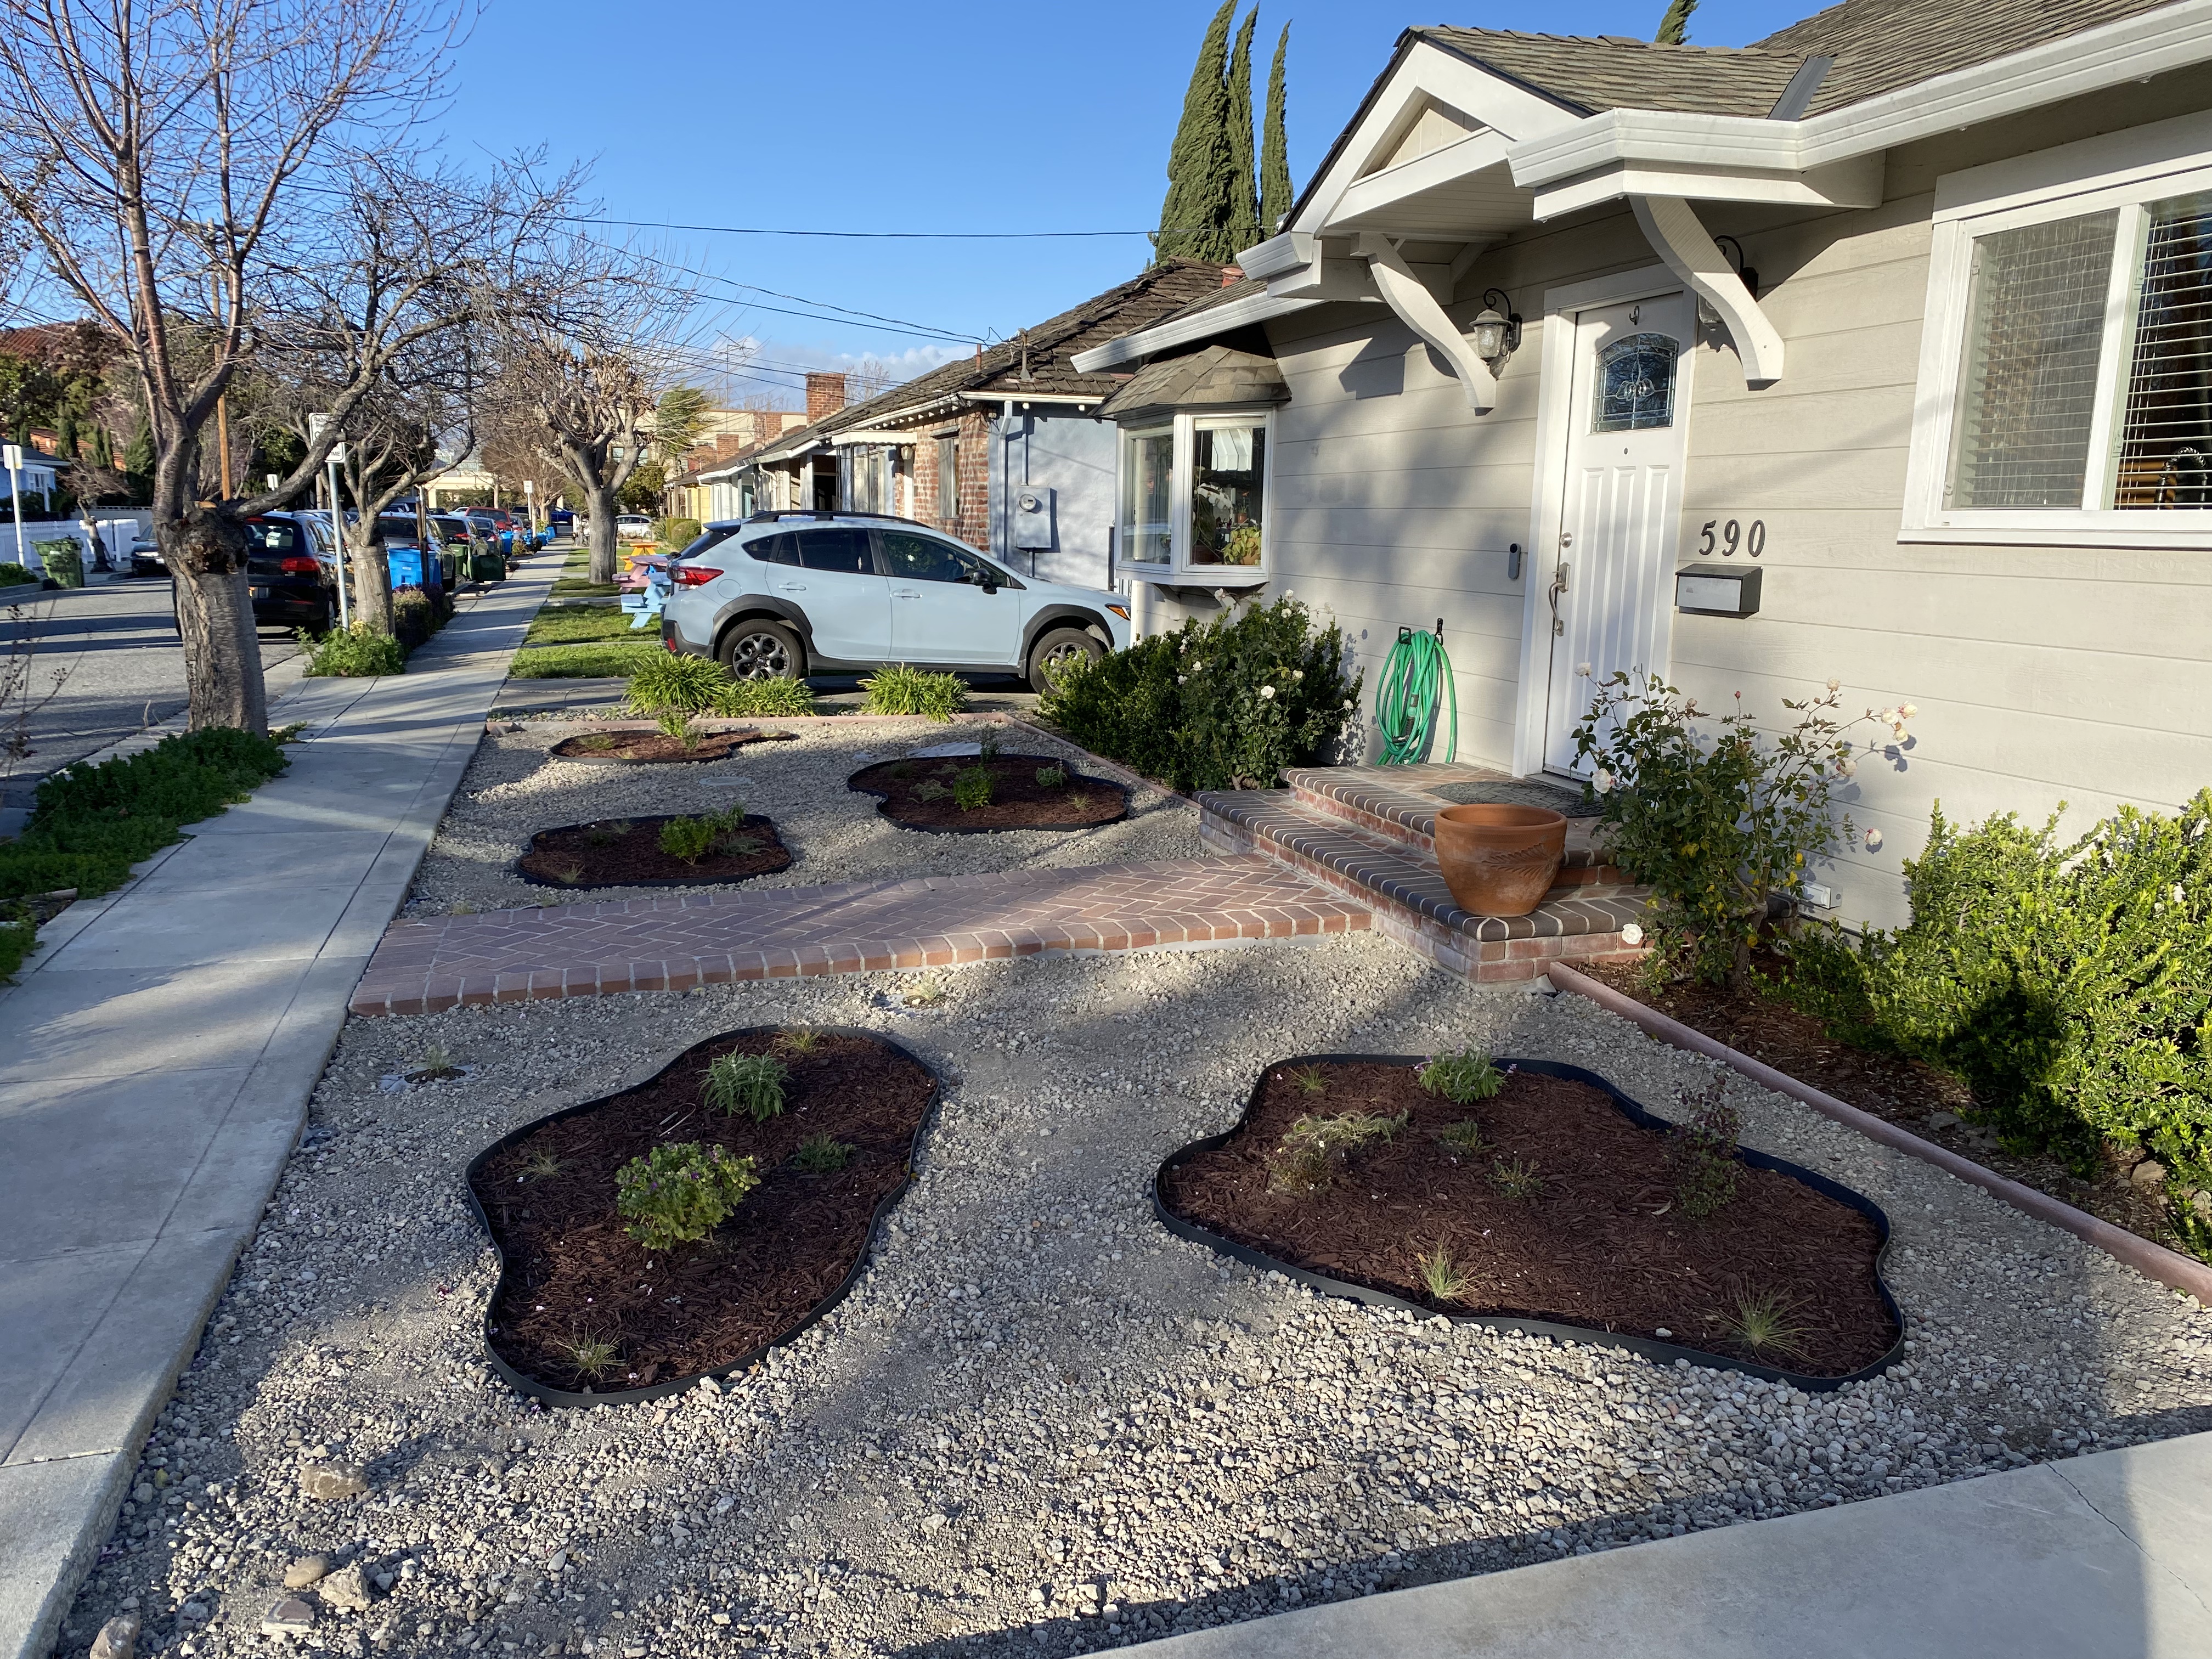
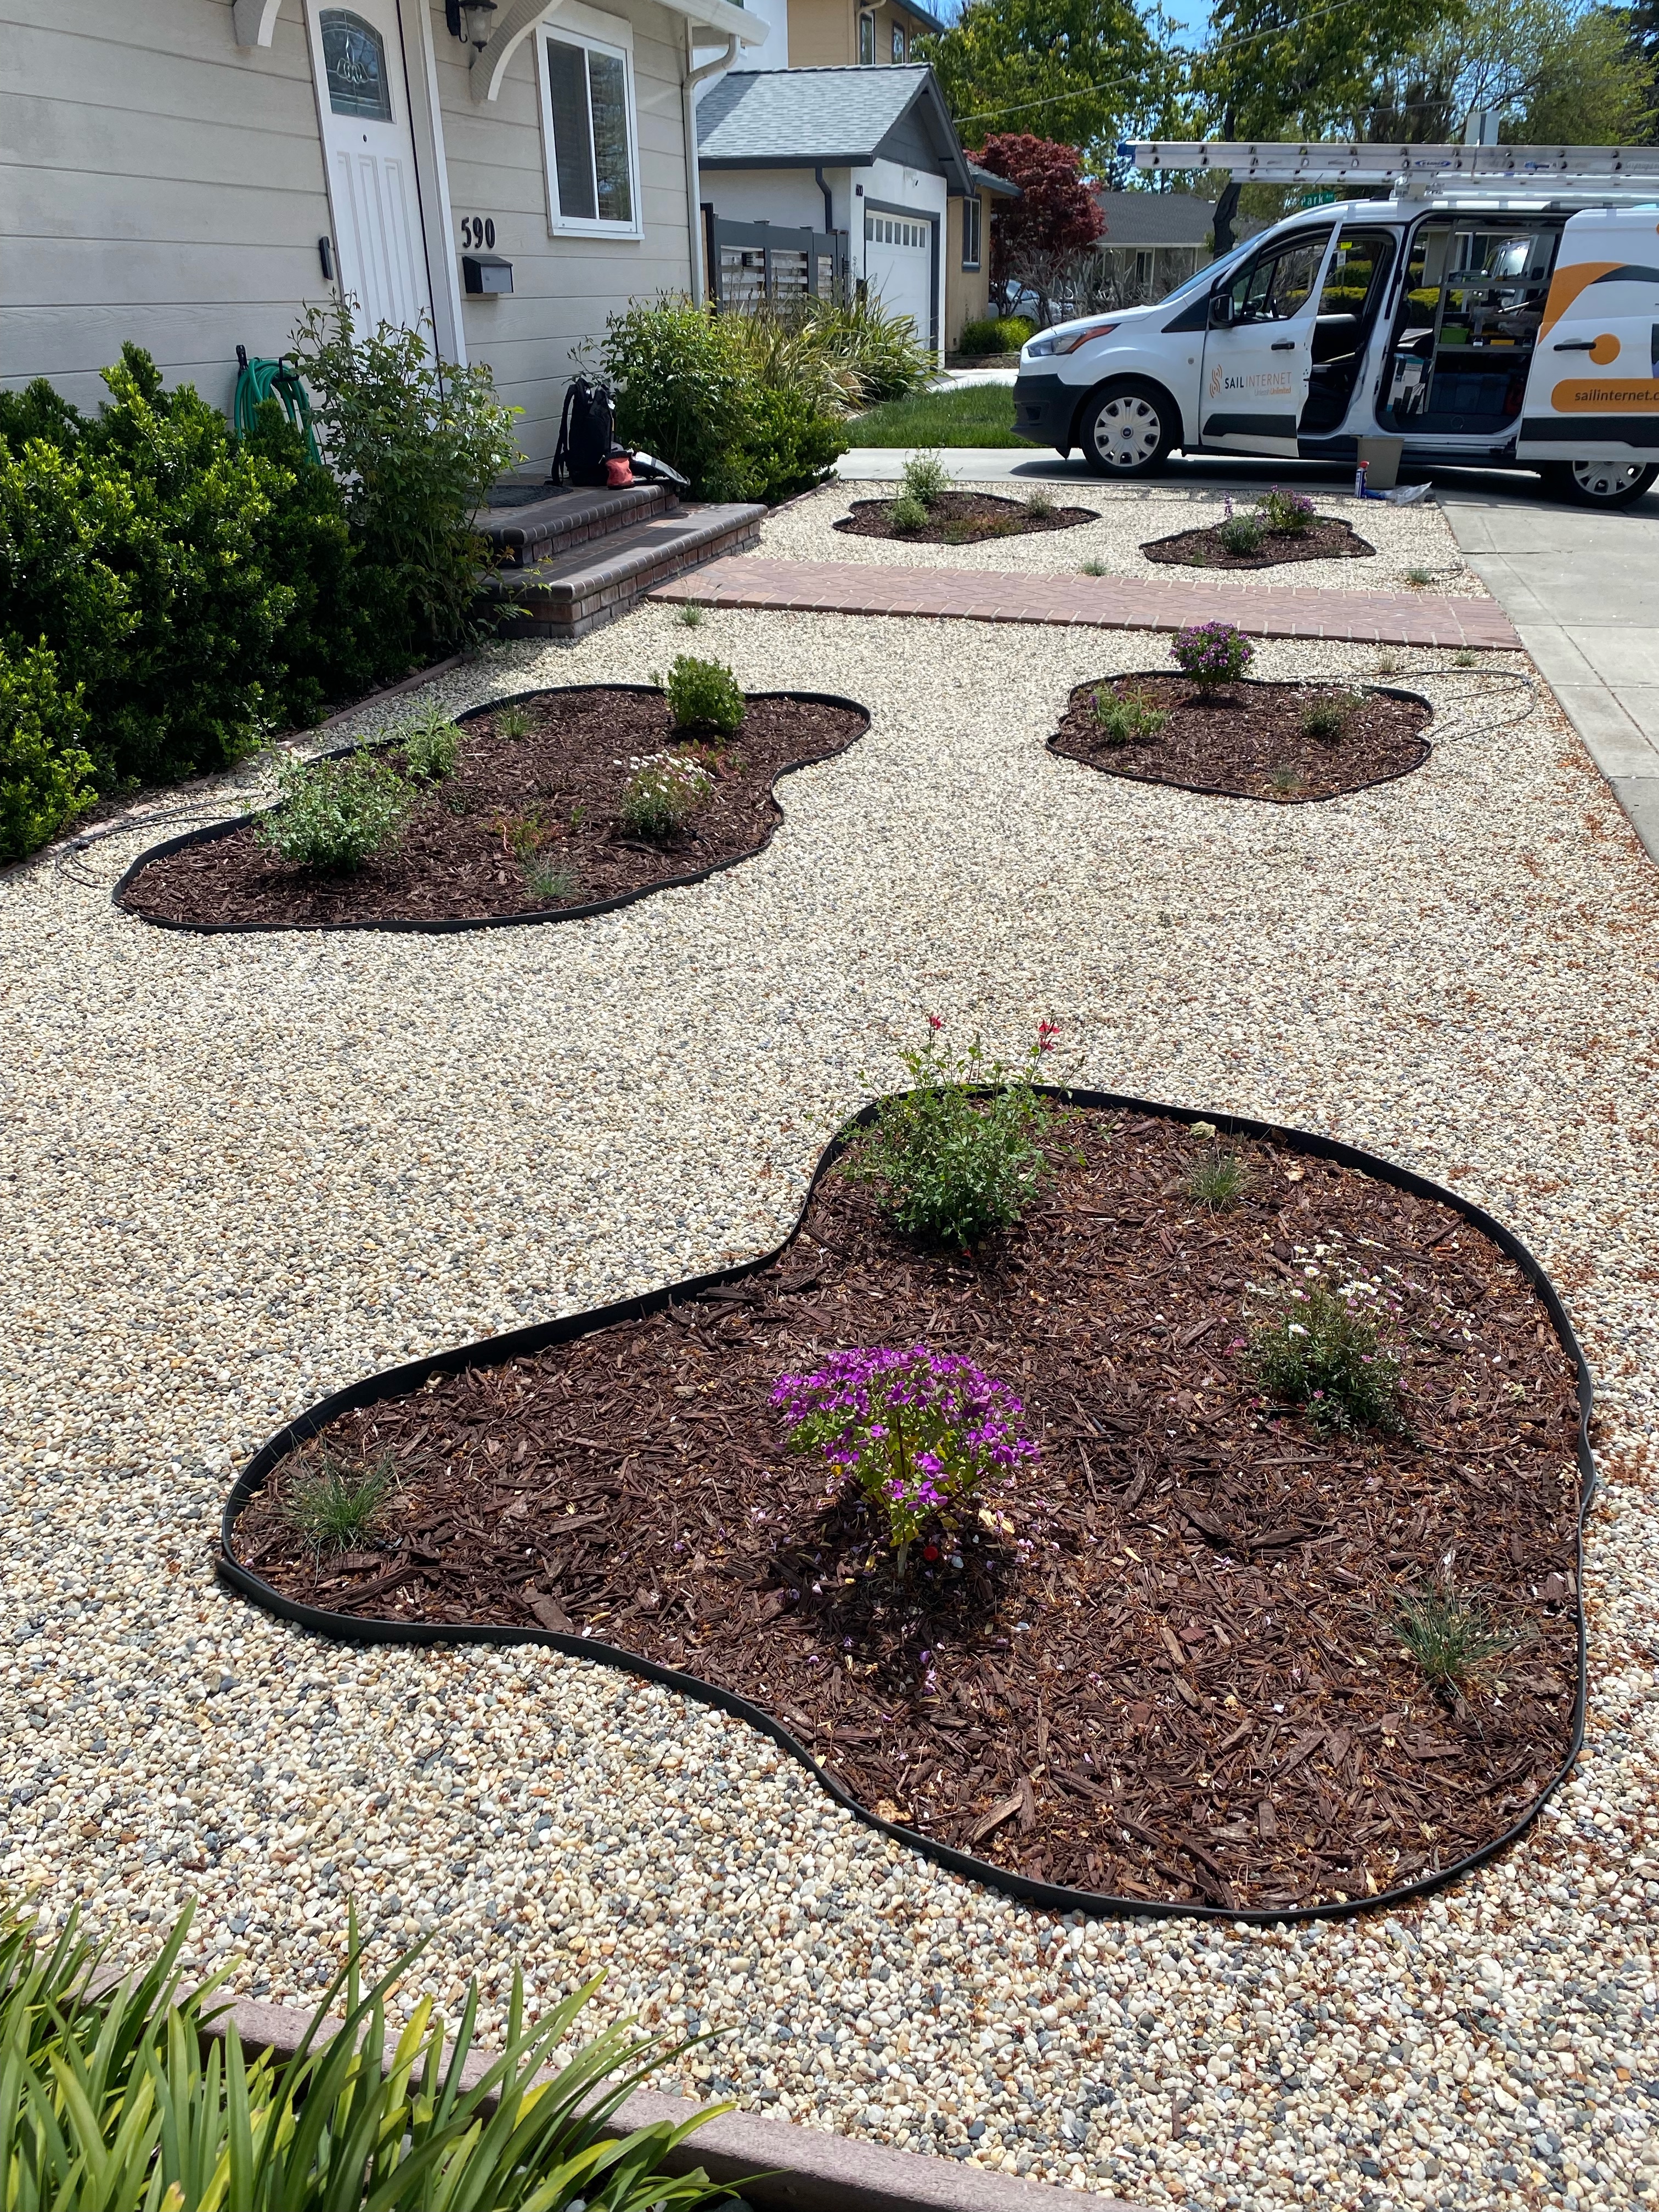
10. The end!
With all that, the landscape project was complete!
Project Costs
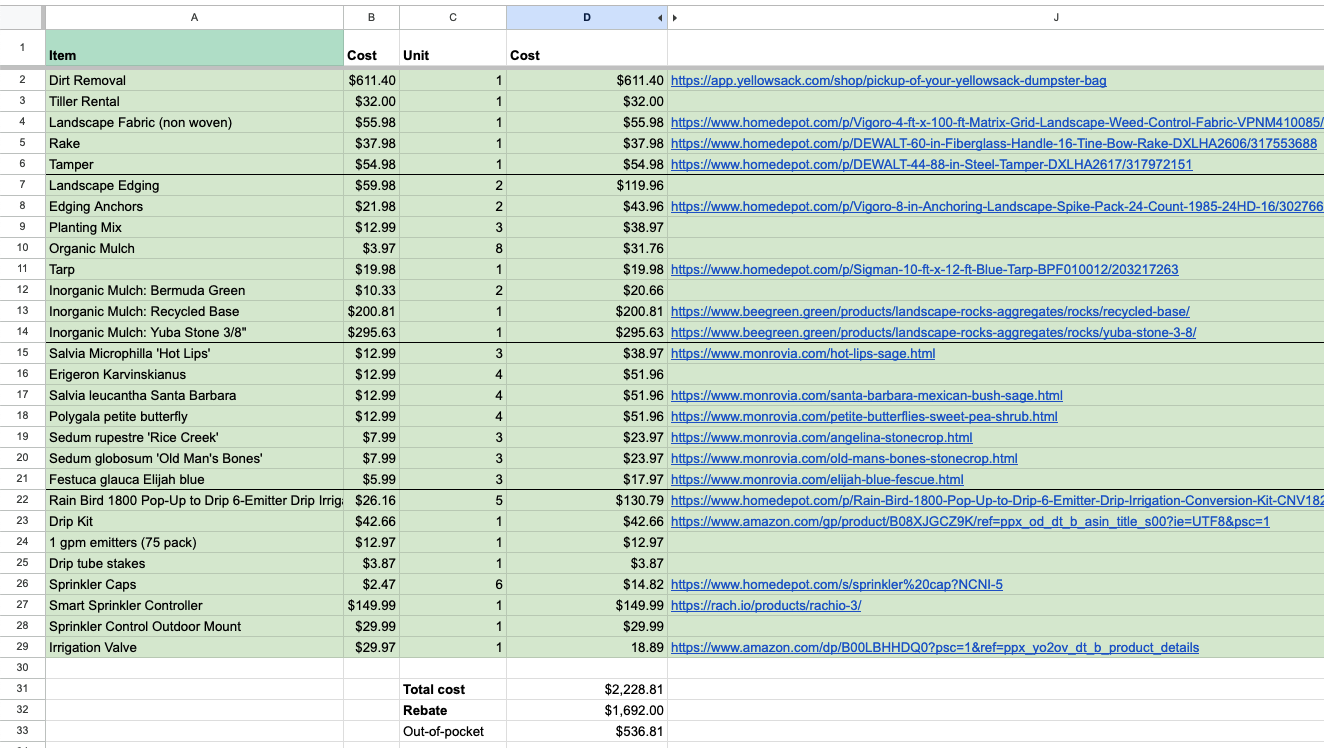
The project cost $2,228.81, but with the rebate, we spent just $536.81. We received the rebate about one month after completing the project and showing proof of work.
I made a few mistakes along the way and could have reduced the cost by $144 had I had planned better. In addition, some of the costs include one-time purchase of tools that I continue to use, specifically the rake and tamper. Thus, the true cost could have been as low as $300.
Learning Moments
Mistakes I made
- Hand pulling most of the grass instead of immediately using tiller or sod cutter, creating unnecessary fatigue.
- After removing the grass, I procrastinated a couple weeks before placing the landscape fabric, causing weeds to start to grow.
- Not properly estimating how much dirt I needed to remove, resulting in having to schedule two Yellowsack pickups. Each pickup costs $70.
- After adding the landscape fabric, I waited too long before planting and putting in rocks. Landscape fabric degrades faster when exposed to sunlight.
- Not keeping some of the dirt that we removed, which would come in handy when it was time to plant plants.
- Planting some plants before putting down all the landscape fabric. Had to get creative with placing fabric around existing plants.
- Not getting a wheelbarrow or cart earlier on. Would have made placing mulch extremely fast.
Things that went well
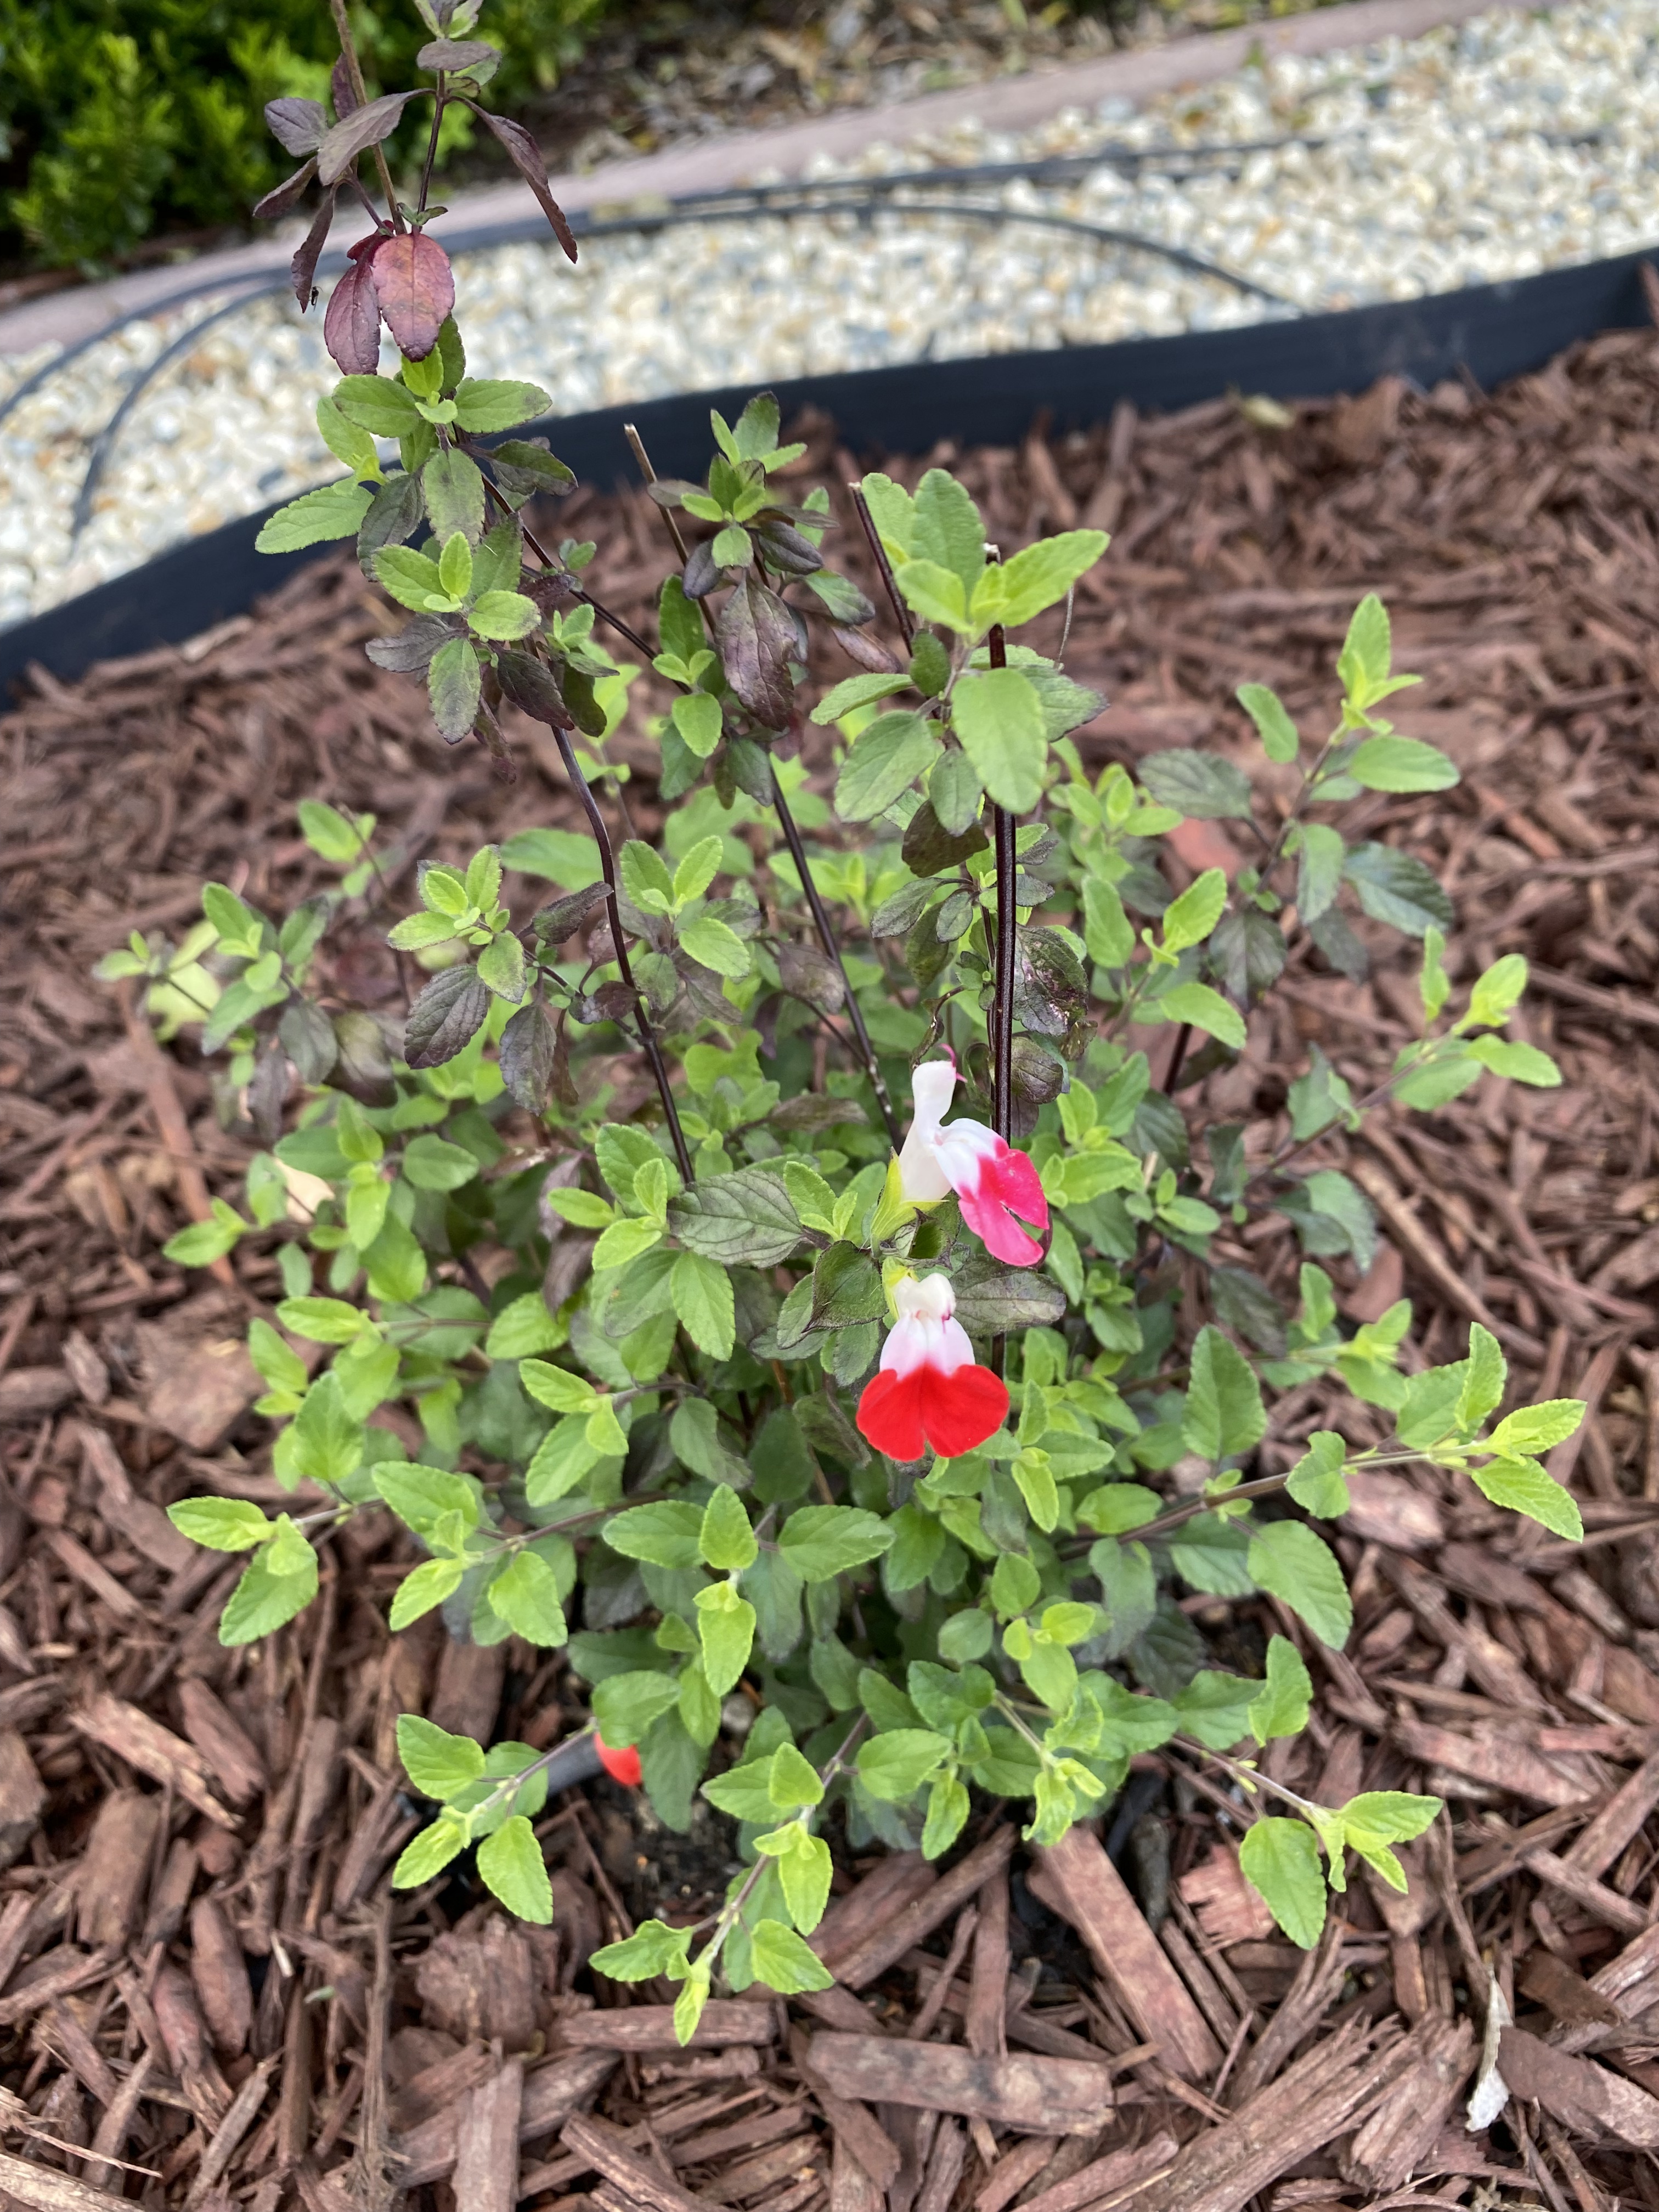
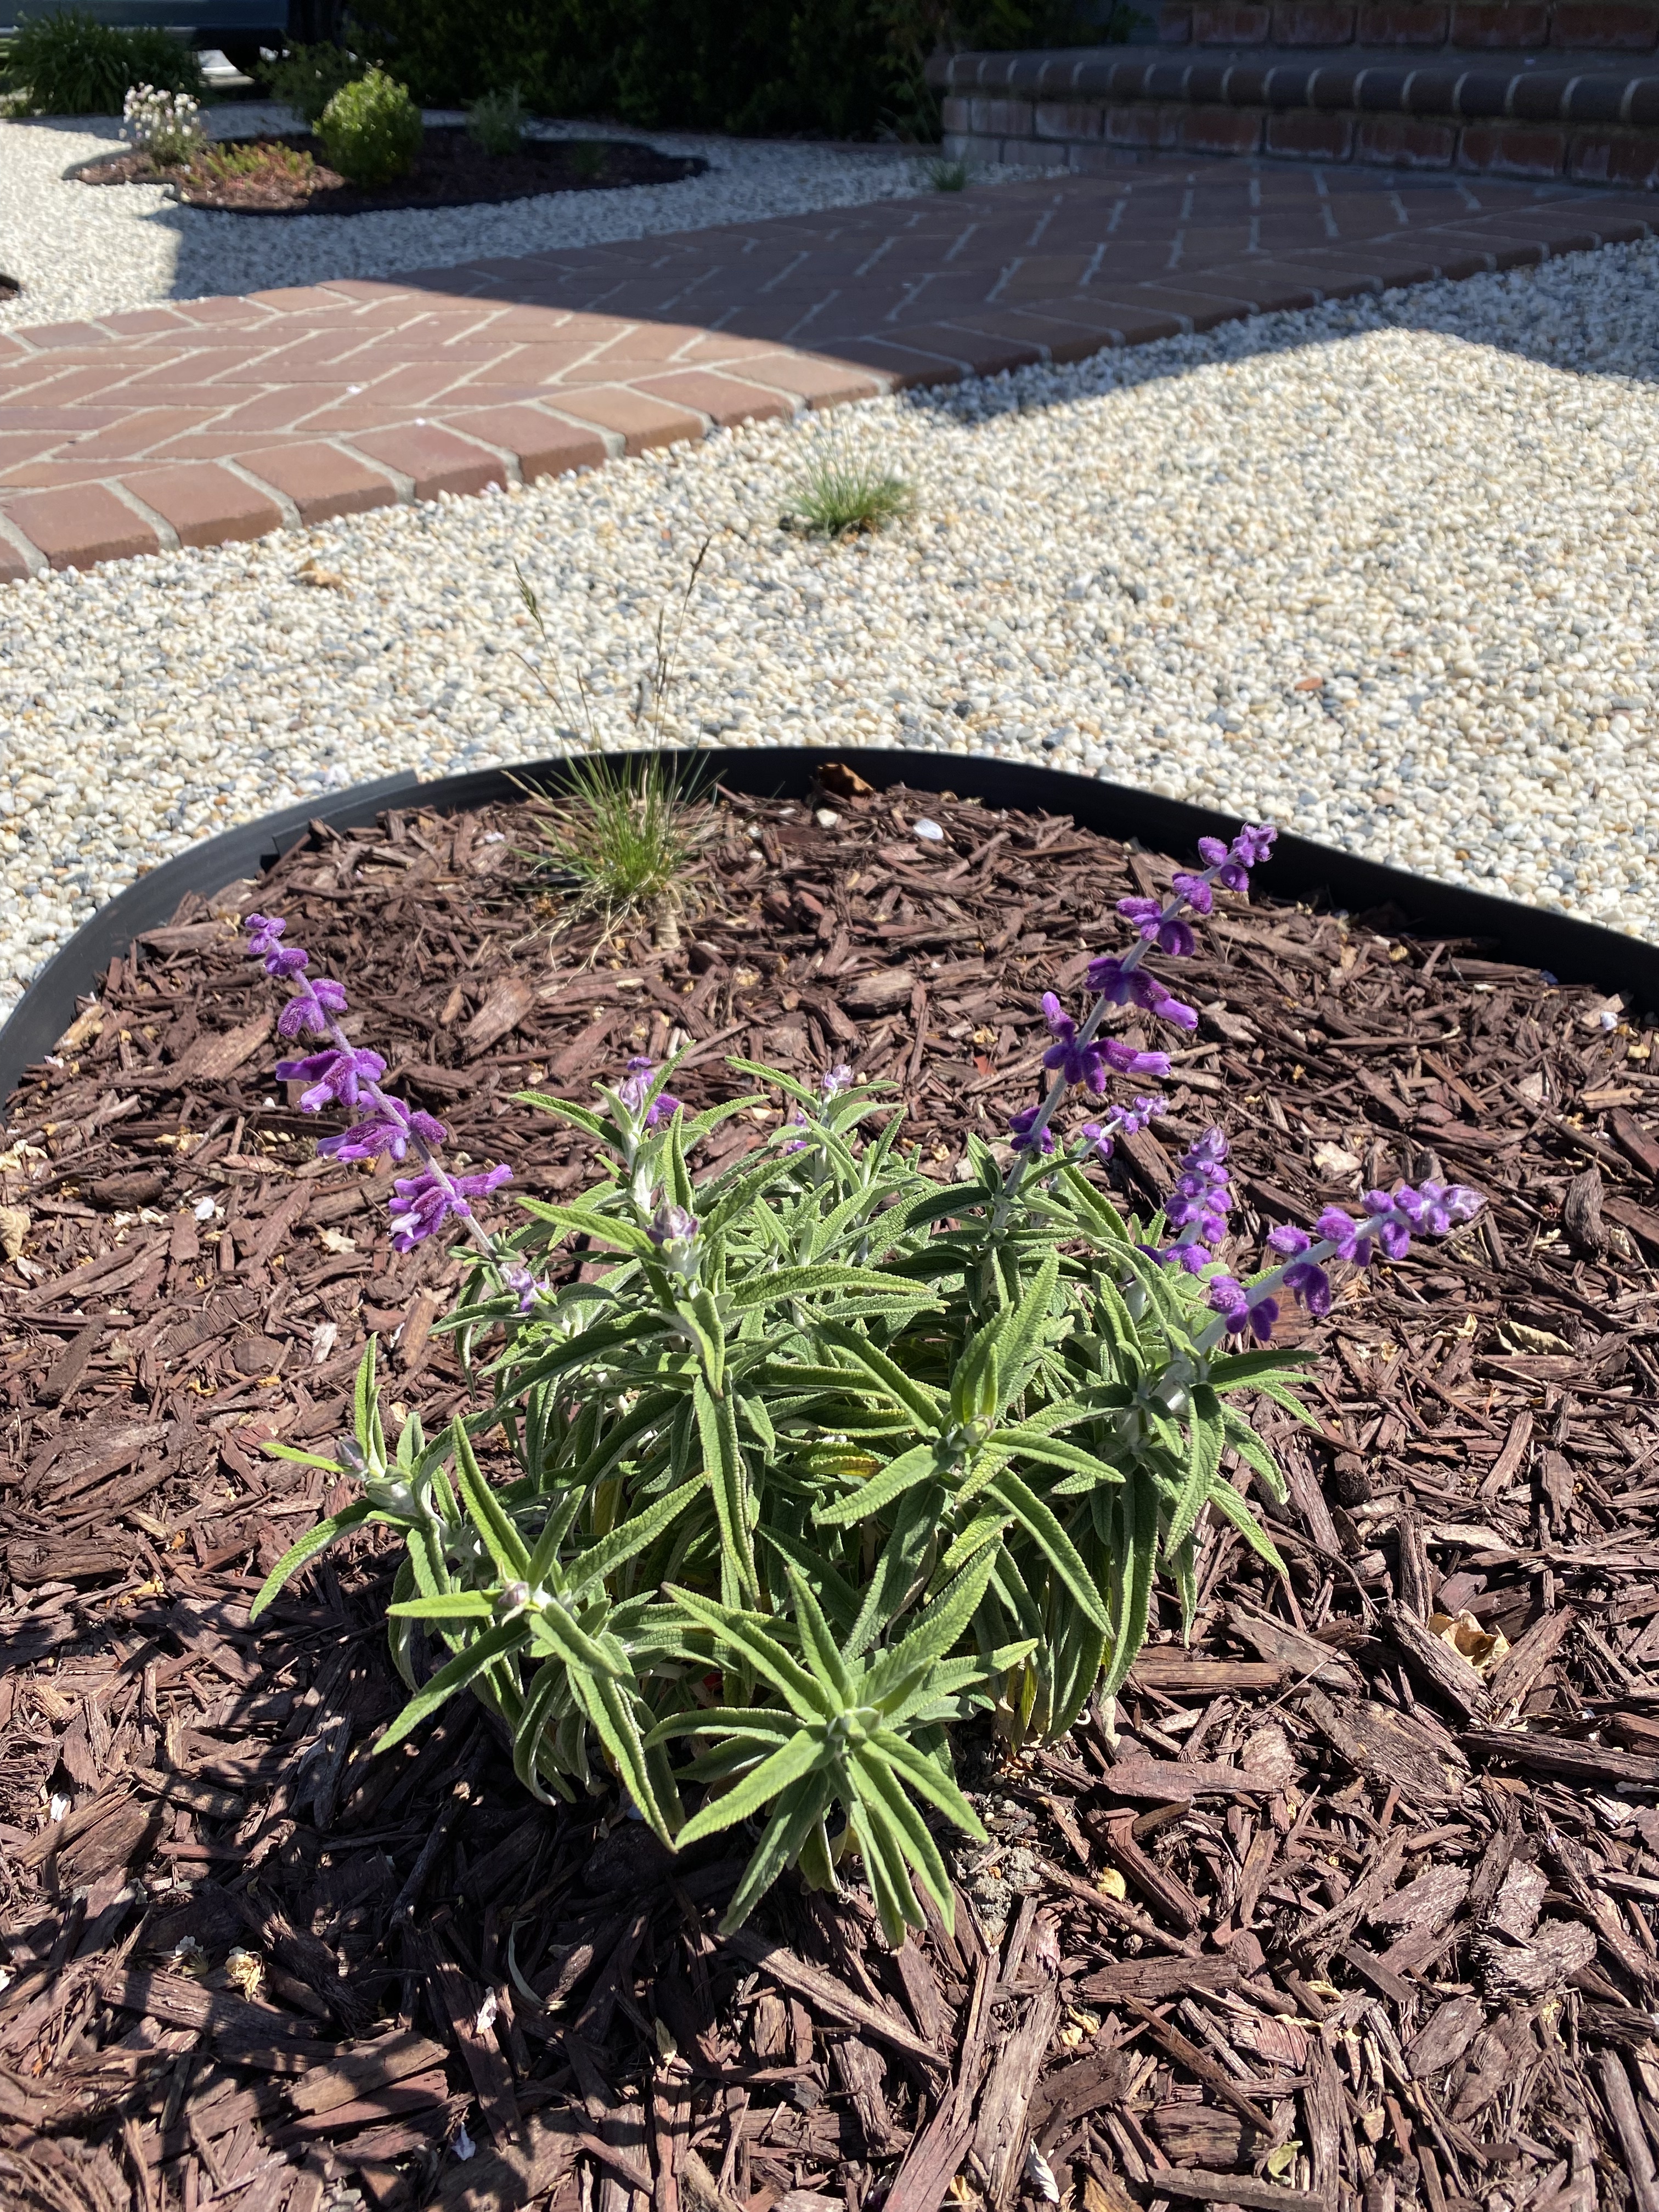
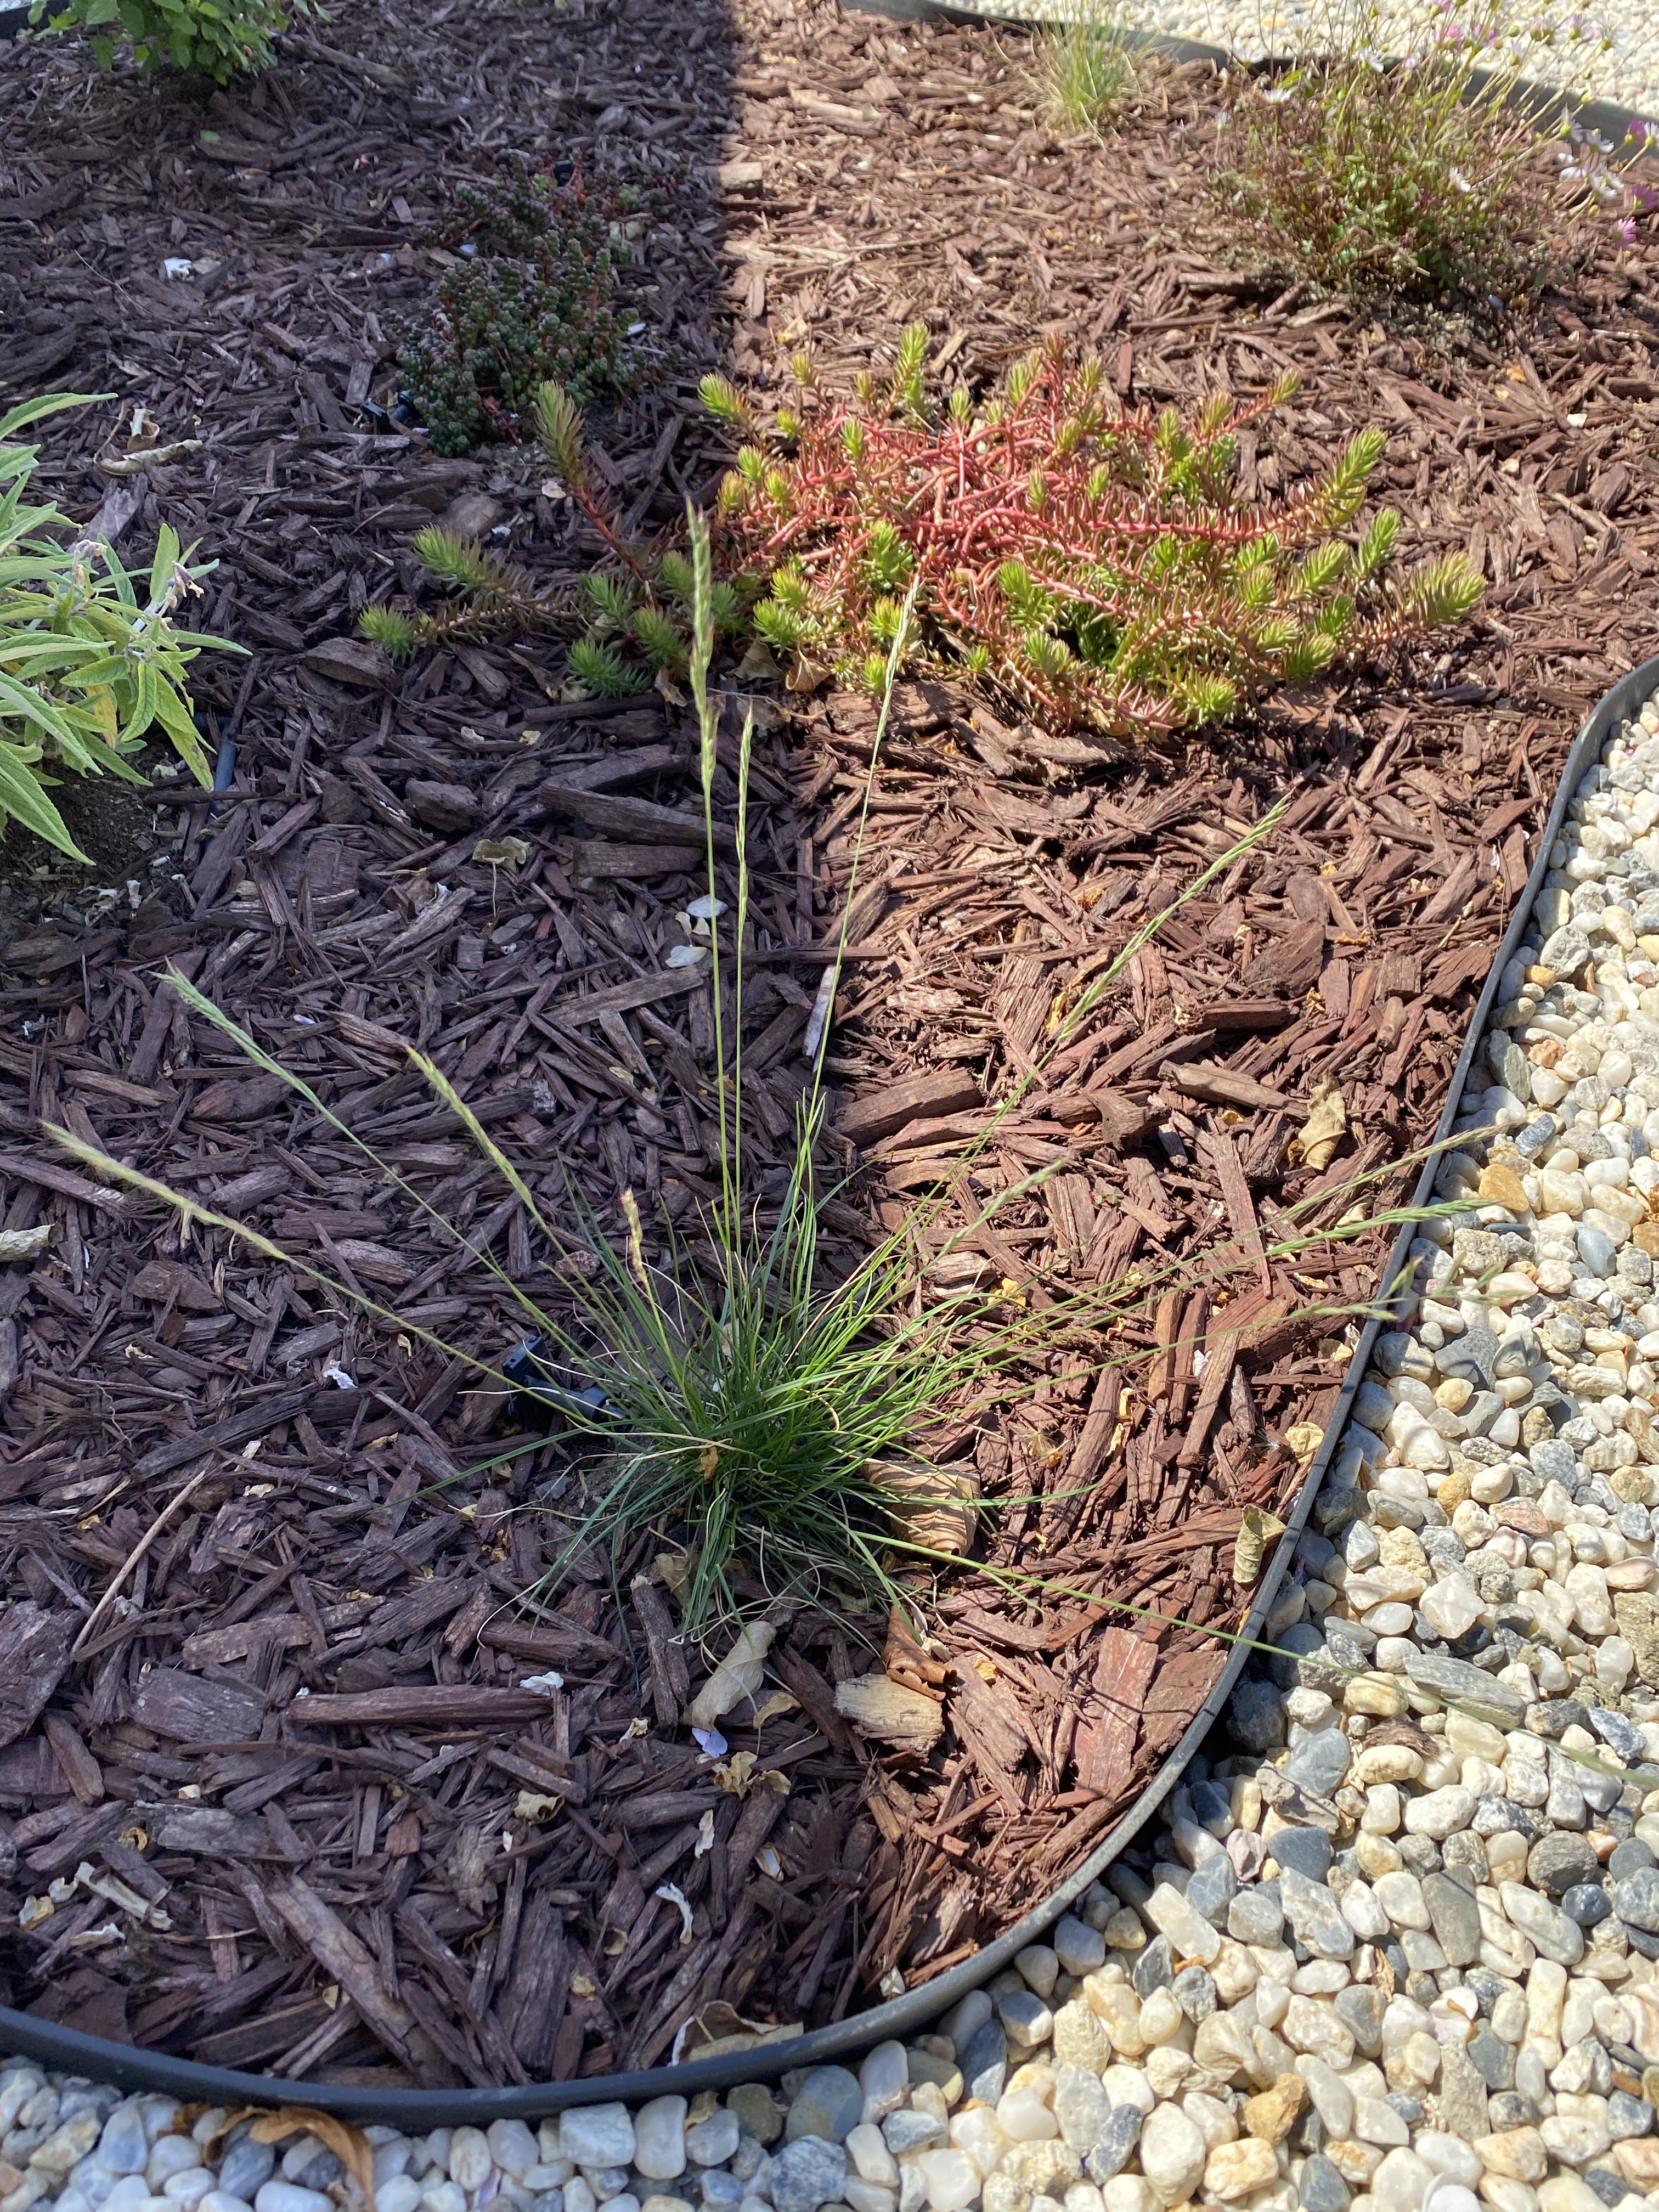
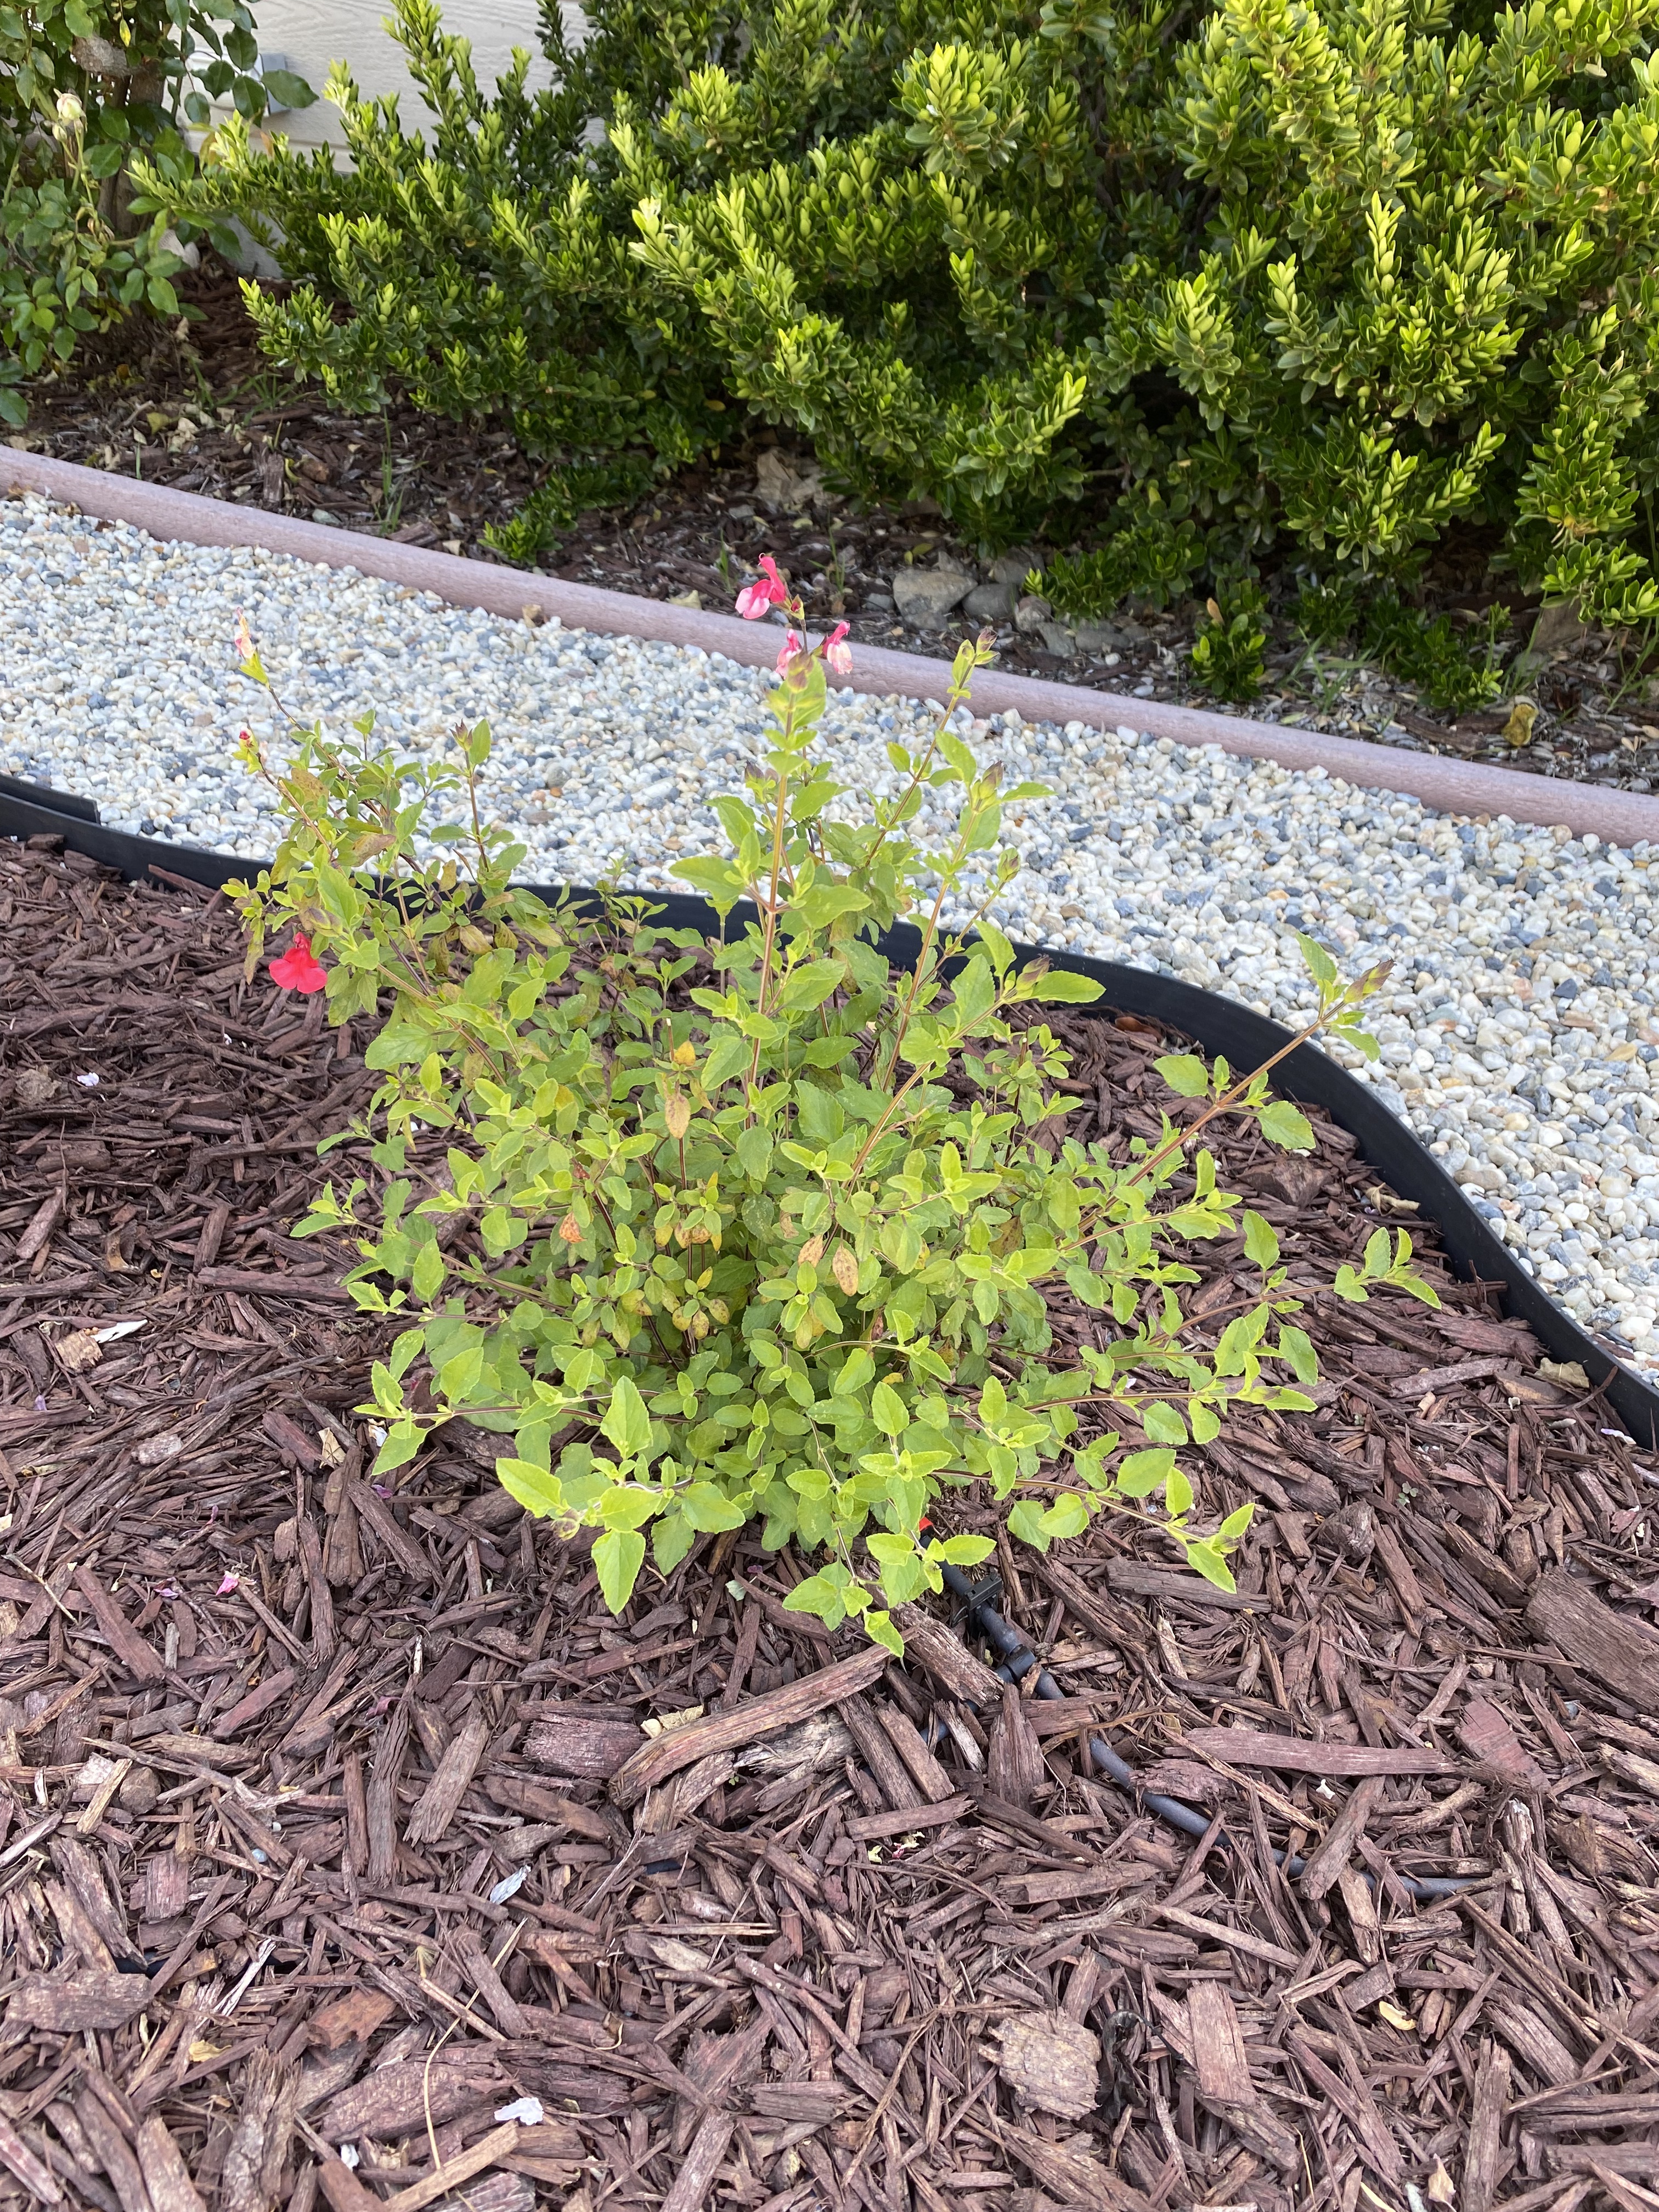
Most of the plants are thriving, and it’s been fun watching them grow over time!

- Being flexible with the plants we wanted, so long as they all had similar watering needs
- Propagating larger plants into smaller ones and distributing it. Smaller plants cost less and are easier to plant.
- Reusing existing irrigation and just replacing the sprinkler heads, instead of cutting through PVC pipe to replace the valve and reduce water pressure.
- Fitting the drip tubes through edging and having most of it be beneath mulch, so that it is protected against the sun, which will damage the tubes over time.
- Replacing just broken parts in the irrigation valve, rather than replacing the entire valve.

Great looking garden Andy! Your writing really pulled me along on a topic I might not have ever read up on. I hope one day I can achieve a similar feat. I bet your sense of accomplishment at the end was extremely satisfying. My favorite part was how you got a $1,692 rebate. That is so cool.
LikeLike
This was very helpful! How much base and stone did you end up ordering?
LikeLike
Thank you! I ordered 1.25 cubic yards of gravel (up to 3/4″ big), and 1 cubic yard of the rock (3/8″ stones branded as Yuba Stone). 1 cubic yard was too much. We only needed 0.75 cubic yards. The extra we put into the side yard.
LikeLike
I really enjoyed reading your blog about front yard landscaping—it’s clear you’ve put a lot of thought into creating practical yet visually appealing ideas. I appreciated your emphasis on incorporating native plants and using hardscaping to complement greenery. As someone currently rethinking my front yard design, I found your insights on balance and texture especially helpful.
Your mention of tree placement as a way to provide shade and create focal points resonated with me. However, I’m facing the challenge of removing a large tree that has overgrown its space and is starting to pose risks to nearby structures. Do you have any advice on how to approach tree removal thoughtfully so it doesn’t disrupt the surrounding landscape too much?
https://www.mesatreeremovalservice.com/
LikeLike