Earlier this year we converted our 370 square feet garage to a guesthouse/office/entertainment space. It was a very fun experience, and we’ve been putting the space to good use. This post shares the design and build process, learnings, and costs.

Before and after pictures
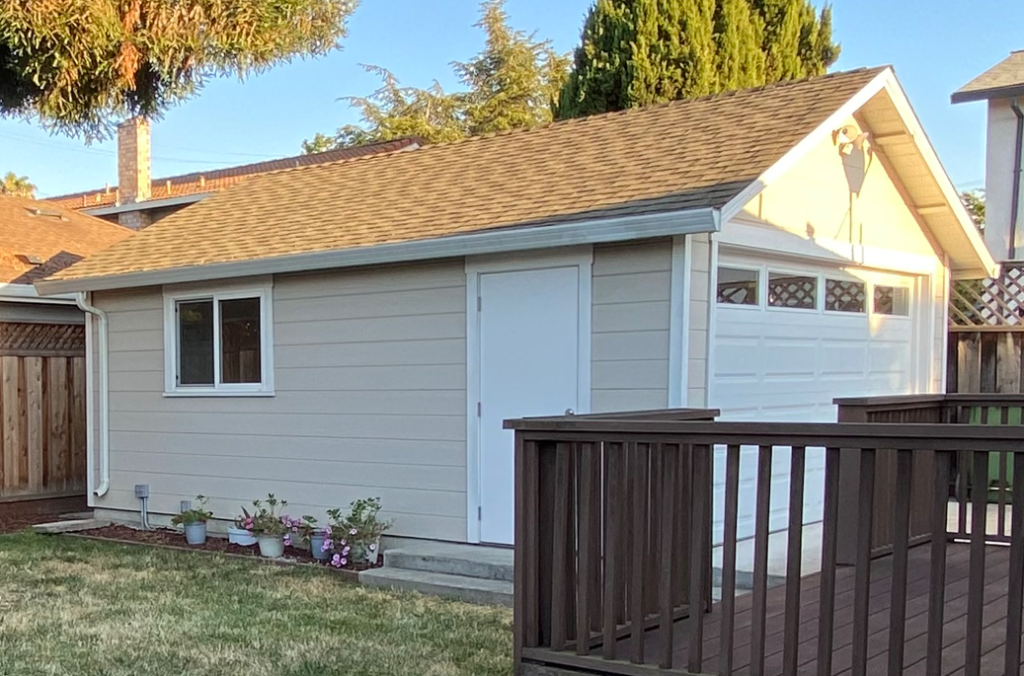
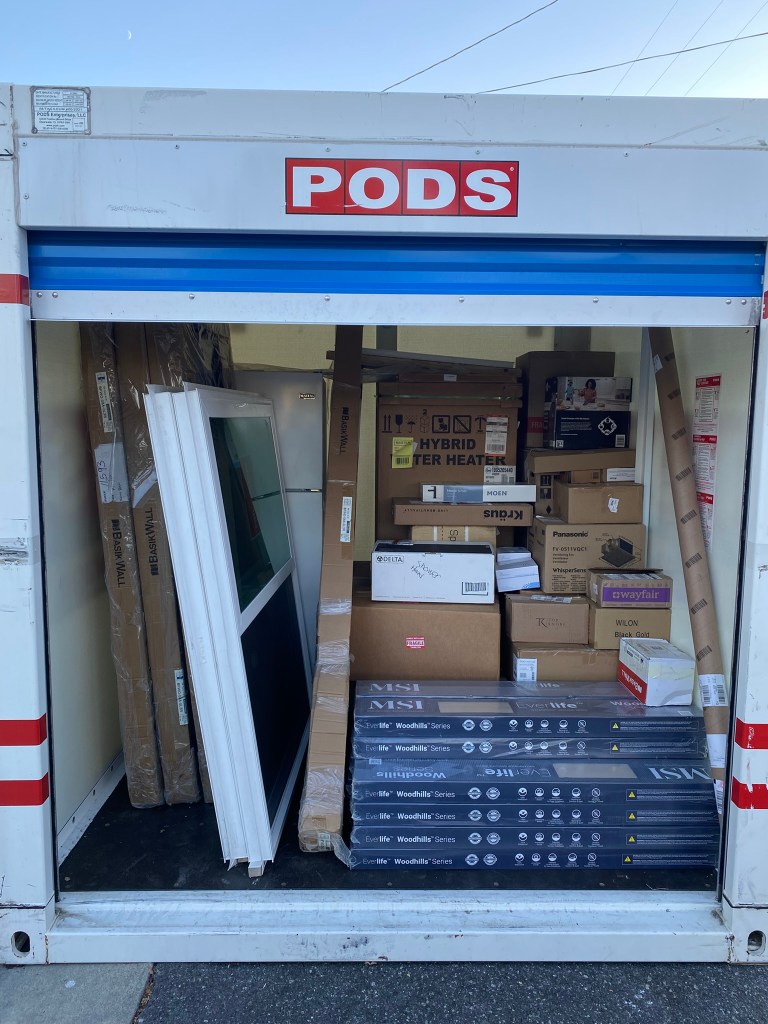
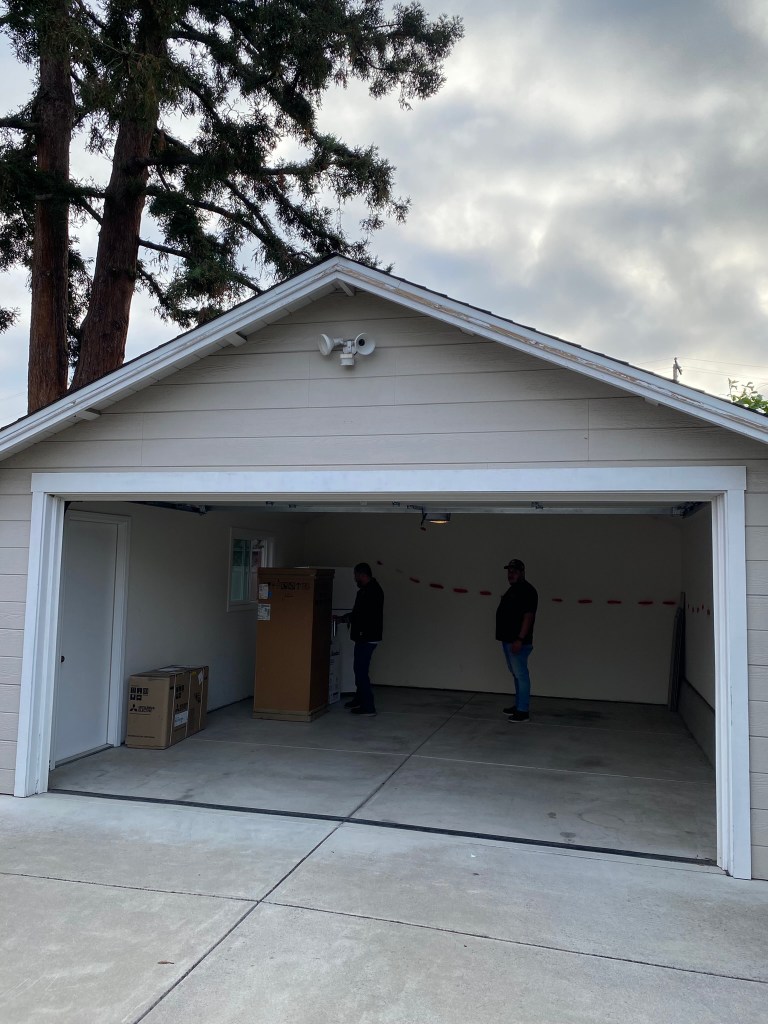
Before

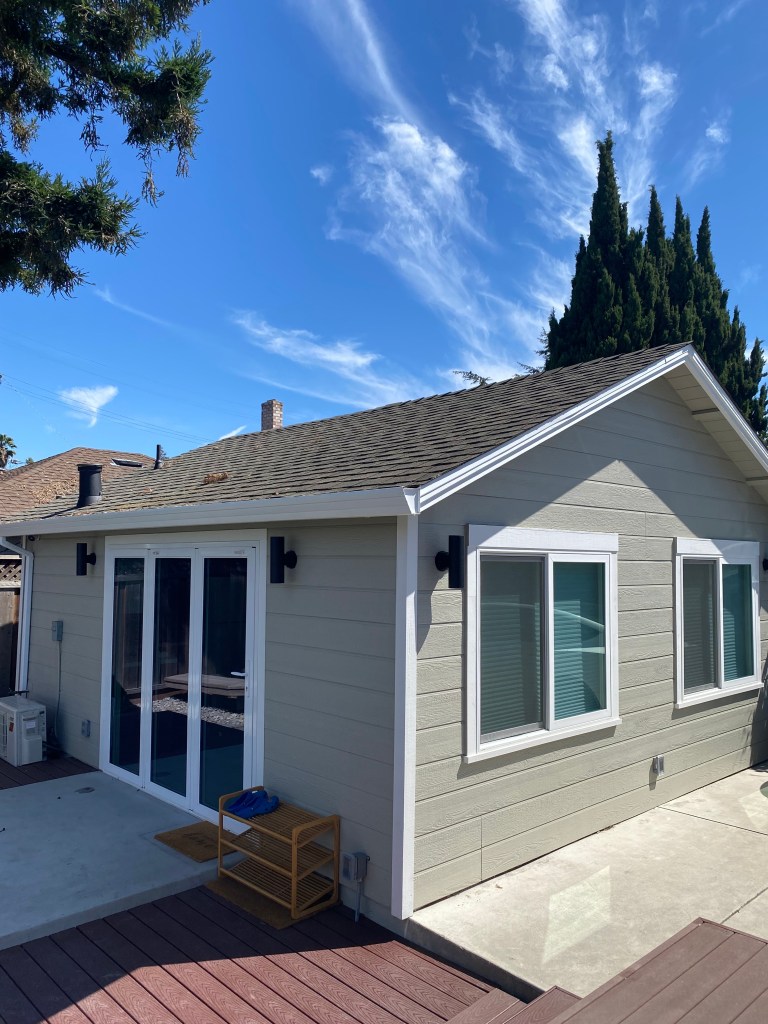
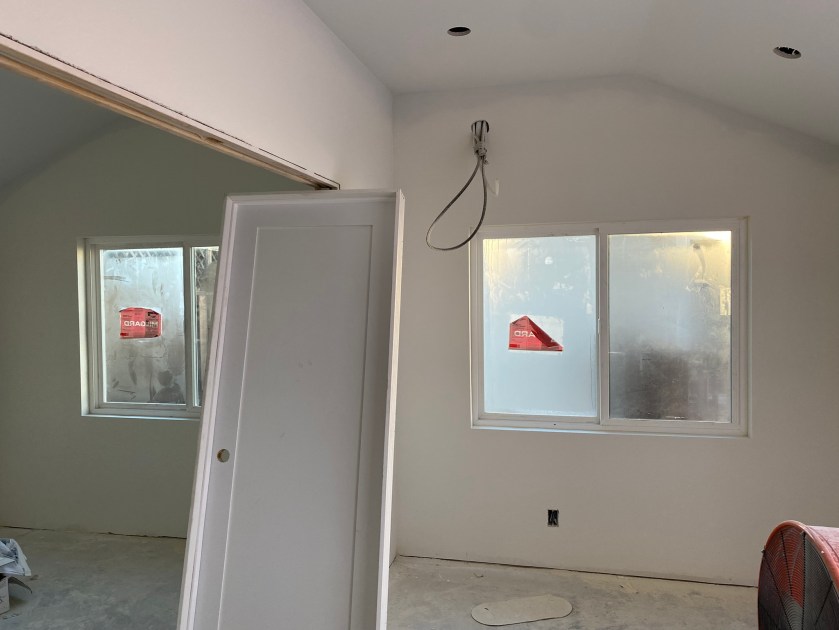
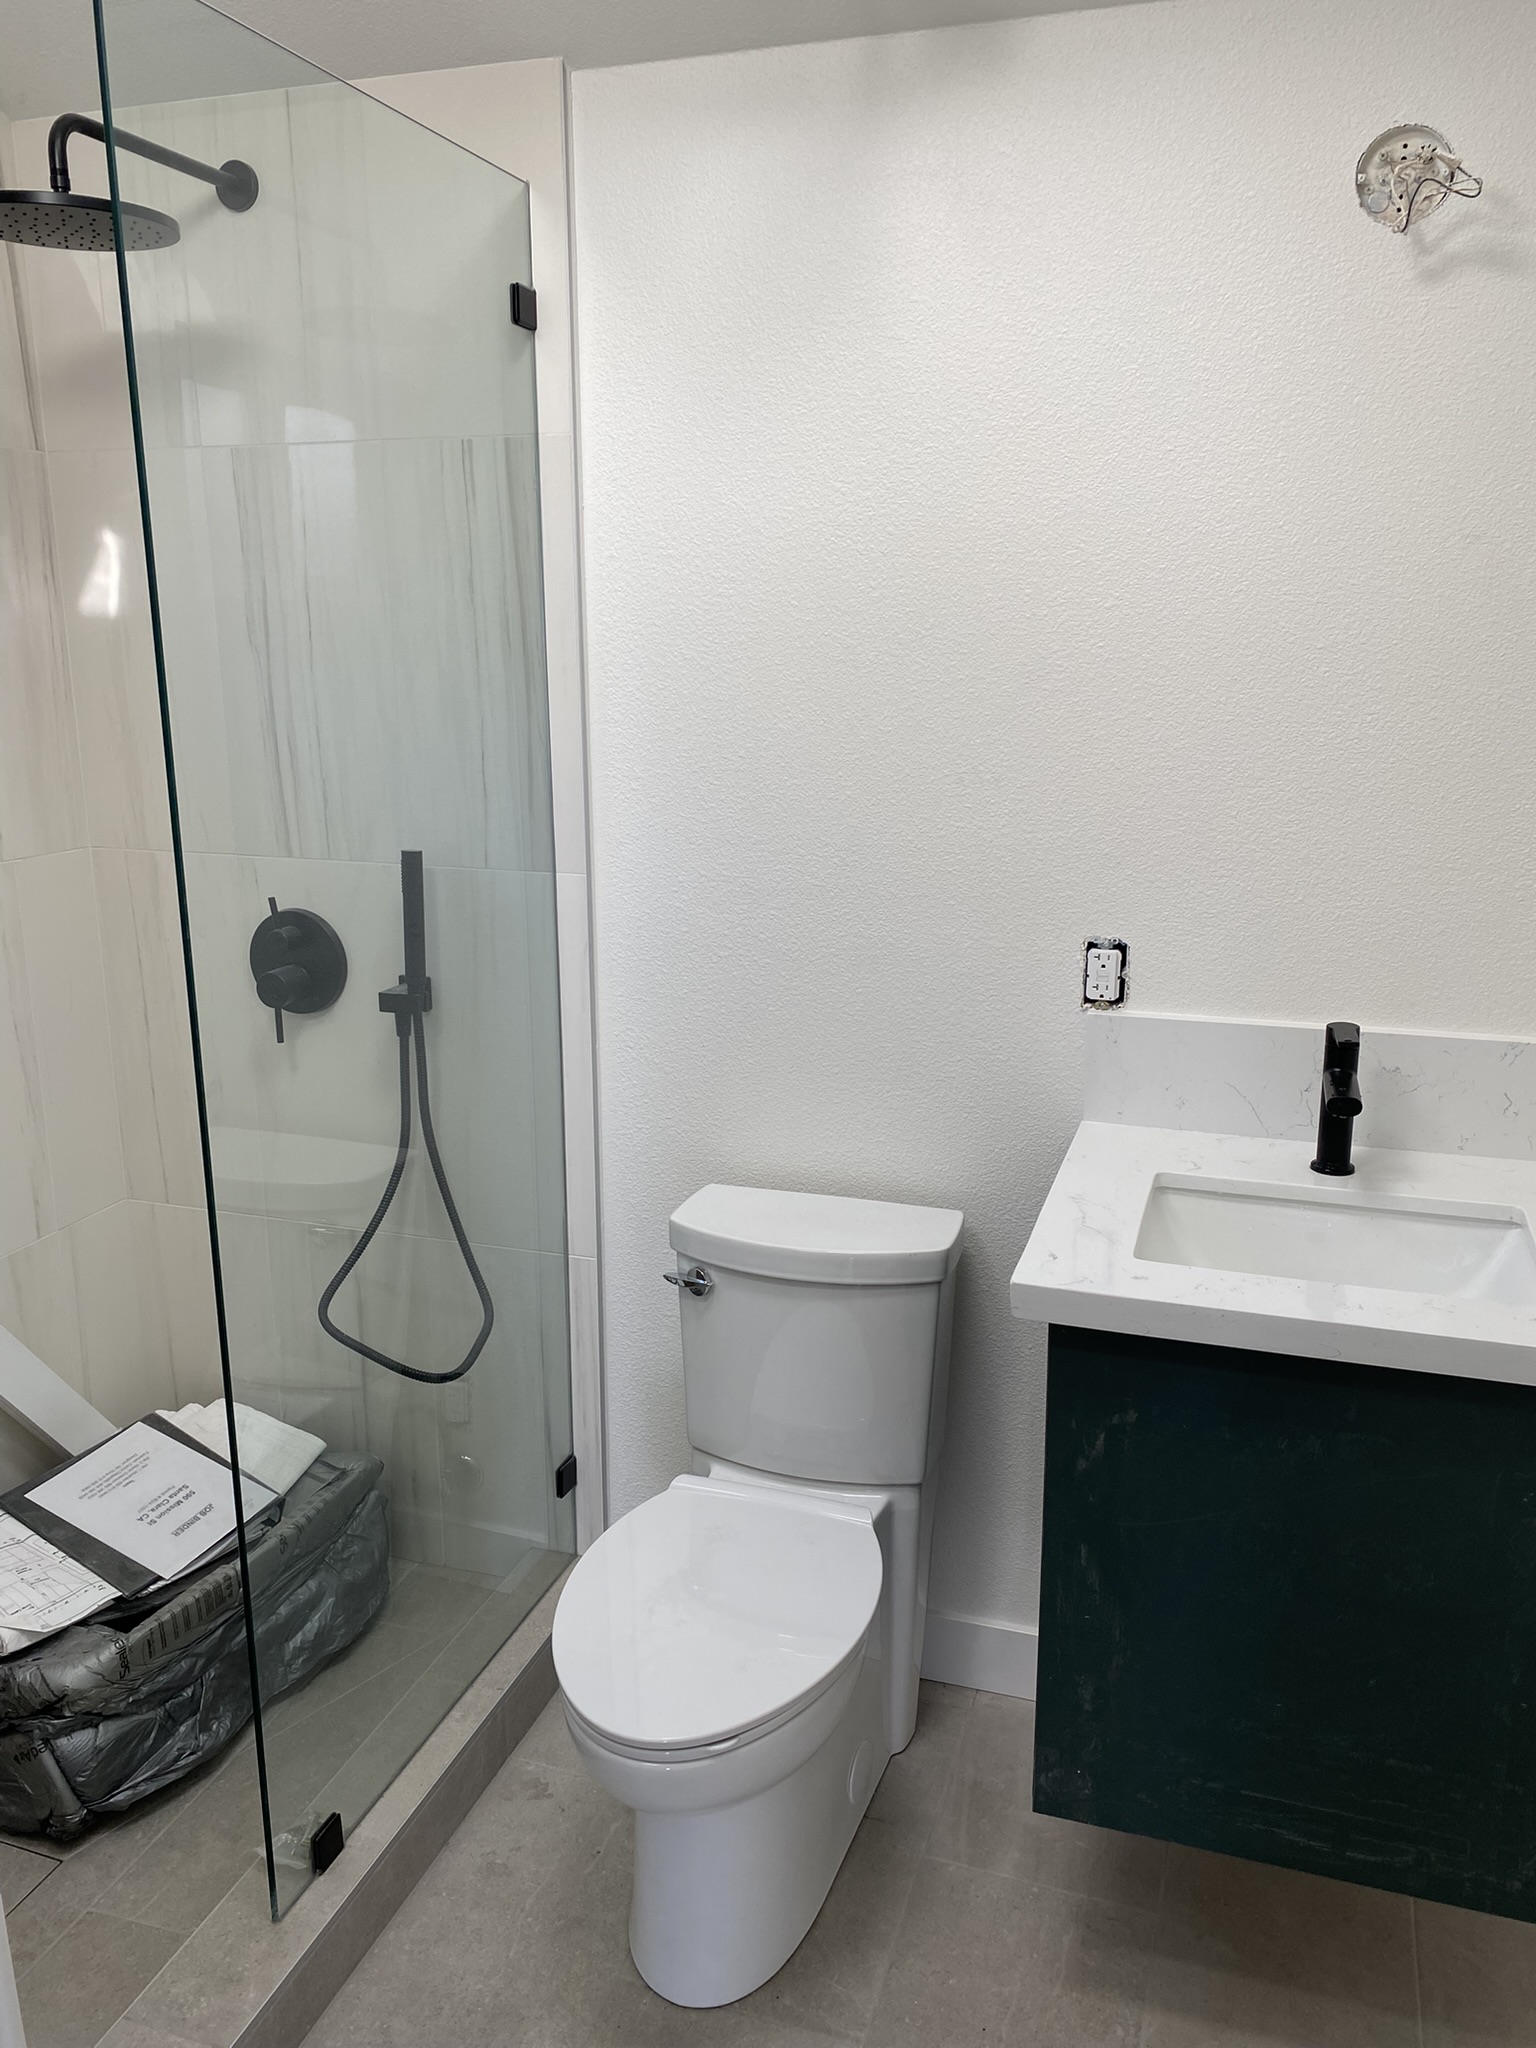
After
Why convert the space?
tl;dr needed office, guestroom, and ongoing desire for indoor/outdoor living.
As early as 2022, Bonita and I discussed whether to build a separate space in the backyard. I worked from home full time while Bonita worked from home 2-3 days a week. Our house had 3 bedrooms, and we each took one room for our offices. We wanted children and knew that the setup was not sustainable. The thought was to build a space in the backyard that could be used as an office and possible workout space.
I didn’t make any meaningful progress for a couple years. We had a redwood tree in the backyard that I hoped could be cut down, with the office built over it. Despite consulting two arborists and being told the tree was protected by the city and unlikely to be removable, I was stubborn and wouldn’t consider alternatives.
Fast forward to 2024. By then:
- We experienced family staying overnight. 5-6 people living in ~1,200 sf of space felt too tight.
- Our daughter CC was born. One of the two offices became the nursery, and the other became a shared office where our meetings often distracted each other.
It was time to seriously consider building more space.
What did we prioritize?
I sought a friend, Alex, for home building advice. He and his dad visited our property and recommended converting our garage. Knowing our plans, Alex advised me to think not just about how we as homeowners would use the space as residents, but also how we as investors could rent the property for more income. He urged us to try to check as many of those boxes to maximize utility and value. This motivated me to try to build a space that would achieve the following:
- As residents, use the space daily as an office
- As residents, use the space every few weeks for entertainment
- As residents, use the space every few months as a guesthouse
- As investors, maximize rental income by providing the right layout and features
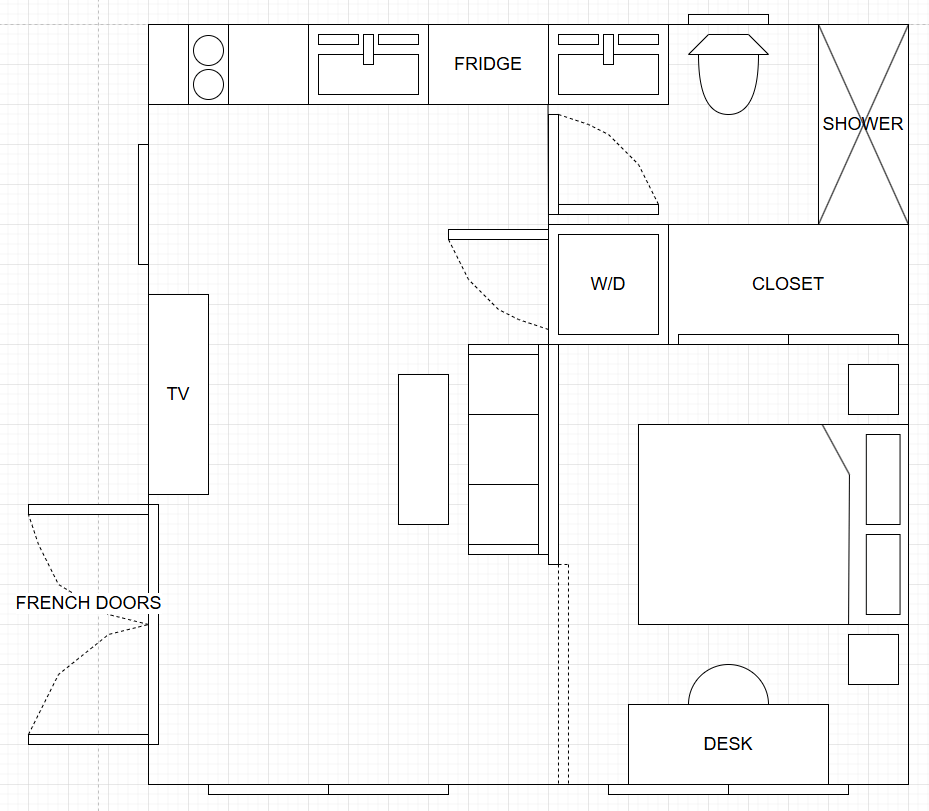
These considerations became the basis for our construction project. We committed to converting the garage, and I designed a couple simple floor plans that visualized how we as residents or someone else as a renter would use it.
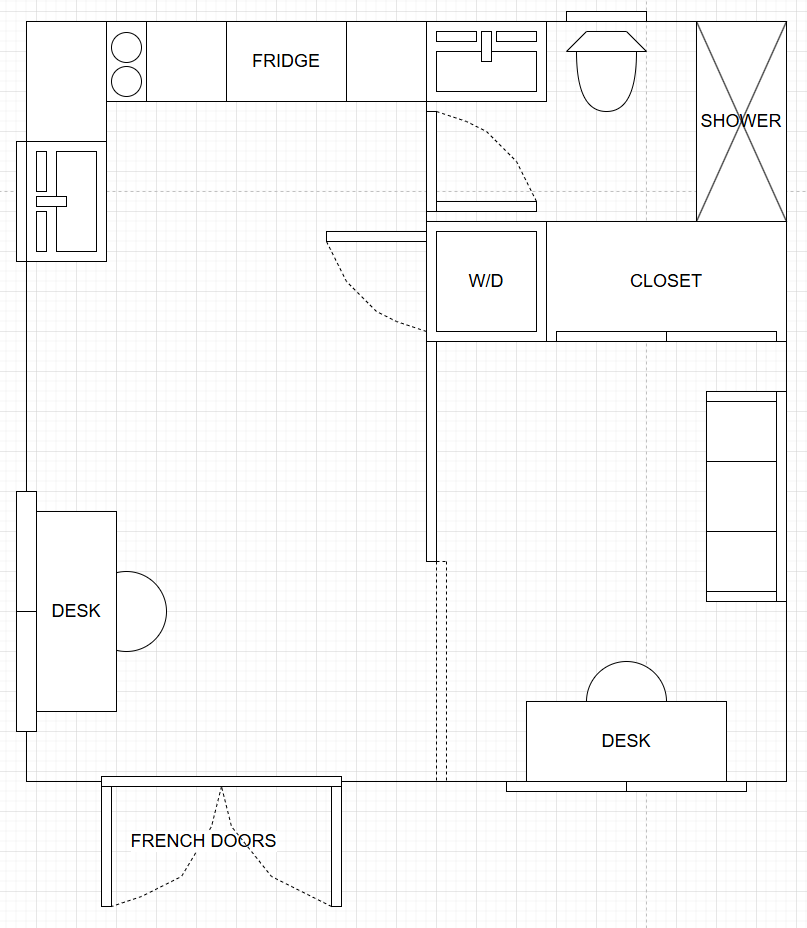
Design
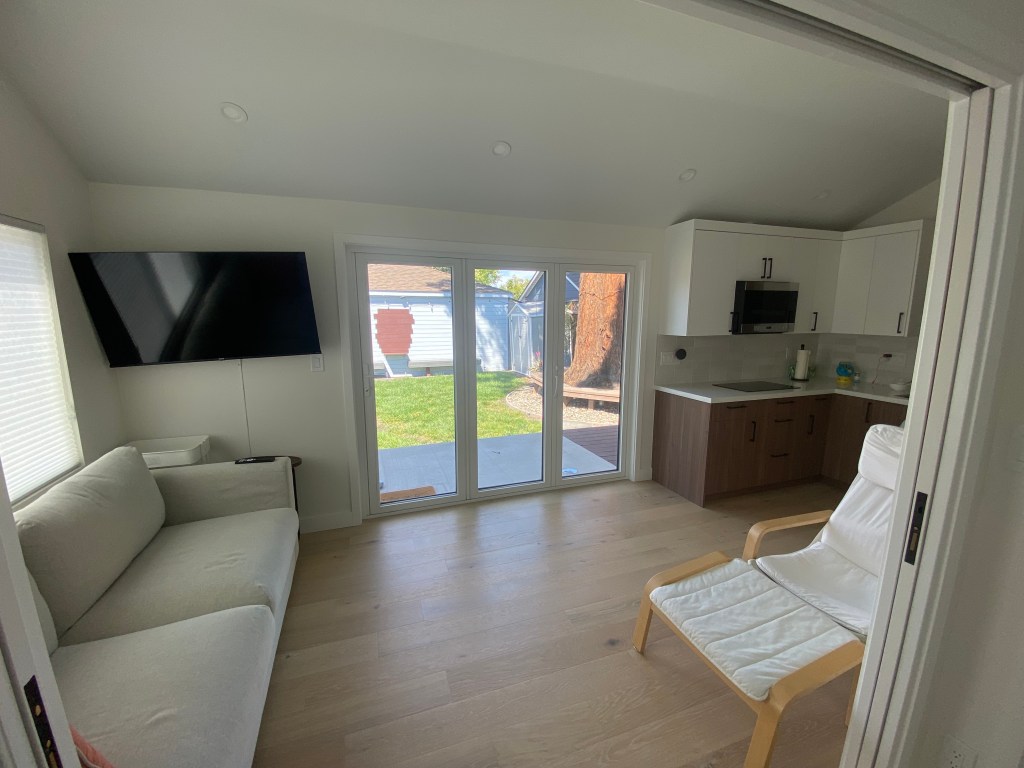
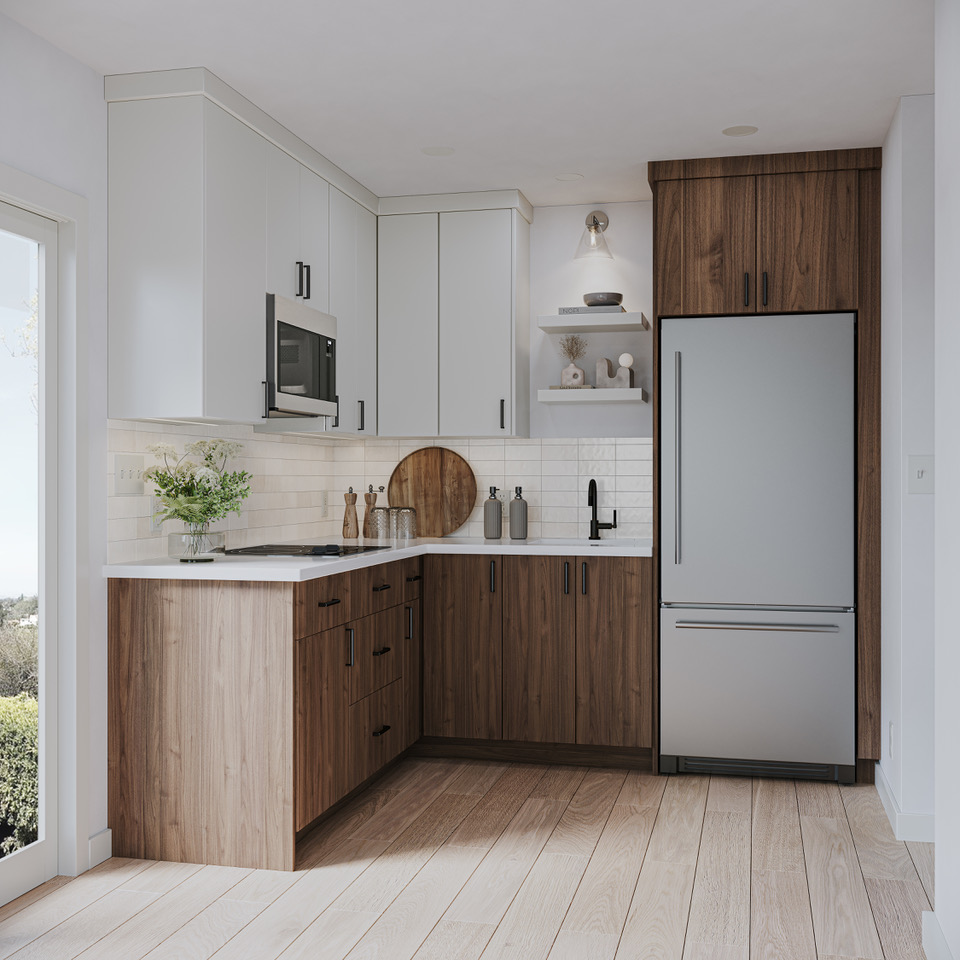
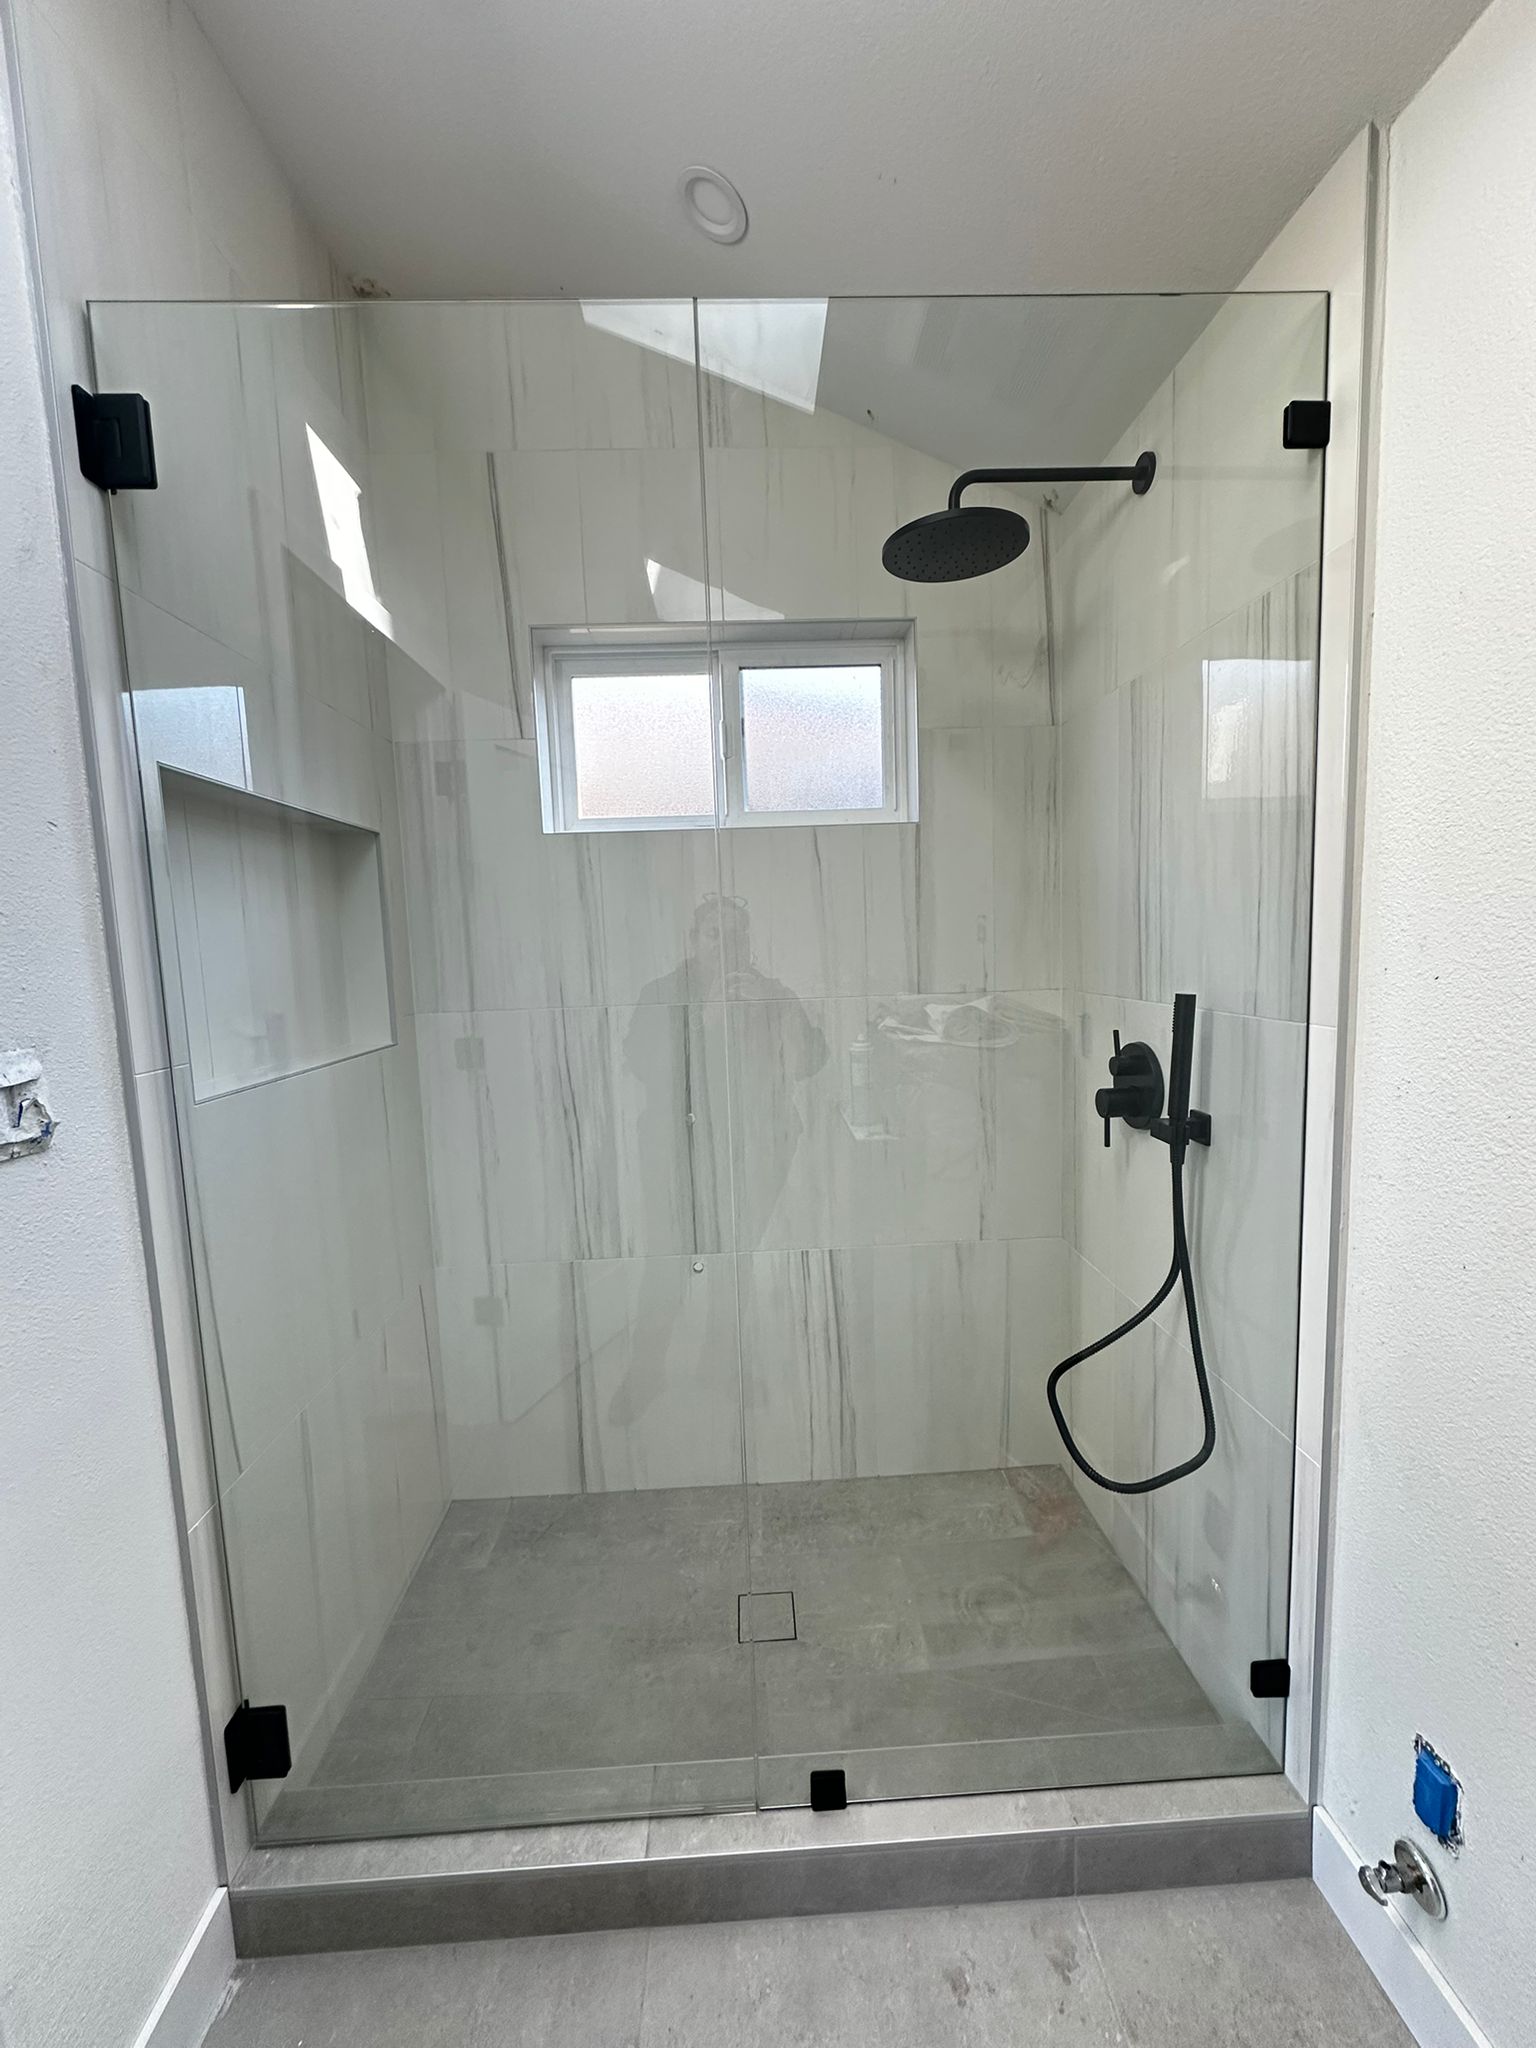
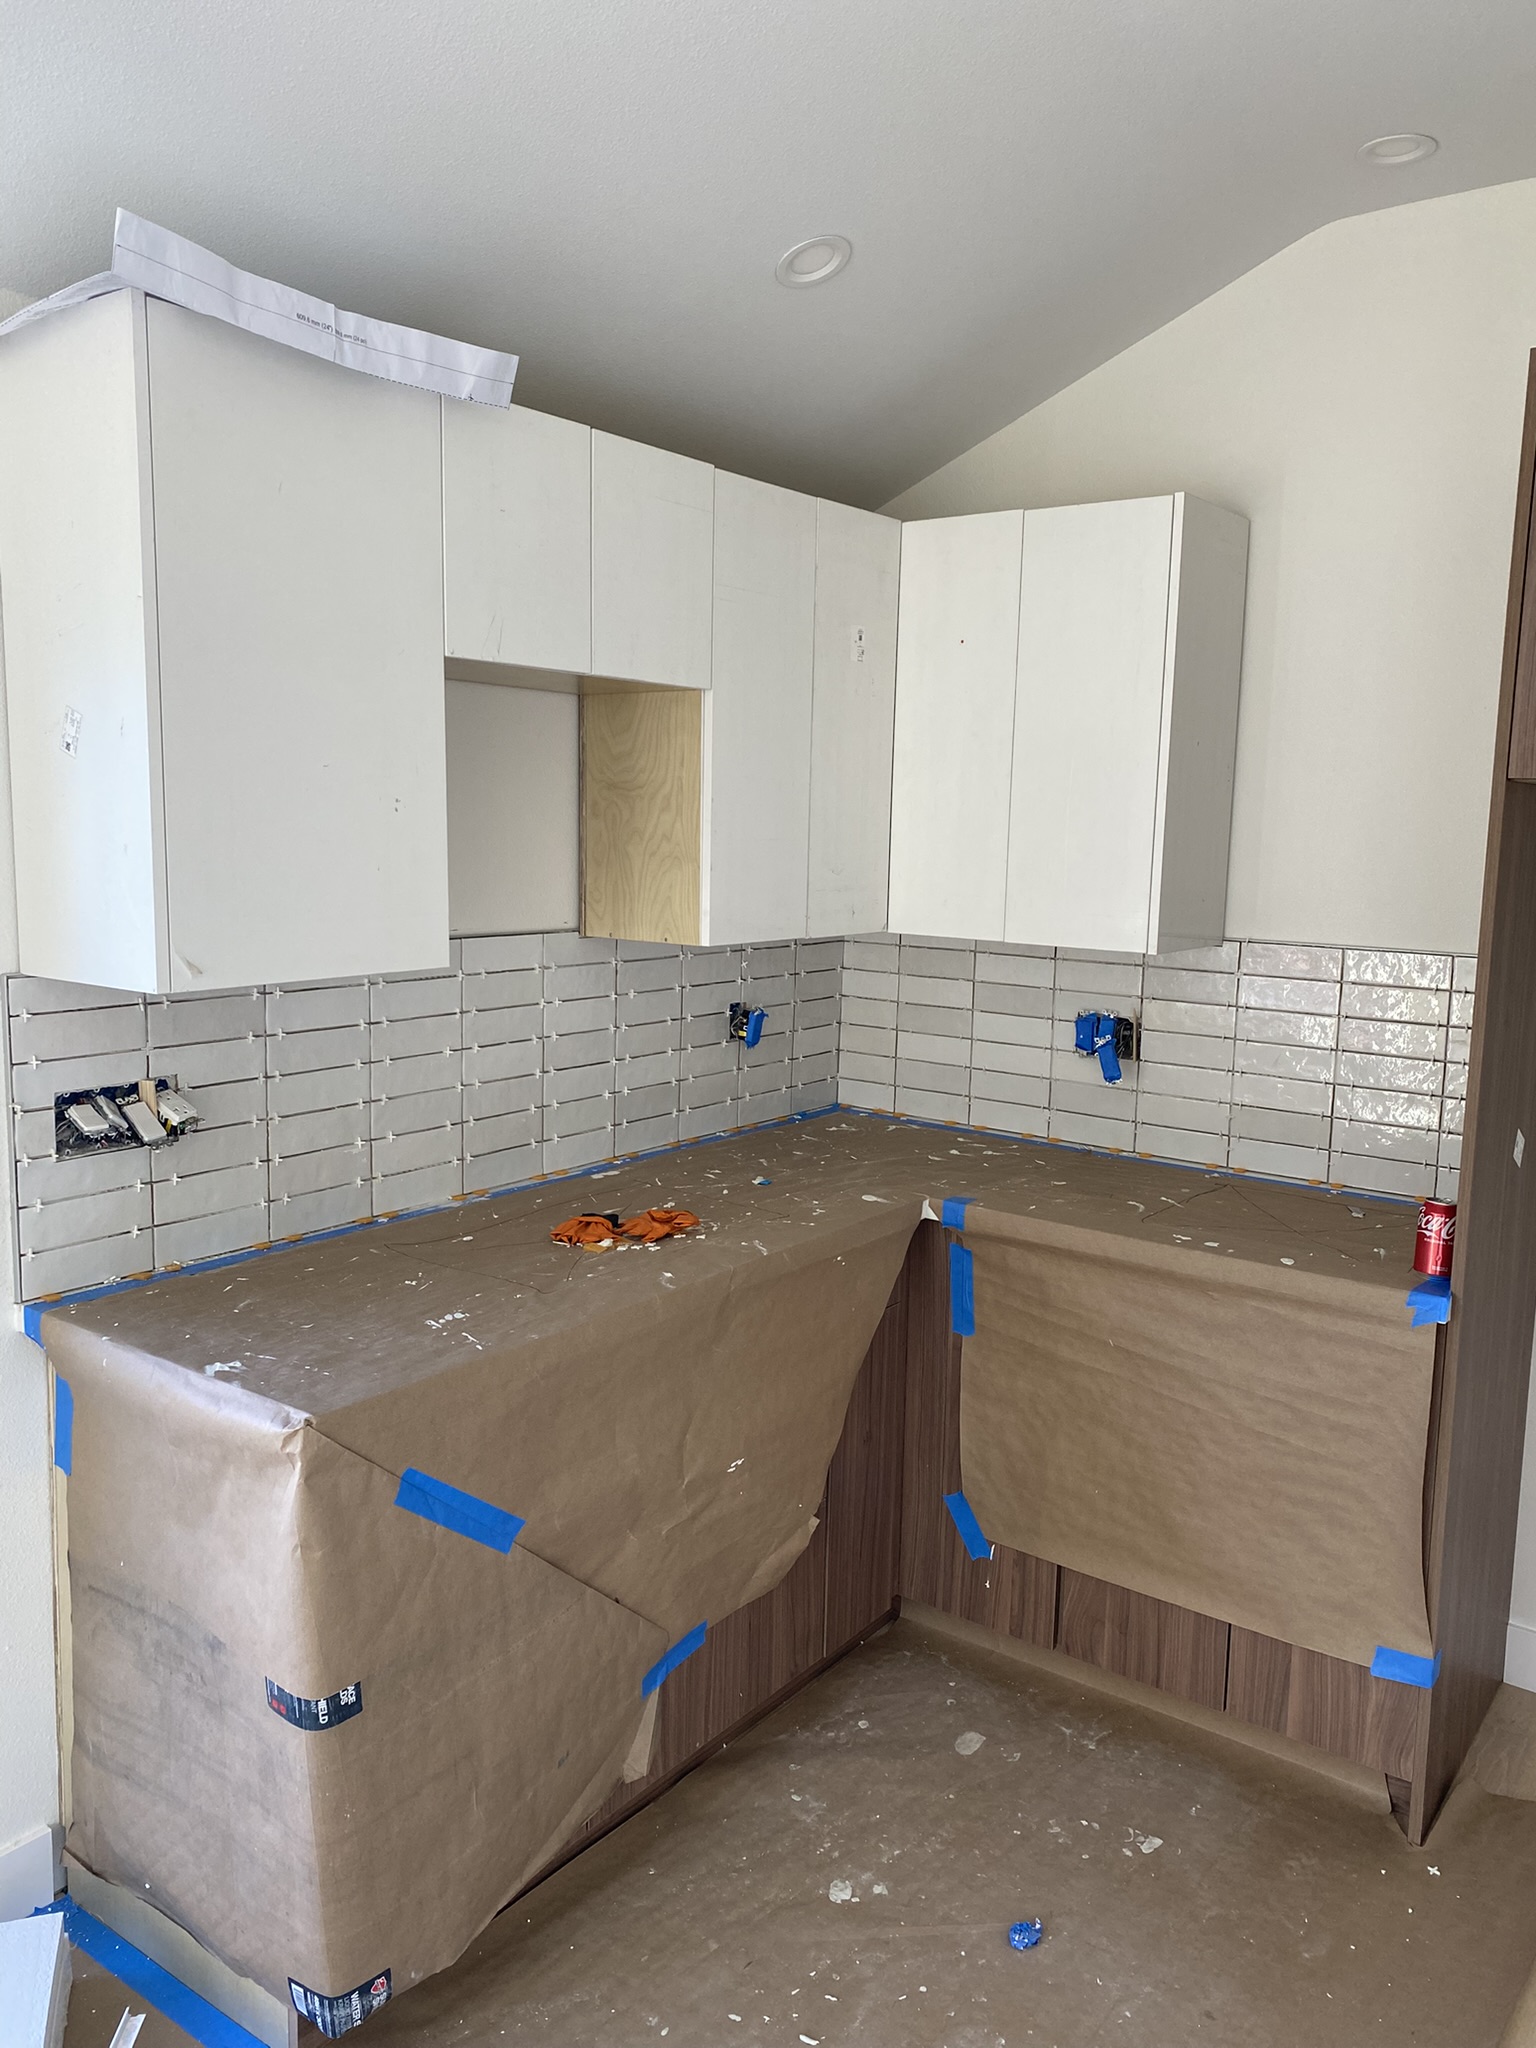
We spent a few weeks finding a design-build general contractor. Through them we learned more about home features and how to optimize the small space. They also considered what was important to us. After a couple revisions, we agreed to go with an accordion/folding entrance door, double pocket doors for the bedroom, a skylight for more natural lighting, a full kitchen, a full bathroom with washer/dryer hookups, and a couple closets. The architect designed the floor plan with those features.
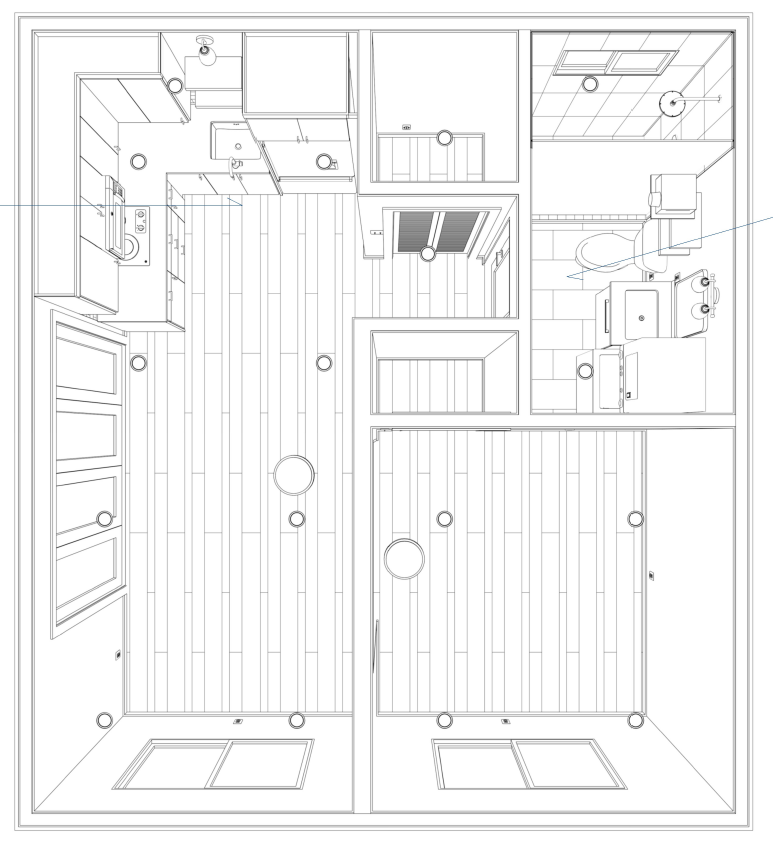
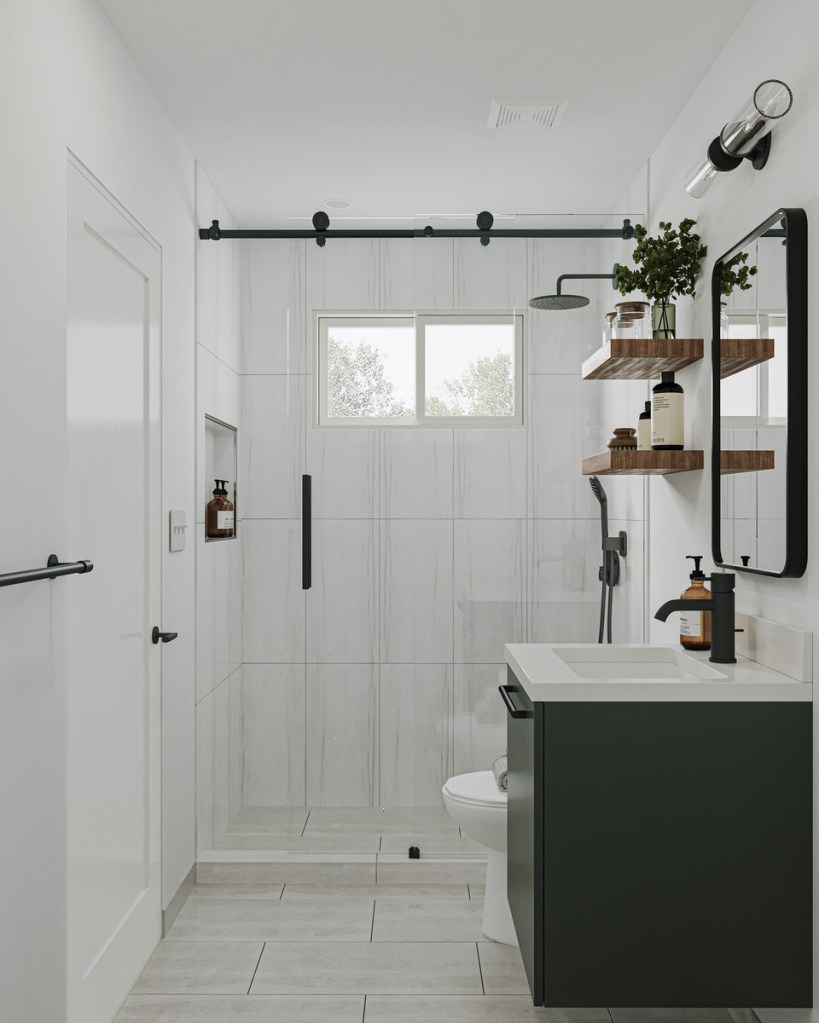
The contractor had us shop for finish materials upfront so that they could create realistic renderings of the space, and avoid delays once the construction started. They took us to some showrooms where we picked out countertops, flooring, bathroom tiles, and more. We ordered remaining materials online and had most things shipped to our house. The design phase was fun and exciting. Here are some of the renderings.
The rest of the process
The contractors submitted engineering and architectural plans submitted to the city. Roughly 3 months later, the permits were issued, and the rest of the process was:
- Demolition and site prep
- Plumbing and foundation
- Framing
- Rough mechanical, electrical, water
- Insulation
- Dry wall
- Paint and leveling
- Finish materials
1. Demo and site prep
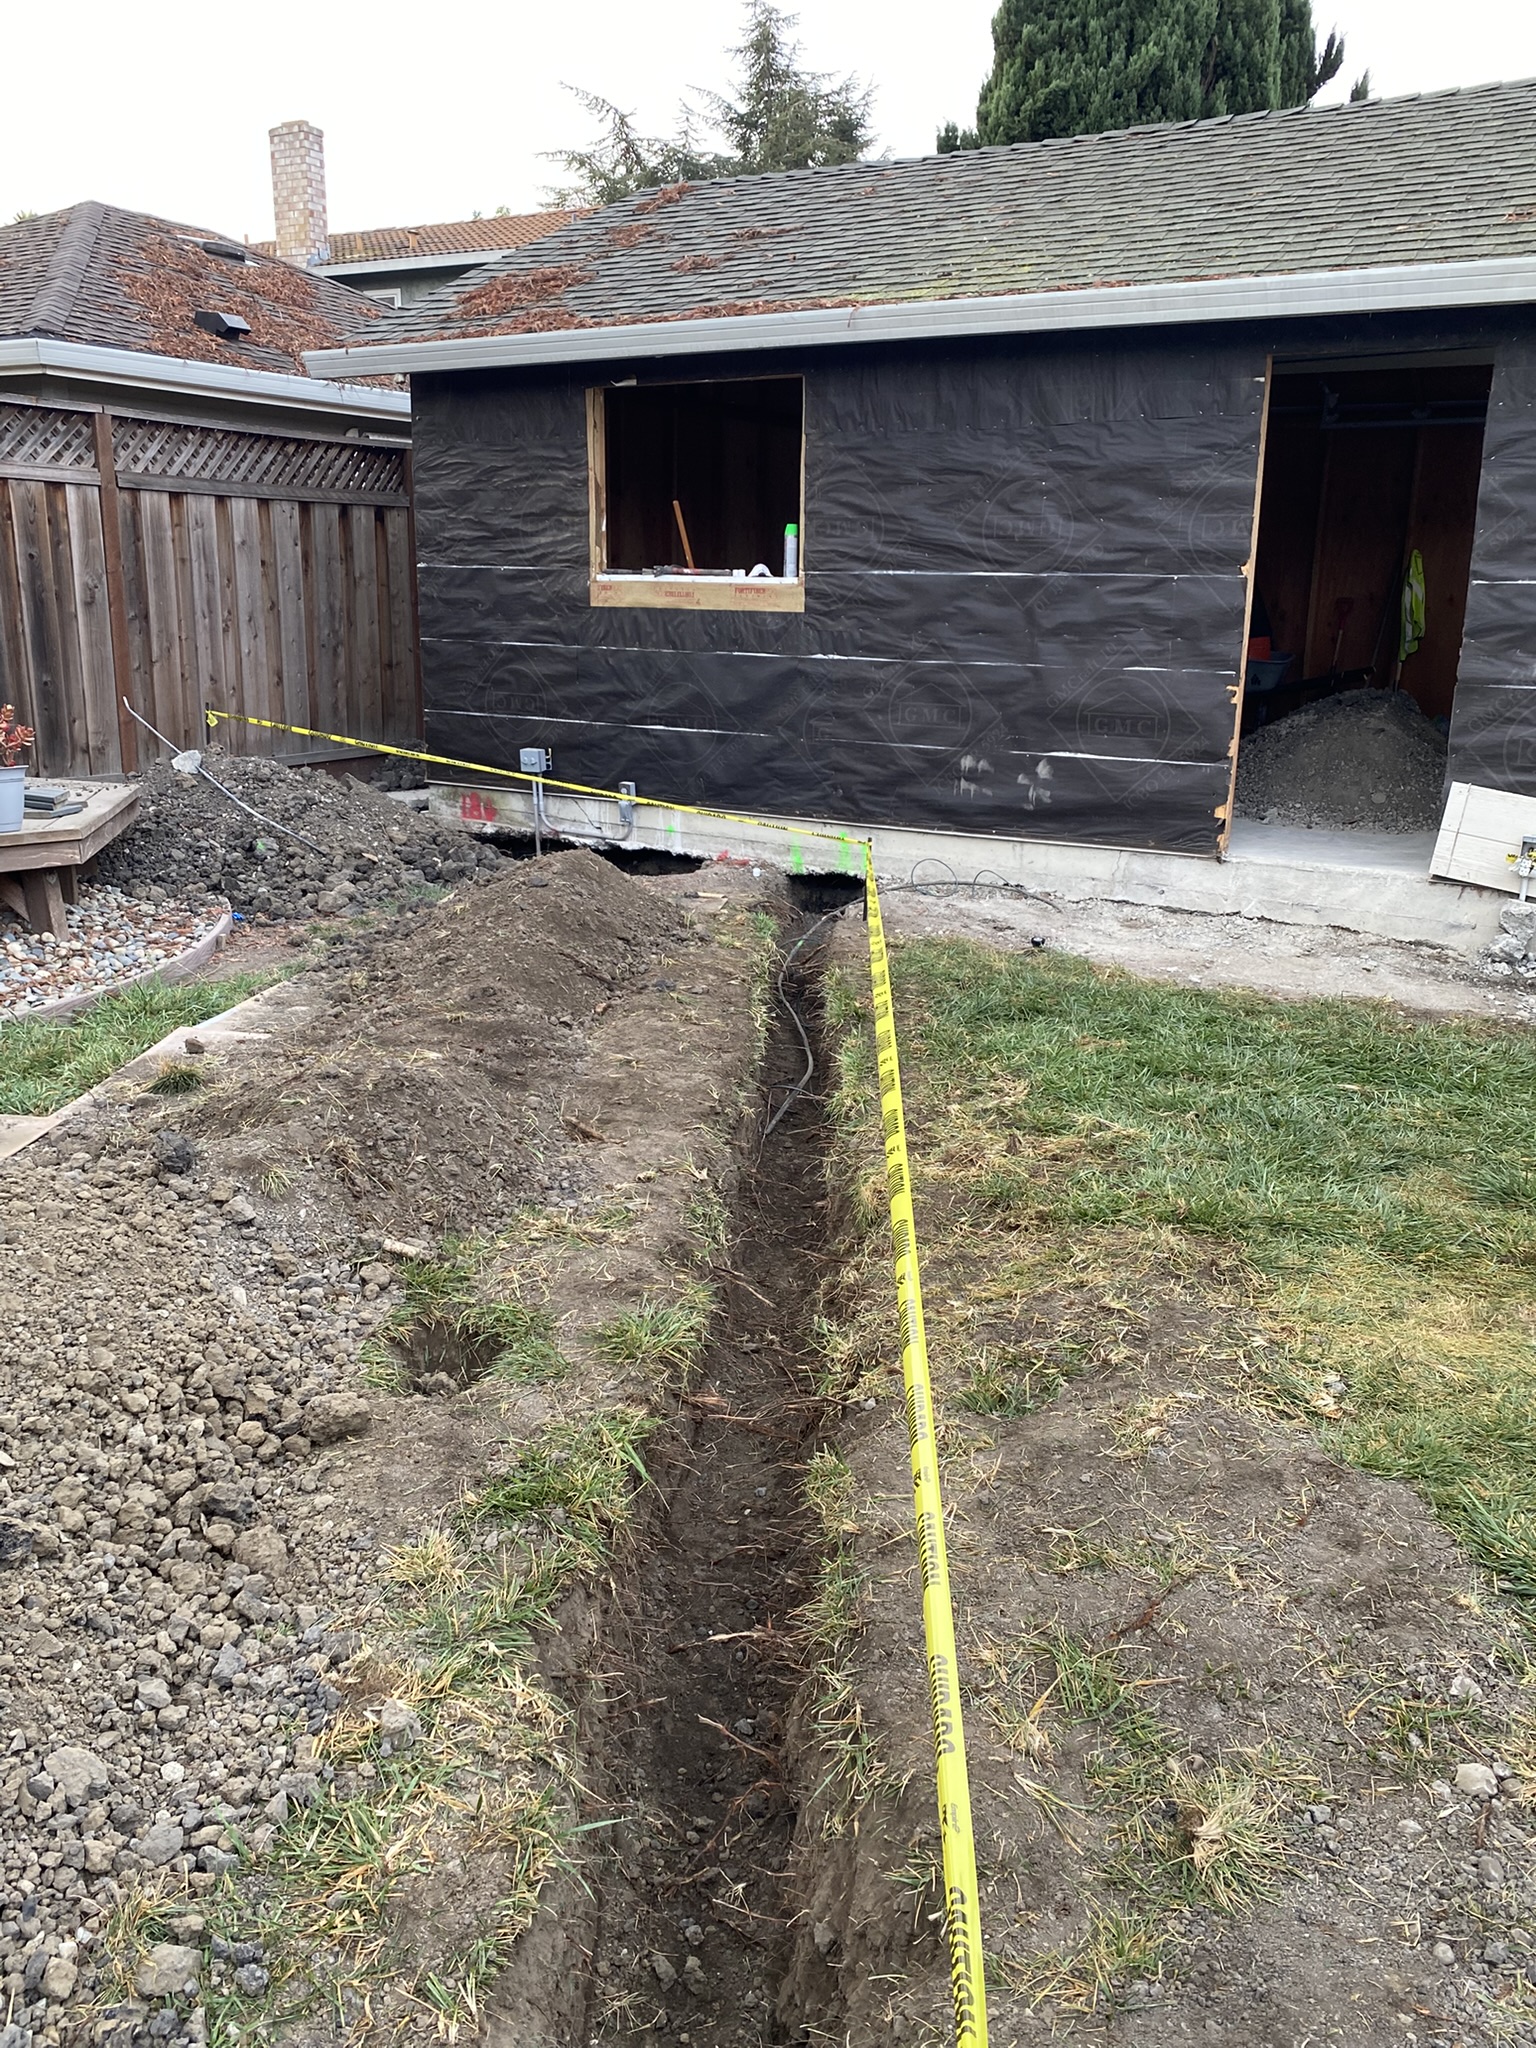
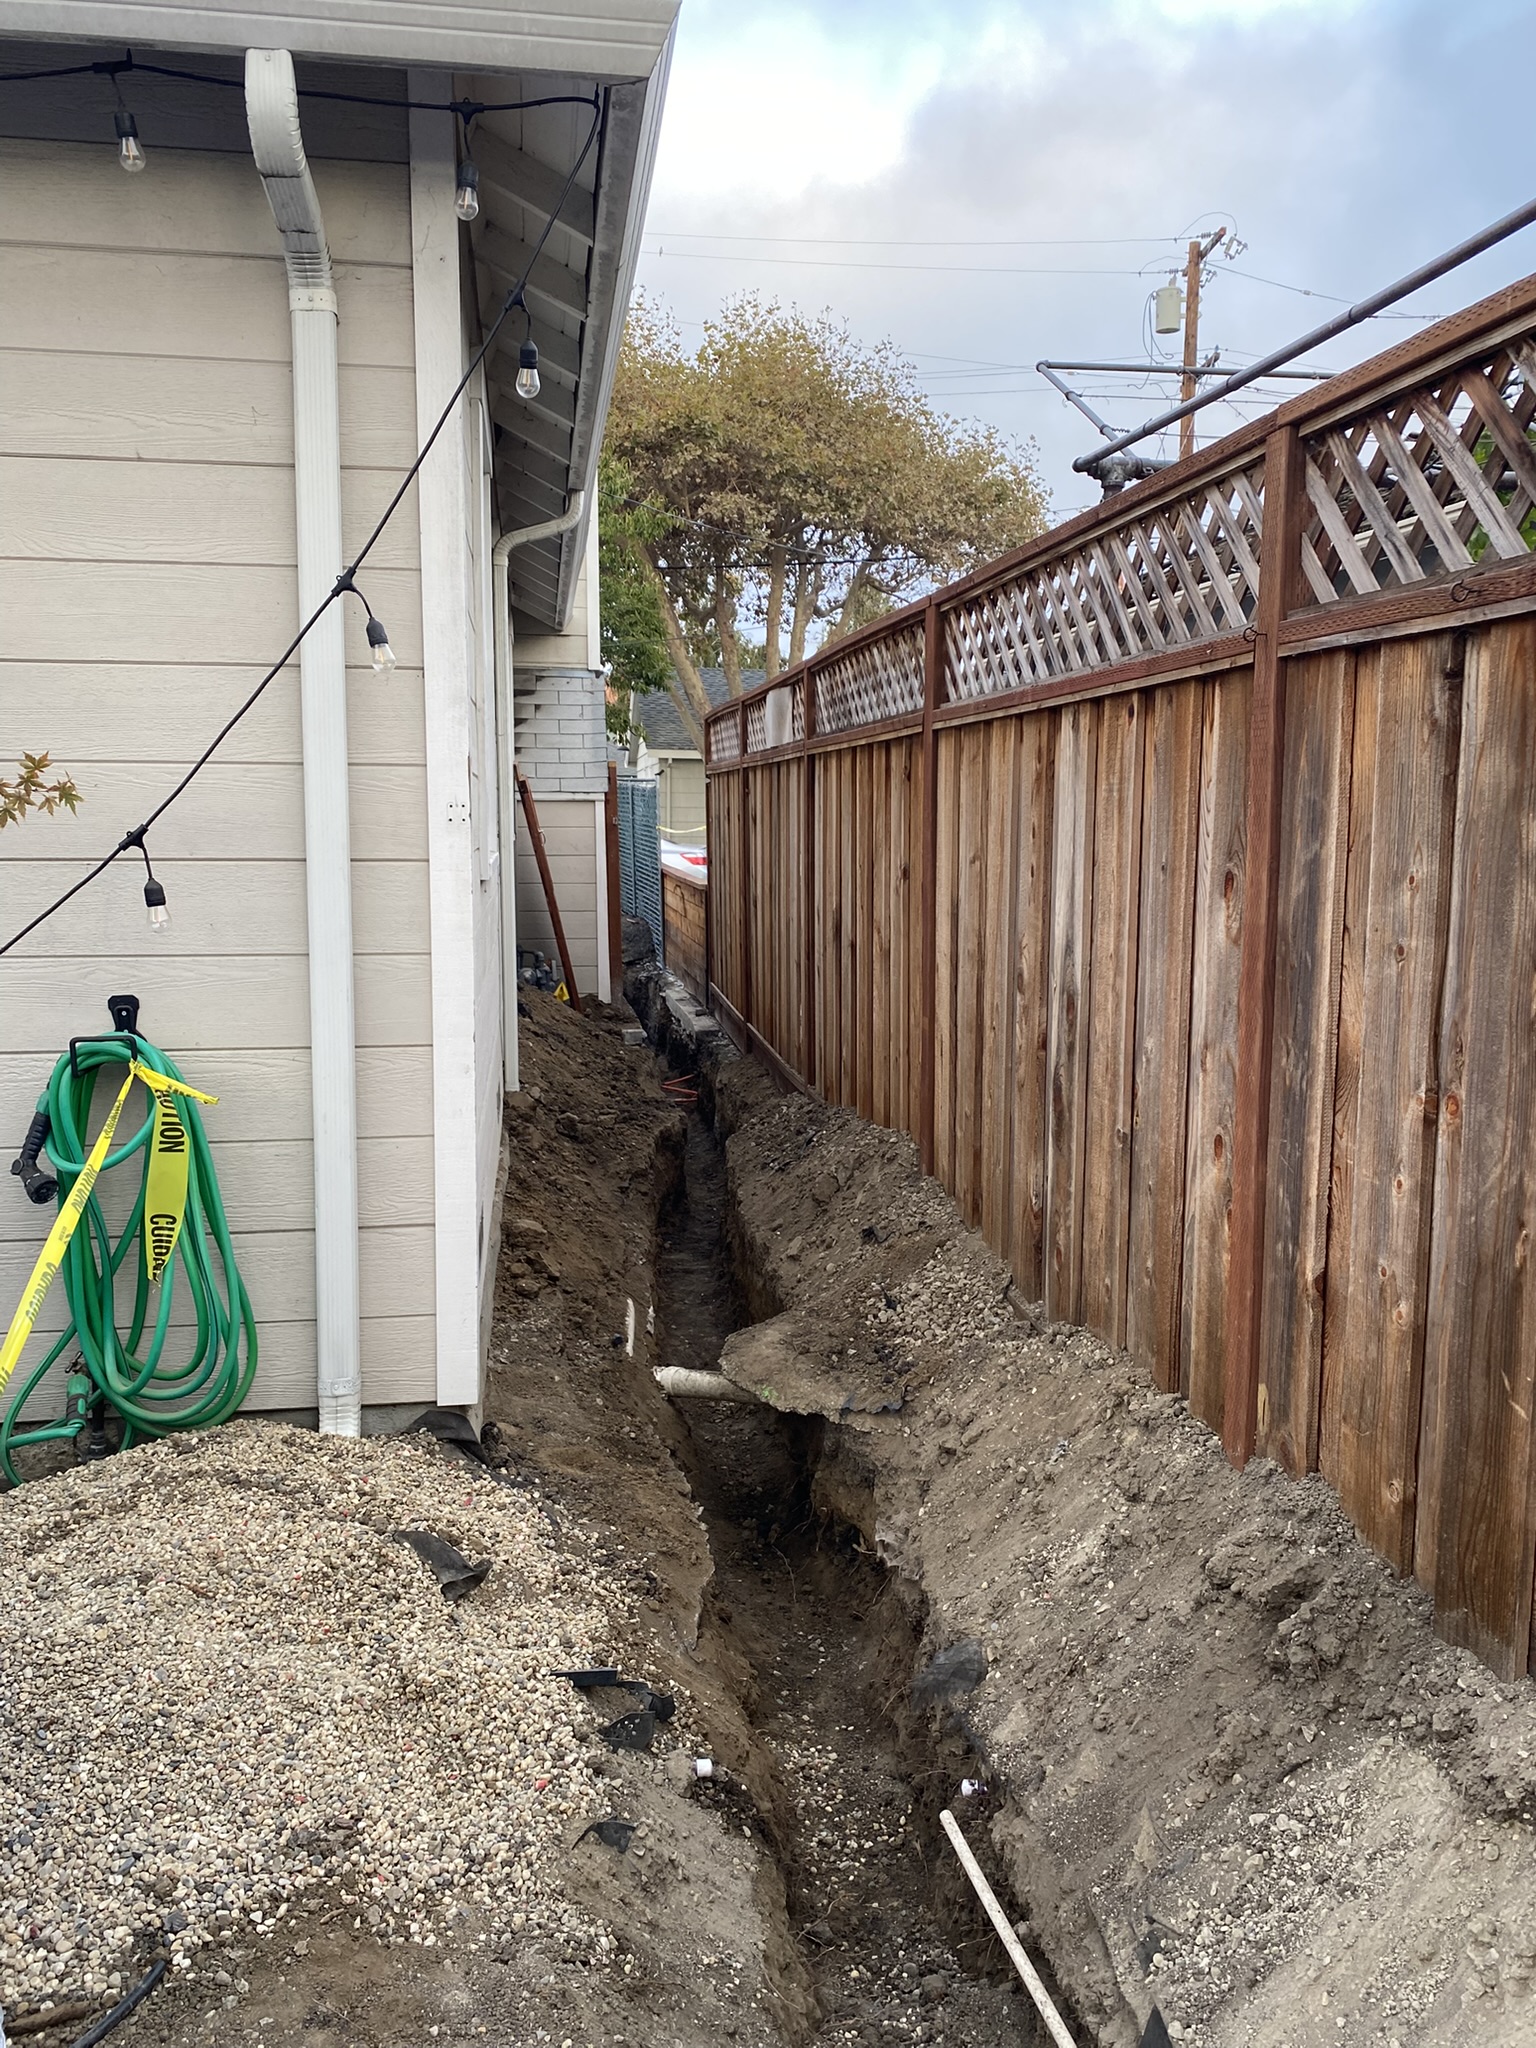
Given the bathroom and kitchen, we needed to connect water and sewage. It unfortunately wasn’t as simple building homes in The Sims. The city required the water and sewage to be hooked up to the city line (as opposed to our house), which meant excavation was needed from the front to the back of the house. That was an hard reality to confront: 80 feet of digging was needed, including uprooting the DIY work I had done over the years with our front yard landscaping, side yard entrance, and back yard patio. Electricity also needed to be connected, and part of the driveway needed to be excavated to trench wires.
Work officially began on September 26, 2024.
I took one last look at the garage I had grown somewhat fond of. It was bittersweet taking down the slat wall I had built to hold stuff. And I had grown used to parking my car inside the garage. Both would no longer be possible. A storage pod was brought to the front of our house; all finished goods moved in; our property became fenced; a porta potty brought in. And construction officially commenced.
Demo started and continued for a few weeks.
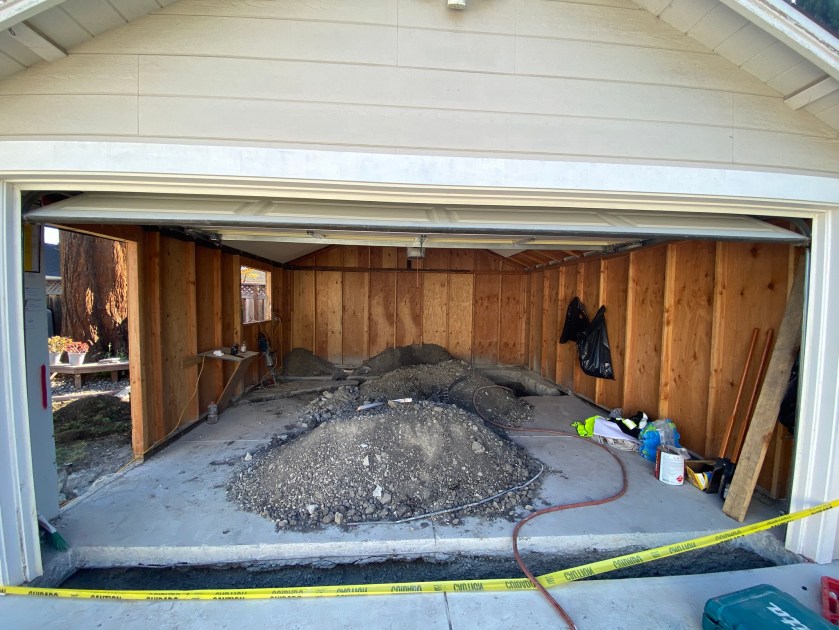

I watched with equal horror at the undoing of hundreds of hours of DIY work, equal excitement of witnessing the construction process. I walked around the site way too many times wearing Crocs, both daytime and night, just to learn what was happening. It was so cool seeing the exposed sewage, water, and gas lines; machinery used to excavate, tools to cut concrete and rebar; and the sheer volume of earth that was dug up and displaced throughout the site. One of my favorite MBA classes was real estate development, and it was great to see it at a small scale.
2. Plumbing and foundation
With the excavation done, the contractors simultaneously worked on plumbing and foundation. Water and sewage lines were installed. I shamelessly kept providing drinks to the workers daily so that I could slowly learn from them what was happening.
Sewage lines need to slope slightly downward toward the main city line to reduce drainage issues. Through the plumber I learned that they were nervous about passing the plumbing inspection. The city’s main line 8″ less buried underground as they had expected, which meant it would be harder to achieve the minimum slope requirements.

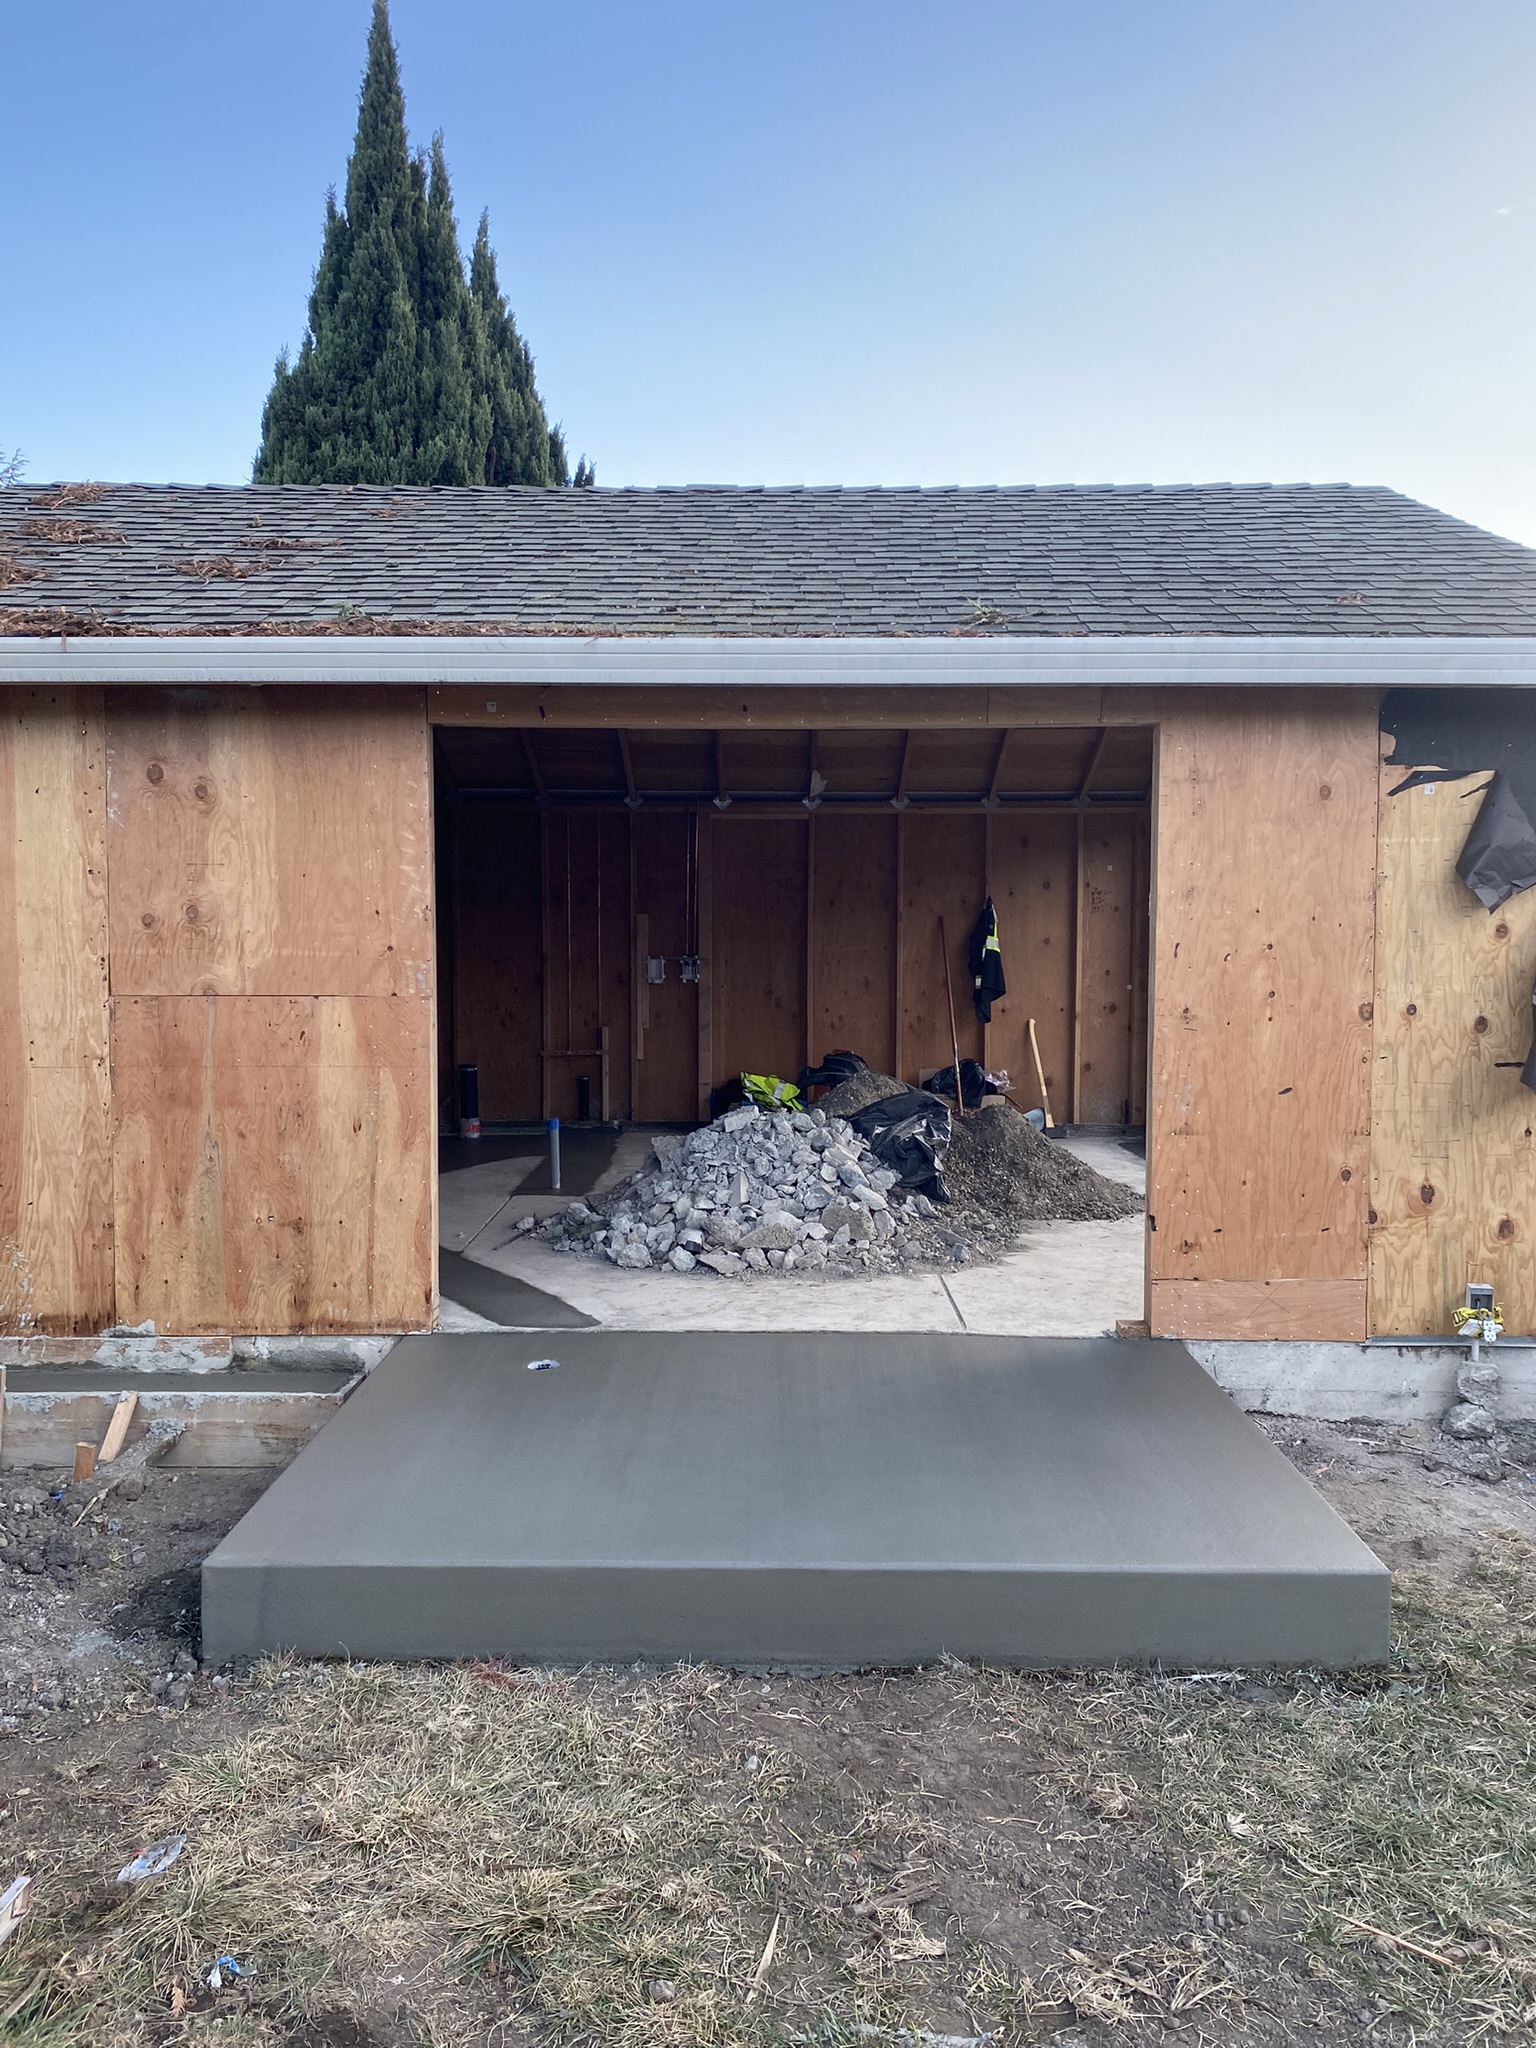
Long story short, it was achieved creatively by having the downward slope start inside the ADU. To avoid exposing the sewage lines in our backyard, the concrete step to enter the ADU had to be lengthened to give the sewage line enough runway to be buried under the grass. This explains why our concrete pad had to be so big.
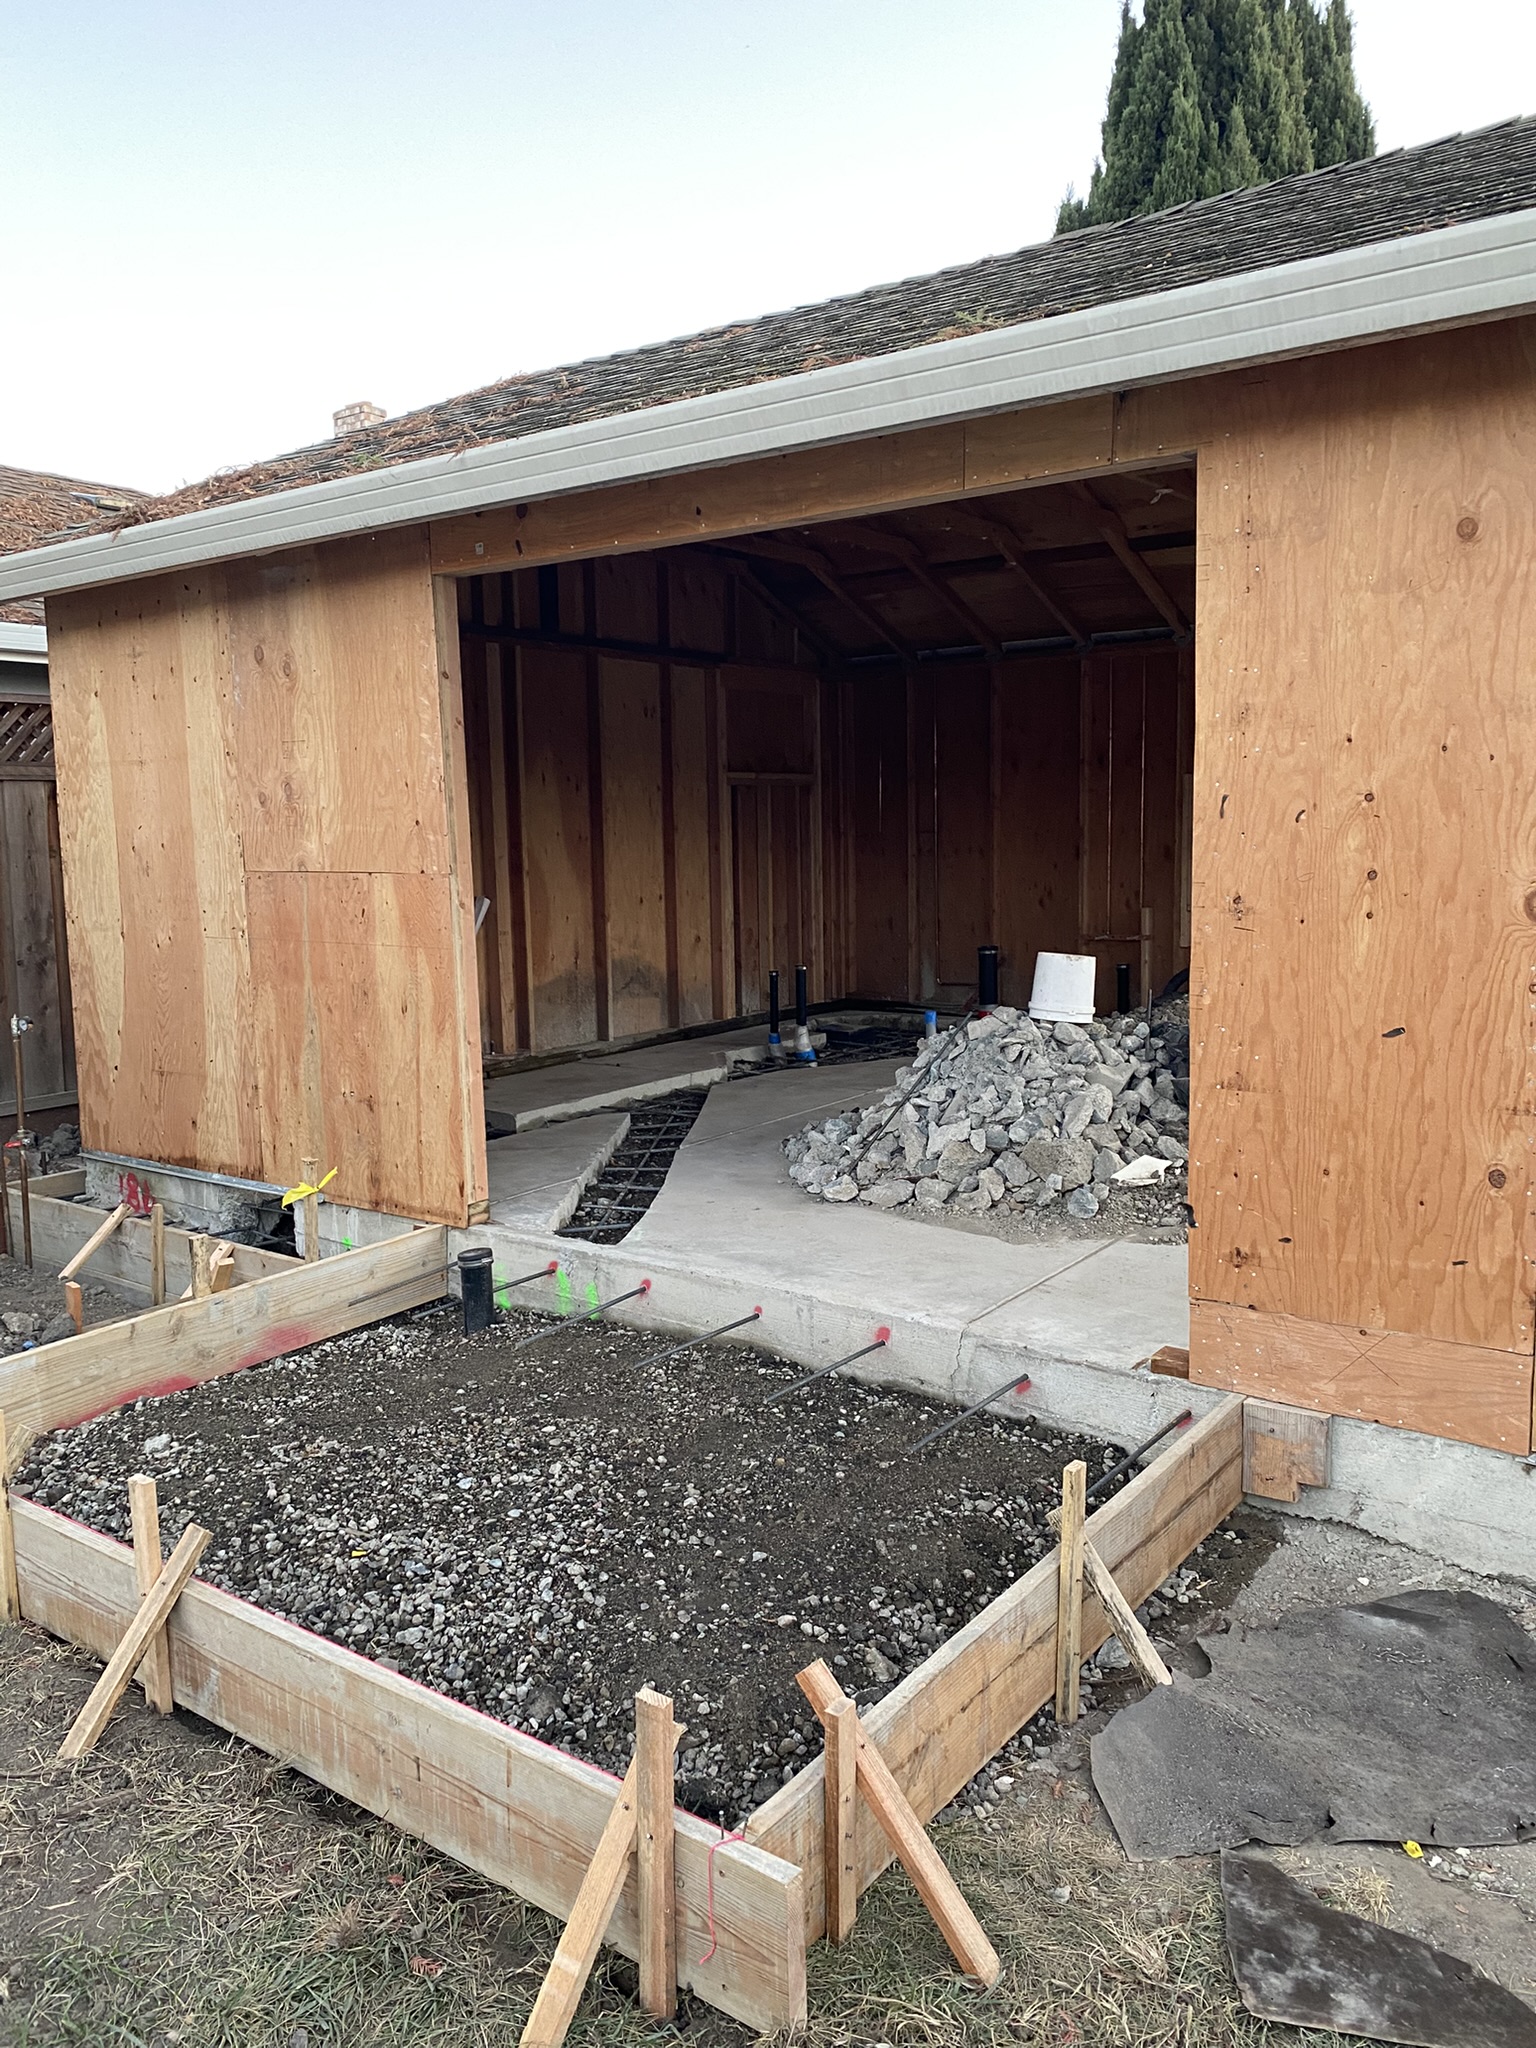
The foundation was more straight forward. Digging was done throughout the exterior of the building, with concrete saws used to drill through the driveway, so that an additional 12″ of concrete could be poured to reinforce the structure.

Concrete pouring was done entirely in one day, and with that, the rough plumbing and foundation phase was complete!
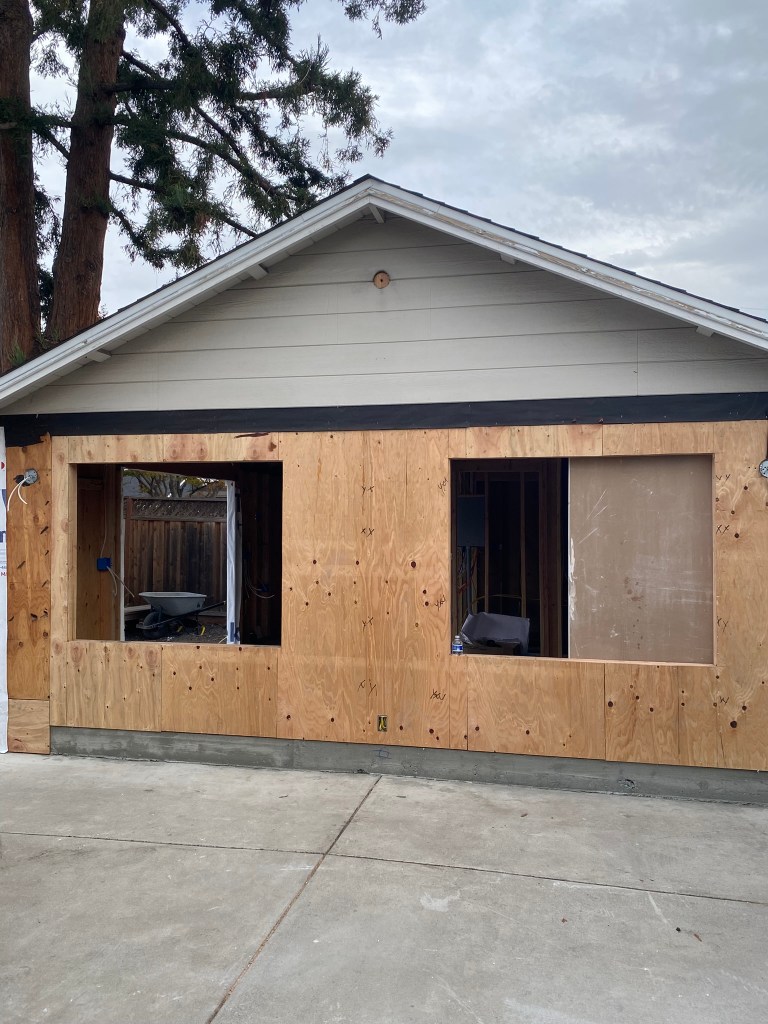
3. Framing
Creating the “frames” of the doors, windows, and rooms was next. I learned that the electrical and mechanical work inside the building could not start until the exterior was sealed from the elements, with rain being the primary concern. So the construction crew worked toward being able to put up the doors and windows.
The exterior siding was taken off entirely, as was a bunch of the existing lumber frame.


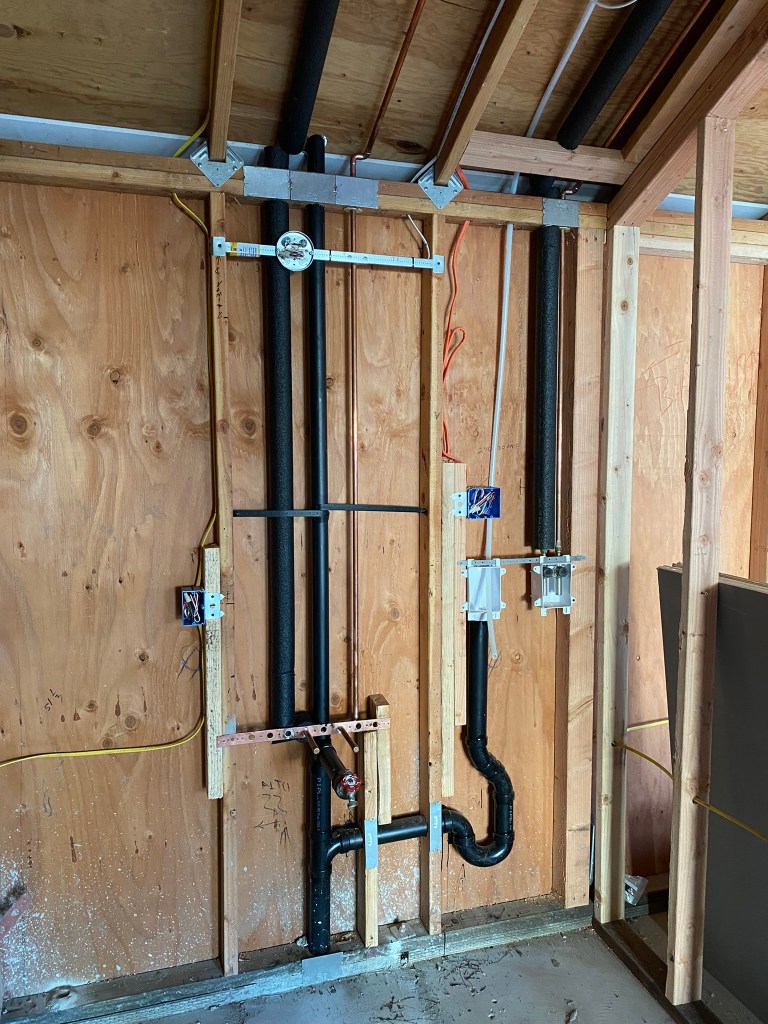
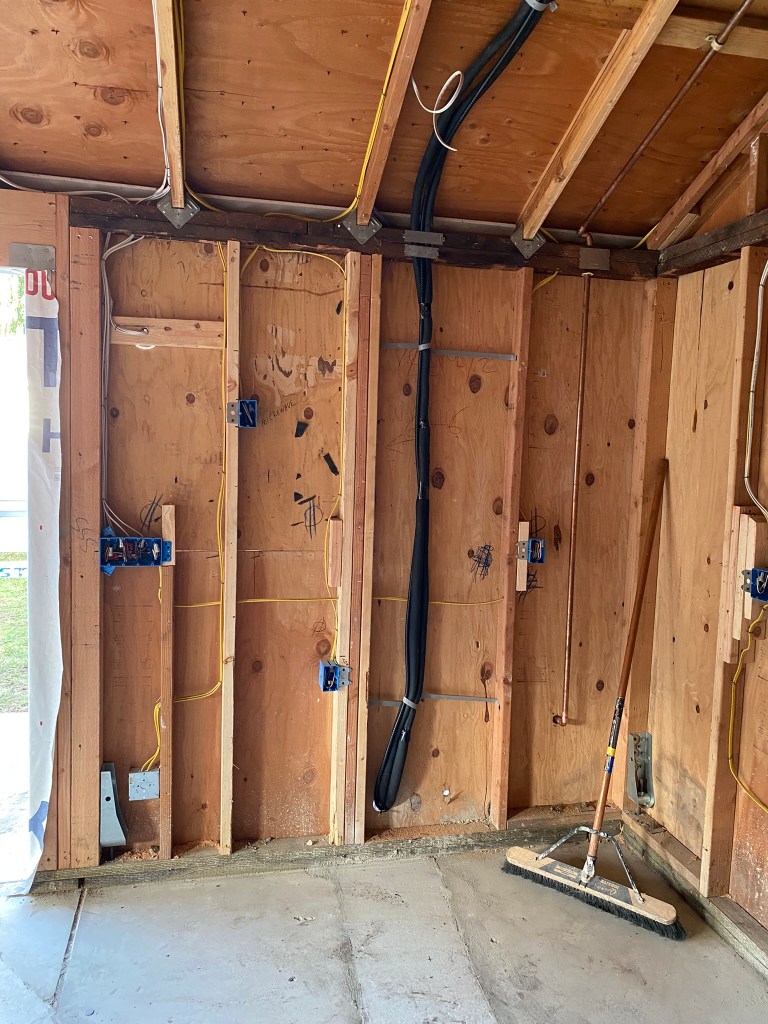
4. Rough mechanical, electrical, water
With the interior relatively protected from weather, the electricians and plumbers worked to get the mechanical, electrical, and water lines “roughly” into place. It was fascinating to see just how many things were put up against the wall and ceiling, even for such a small space.
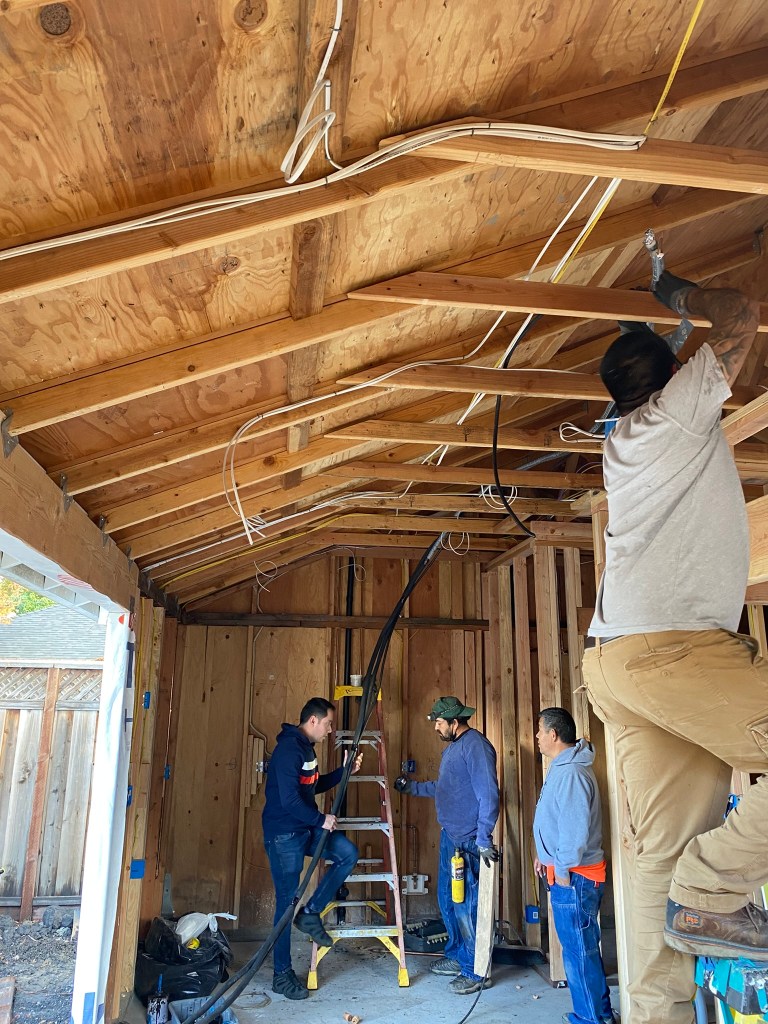
With the framing and rough components in, I was able to begin visualizing the end product. I’d walk in daily for a few minutes to imagine how the space would materialize.
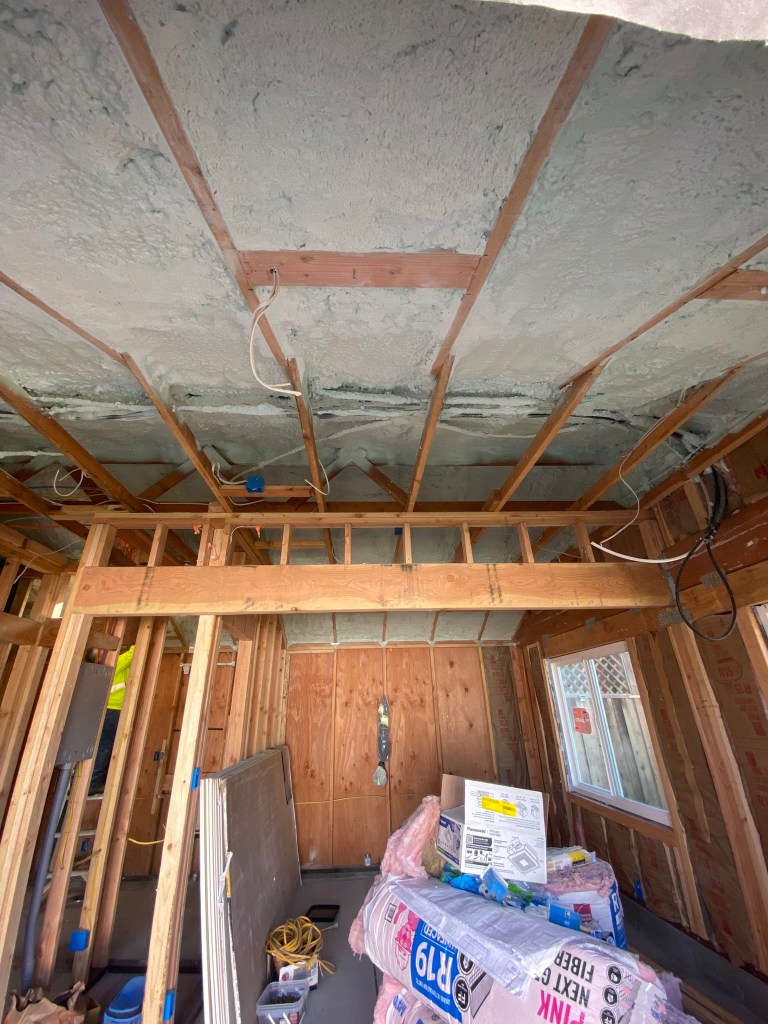
5. Insulation
Admittedly boring topic, but the next step was to insulate the building. We originally planned to put cheaper fiberglass insulation throughout, but upon learning our roof frame was too thin for it, we had no option but to go with the more expensive but energy efficient option: spray foam.

6. Drywall
With insulation in place, the next step was to put up the walls. I tried to take pictures of all the exposed wooden frames to make it easier to know where to screws into studs.
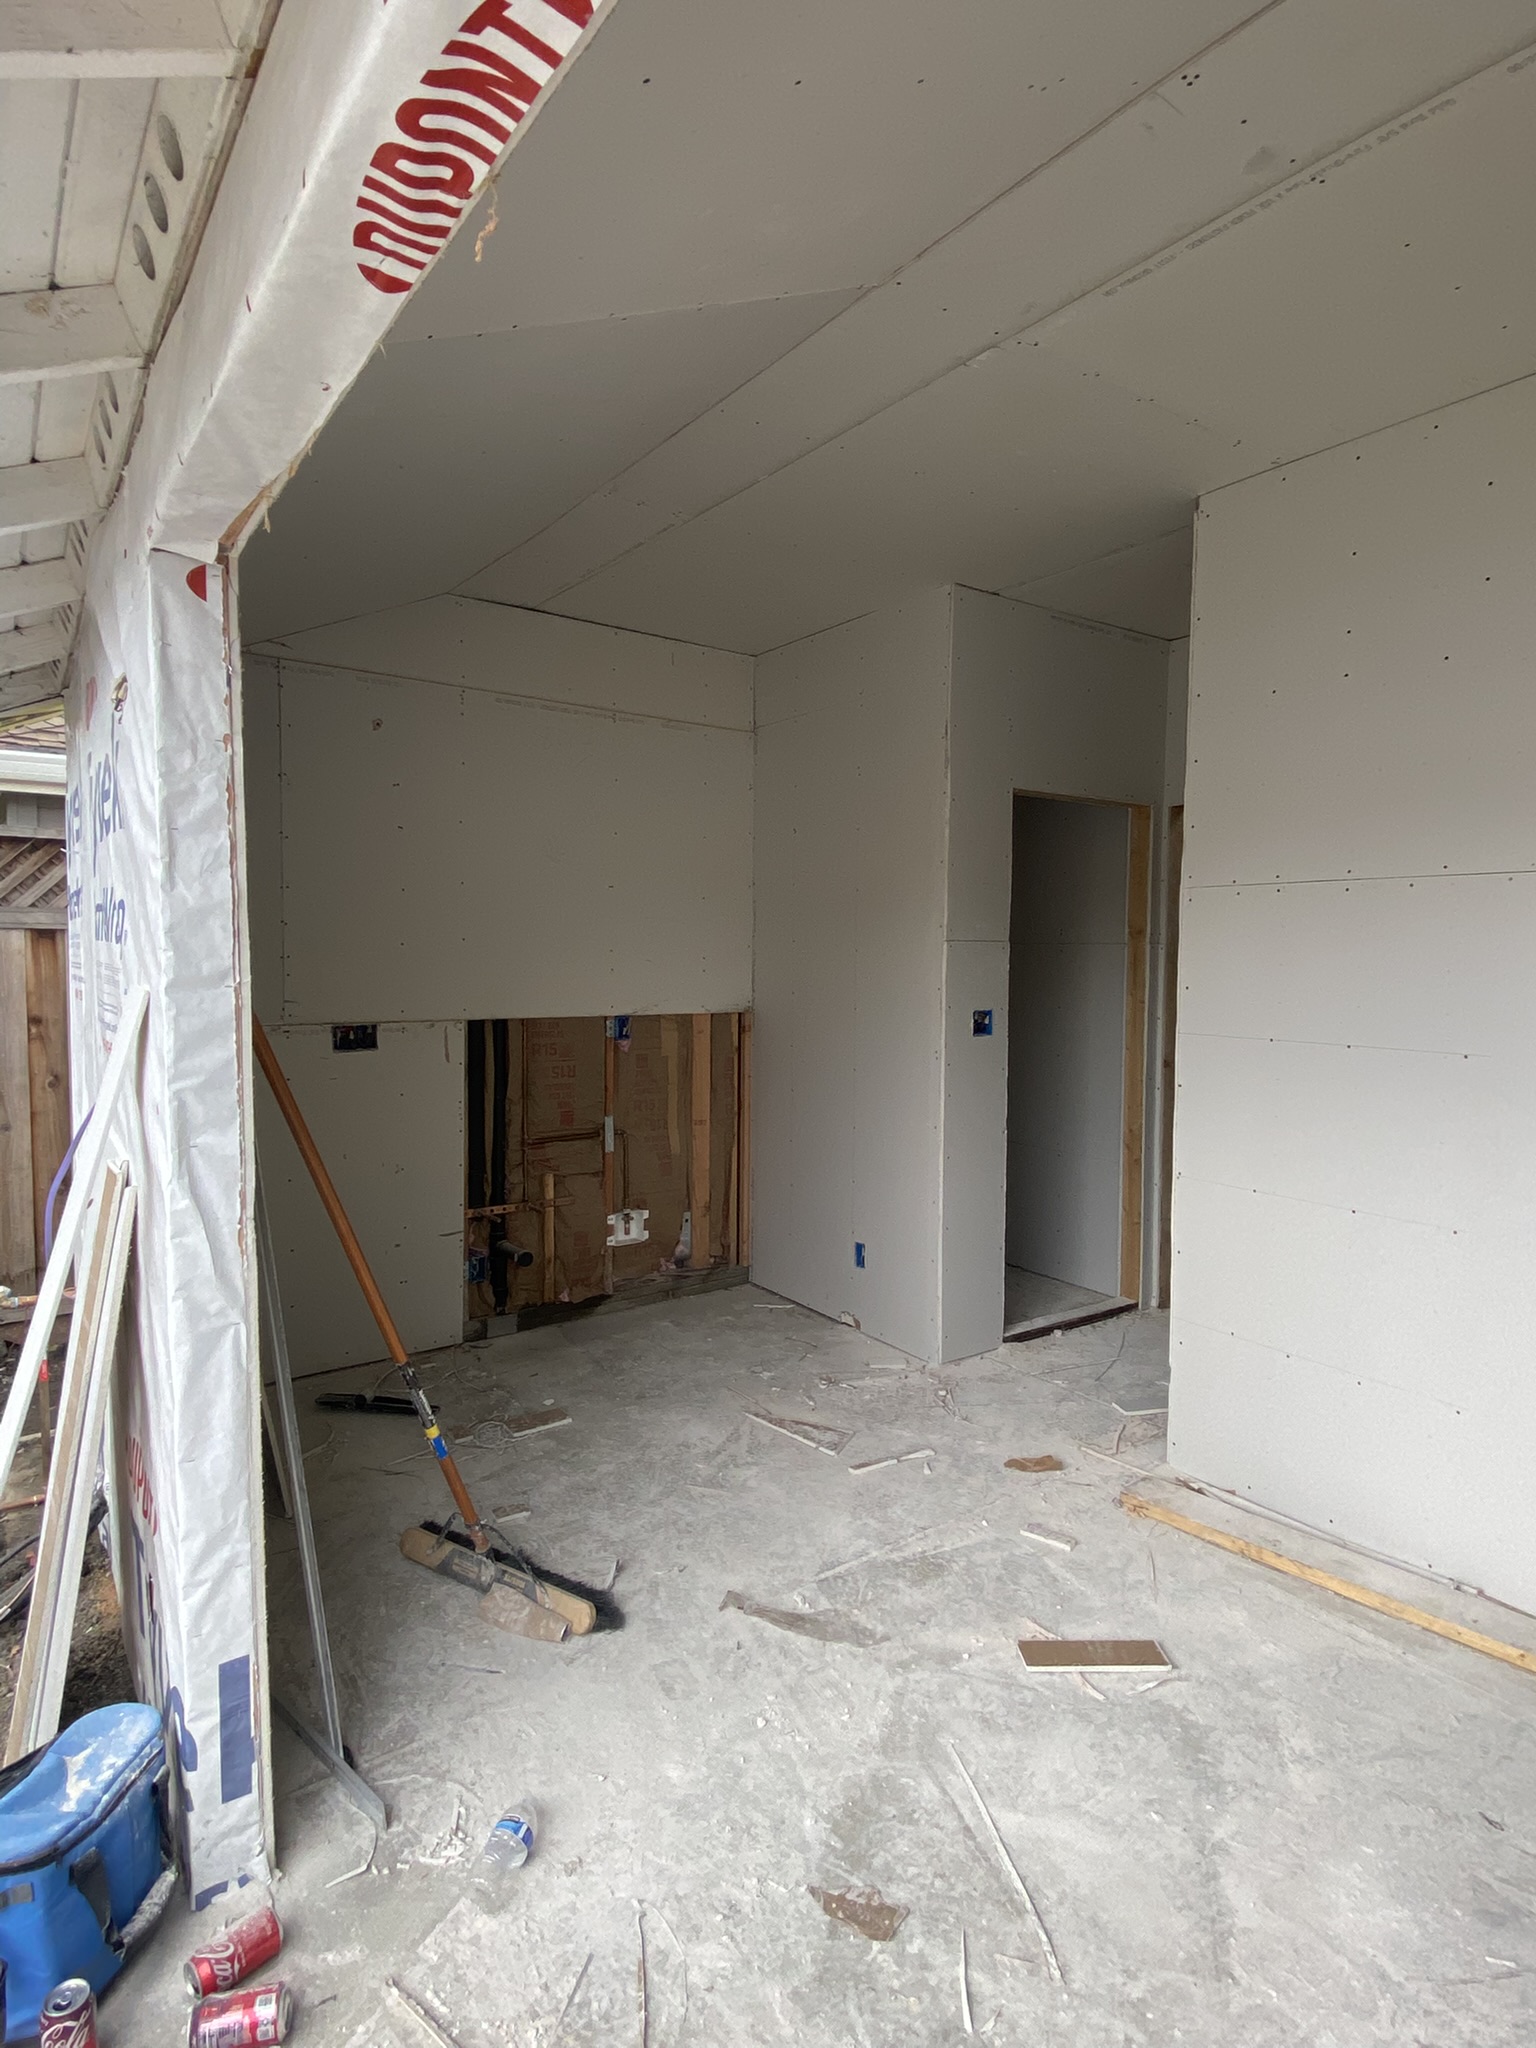
The crew installed the drywall quite quickly. However, it rained the next day, and on my daily walkthrough I wondered why there was water all over the floor.

I posed a question to the contractor on a Sunday. Within a few hours, the contractors dispatched a crew, on an official day off, to work on it. Turns out it was a drop-everything-and-fix-it problem. The crew had forgotten to seal the roof, and water had leaked through both the bathroom skylight and the kitchen vents, and into the walls.
The crew took off most of the drywall, brought in commercial fans, and ran them for a few days to dry the walls. They said any moisture trapped inside the walls is bad since it could quickly rot the wood and lead to structural risks. They admitted the roofing miss was a gigantic oversight on their part.
7. Paint and leveling
When the interior was free from moisture three days later, the crew re-installed the drywall. They then brought in a painter who spent a couple days painting the inside walls and doors.
When the paint dried, the crew was supposed to install the flooring. They however found that the floor was not level, brought in bags of a product known as “self-leveling concrete”, and poured it down.

The process had to be done a couple of times before the floors were level. Now, finally onto the finish materials!
8. Finish materials
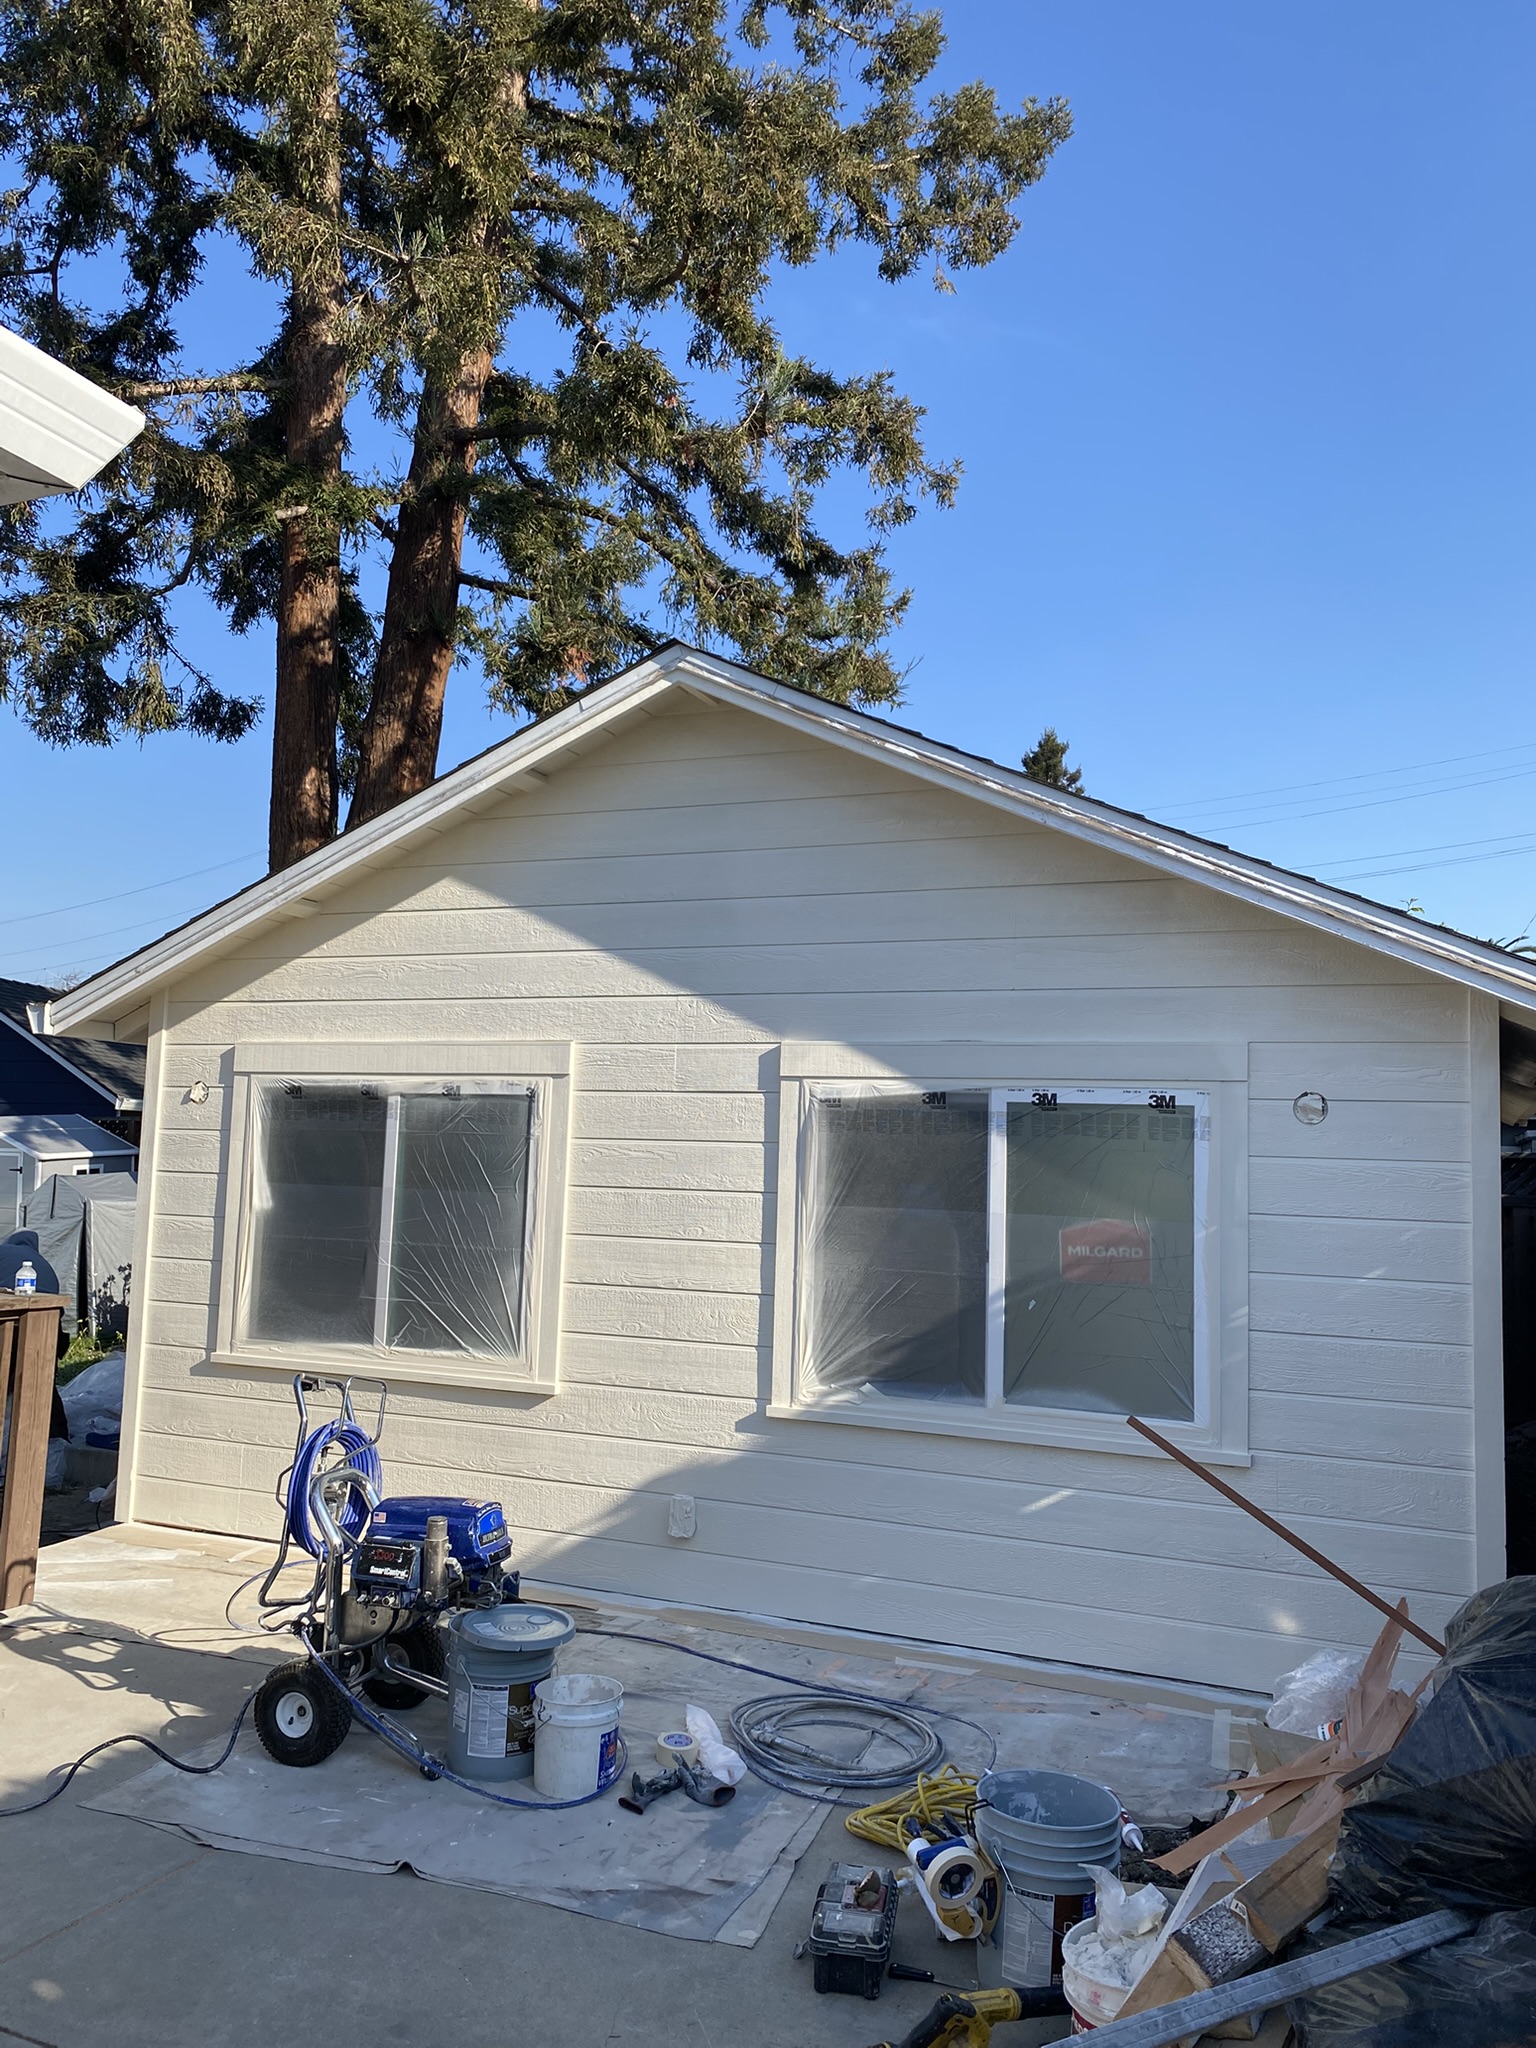
The finishes took a few weeks to complete. The large visibility things were done first, such as installing the exterior wall siding.

As well as the bathroom tiles, which was one of my favorite things to watch come to life over the course of two days. The tile installer was super impressive with his speed and attention to detail, not to mention a pleasure to talk to.

They then moved onto to cabinets and countertops, and it was great to finally see the materials we shopped for months ago finally get installed.

Once most of the finish materials were in, the city became a bottleneck. They took a while to approve hooking up the ADU to power. Without power, the lights, switches, and appliances could not be tested.
I was relieved when the power was finally hooked up, and all appliances worked as expected. It took over one more month before we finally signed the completion form, as there were a number of quality control issues that required repainting; replacing broken parts; adjustments to cabinets and doors. 214 days after construction began, on April 28, 2025, we were finally done.
Cost breakdown
The total project cost was about $223k, broken down by:
- $181,500 paid to the contractor
- $4,539 paid to the city
- $37,092 in finish materials and storage unit rental
Overall, the contractor took responsibility for most of their mistakes, and through discussions we avoided $27,440 in surprise costs.
How it’s been
We’ve enjoyed it a lot. The space has already served many purposes. My parents have visited twice, staying in the ADU for 3 weeks the first visit and 8 weeks the second. We also take CC into the space almost daily for some play time. More recently I officially moved my office in, so Bonita and I no longer have to get distracted by each other.
With the extra space, I’ve also focused more on my health. It’s become a stretching space, and when I muster up the (mostly mental) energy, I pull down the rowing machine to row 2-3k meters while re-watching Breaking Bad for the 500th time. I still hate every single meter and don’t think I will ever love the erg, but the best show on earth (along with Better Call Saul) help pass the time.
Thanks for reading!
