I recently built a side yard fence, entranceway, and gate. The total cost of the project was $563.29. Here was the entire process from start to finish, along with cost breakdown.
Why build?
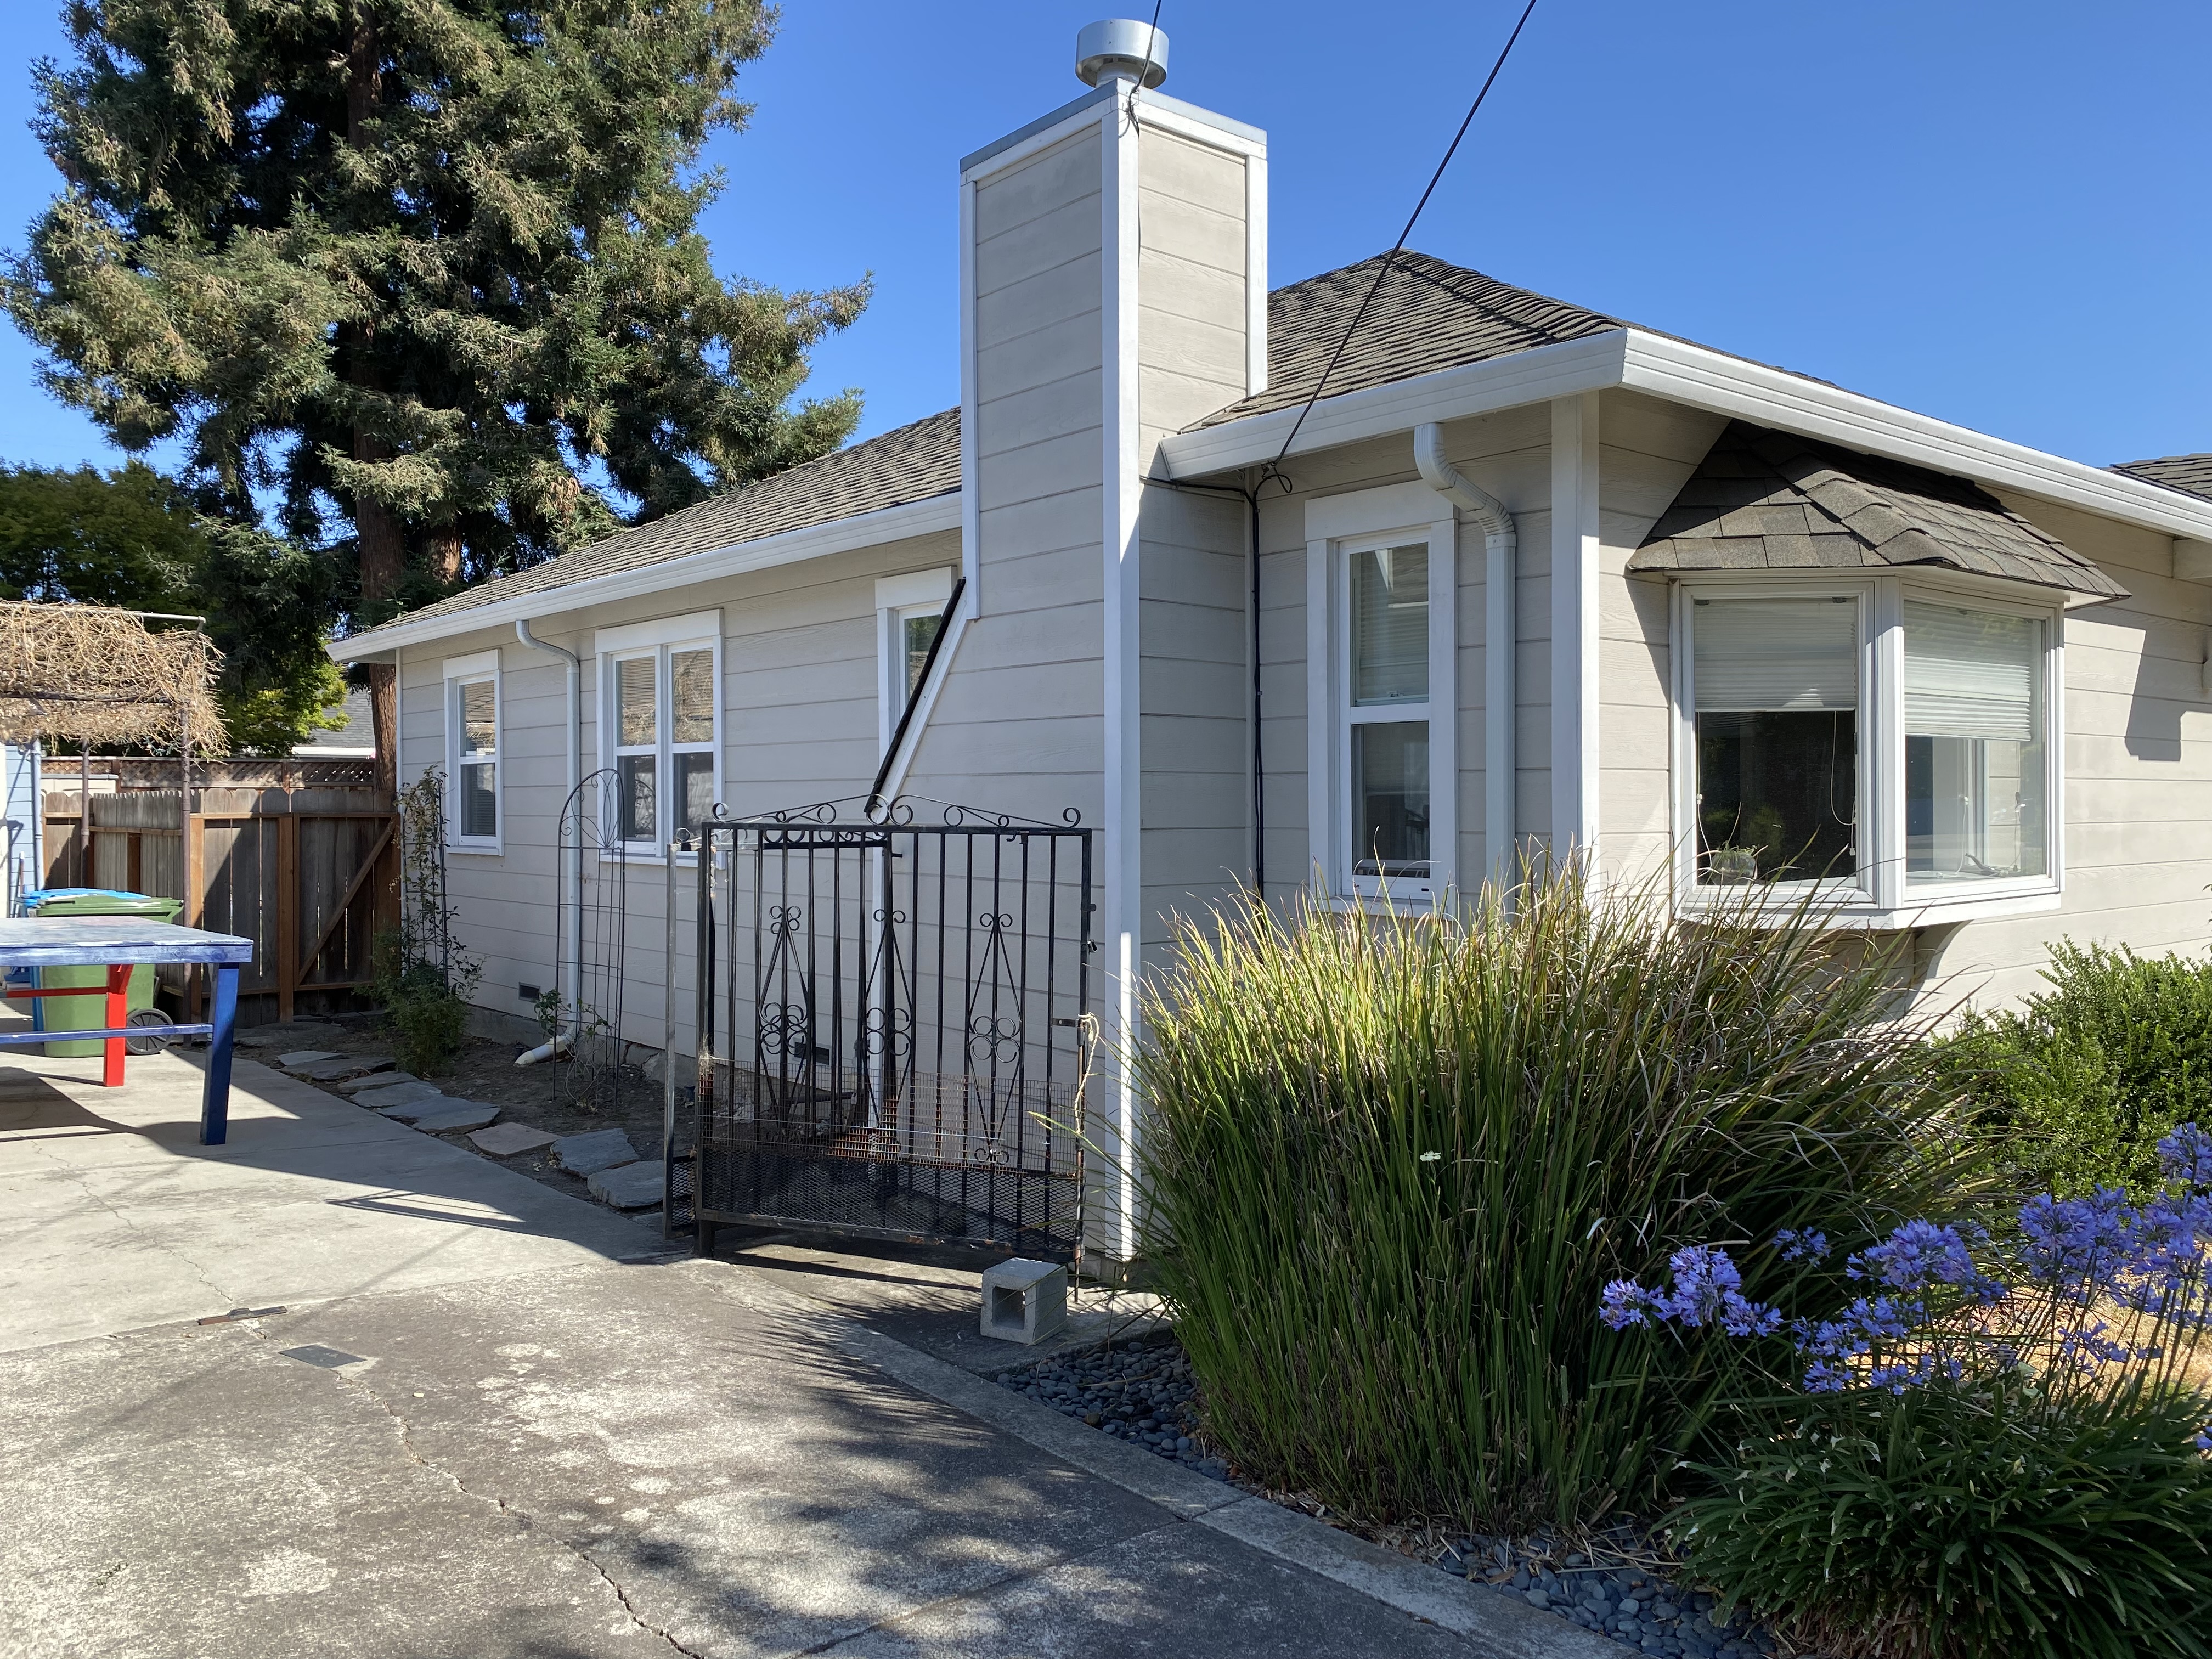
The main reason for the project was to reduce yard maintenance. There were three fully grown Blue Lily of the Nile and a big bush that grew through weed barriers, swallowed the river rocks, and destroyed the drip irrigation system.
In 2021 we hired contractors to build a fence to separate our property line from the neighbors. I made the mistake of not adding a gate that would allow us to walk to the street from the side yard. These pain points were enough to compel me to make a change.
Long term, the plan is to build an ADU in the backyard for rental income.
Design
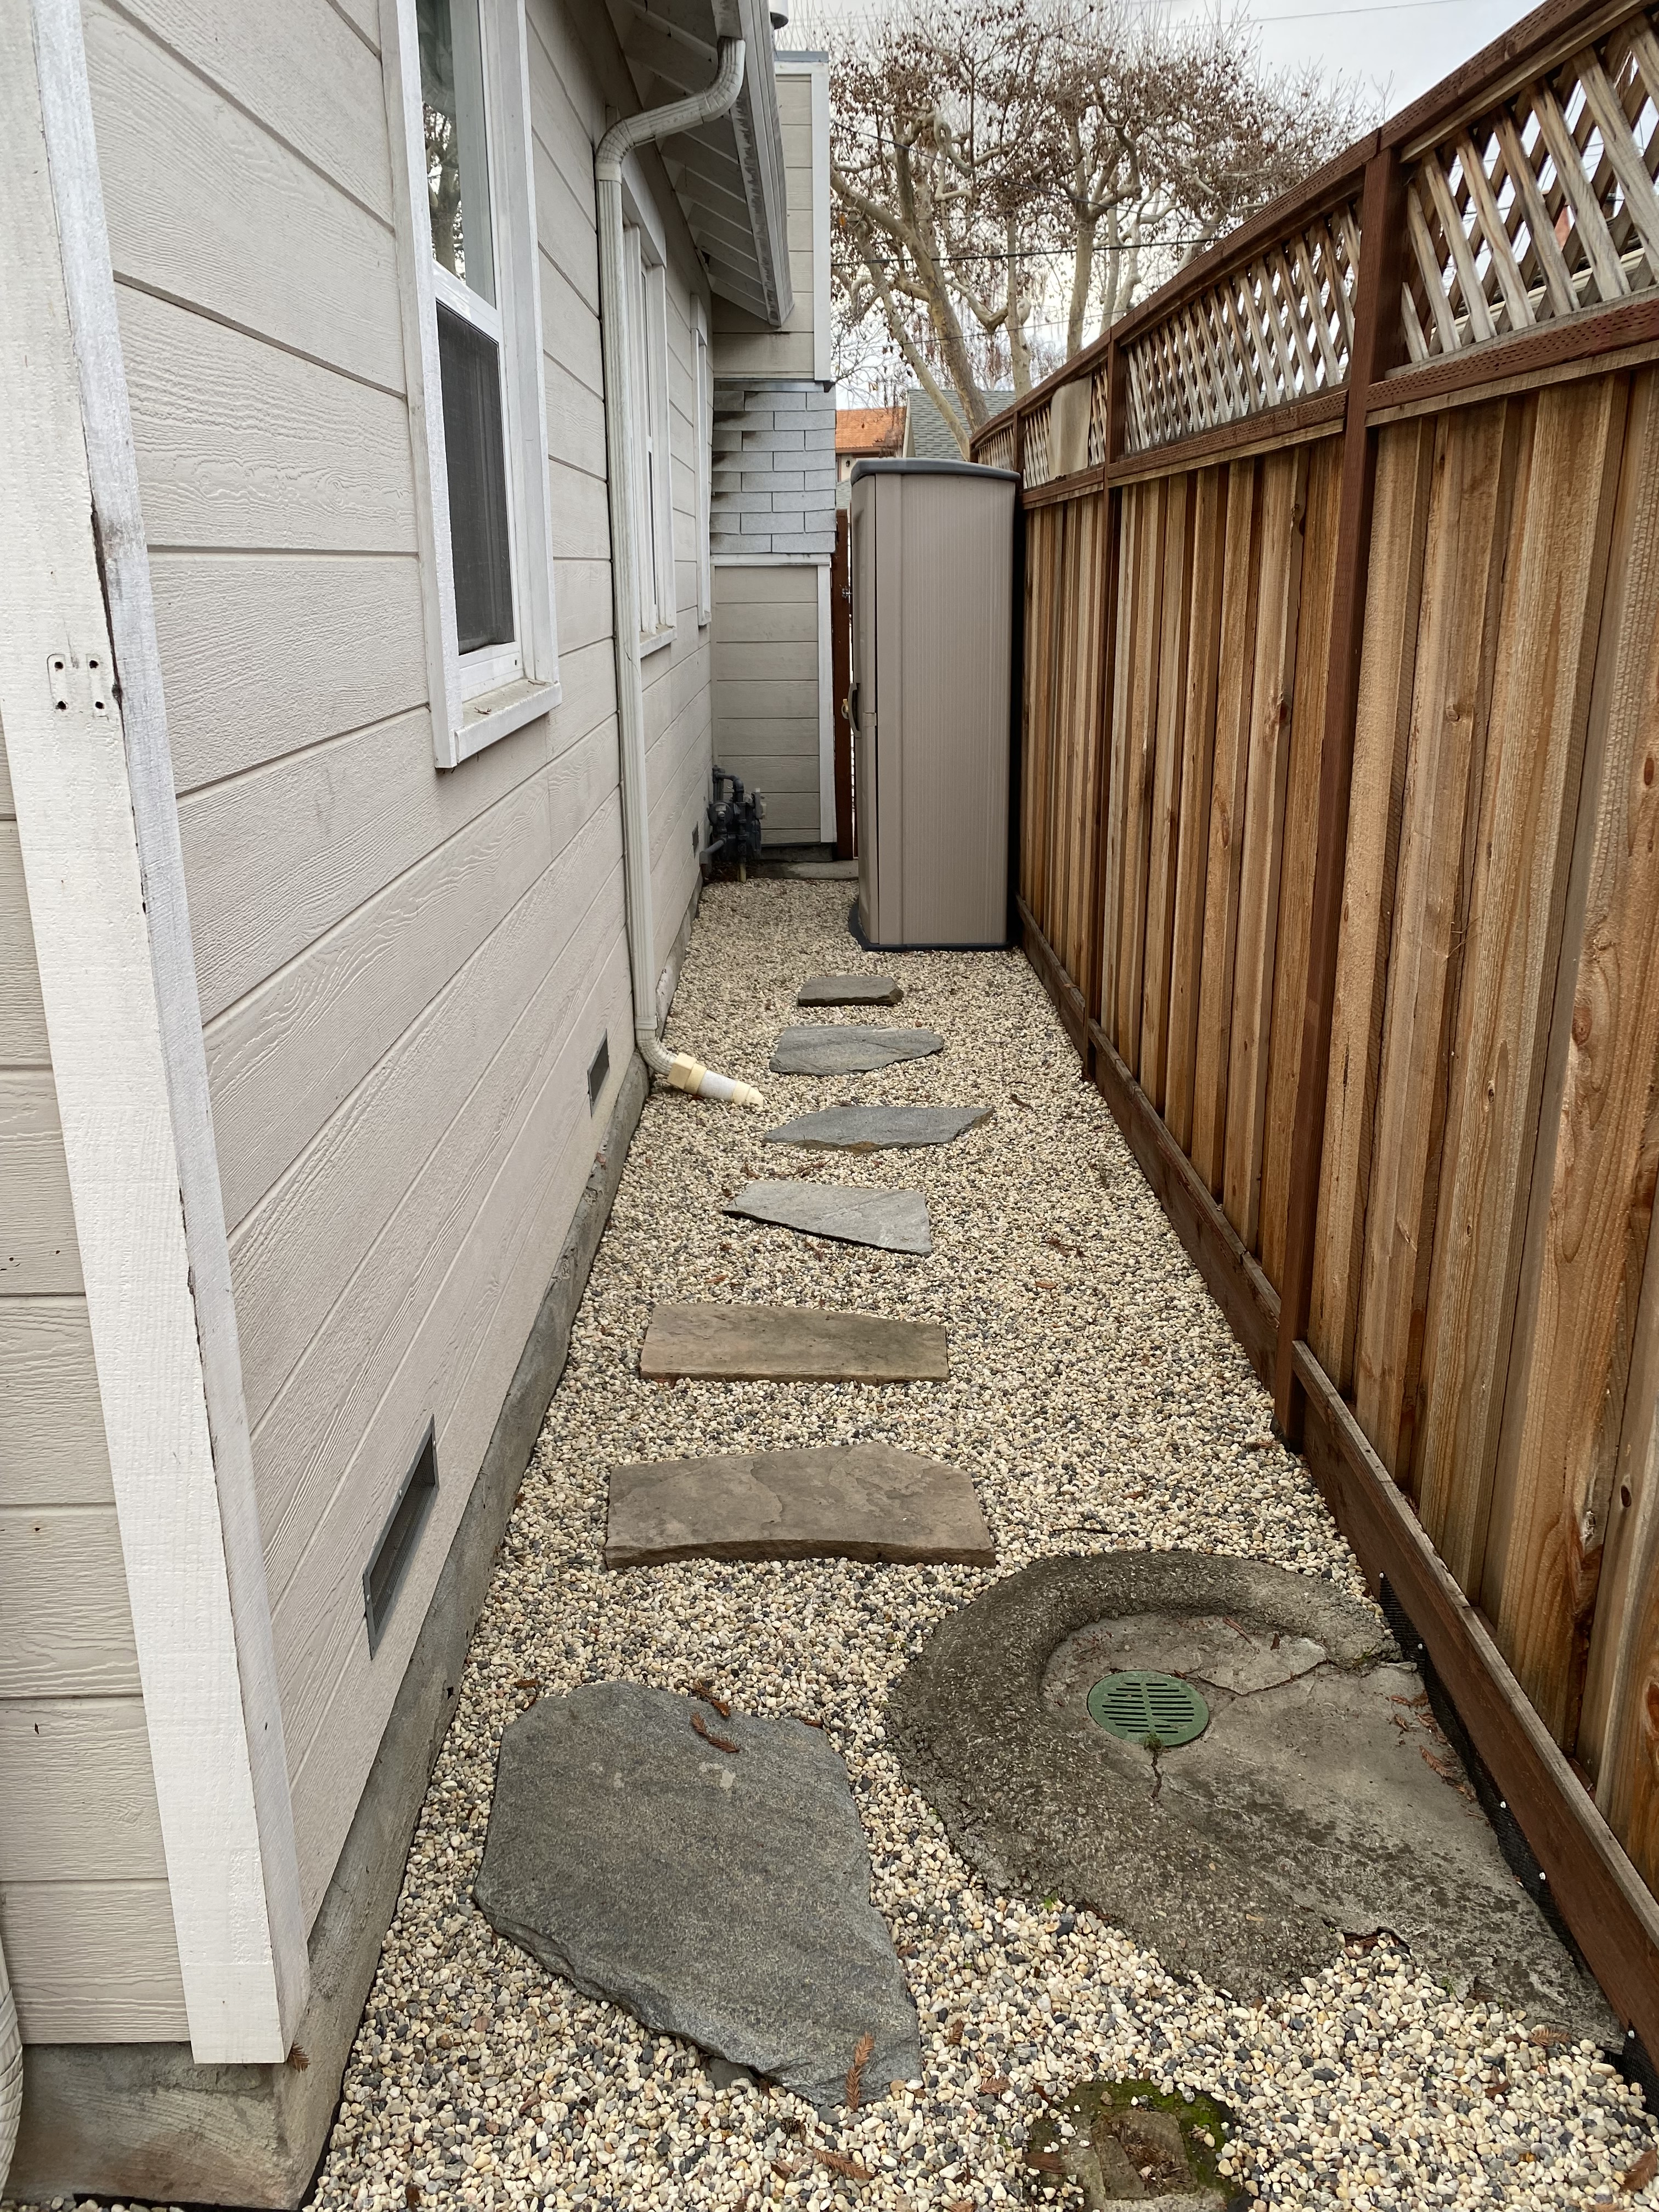
Last year I made the side yard drought proof.
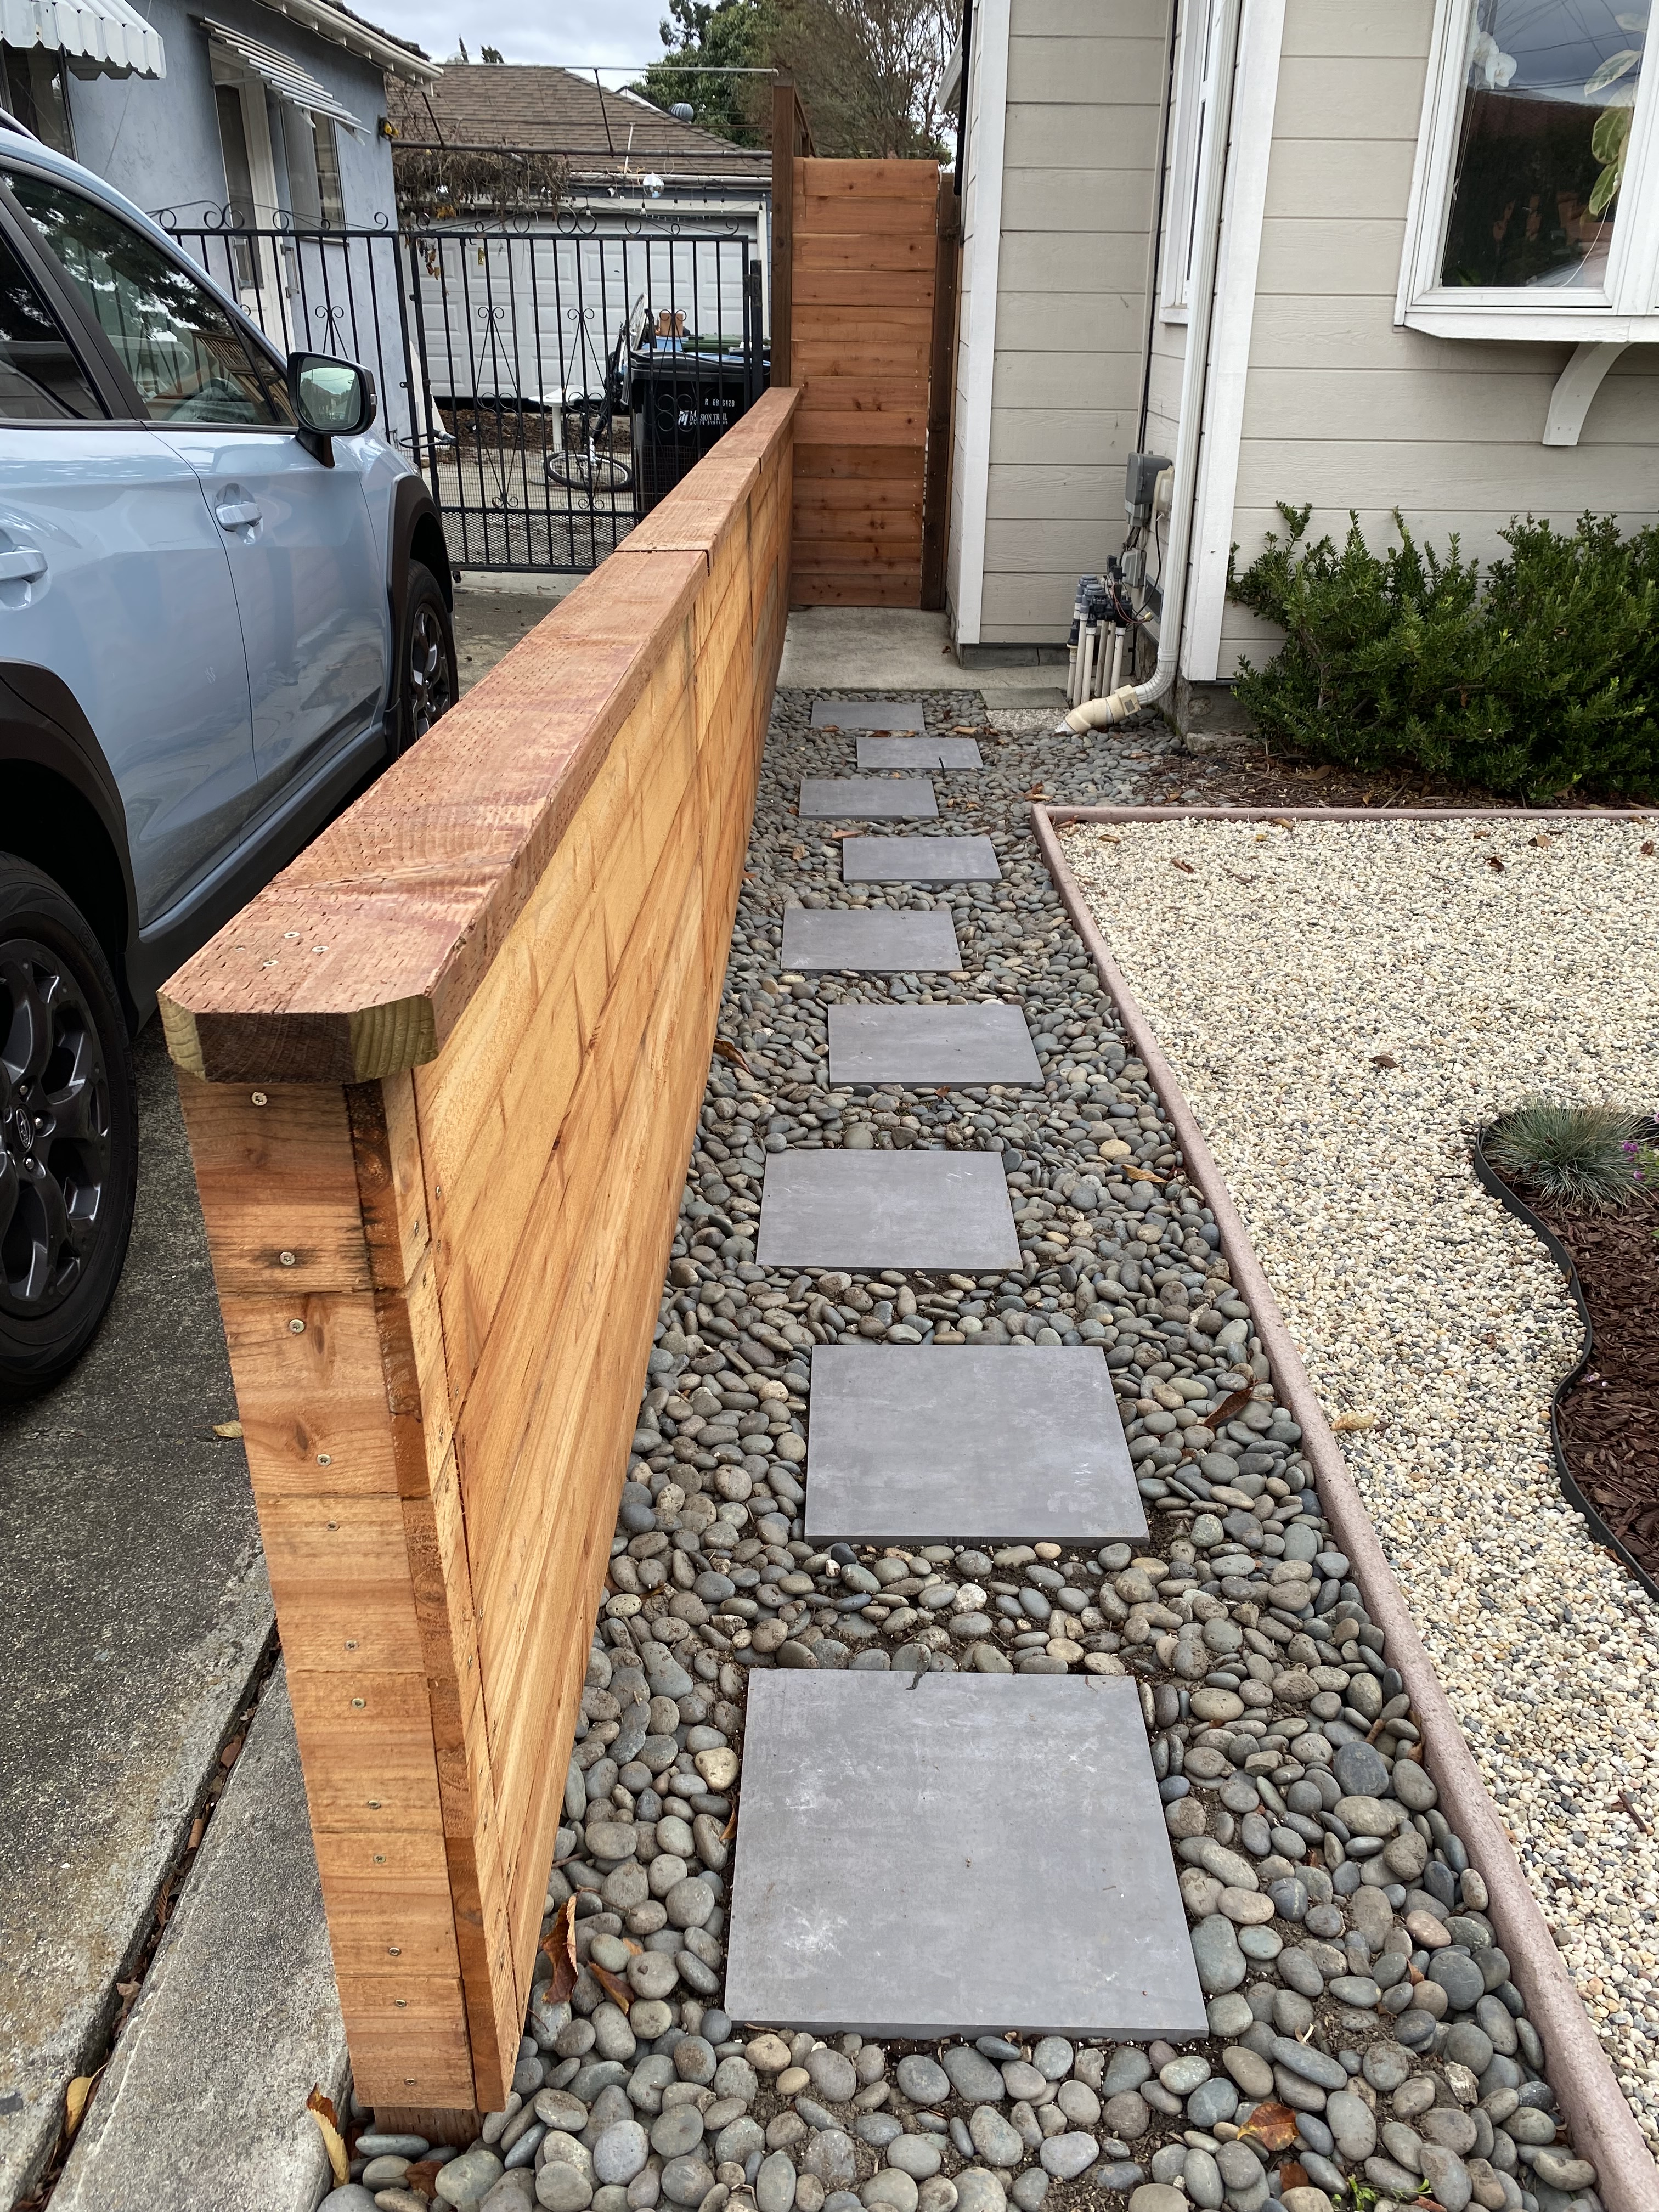
The idea was to build the entryway and fence along the property line. I liked the modern look of horizontal fence boards and opted for redwood to maintain the same look as the fence that the contractors used. Per usual, I drafted a design and ran it by wifey for approval.
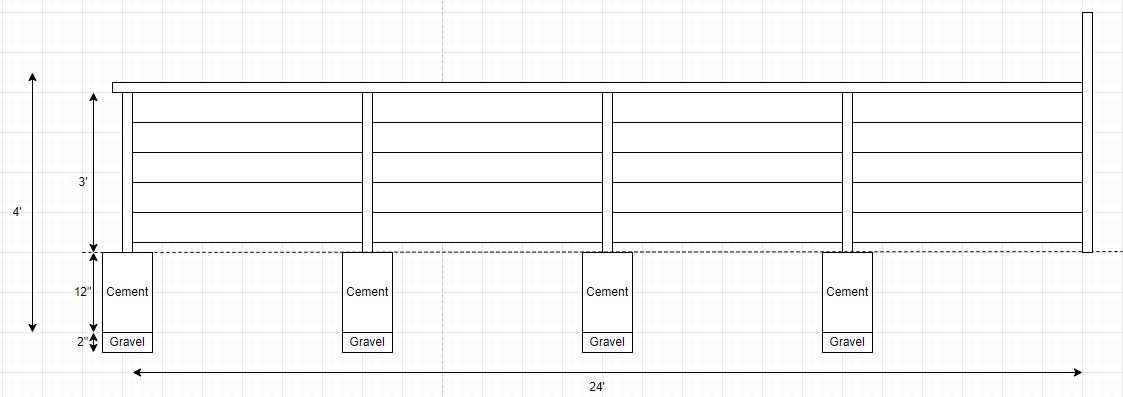
I went with fence boards that were 6′ long and 6″ tall, with 4″x4″ pressure treated wood for fence posts. I YouTubed a bunch of DIYers and professionals to learn the best practices.
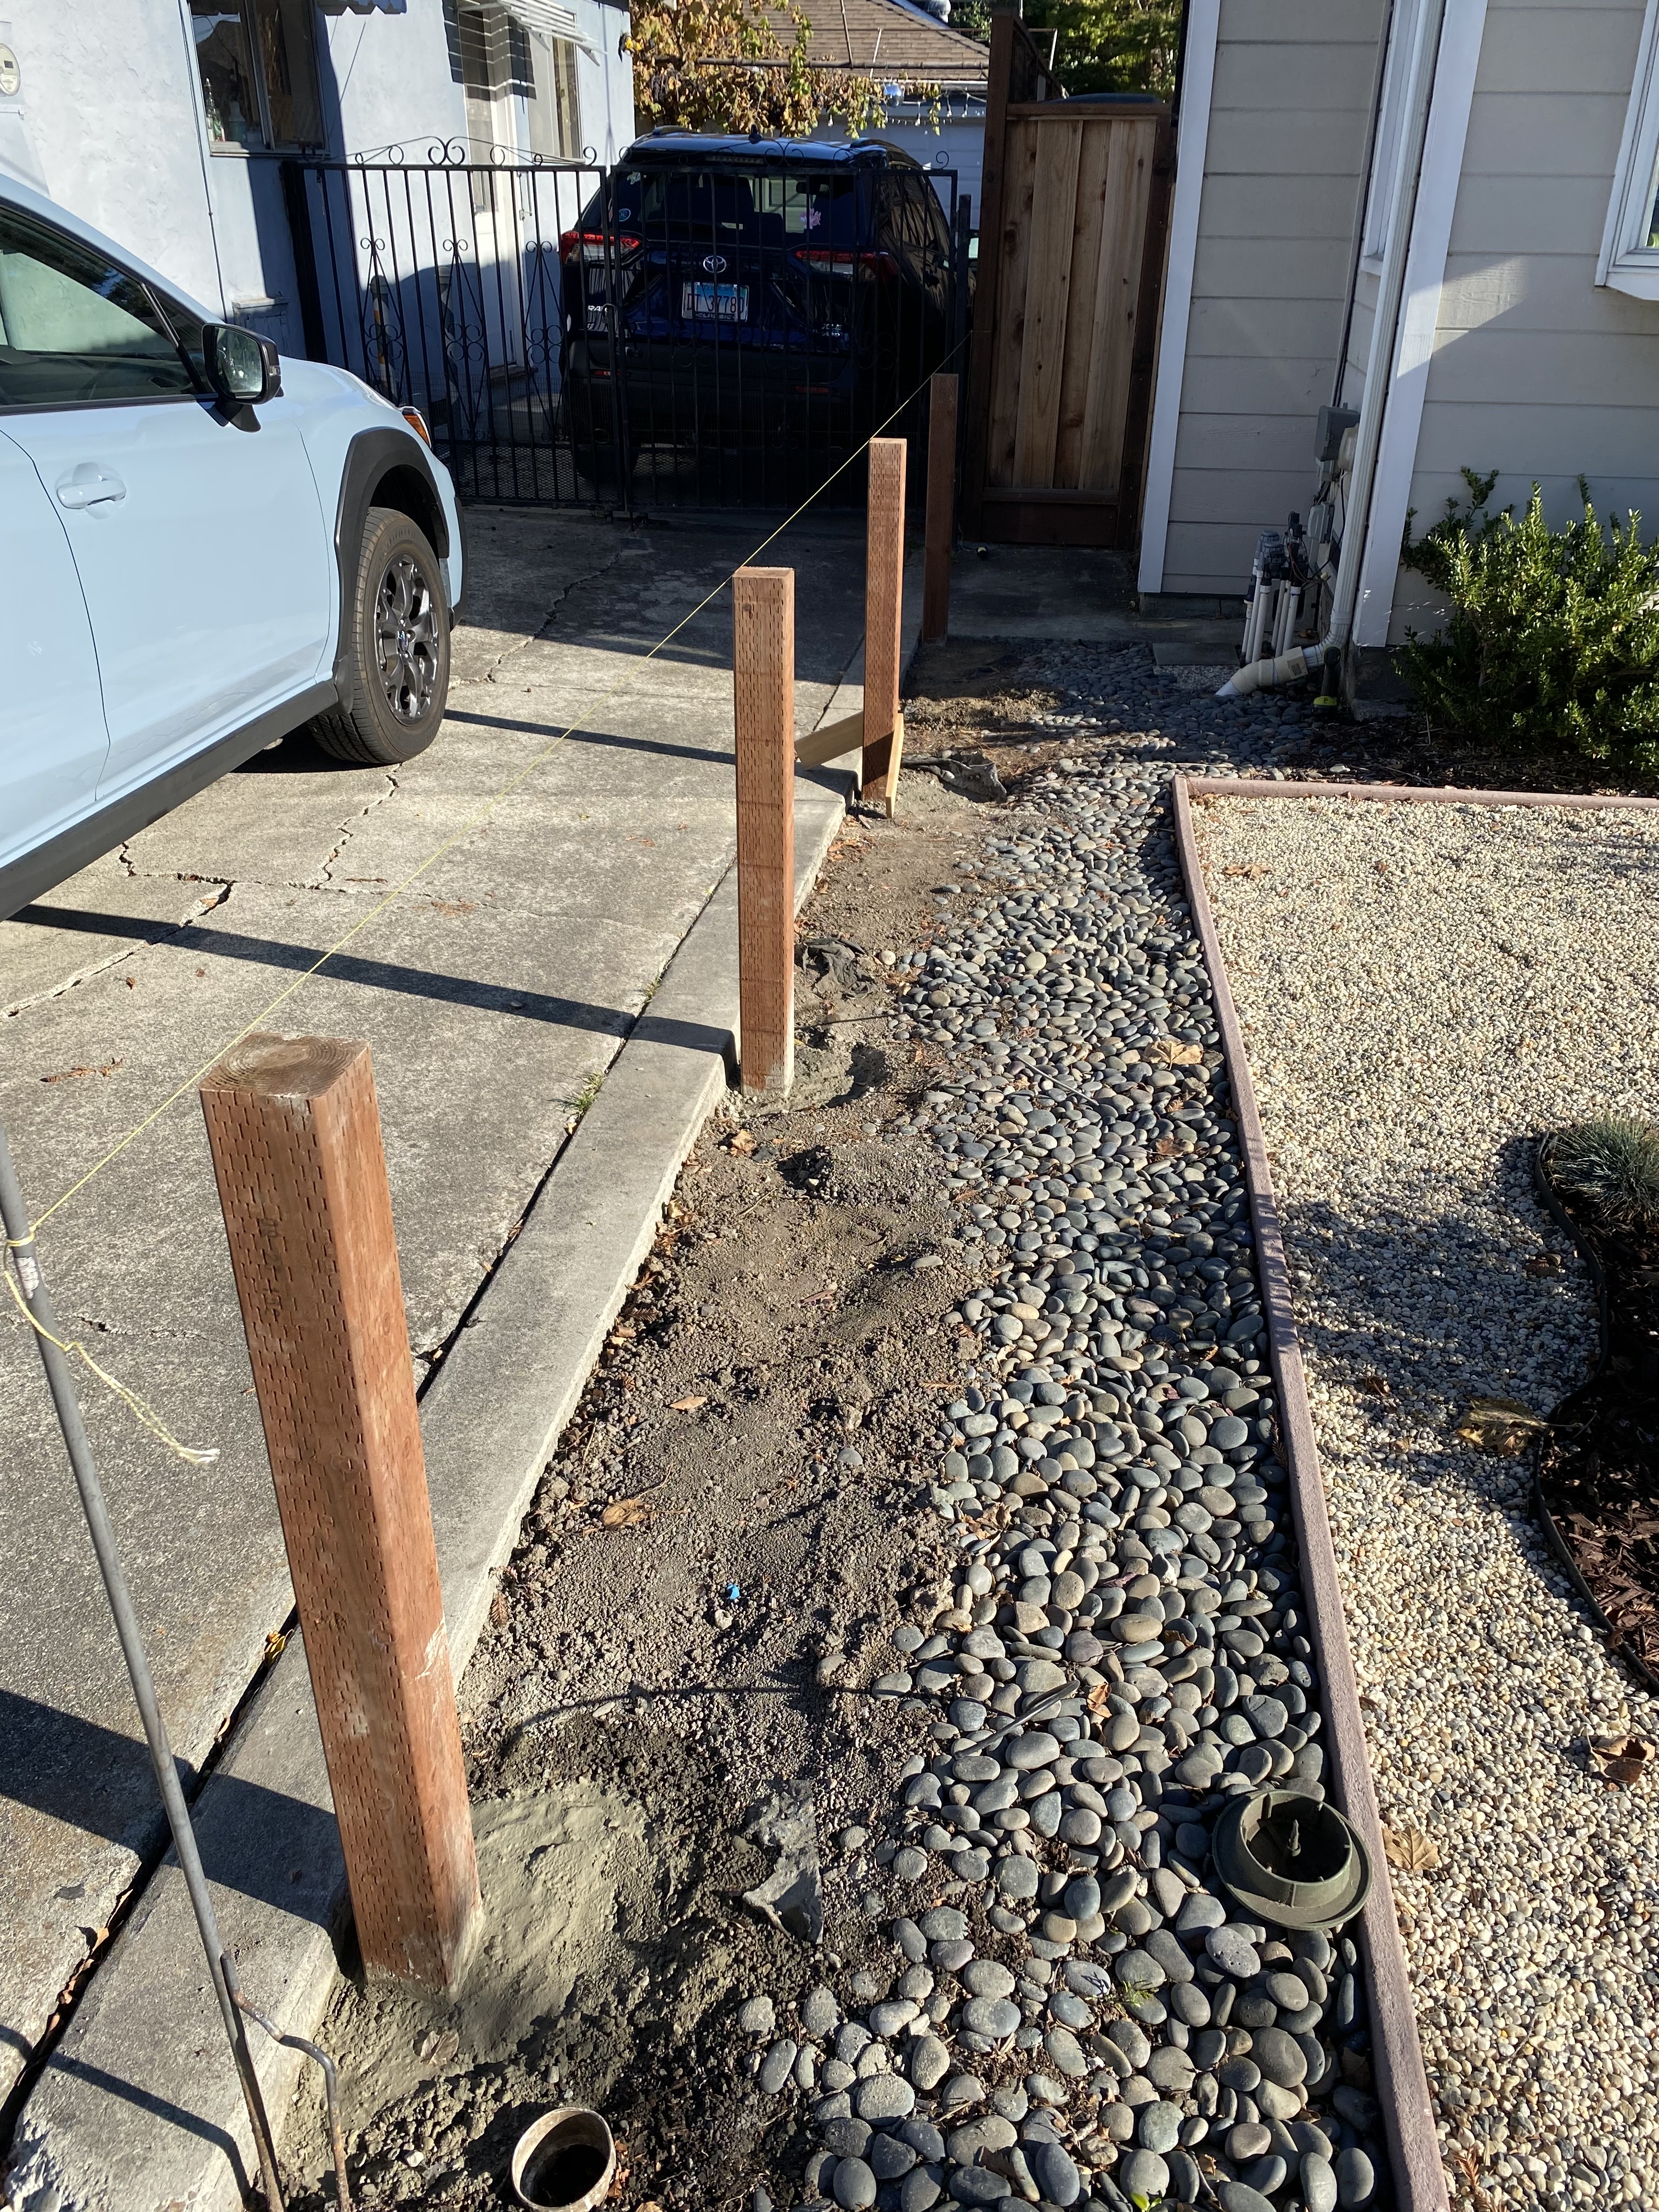
3. Site Preparation
I already cleared the lilies, so I was able to jump straight into measuring and digging.
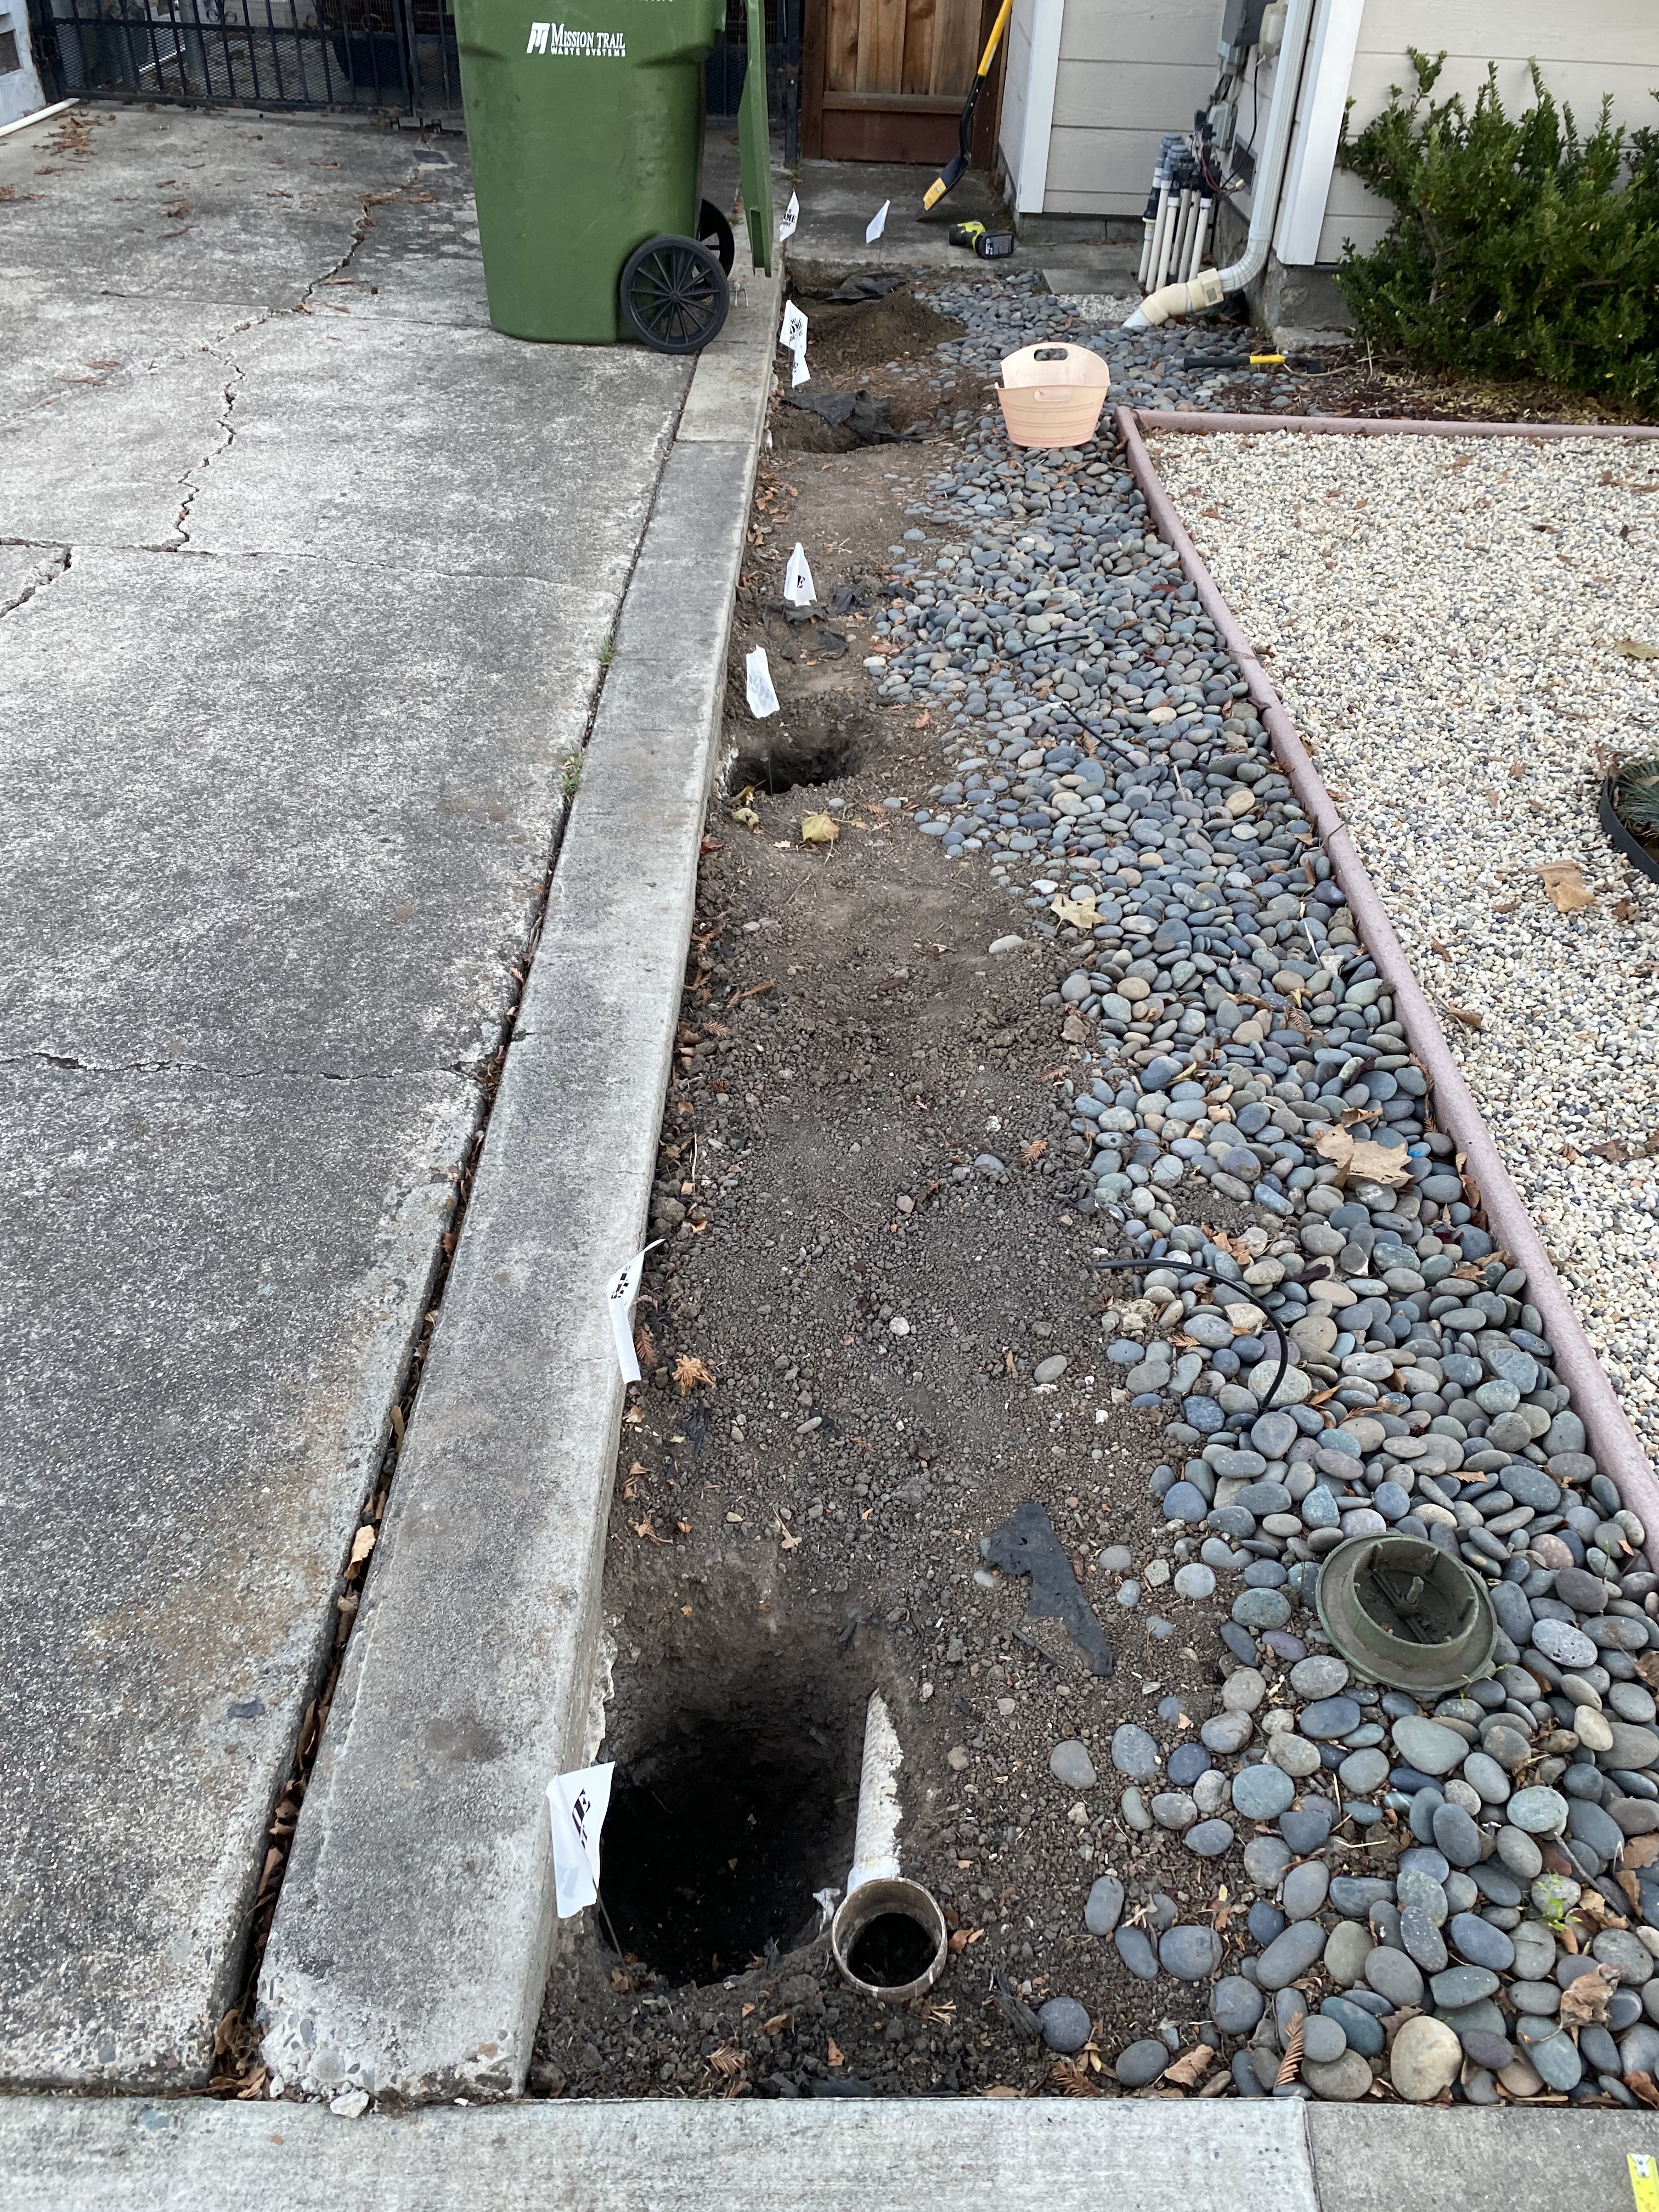
Digging was laborious. I dug holes that were a bit over 12″ wide and 14″ deep. With the exception of the redwood fence boards, all other materials were bought from The Home Depot. I used a circular saw to cut the pressure treated wood, placed 2″ of gravel into the hole to serve as a base, tampered it, then placed in the pressure treated wood. The process was the same for all four holes, and I made sure they were the same height using a string line and level.
4. Fence Posts
The purpose of the gravel base is to discourage rot whenever rainwater sinks down. Once the fence posts were level, I poured in an easy concrete mix, added water, then mixed the solution directly in the hole.
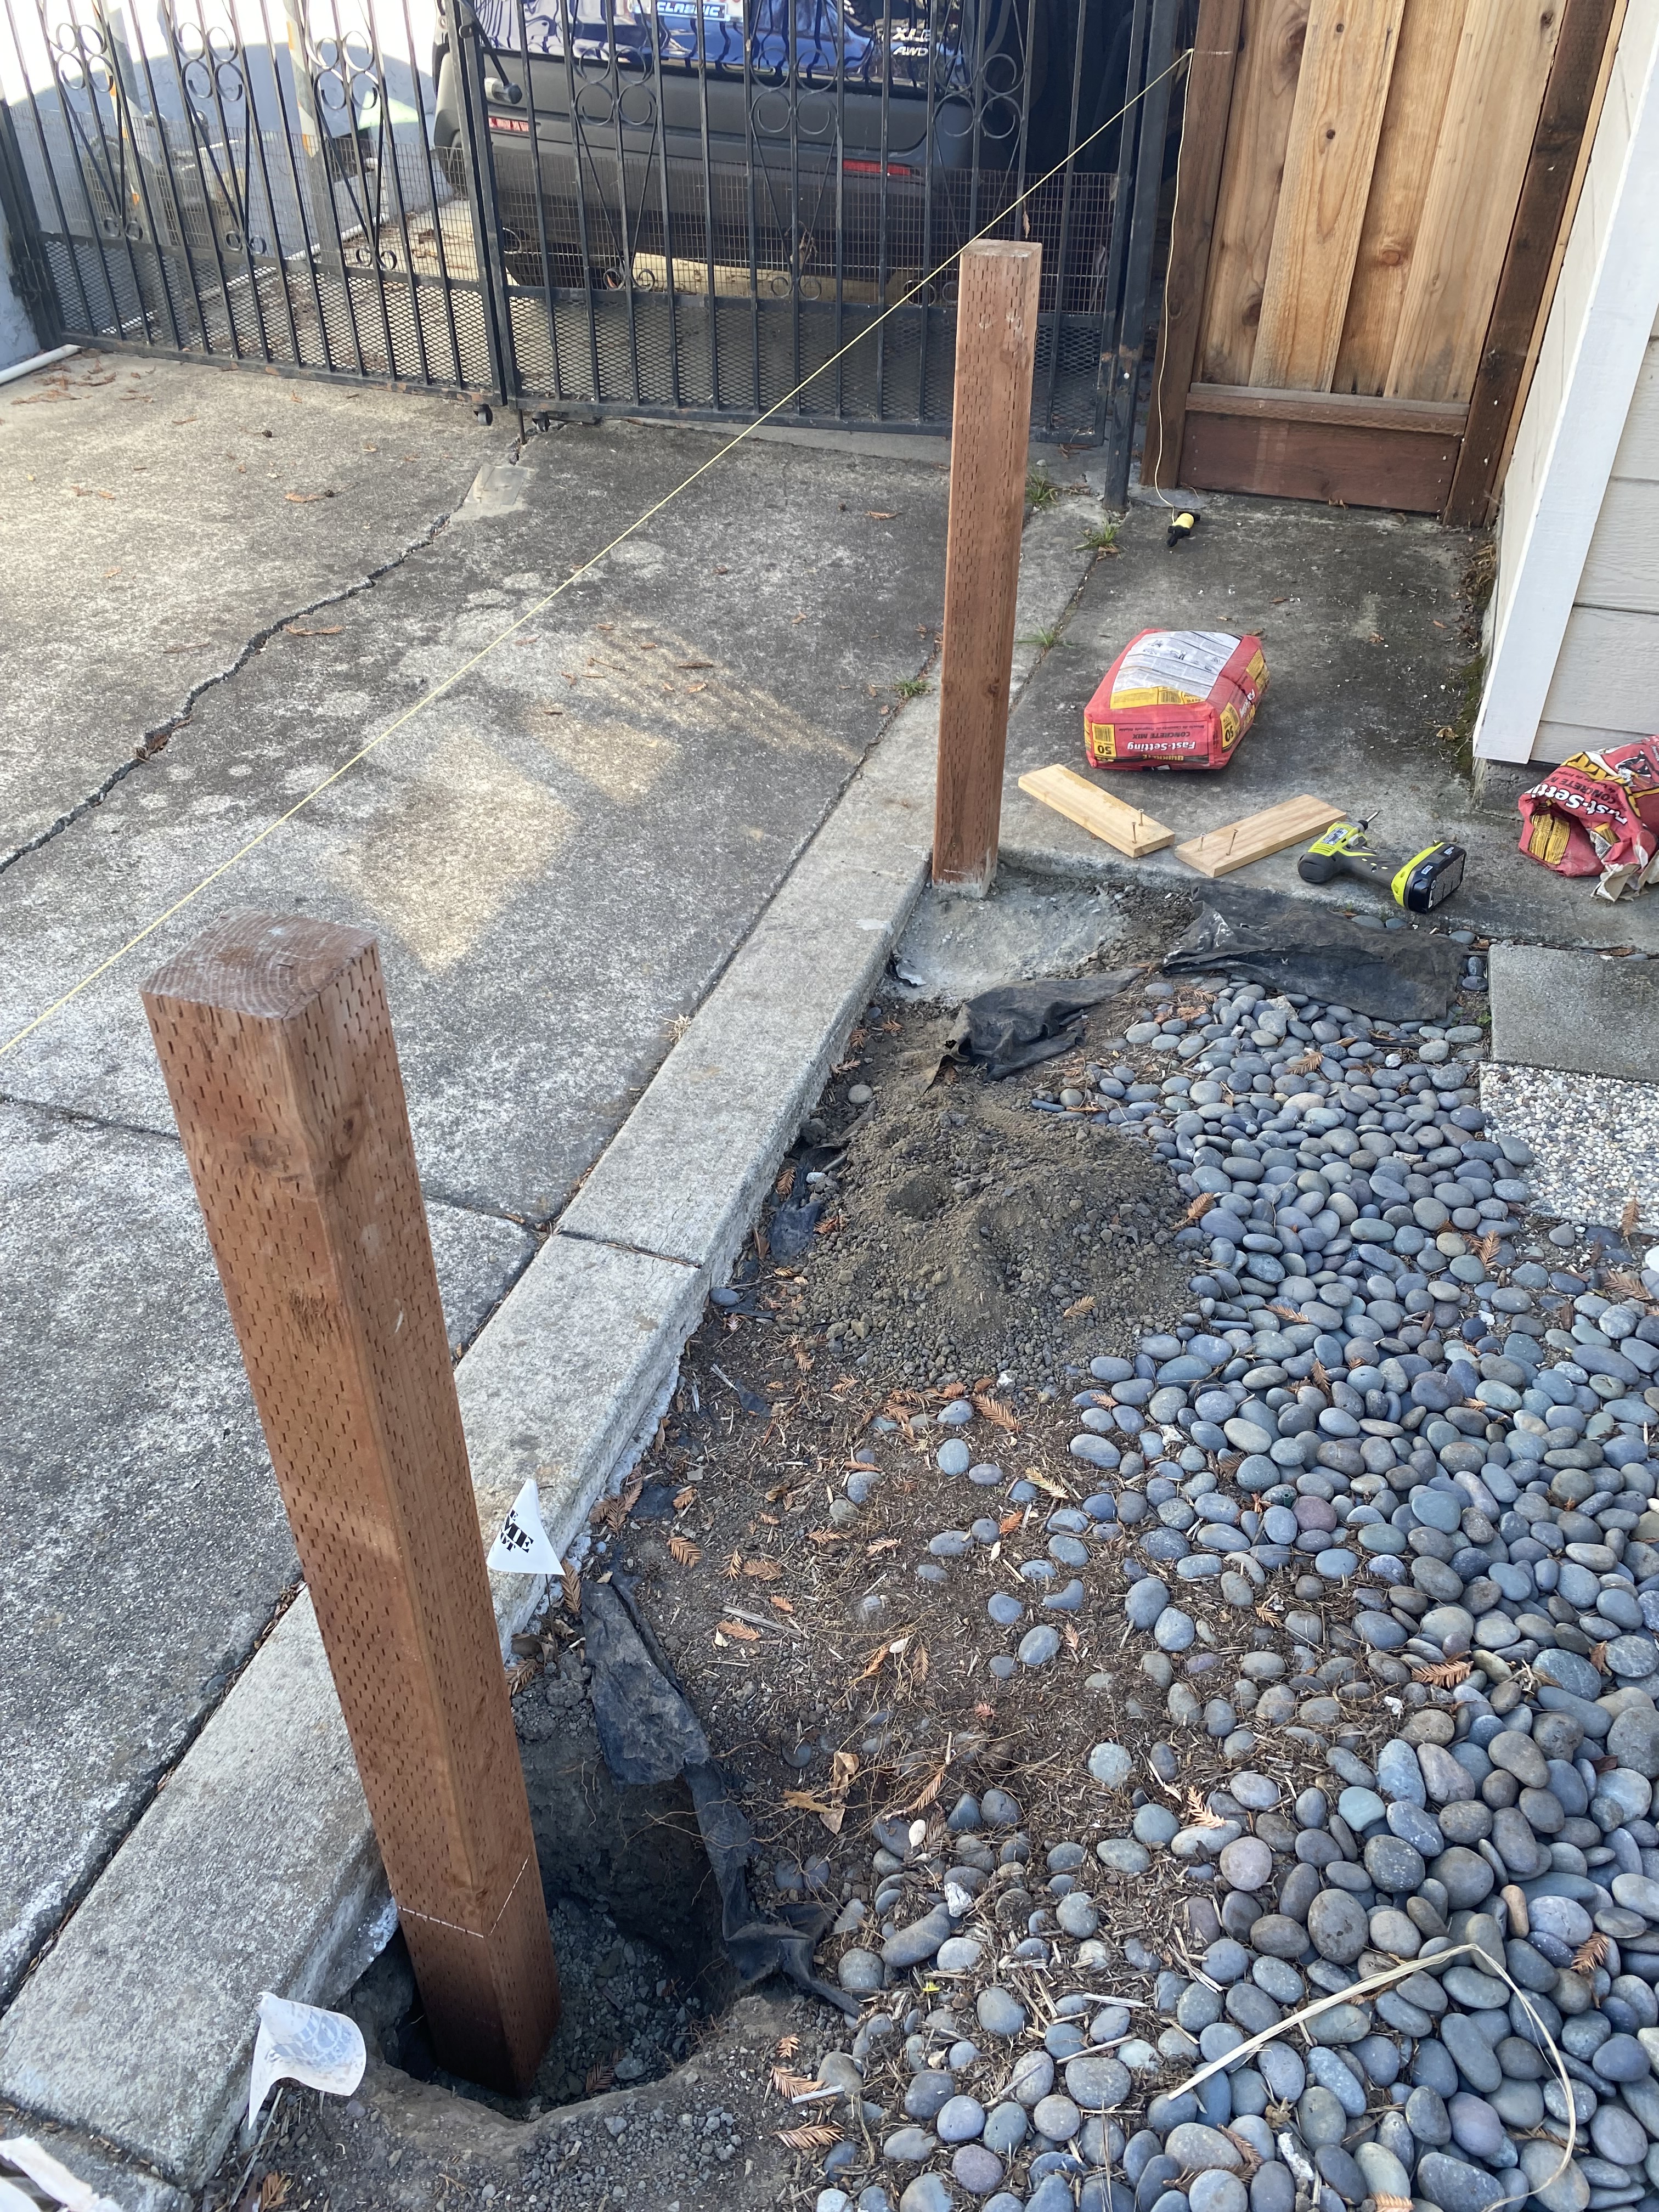
After 24 hours, the concrete dried and the fence boards were ready to be placed.
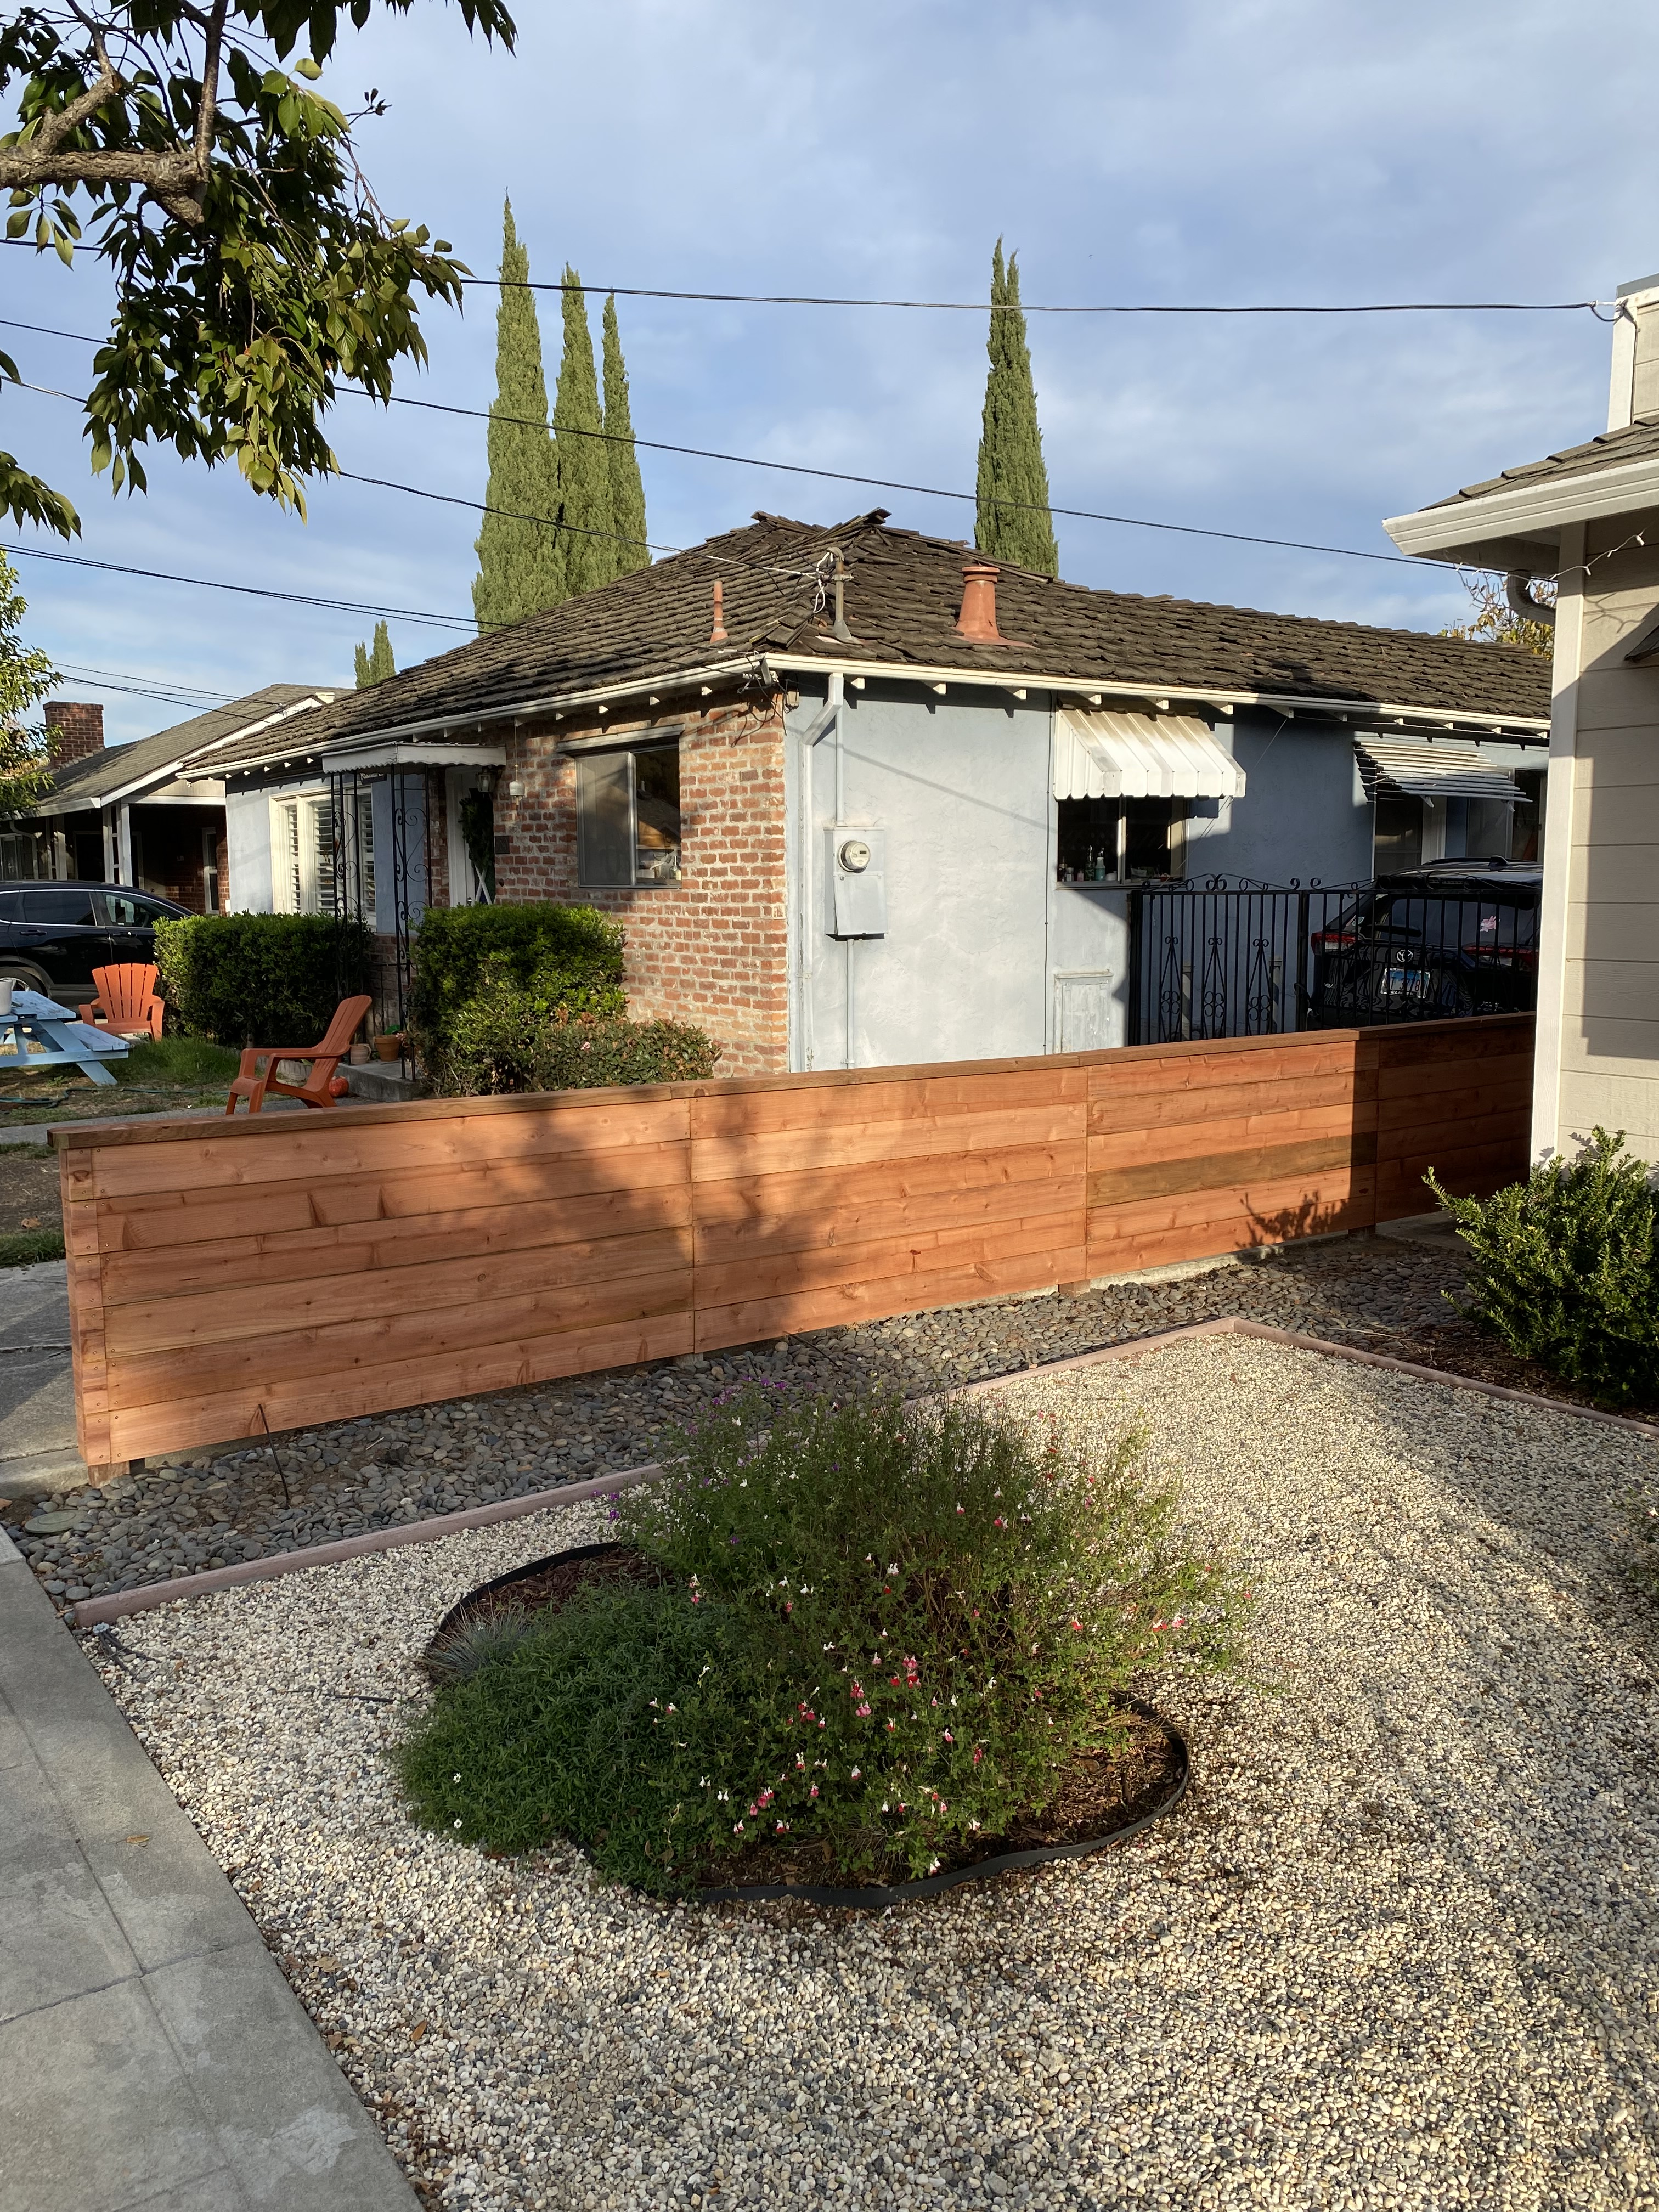
5. Fence Boards
By far the most fun part was putting in the fence boards. I used an impact driver to put in four screws per 6′ board. Bonita helped hold the boards in place with a level to ensure the boards were level. It took less than an hour to screw on 24 boards.
Afterward, I put adhesive tape across the top fence board to protect against water, then put a 6″ pressure treated wood on top for further protection. Here’s the finished product.

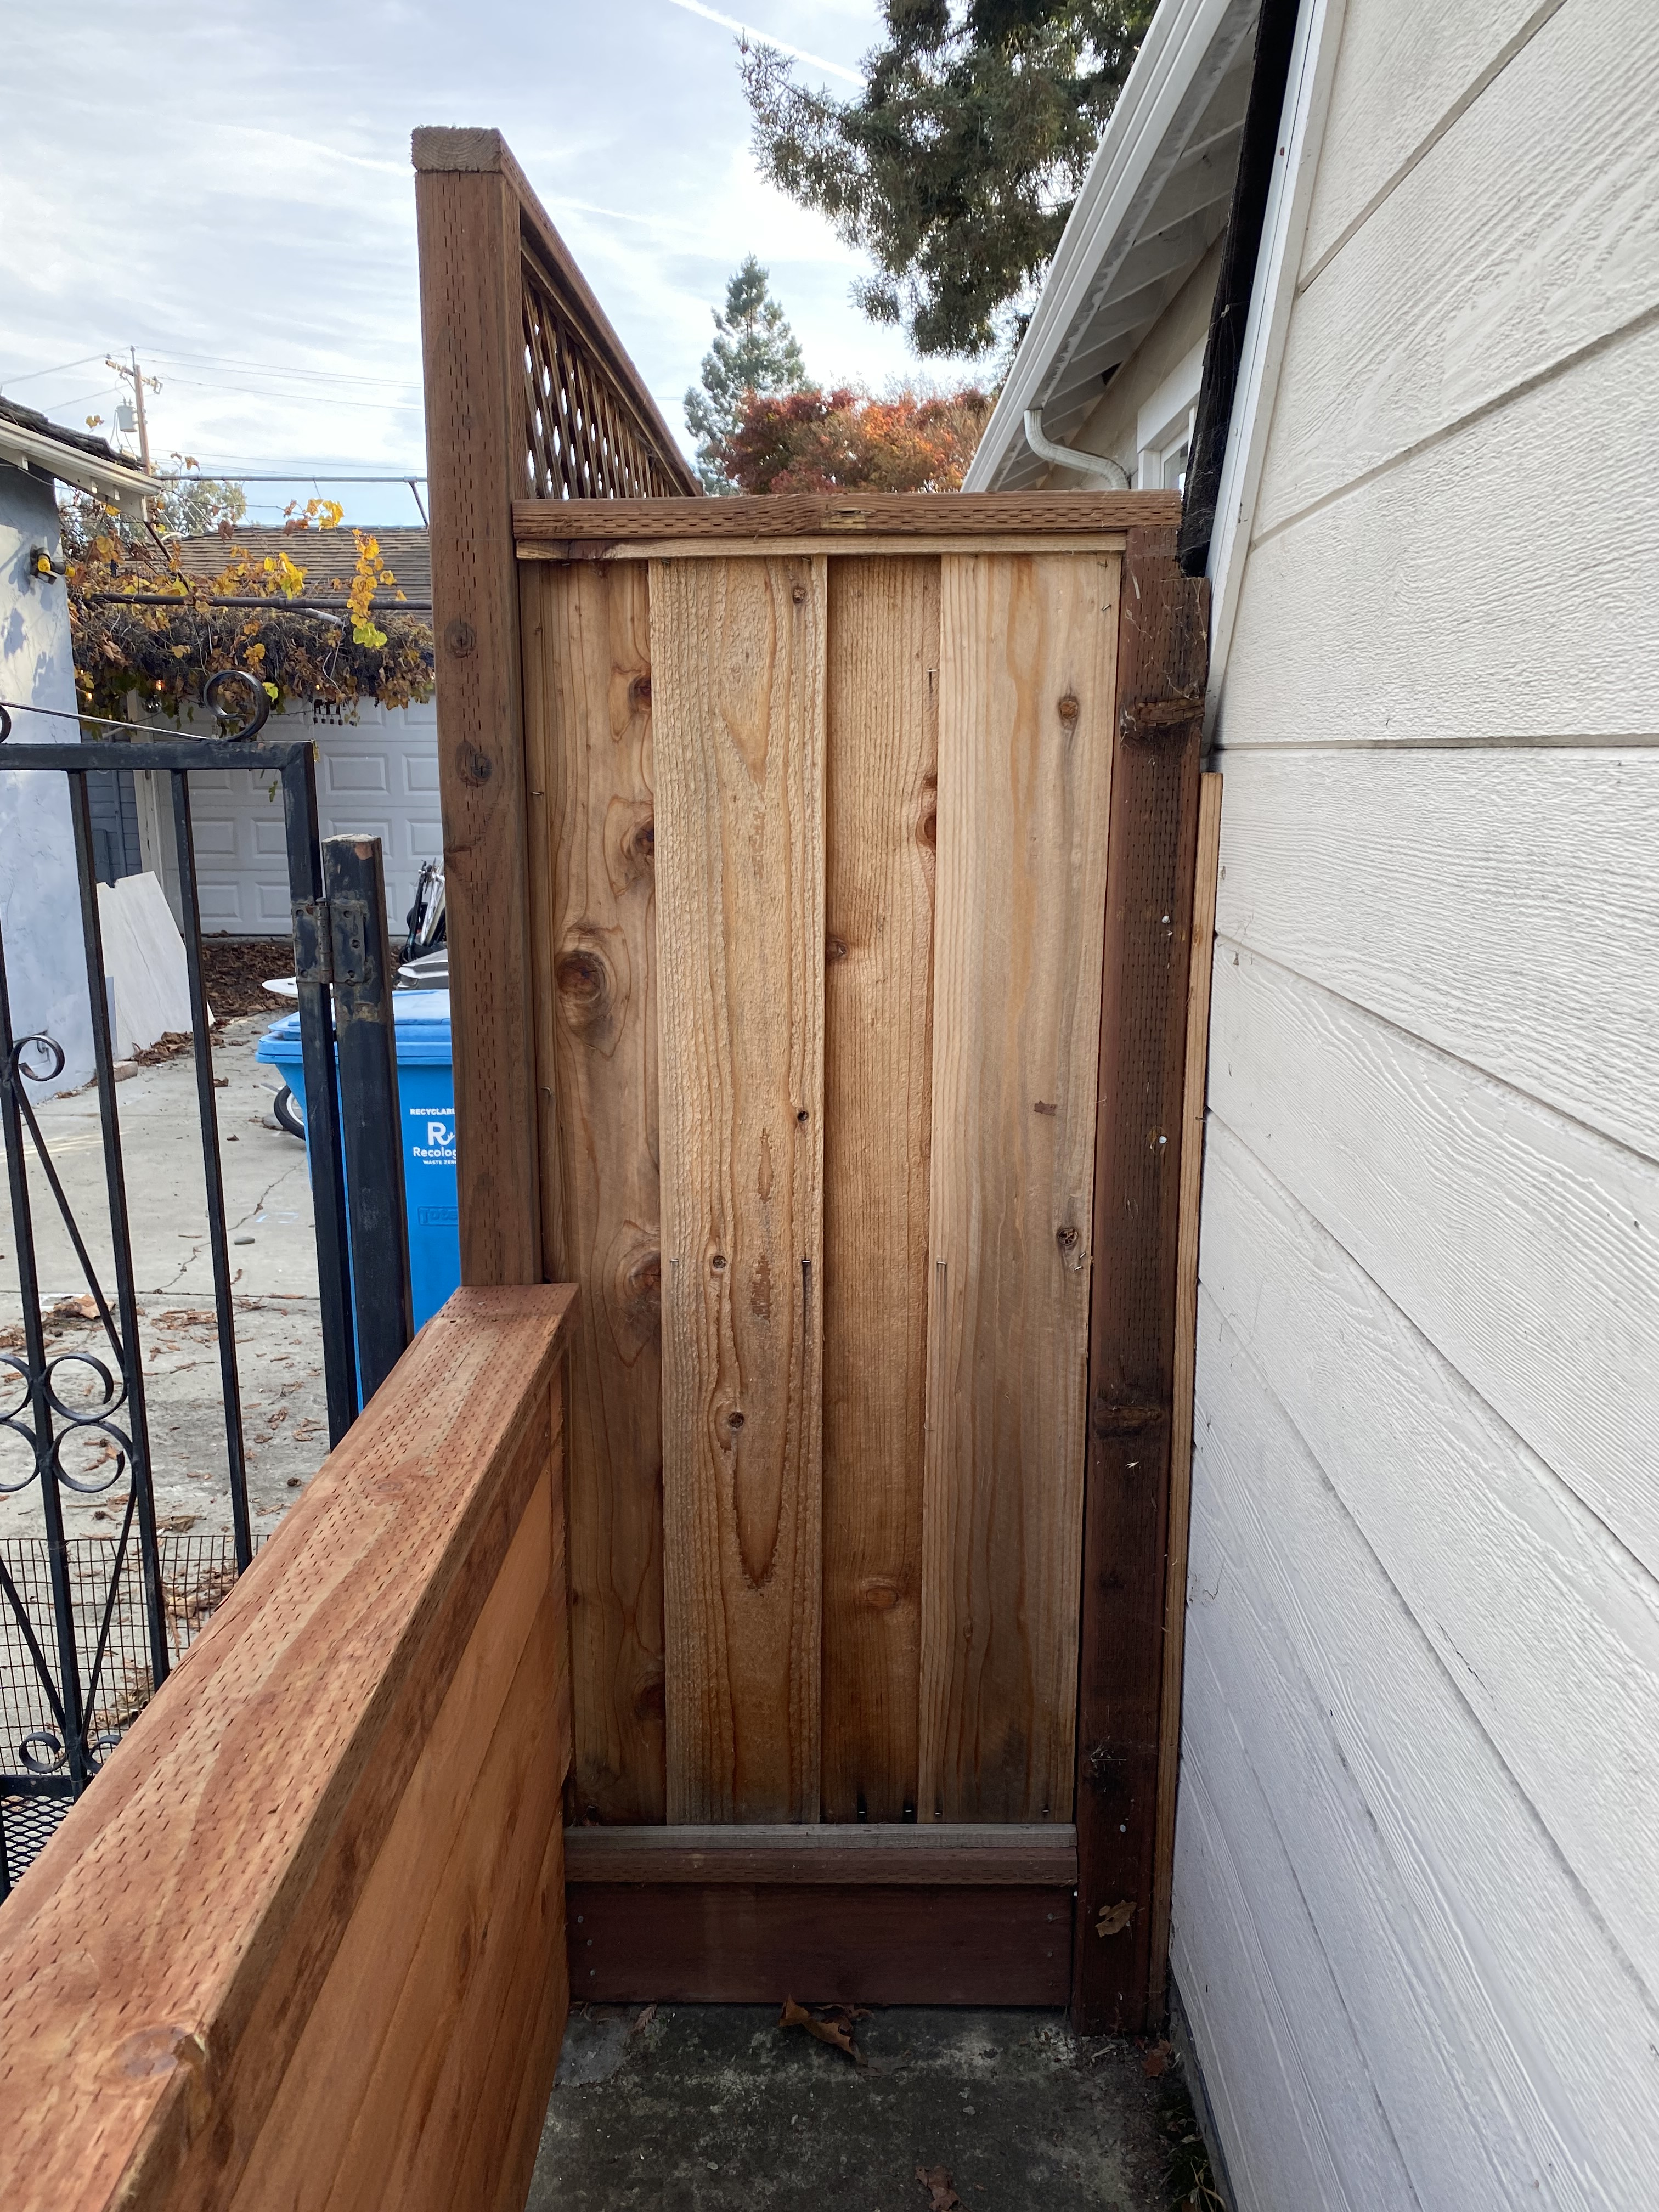
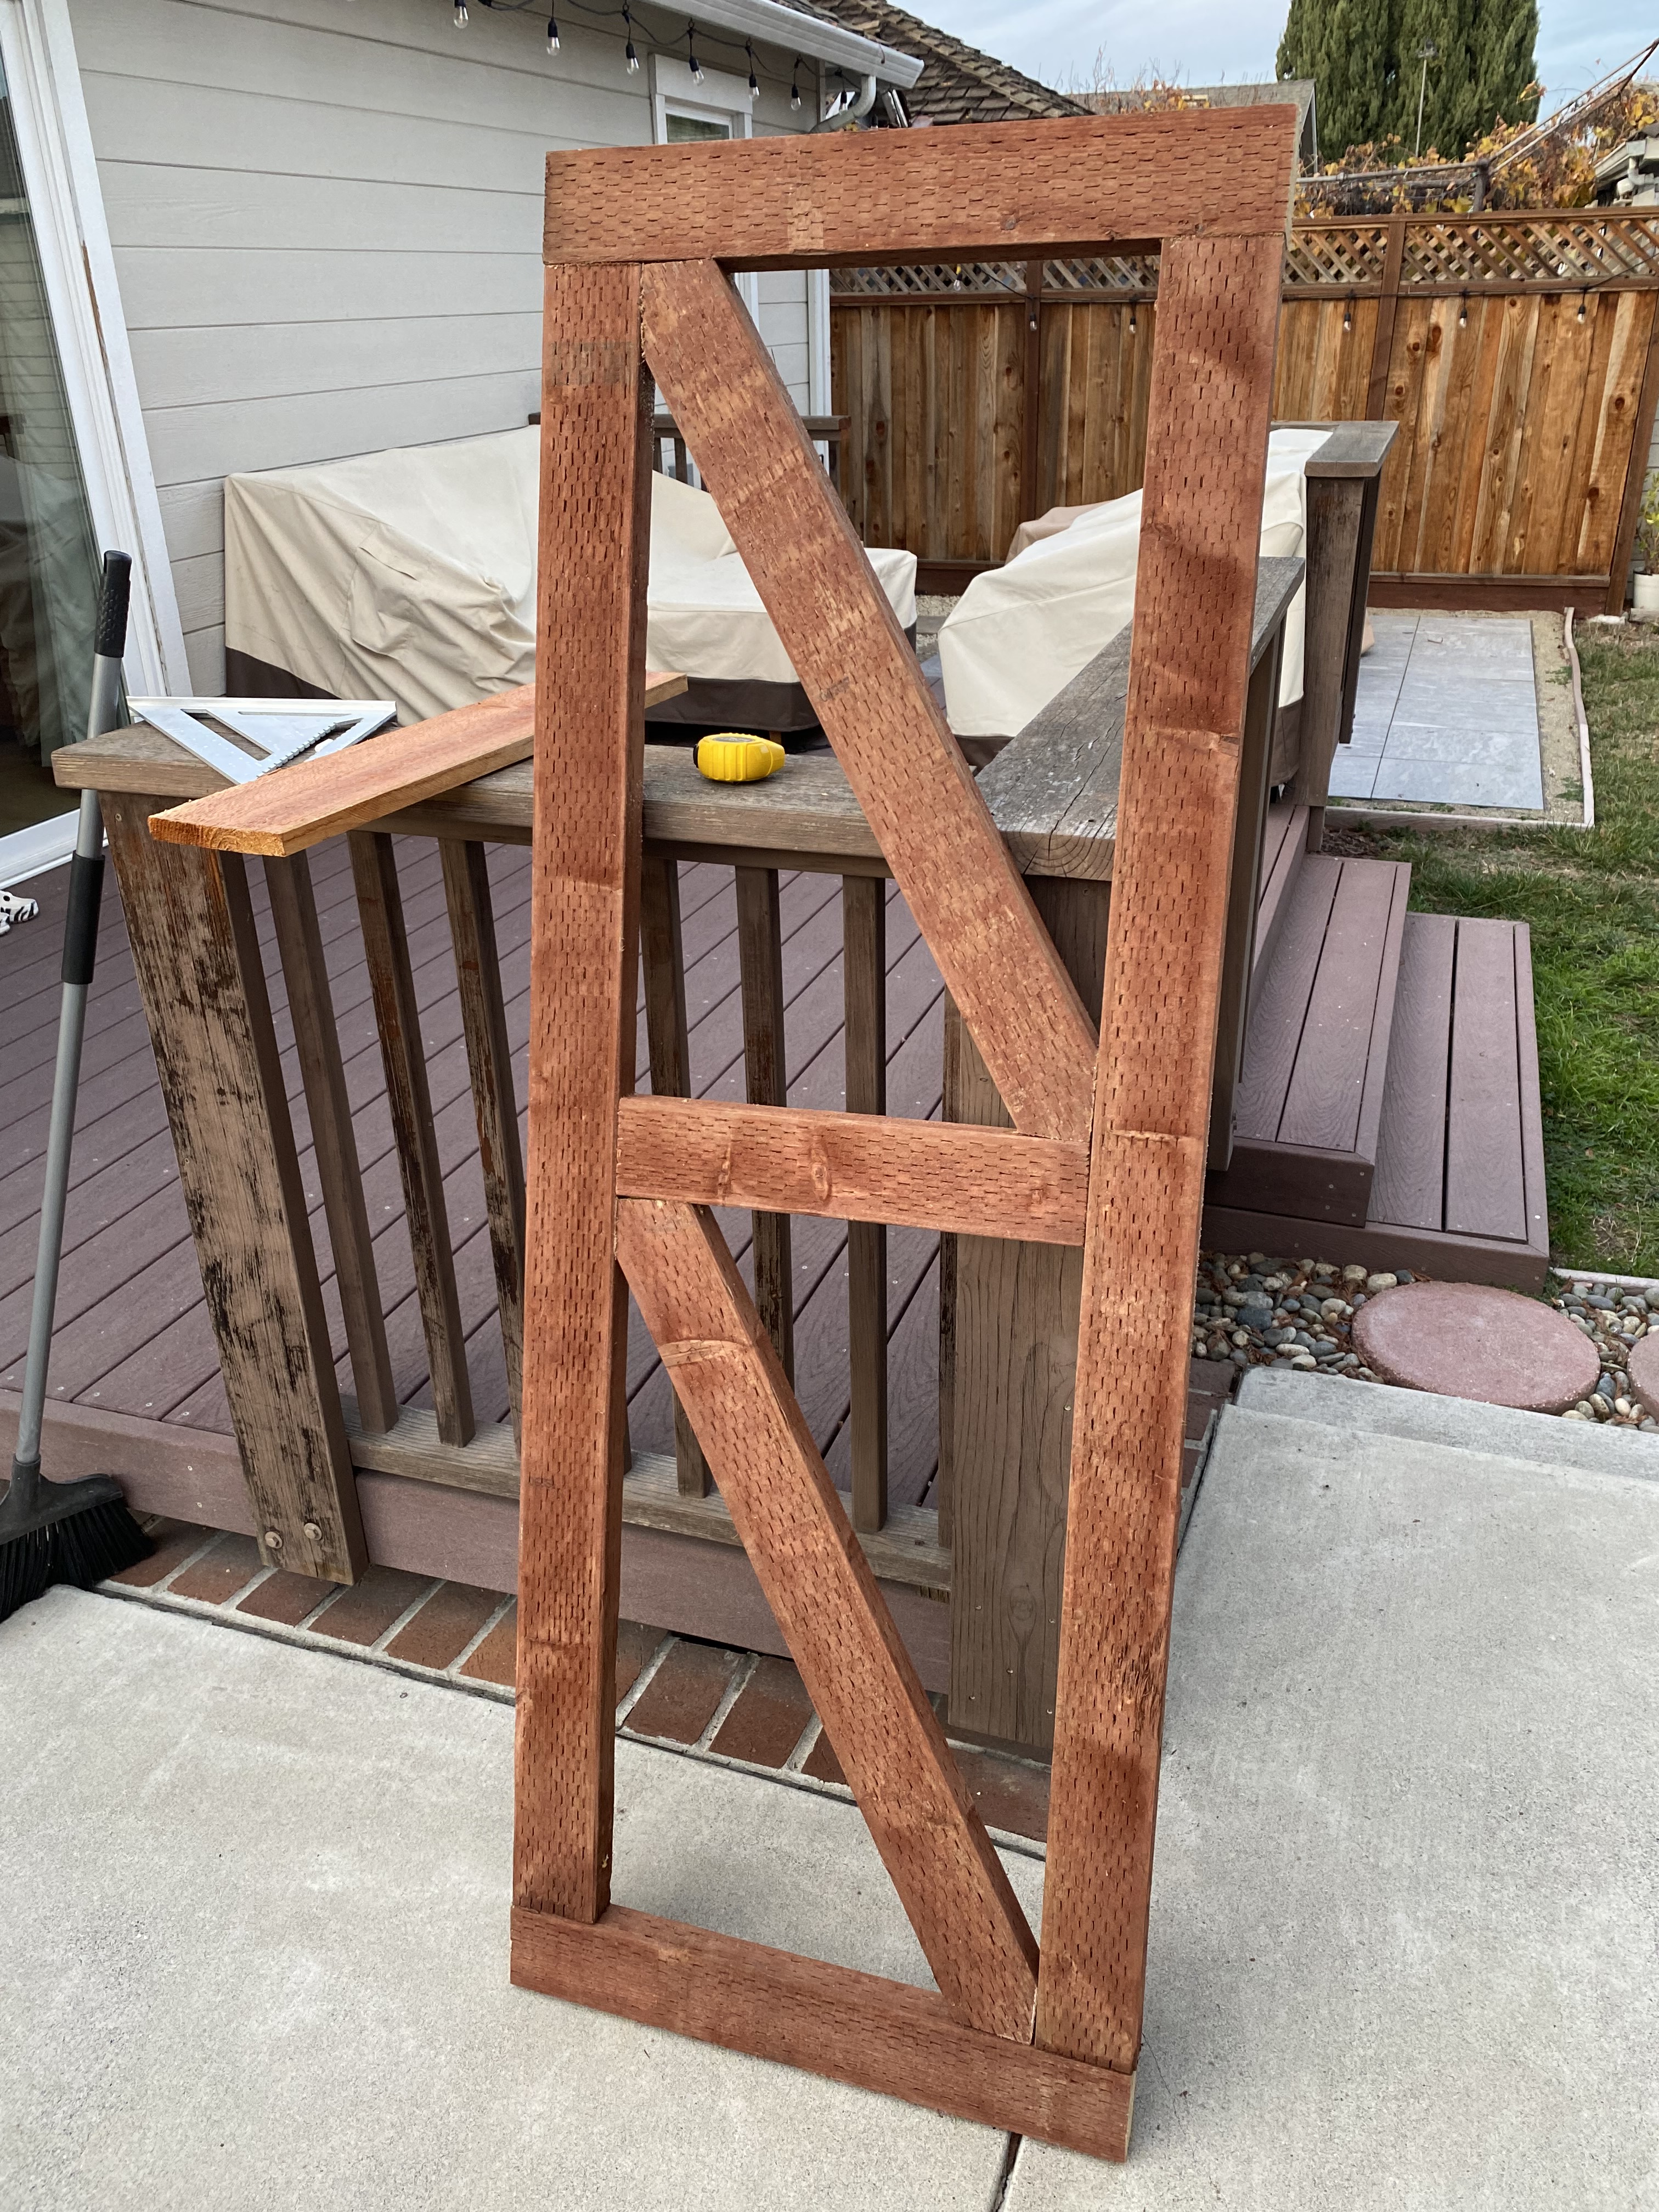
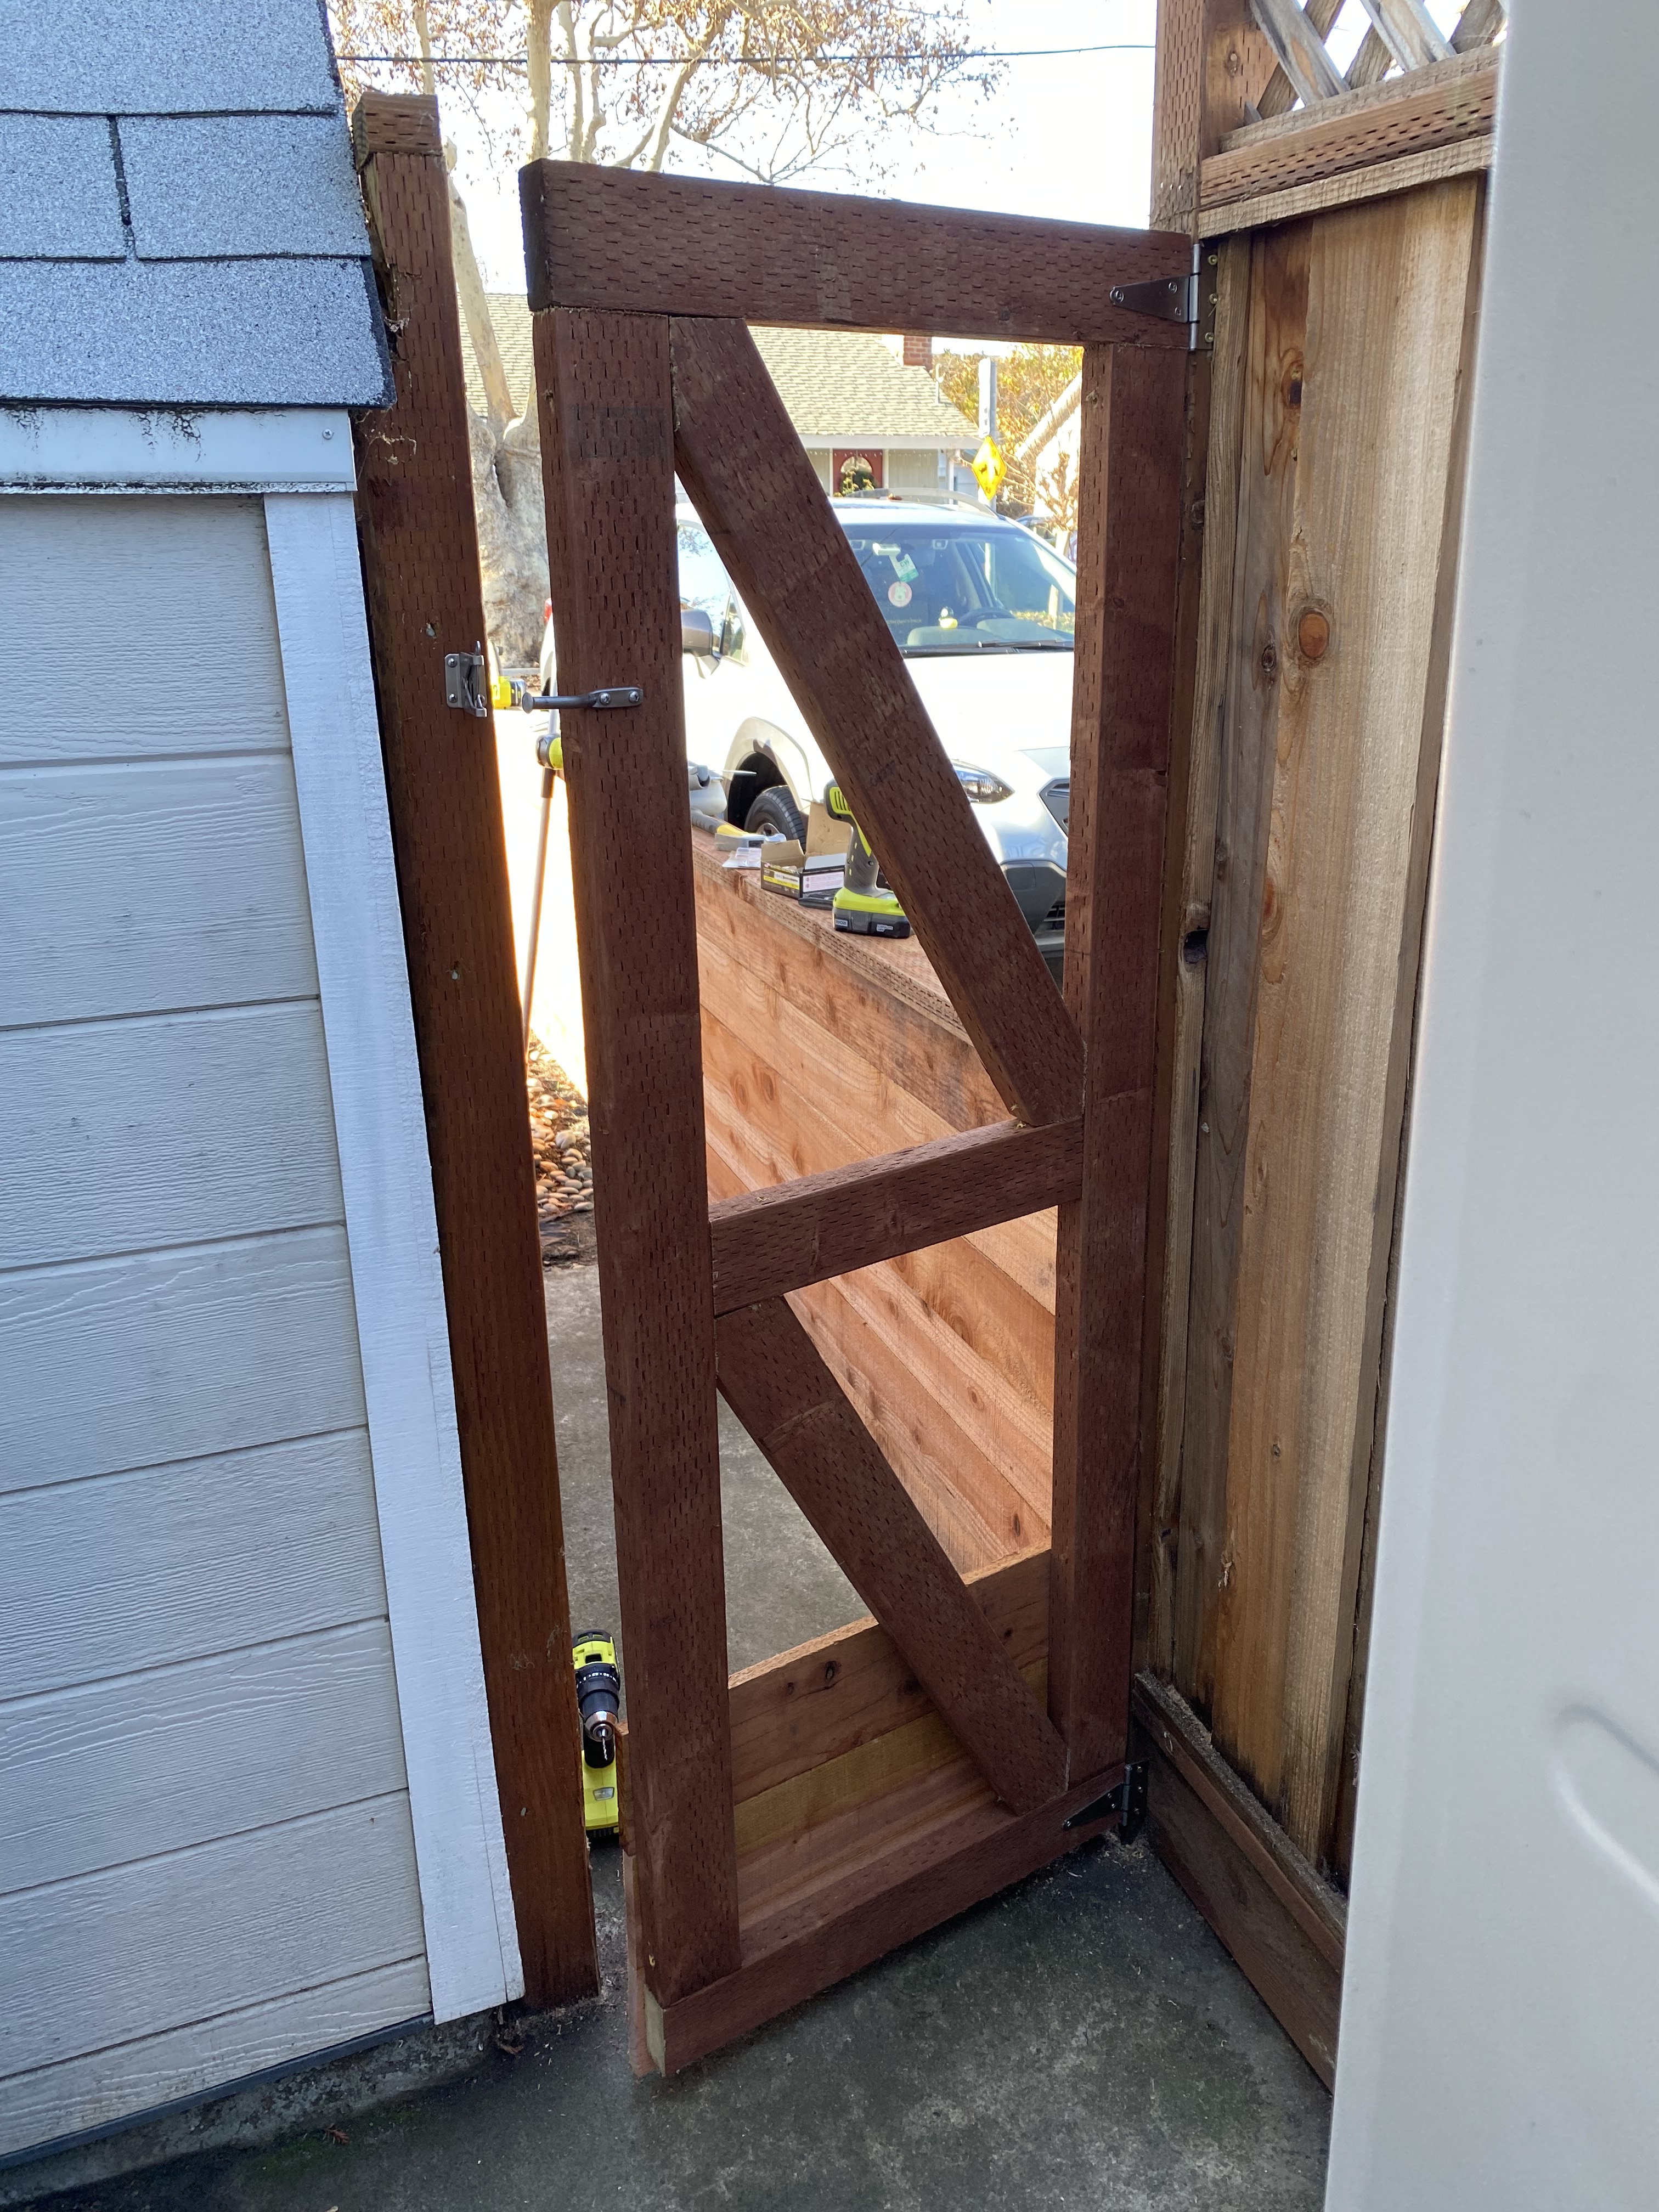
7. Fence Gate Frame
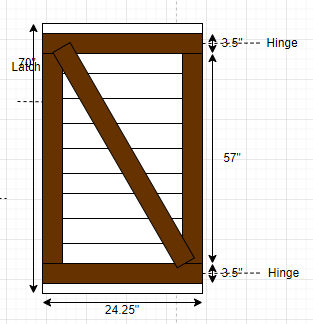
Project almost done. Just needed to demo the existing fence, then replace it with the gate. I designed the gate based on the existing fence post infrastructure.
The frame was supposed to be rectangular, 24.25″ across, with a single diagonal line through the middle. However, I made a mistake early on while cutting the wood and had to improvise.
8. Fence Demo
I then took apart the existing fence using a bunch of tools: hammer, circular saw, reciprocating saw, pliers.
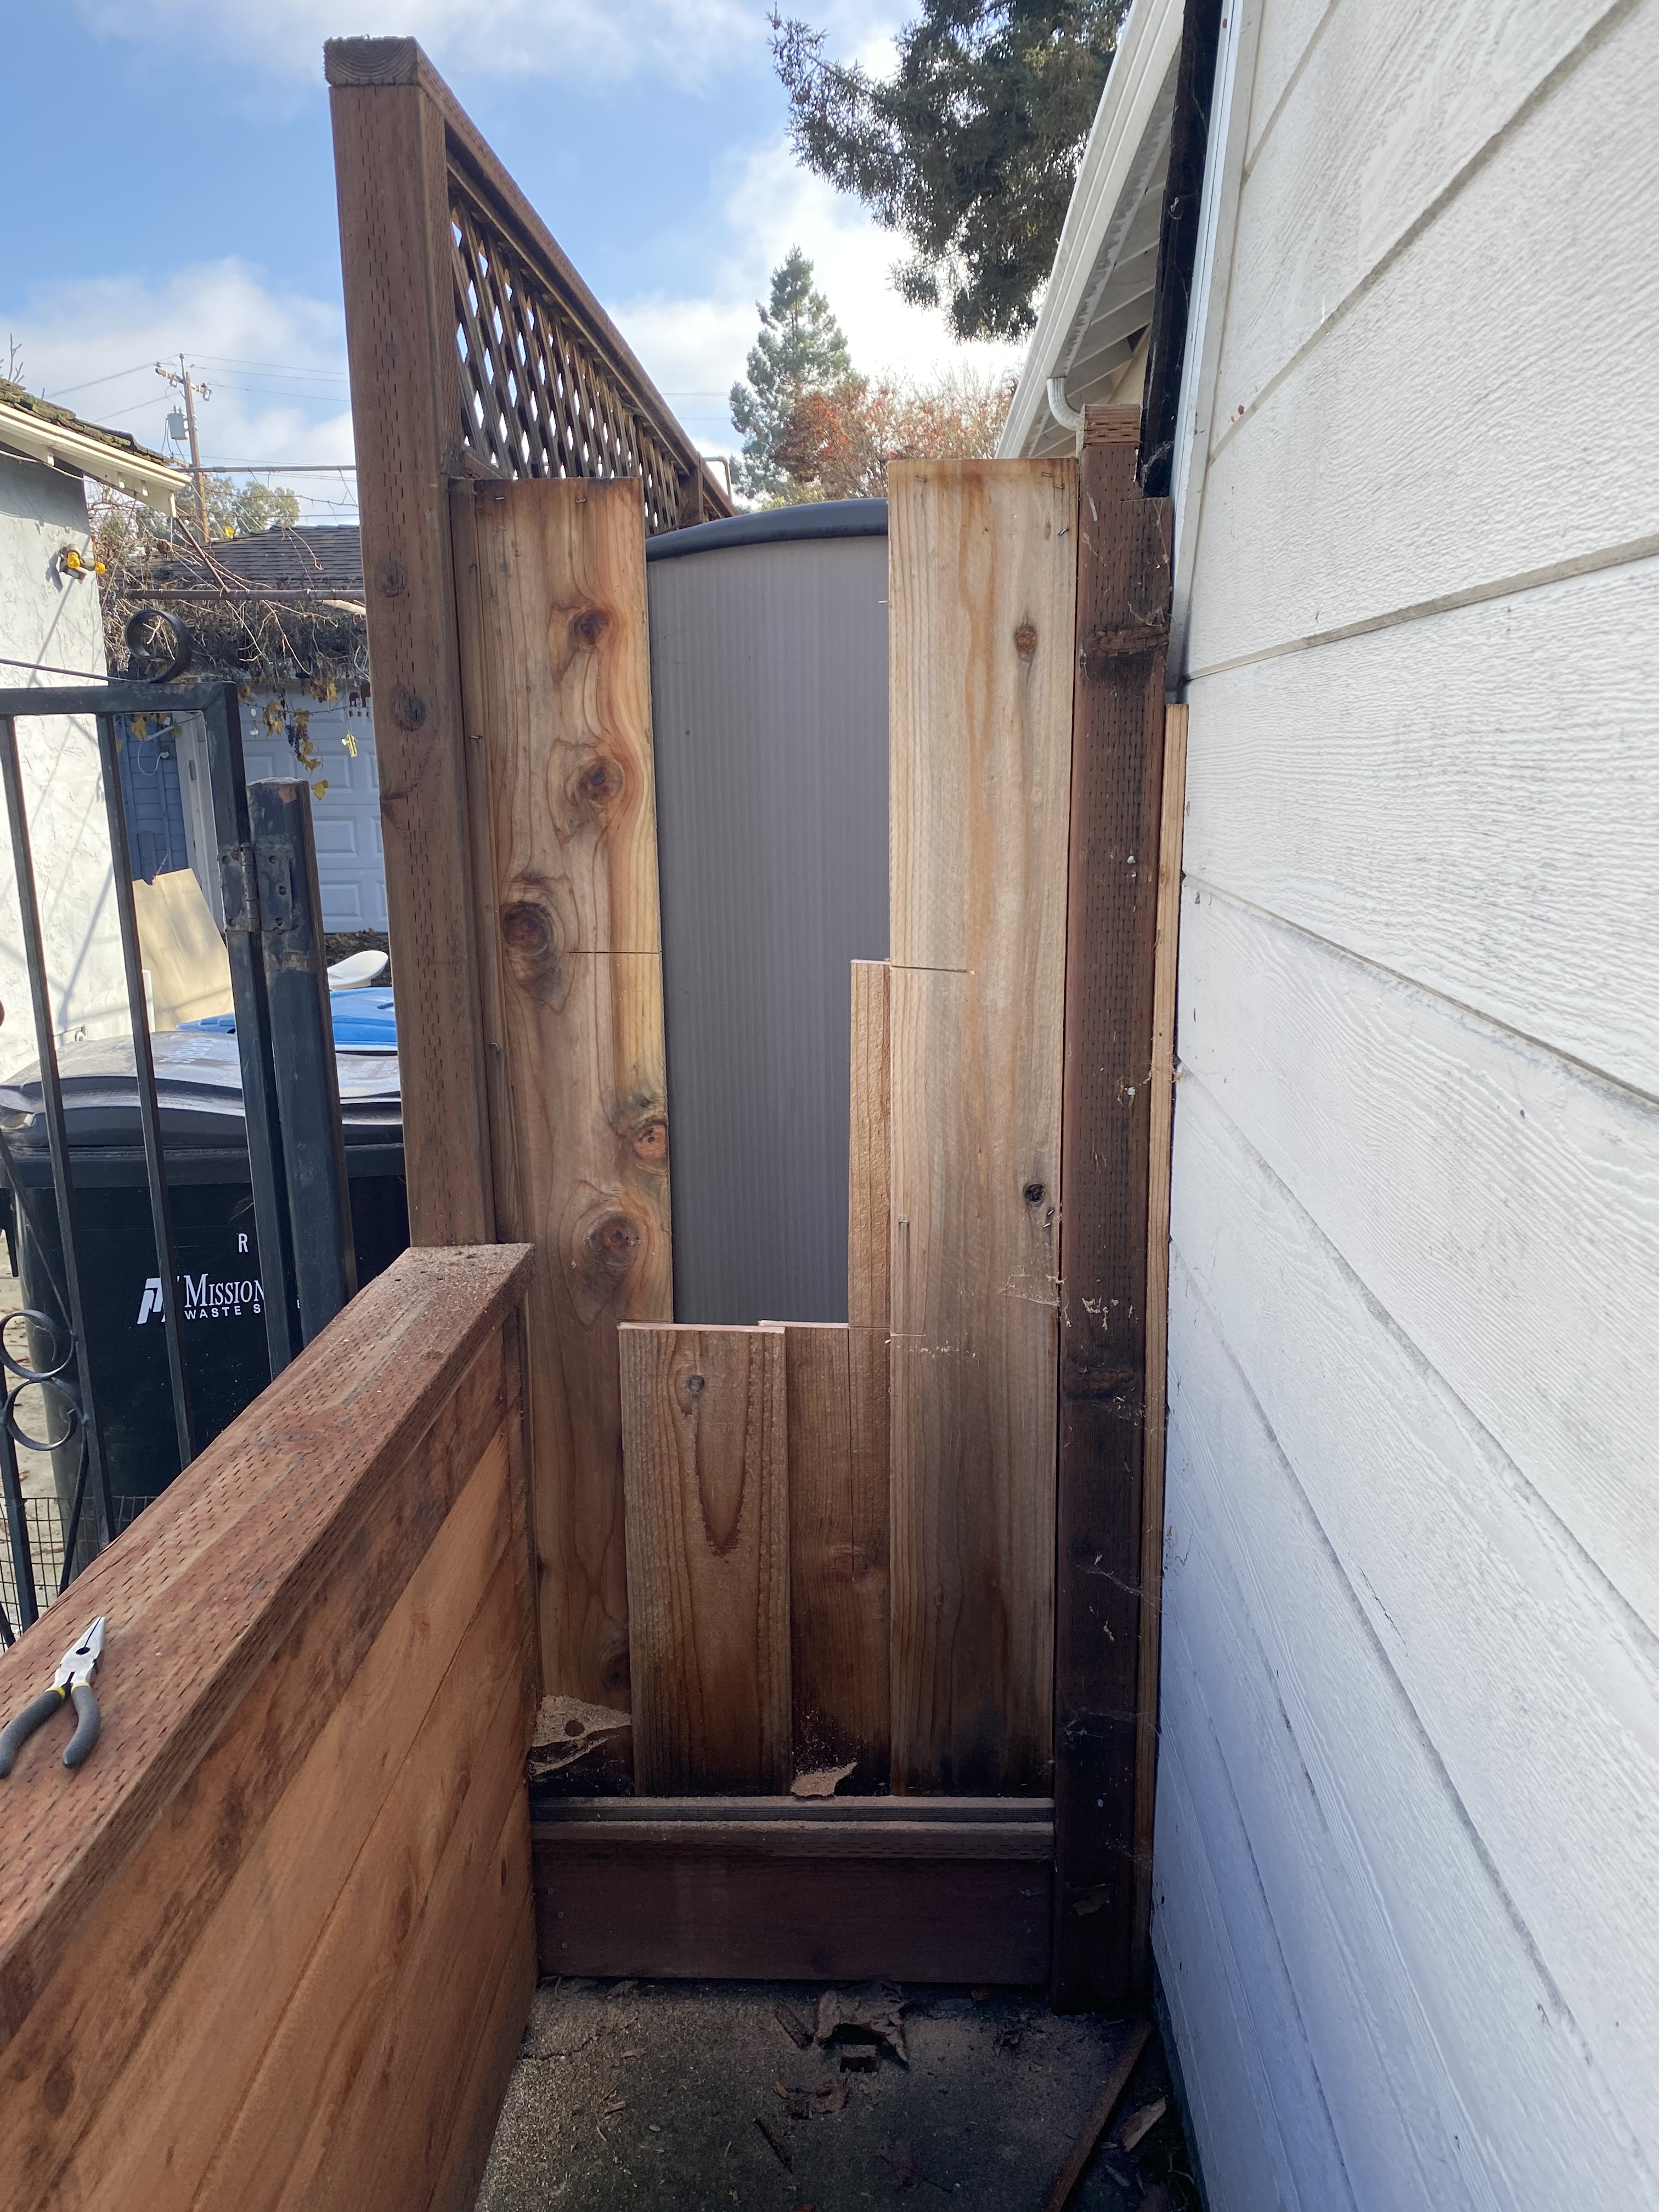
This process took over 3 hours as I tried my best to preserve all the wood. It was too hard, so I ended up going scorched earth and just demolished everything.
9. Mounting
I screwed the hardware onto the frame, then screwed the frame onto the fence post to double check that it would fit. I left a 0.75″ gap between the fence post and the frame to allow the gate to swing freely. I chose stainless steel hardware rather than galvanized steel for longevity against corrosion and rust.
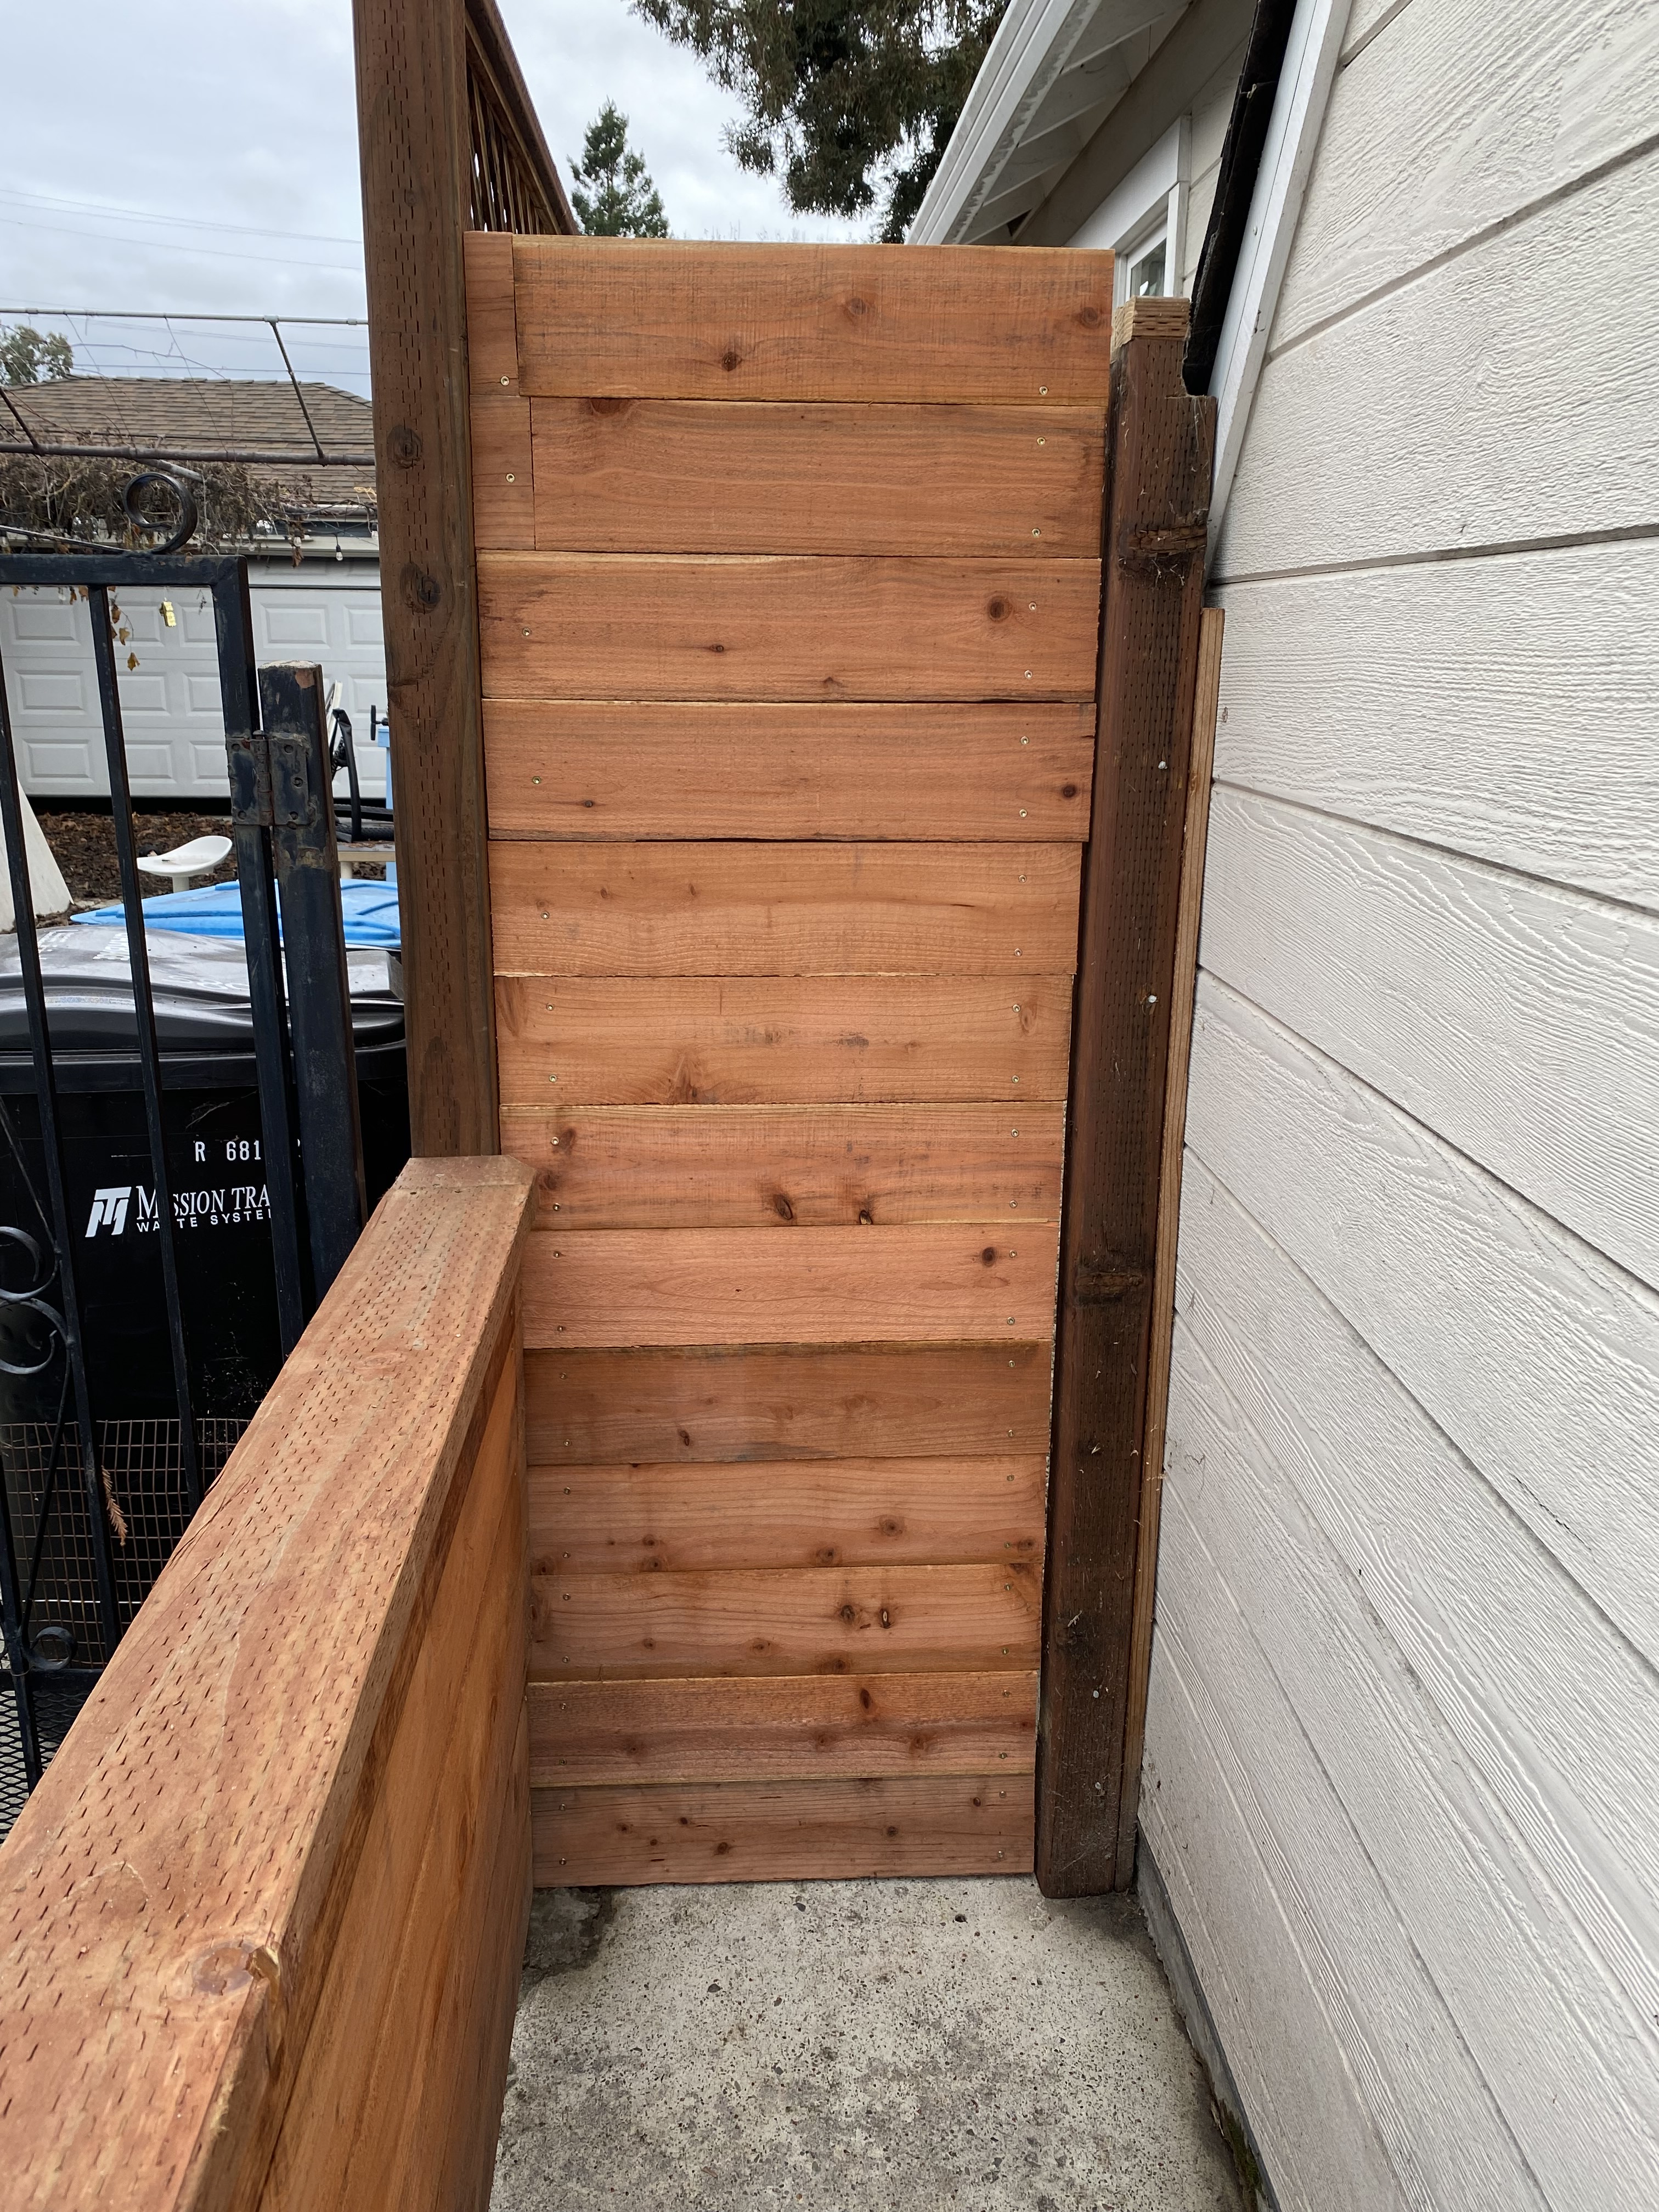
10. Fence Boards
I used a circular saw to cut the rest of the fence boards into 24.25″ pieces, drilled pilot holes into them, then used the impact driver to screw the boards in. I ran out of fence boards, thus had to improvise on the last two boards on the top. Note the left side of the two fence boards are two separate pieces of wood.

11. Stepping Stones
Prices for porcelain pavers have drastically dropped in recent months. I happily bought 16″x16″ pavers from The Home Depot, cleared the river pebbles, leveled the ground, and placed in the pavers.

I like porcelain pavers because it is completely non porous and virtually maintenance free. It is stain resistant and can easily washed with a pressure washer.
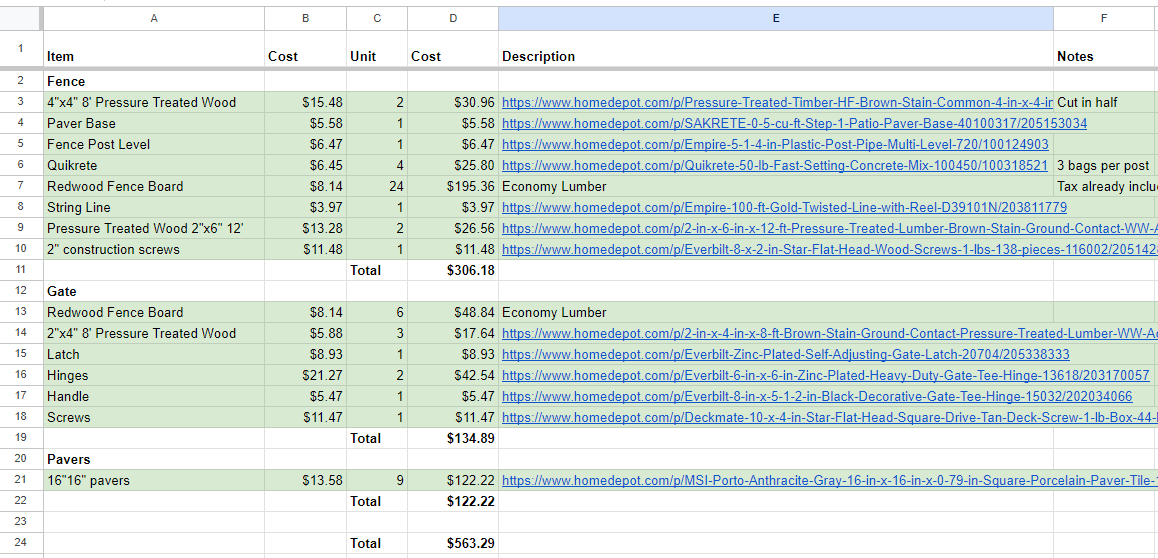
Project Costs
I think of the project as three distinct components: the fence, the gate, and the walking path. Together, everything only cost $563.29. Here’s a full breakdown.

3 thoughts on “Side Yard Entrance”