I recently built a patio in the back yard. The total out-of-pocket cost of the project was $2,652.65. Here was the entire process from start to finish, along with cost breakdown.

1. The reason to build a patio
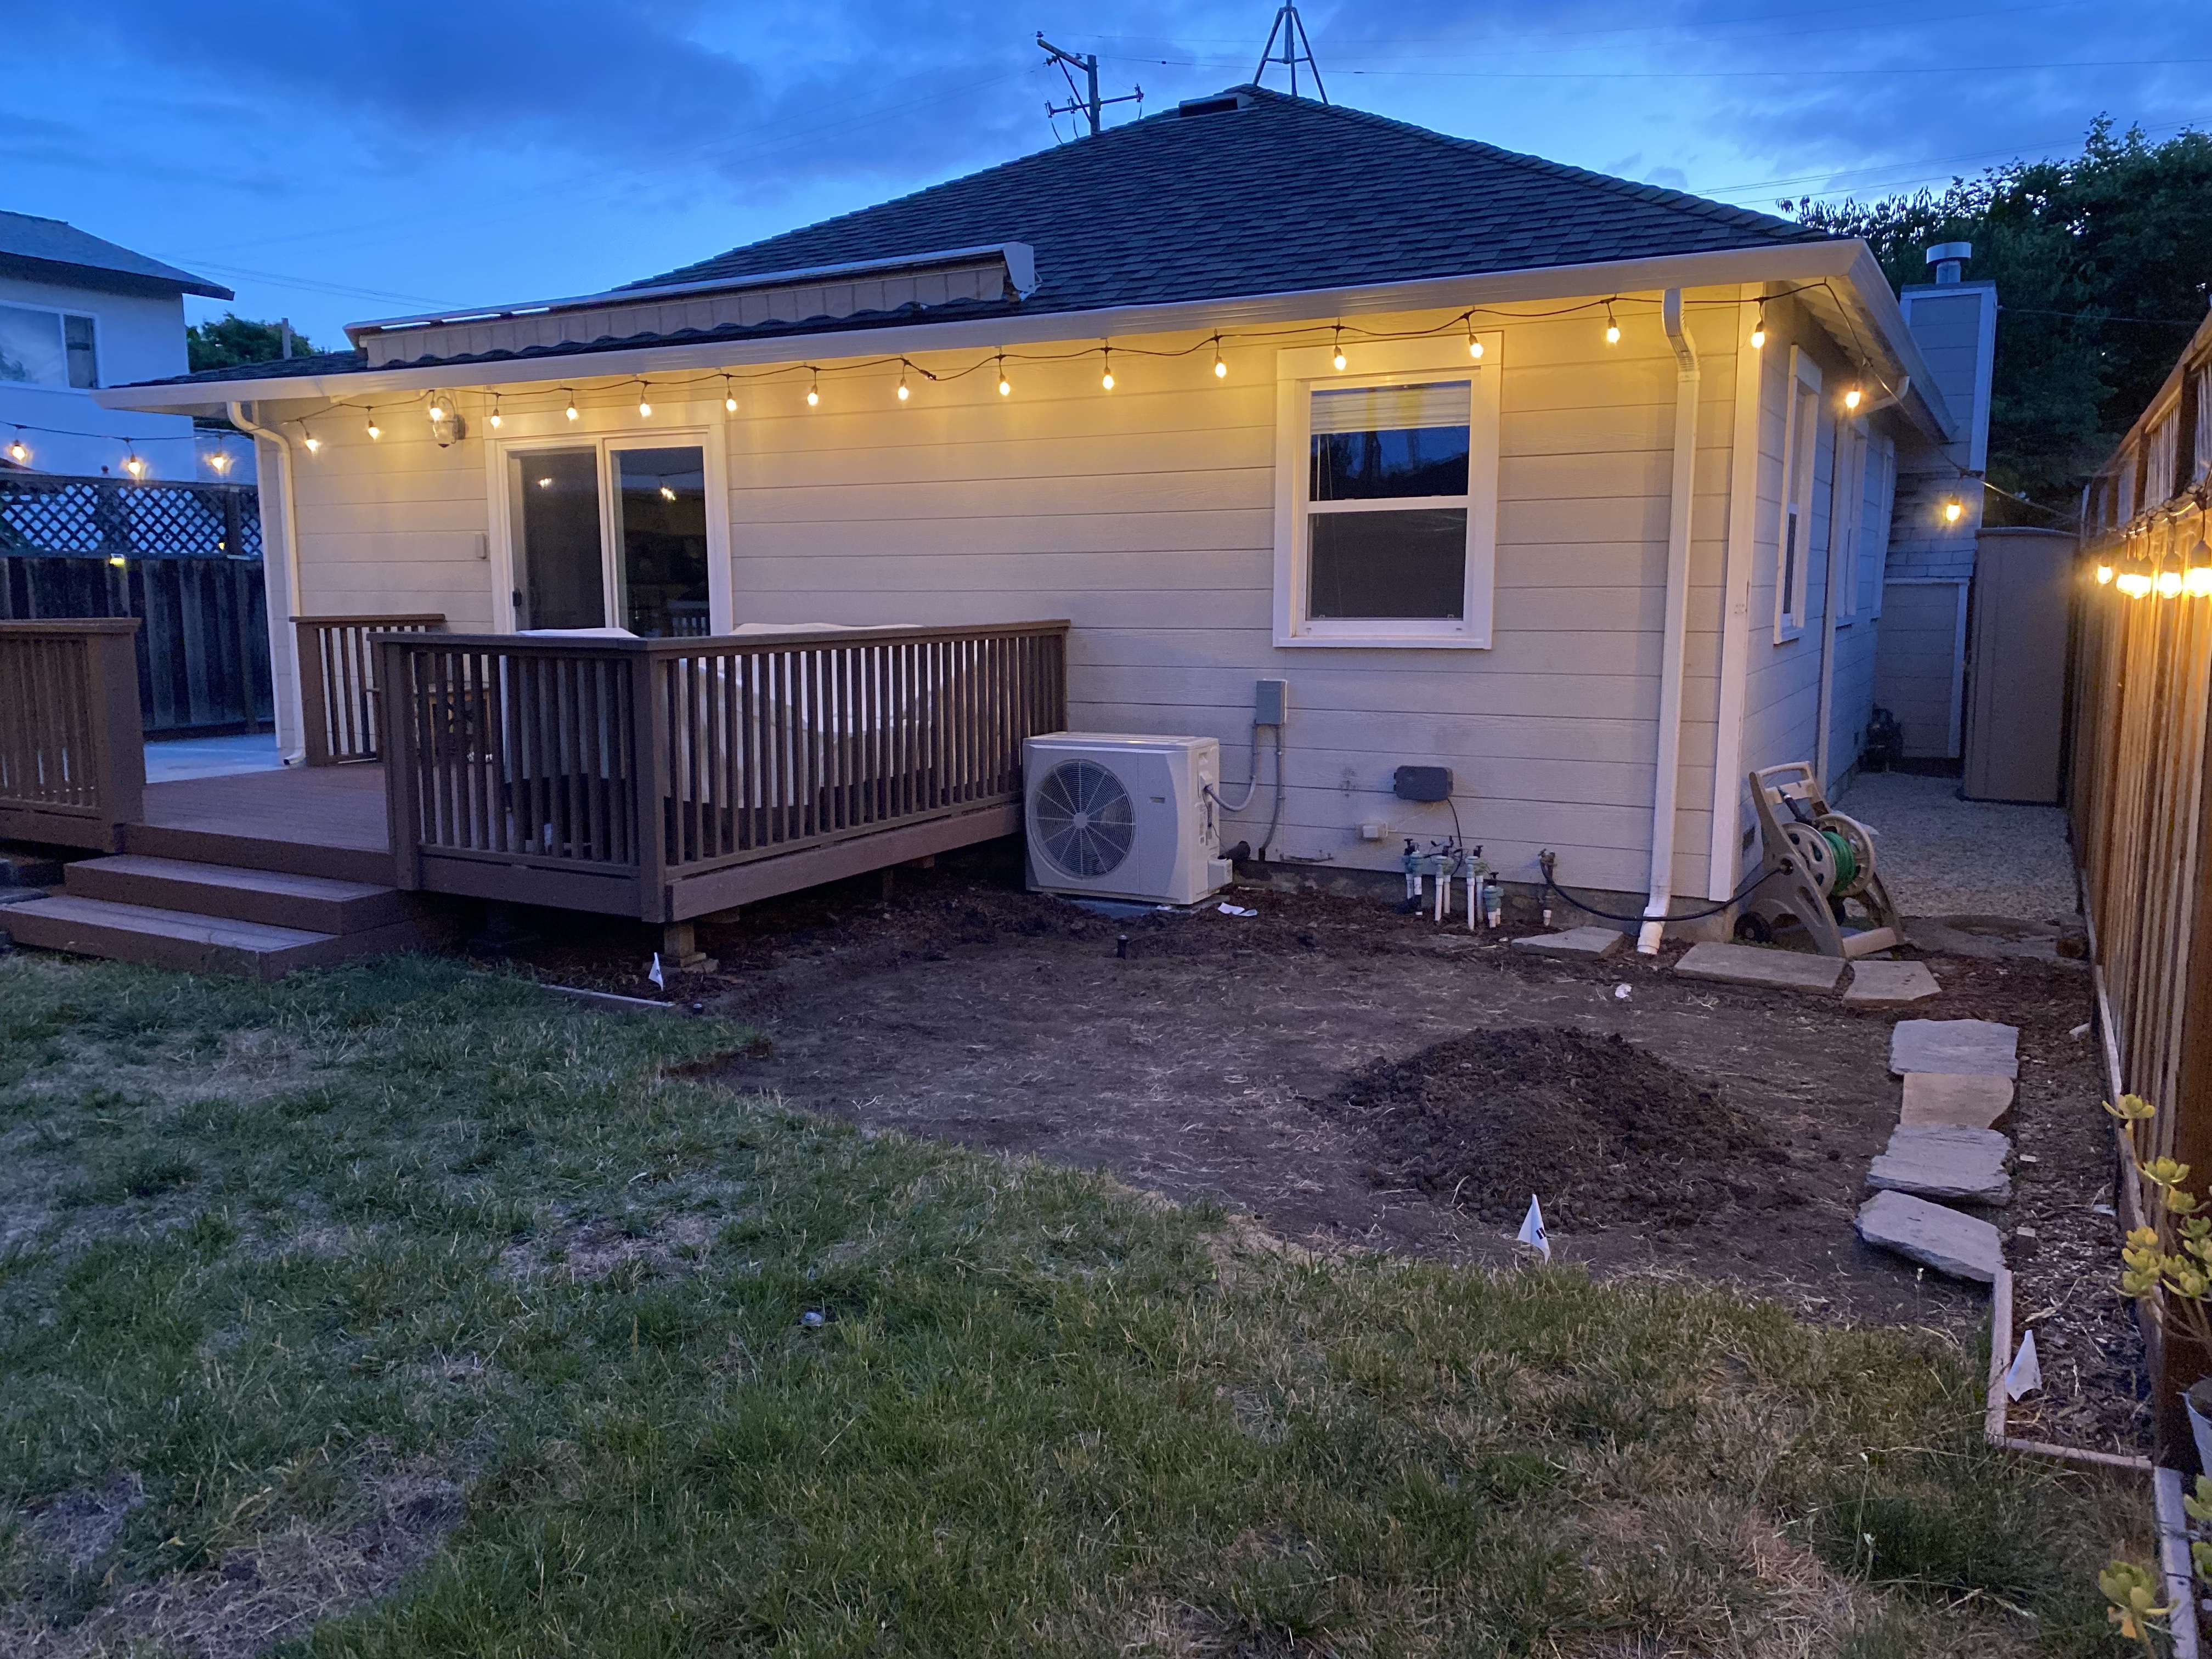
Other than the deck, most of the backyard was grass. We enjoy indoor-outdoor living, but the deck was not quite large enough to do all the things we wanted to do. Patio furniture took up most of the deck so we wanted to extend the space to add at least one more destination spot.
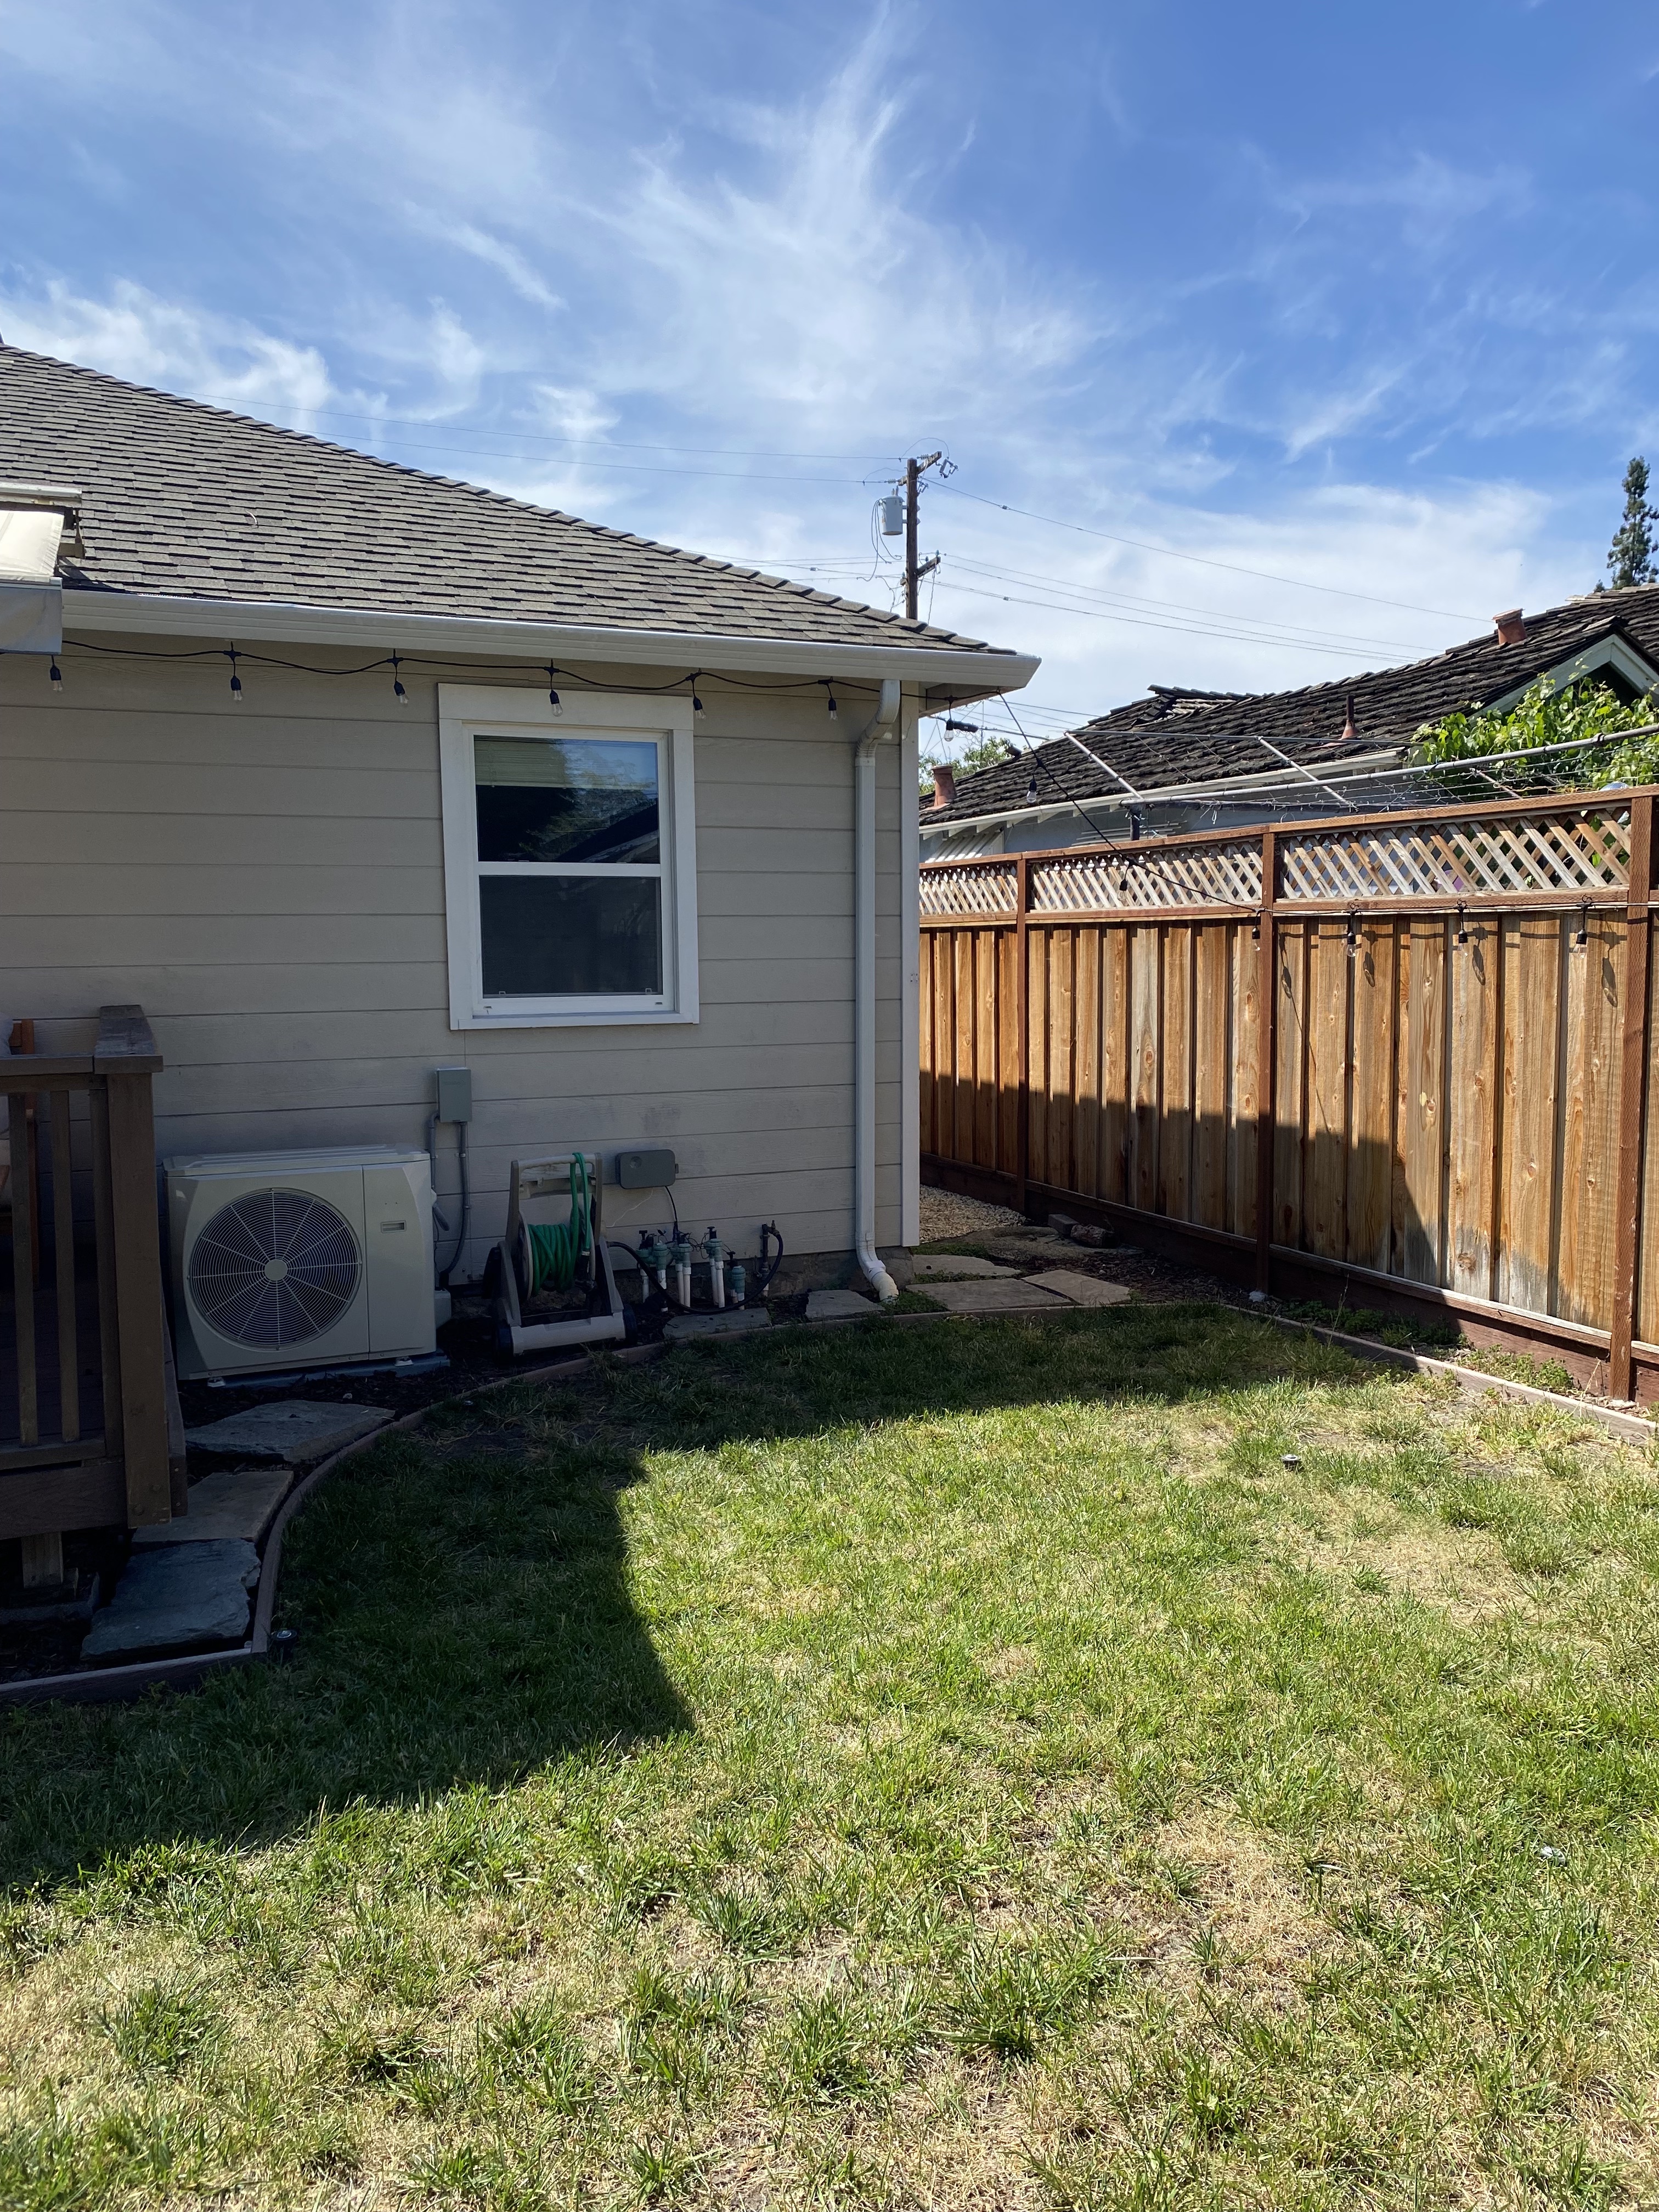
The area adjacent to the deck was never used. It was also hard to access because there were no steps leading down to the grass. We thought the area would be perfect to convert to a patio, then add steps that led down from the deck.
I wanted everything to be DIY. For me, the fun about doing things ourselves was that we (1) learn how things get built, (2) exercise, and (3) save money.
I socialized this grand plan to Supervisor Bonita™ who per usual forced me to create a design so she could visualize and approve my vision.
2. Design
I measured our yard and put it down on paper.
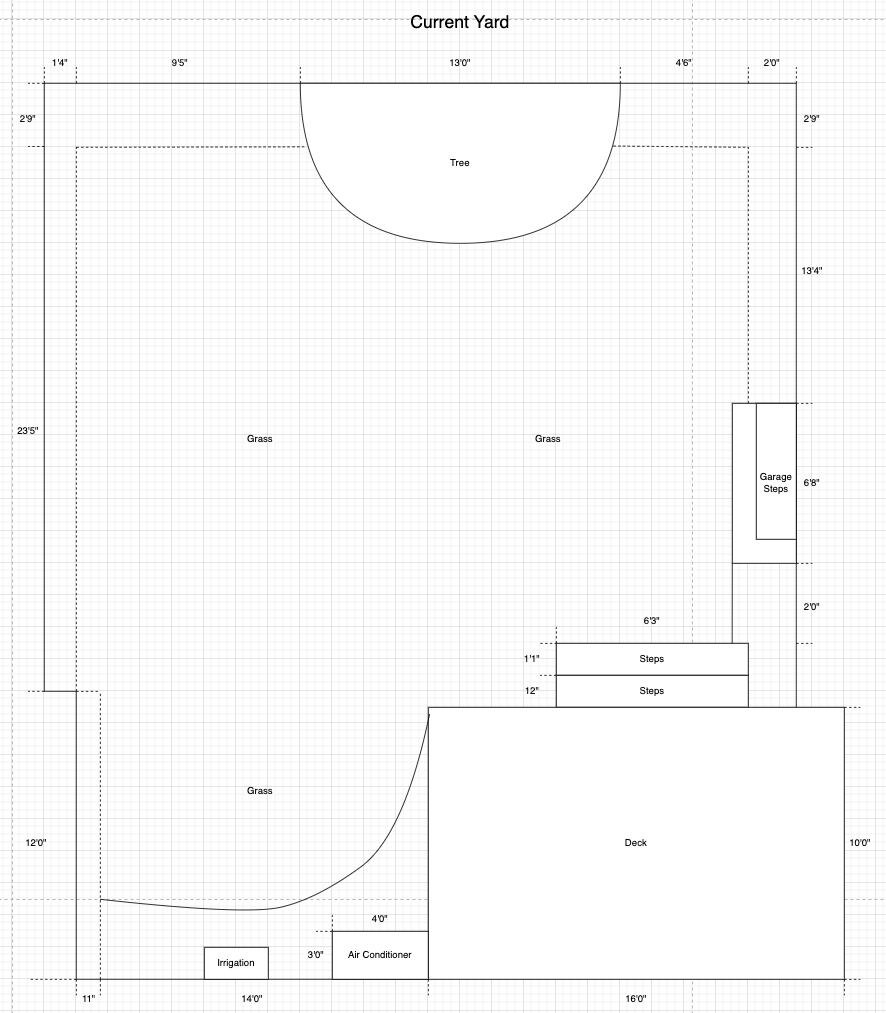
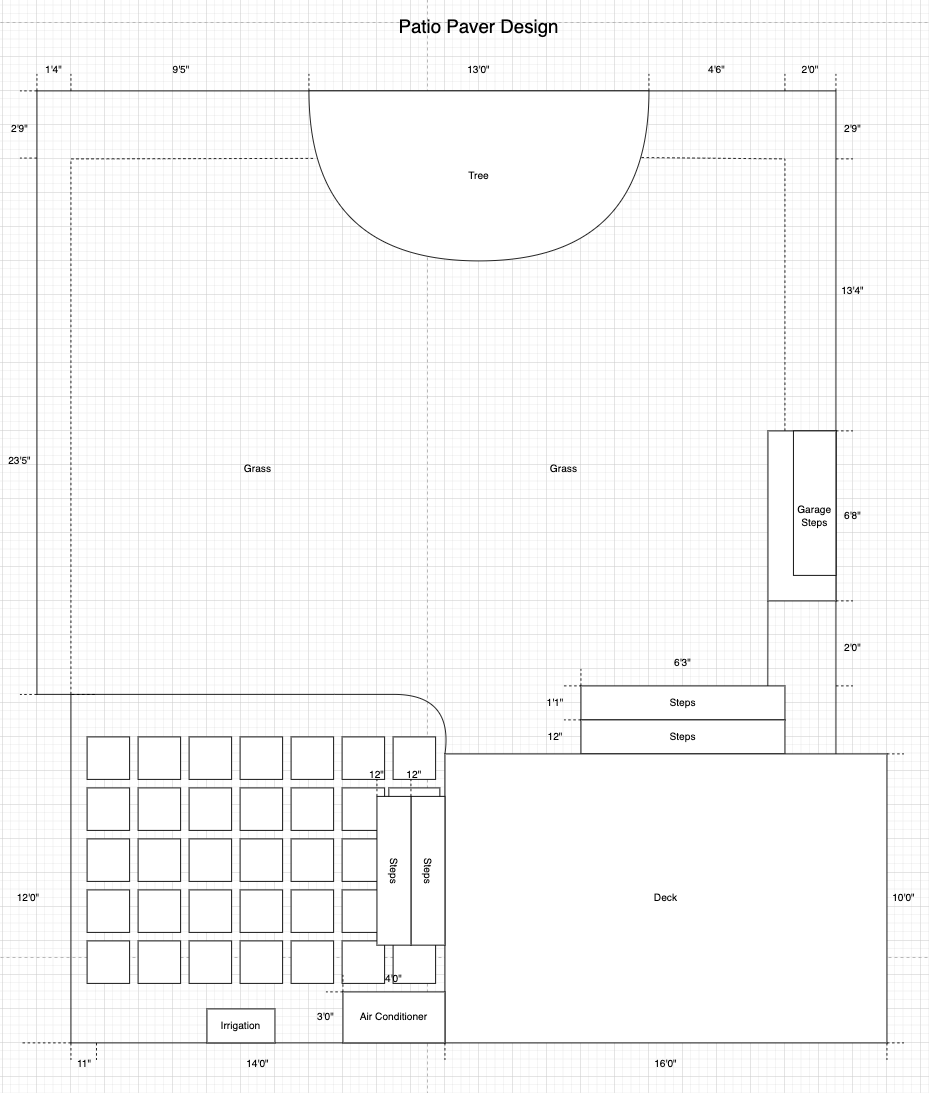
Then I created the design to visualize the before/after changes.
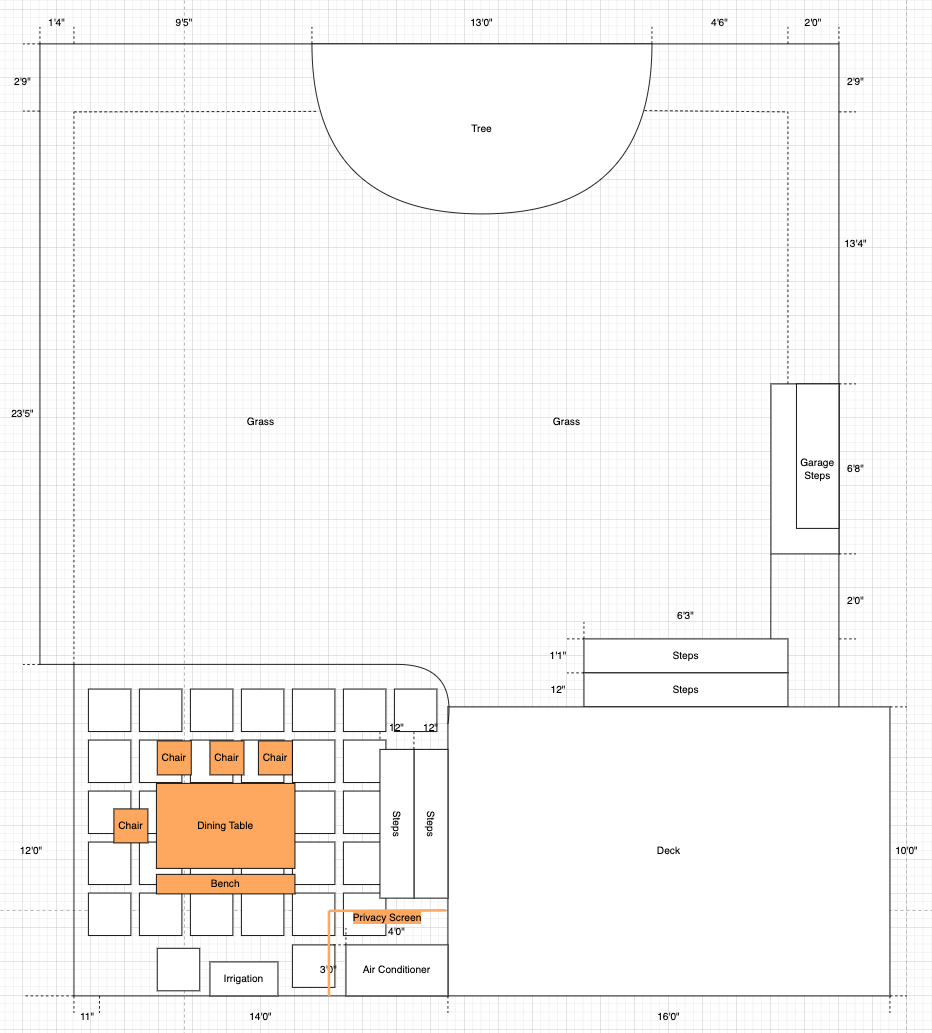
I also staged some furniture and a privacy screen that would hide the air conditioning condenser.
3. Removing the grass and dirt
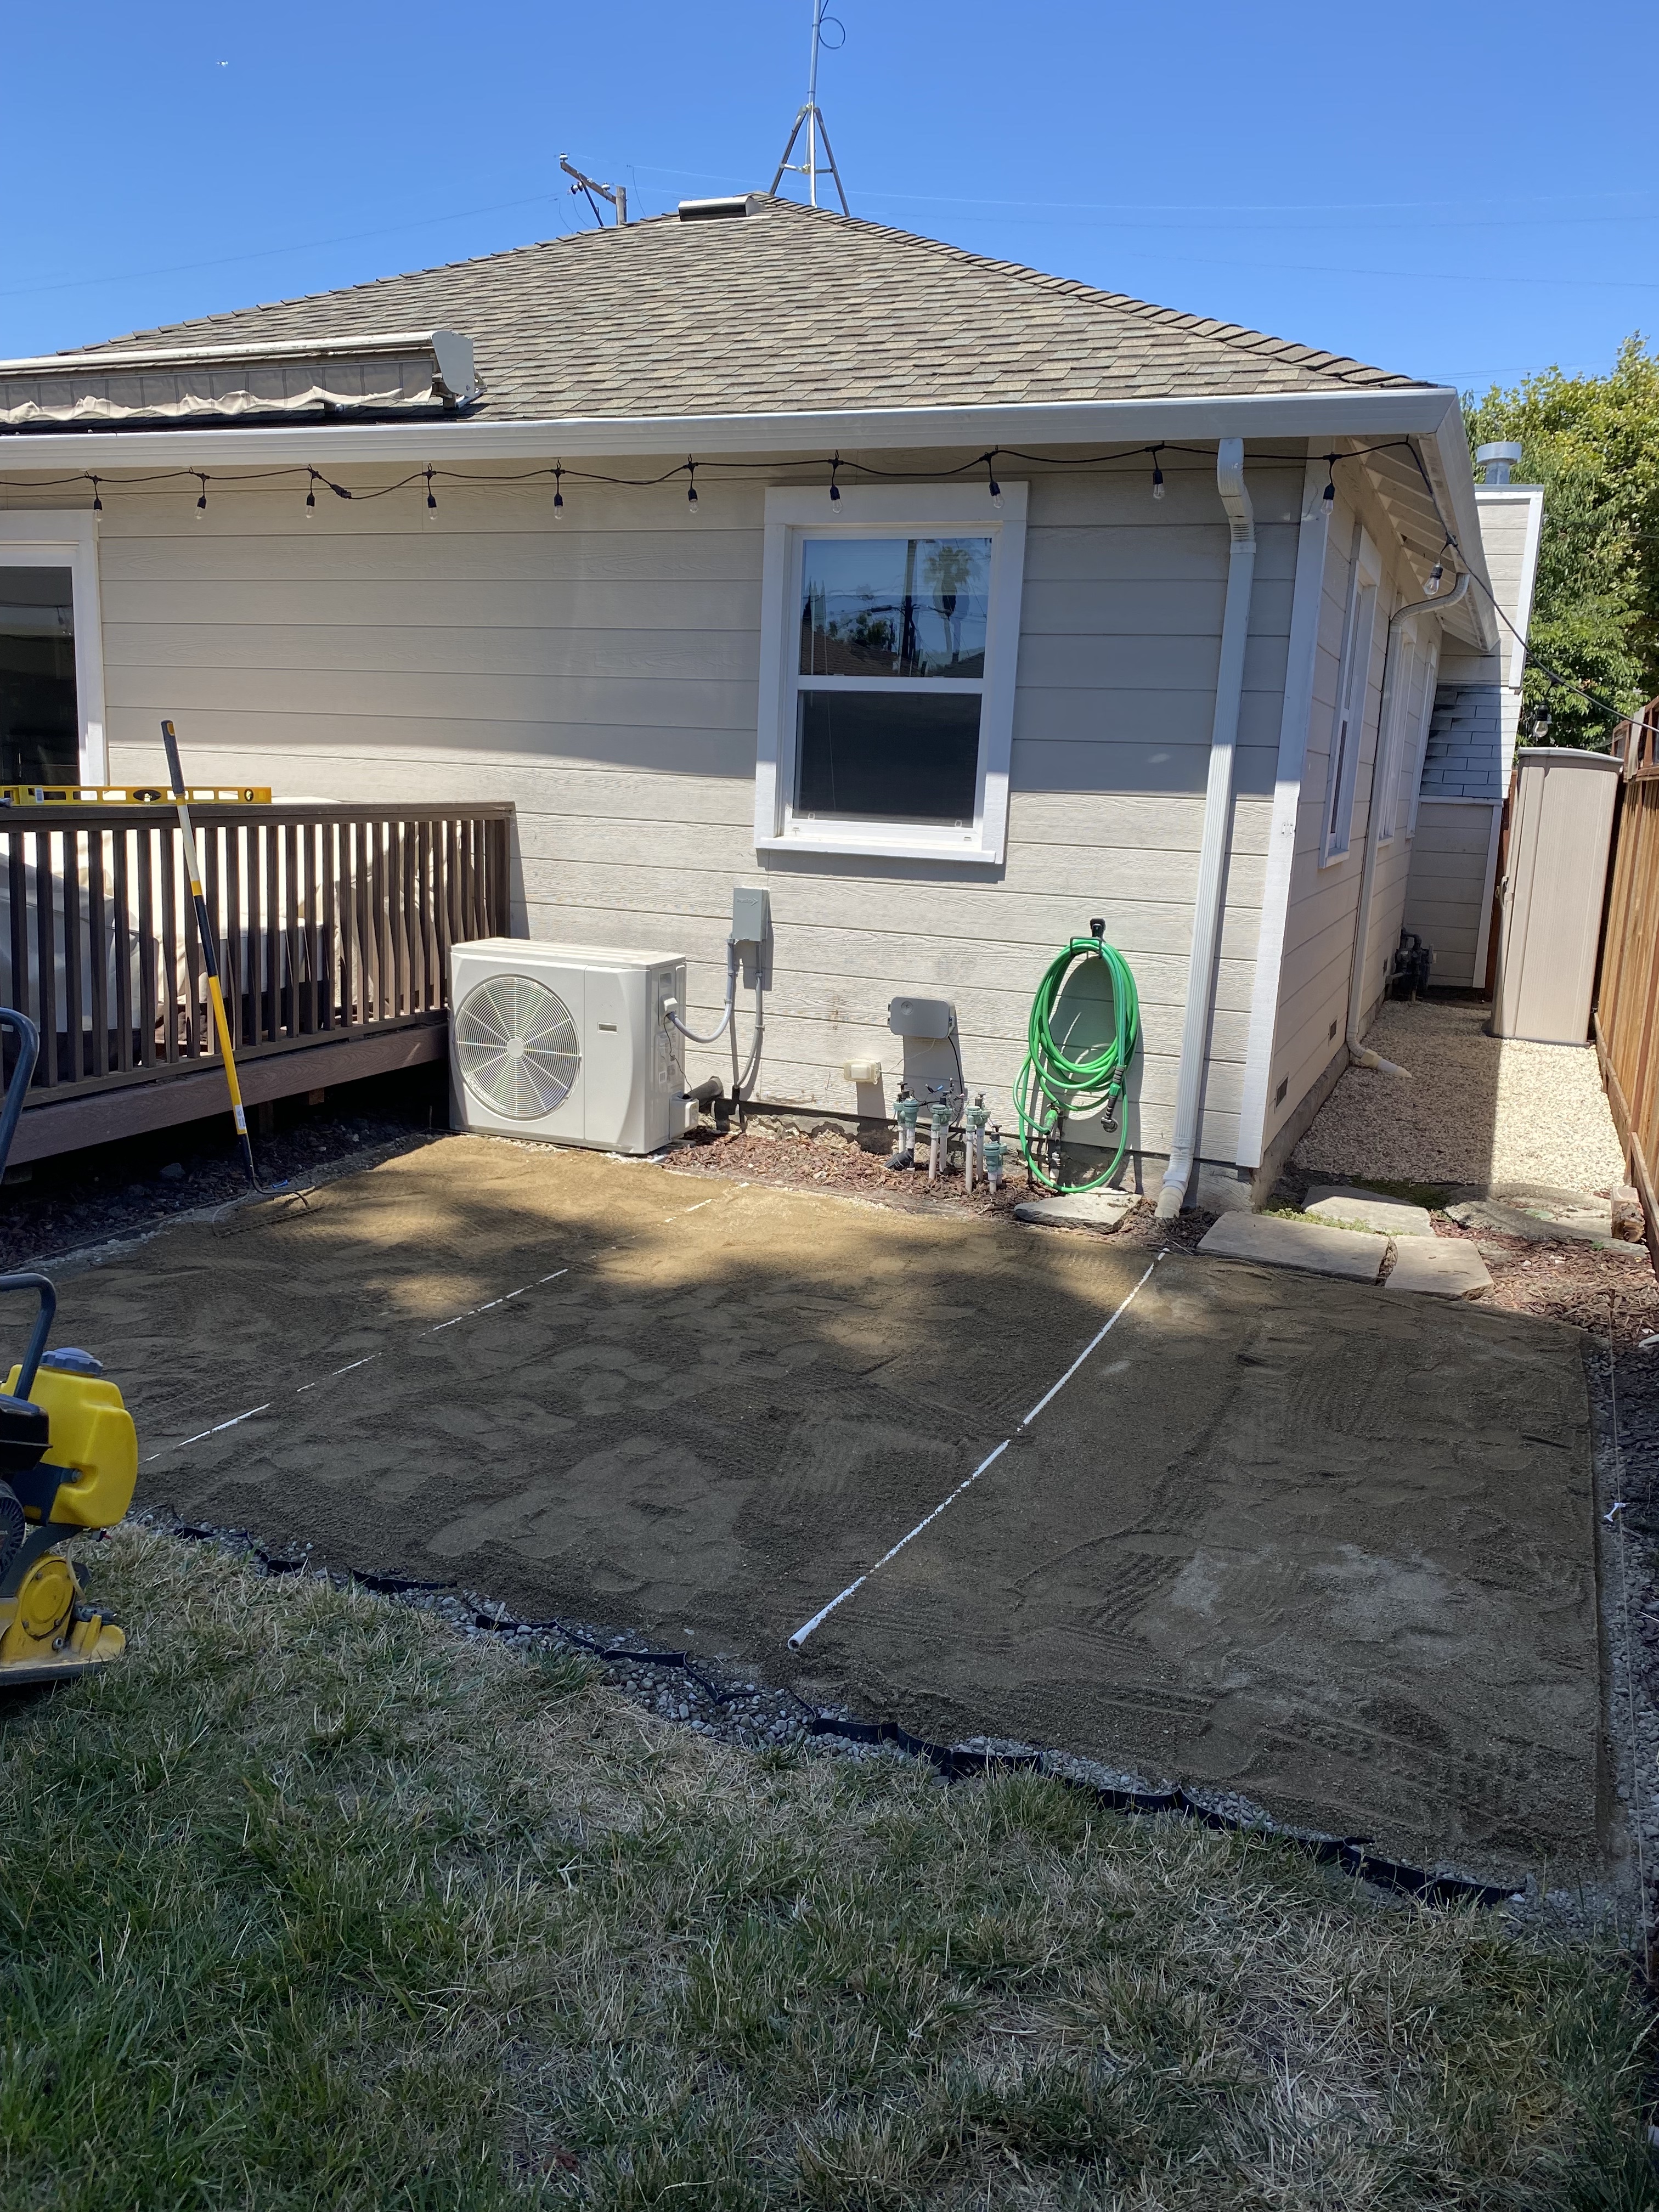
One of the most laborious and unsatisfying parts of the process was removing the dirt. I couldn’t dig recklessly because the backyard had 13 sprinkler heads across three irrigation stations, all which run through the area. So I only dug 4″ deep and had to be extra cautious not to burst a pipe. This took many afternoons and weekends.
Once the dirt was removed, I capped off the sprinkler heads. I then used a tamper to flatten the ground and made sure there was a slight slope away from the house so that water would not accrue near the foundation and cause problems down the road.
4. Landscape Fabric

I then placed porous landscape fabric, covering some areas up to three times to mitigate future weed growth.
5. Geo Cell Installation
I then installed what is known as a geo cell product. It is heavy duty plastic that, when filled with gravel and/or dirt, holds everything together while withstanding thousands of pounds of force.
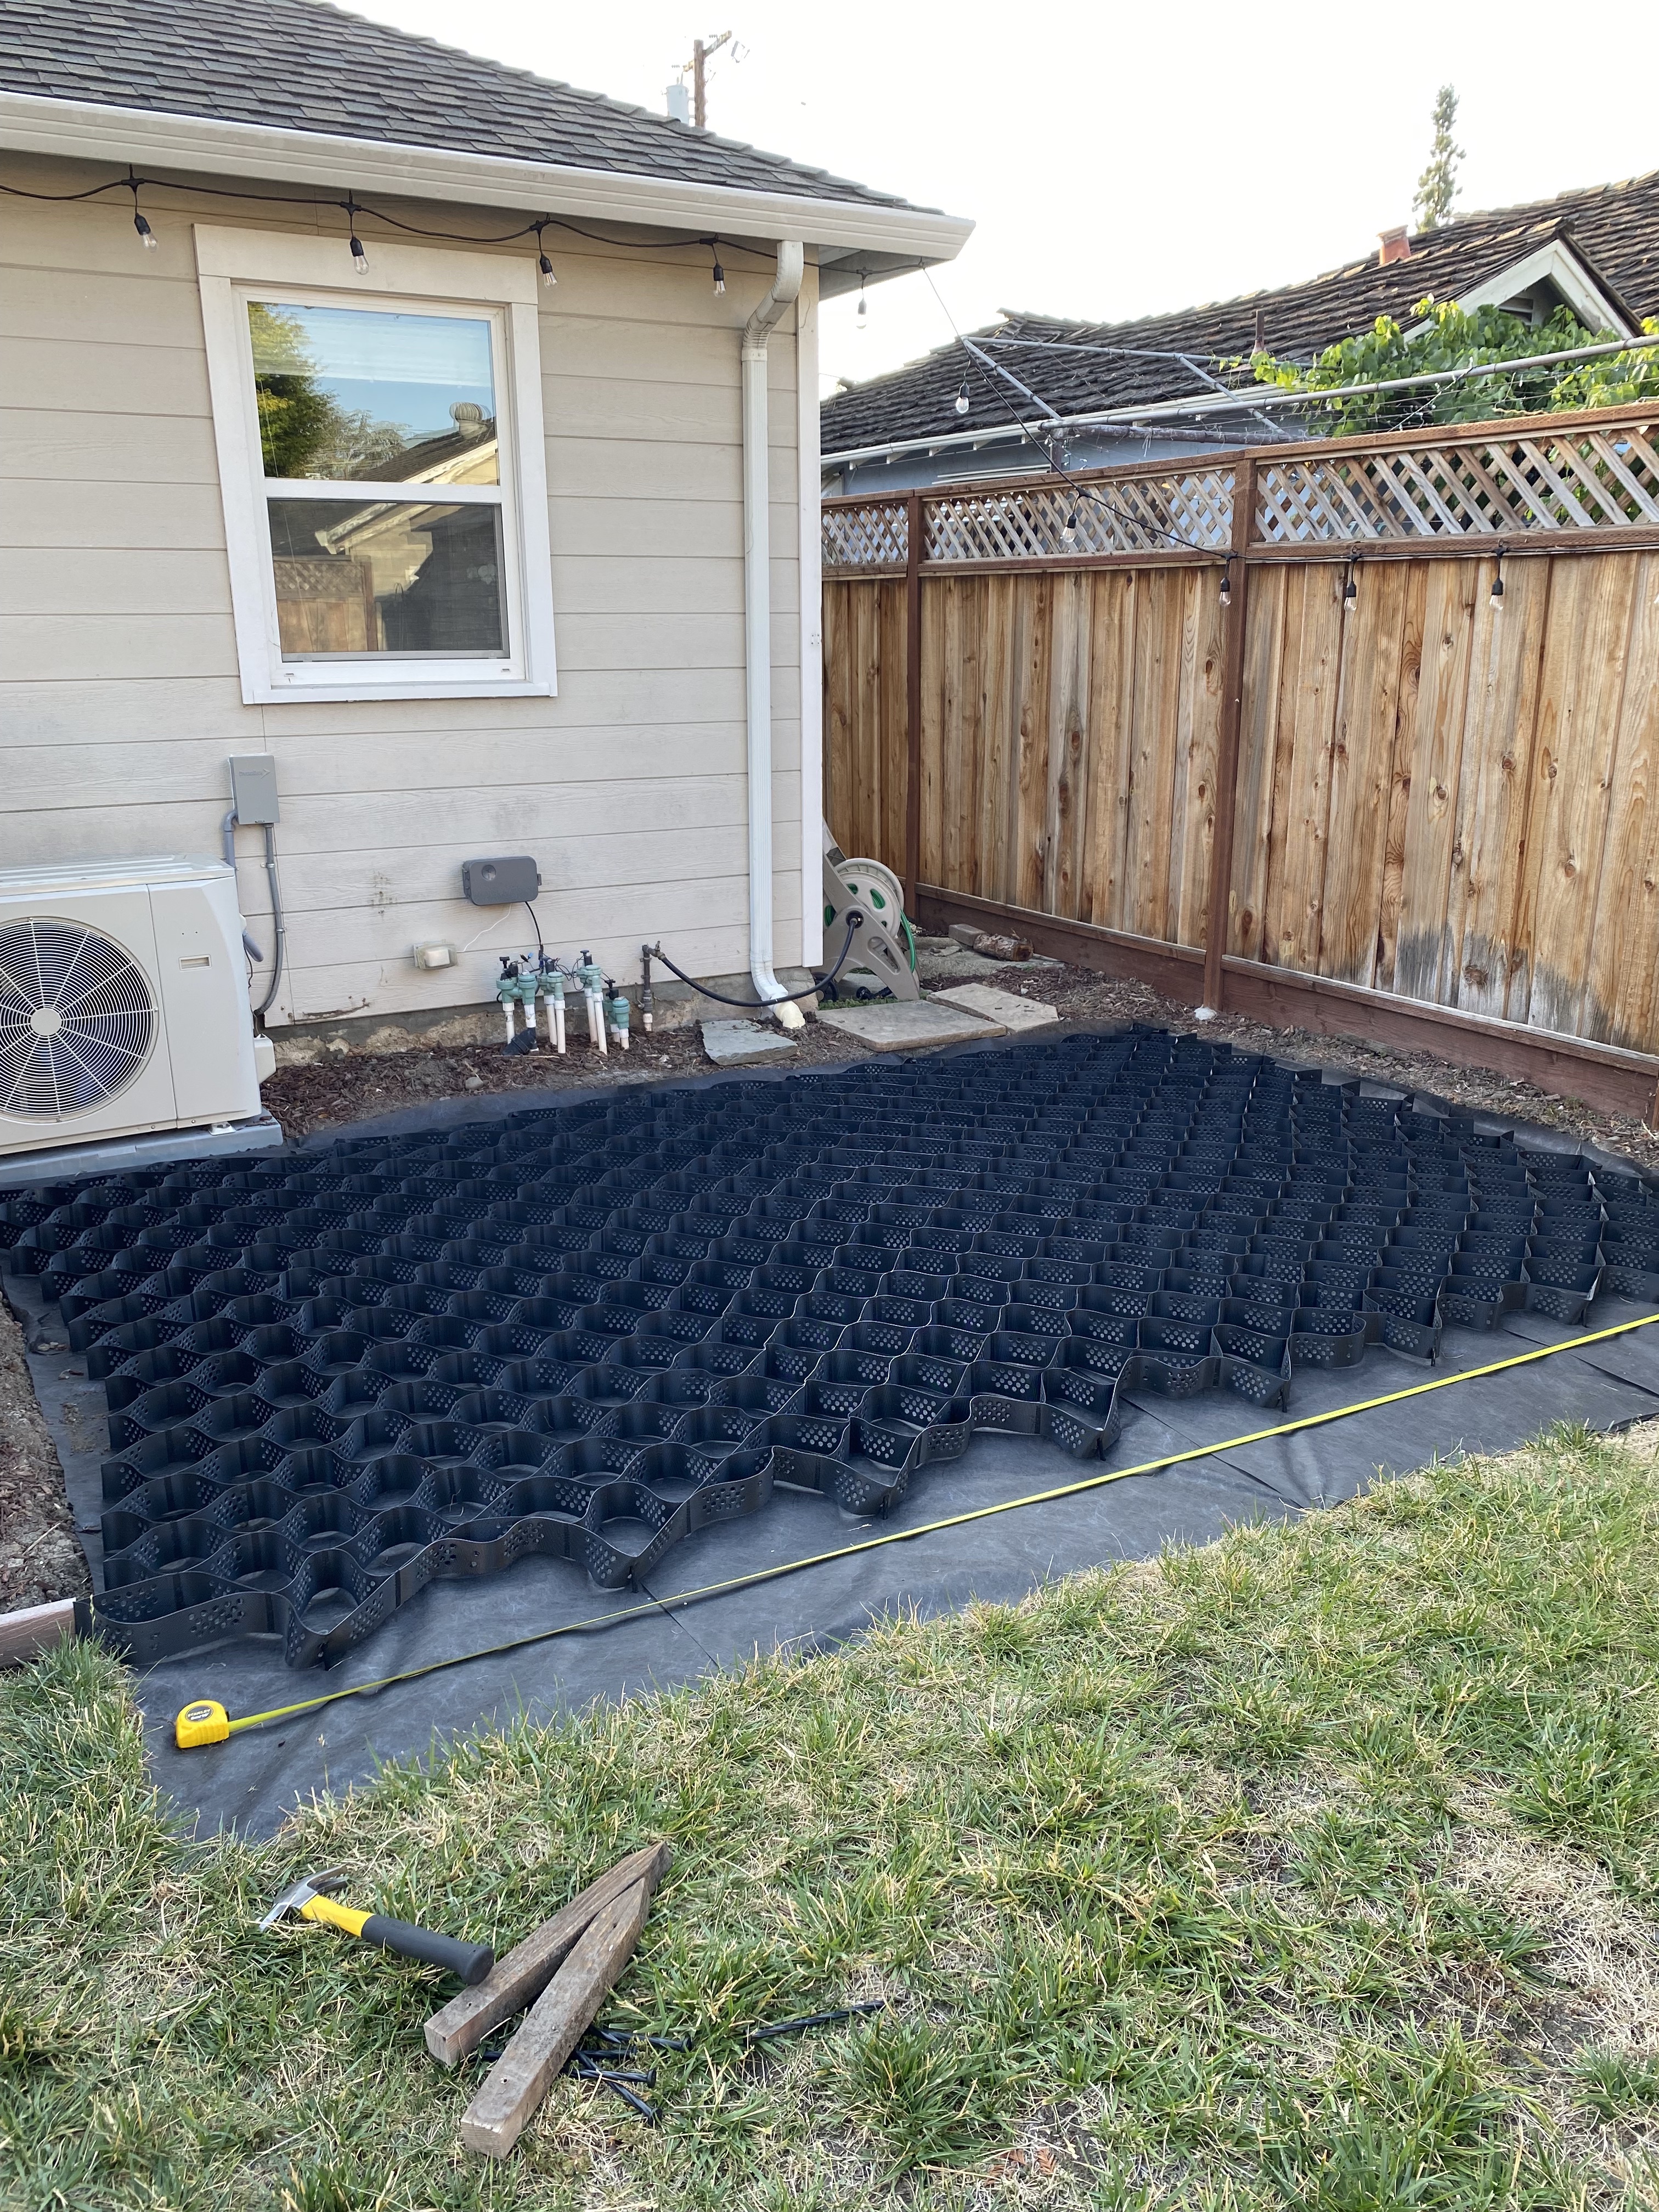
I decided to use this product to compensate for the shallow depth of the patio base. The traditional way of installing patio involves digging 8″ deep, adding 4-6″ of gravel, 1″ of sand, and finally the pavers. Since I dug only 4″ deep, I used the geo cell to assist in creating a stable foundation that won’t shift the pavers over time.
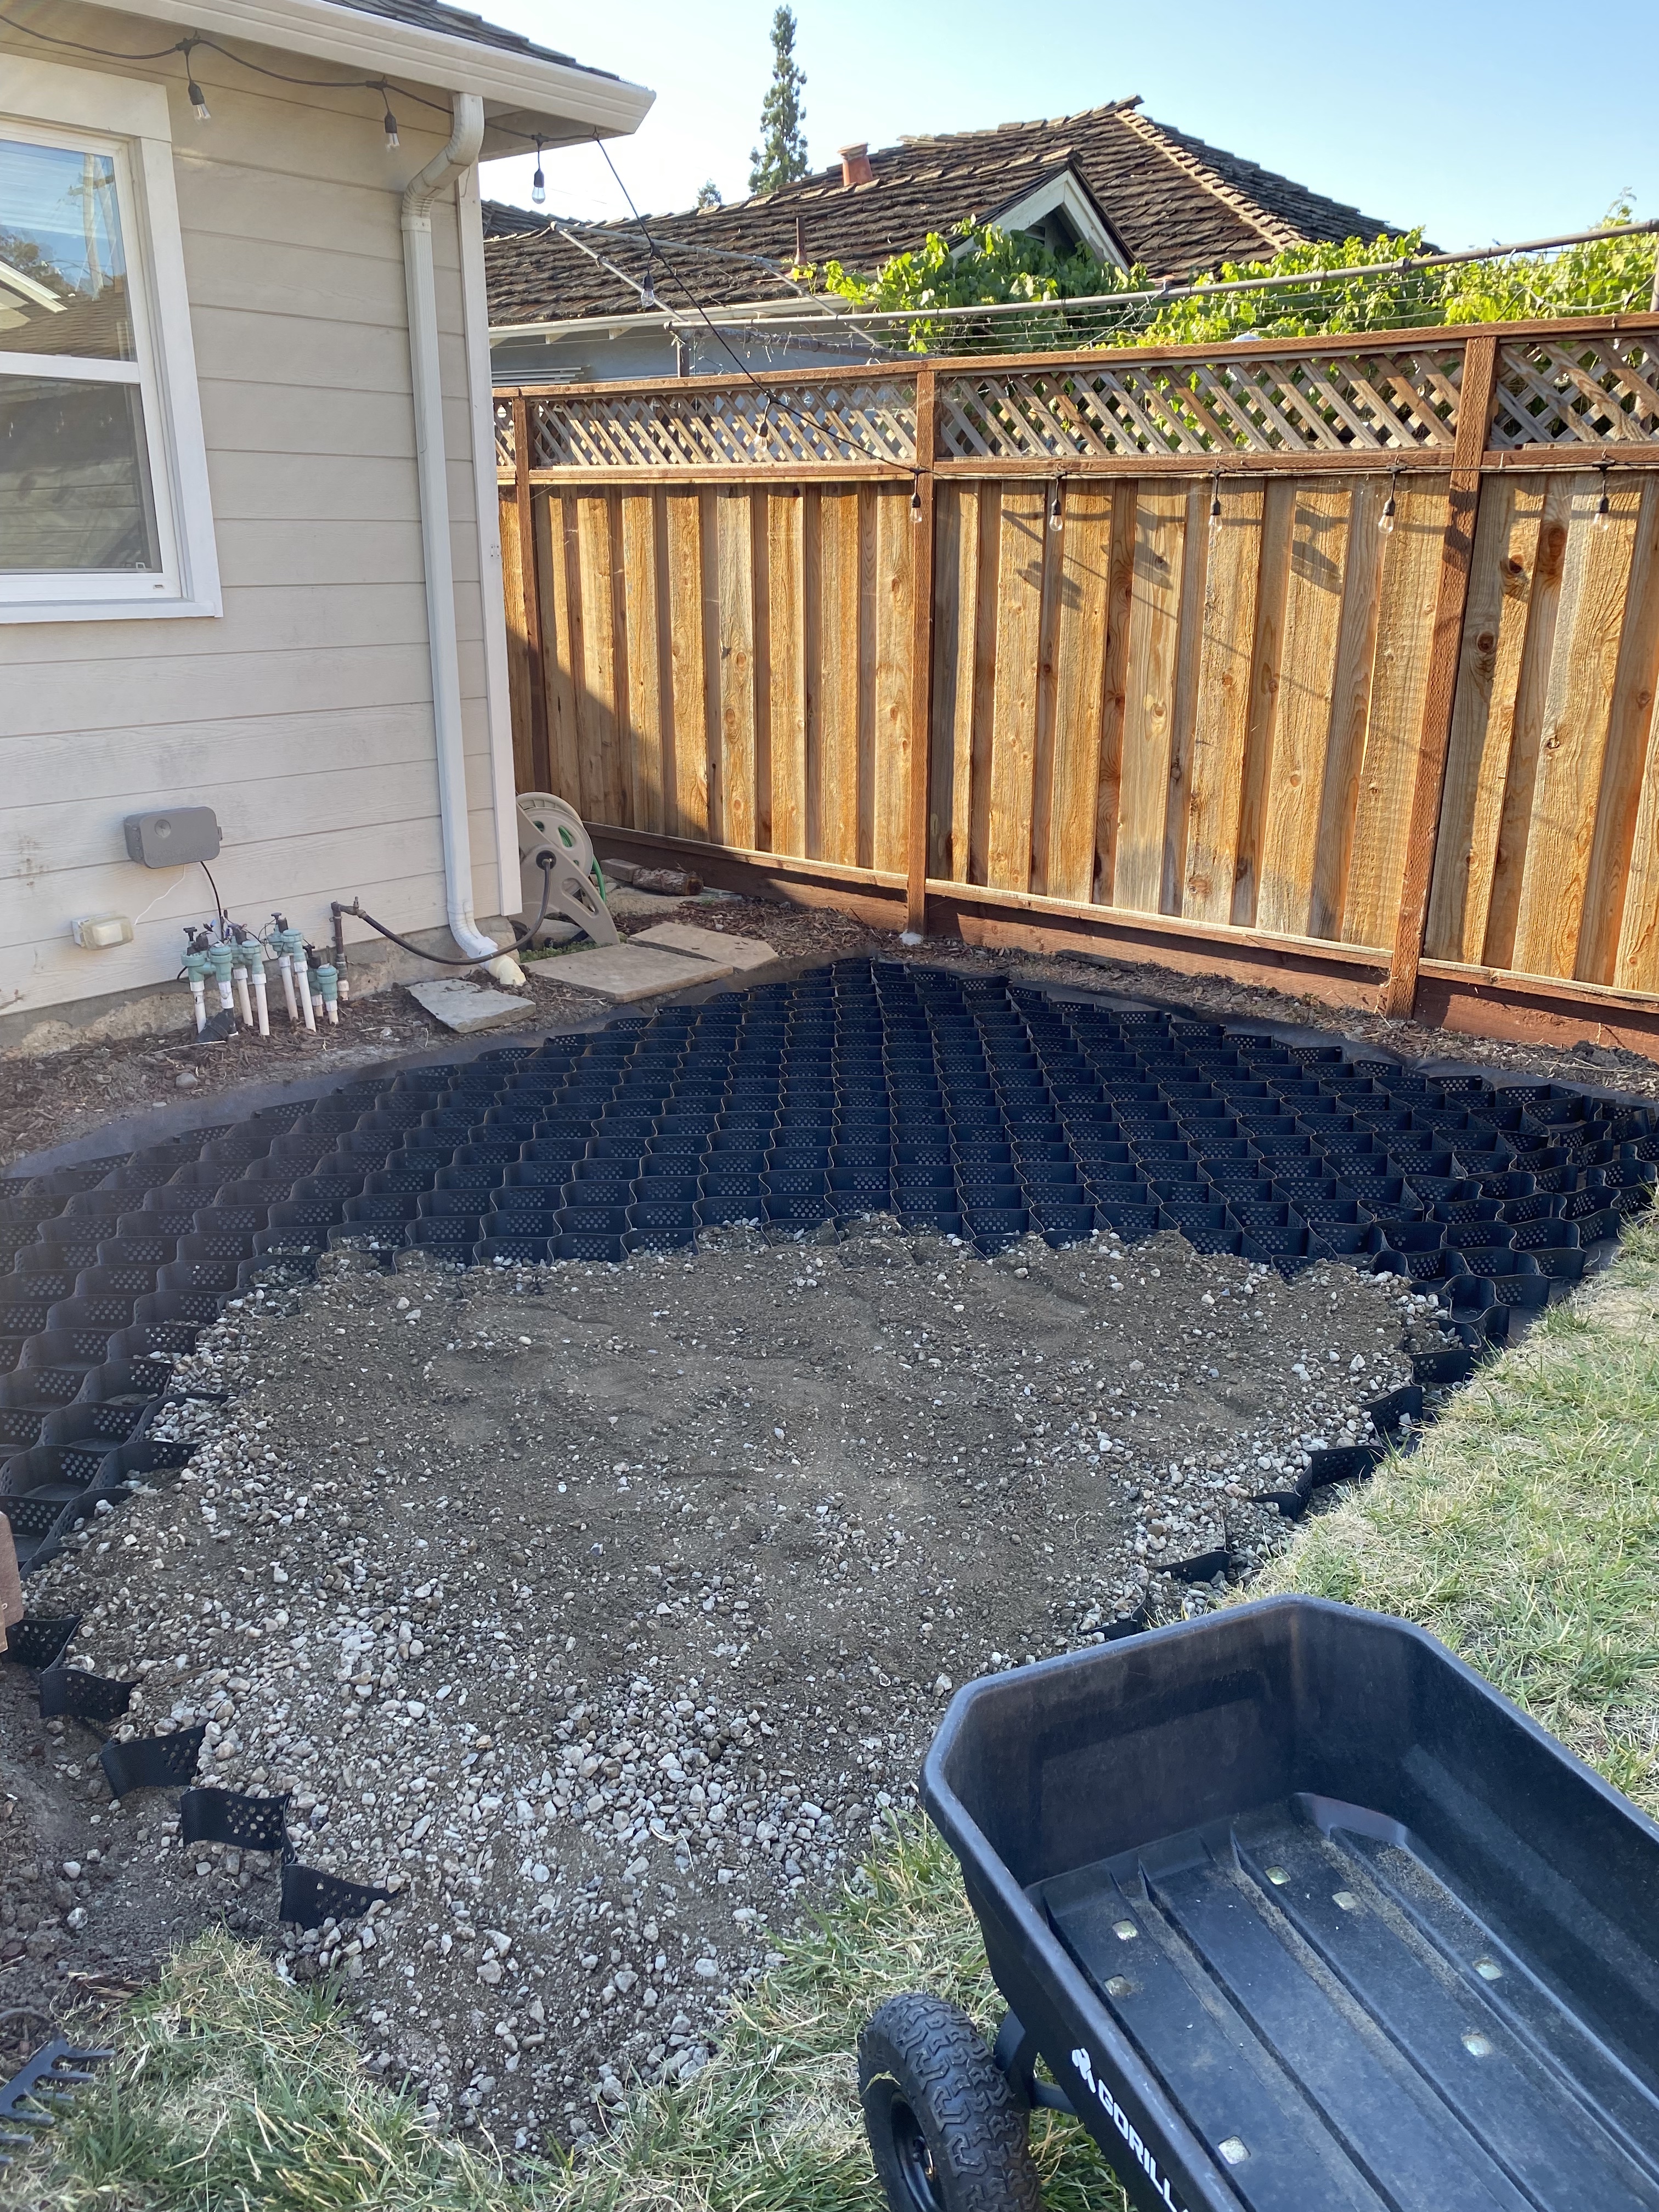
6. Filling in the Geo Cell with Gravel and Sand
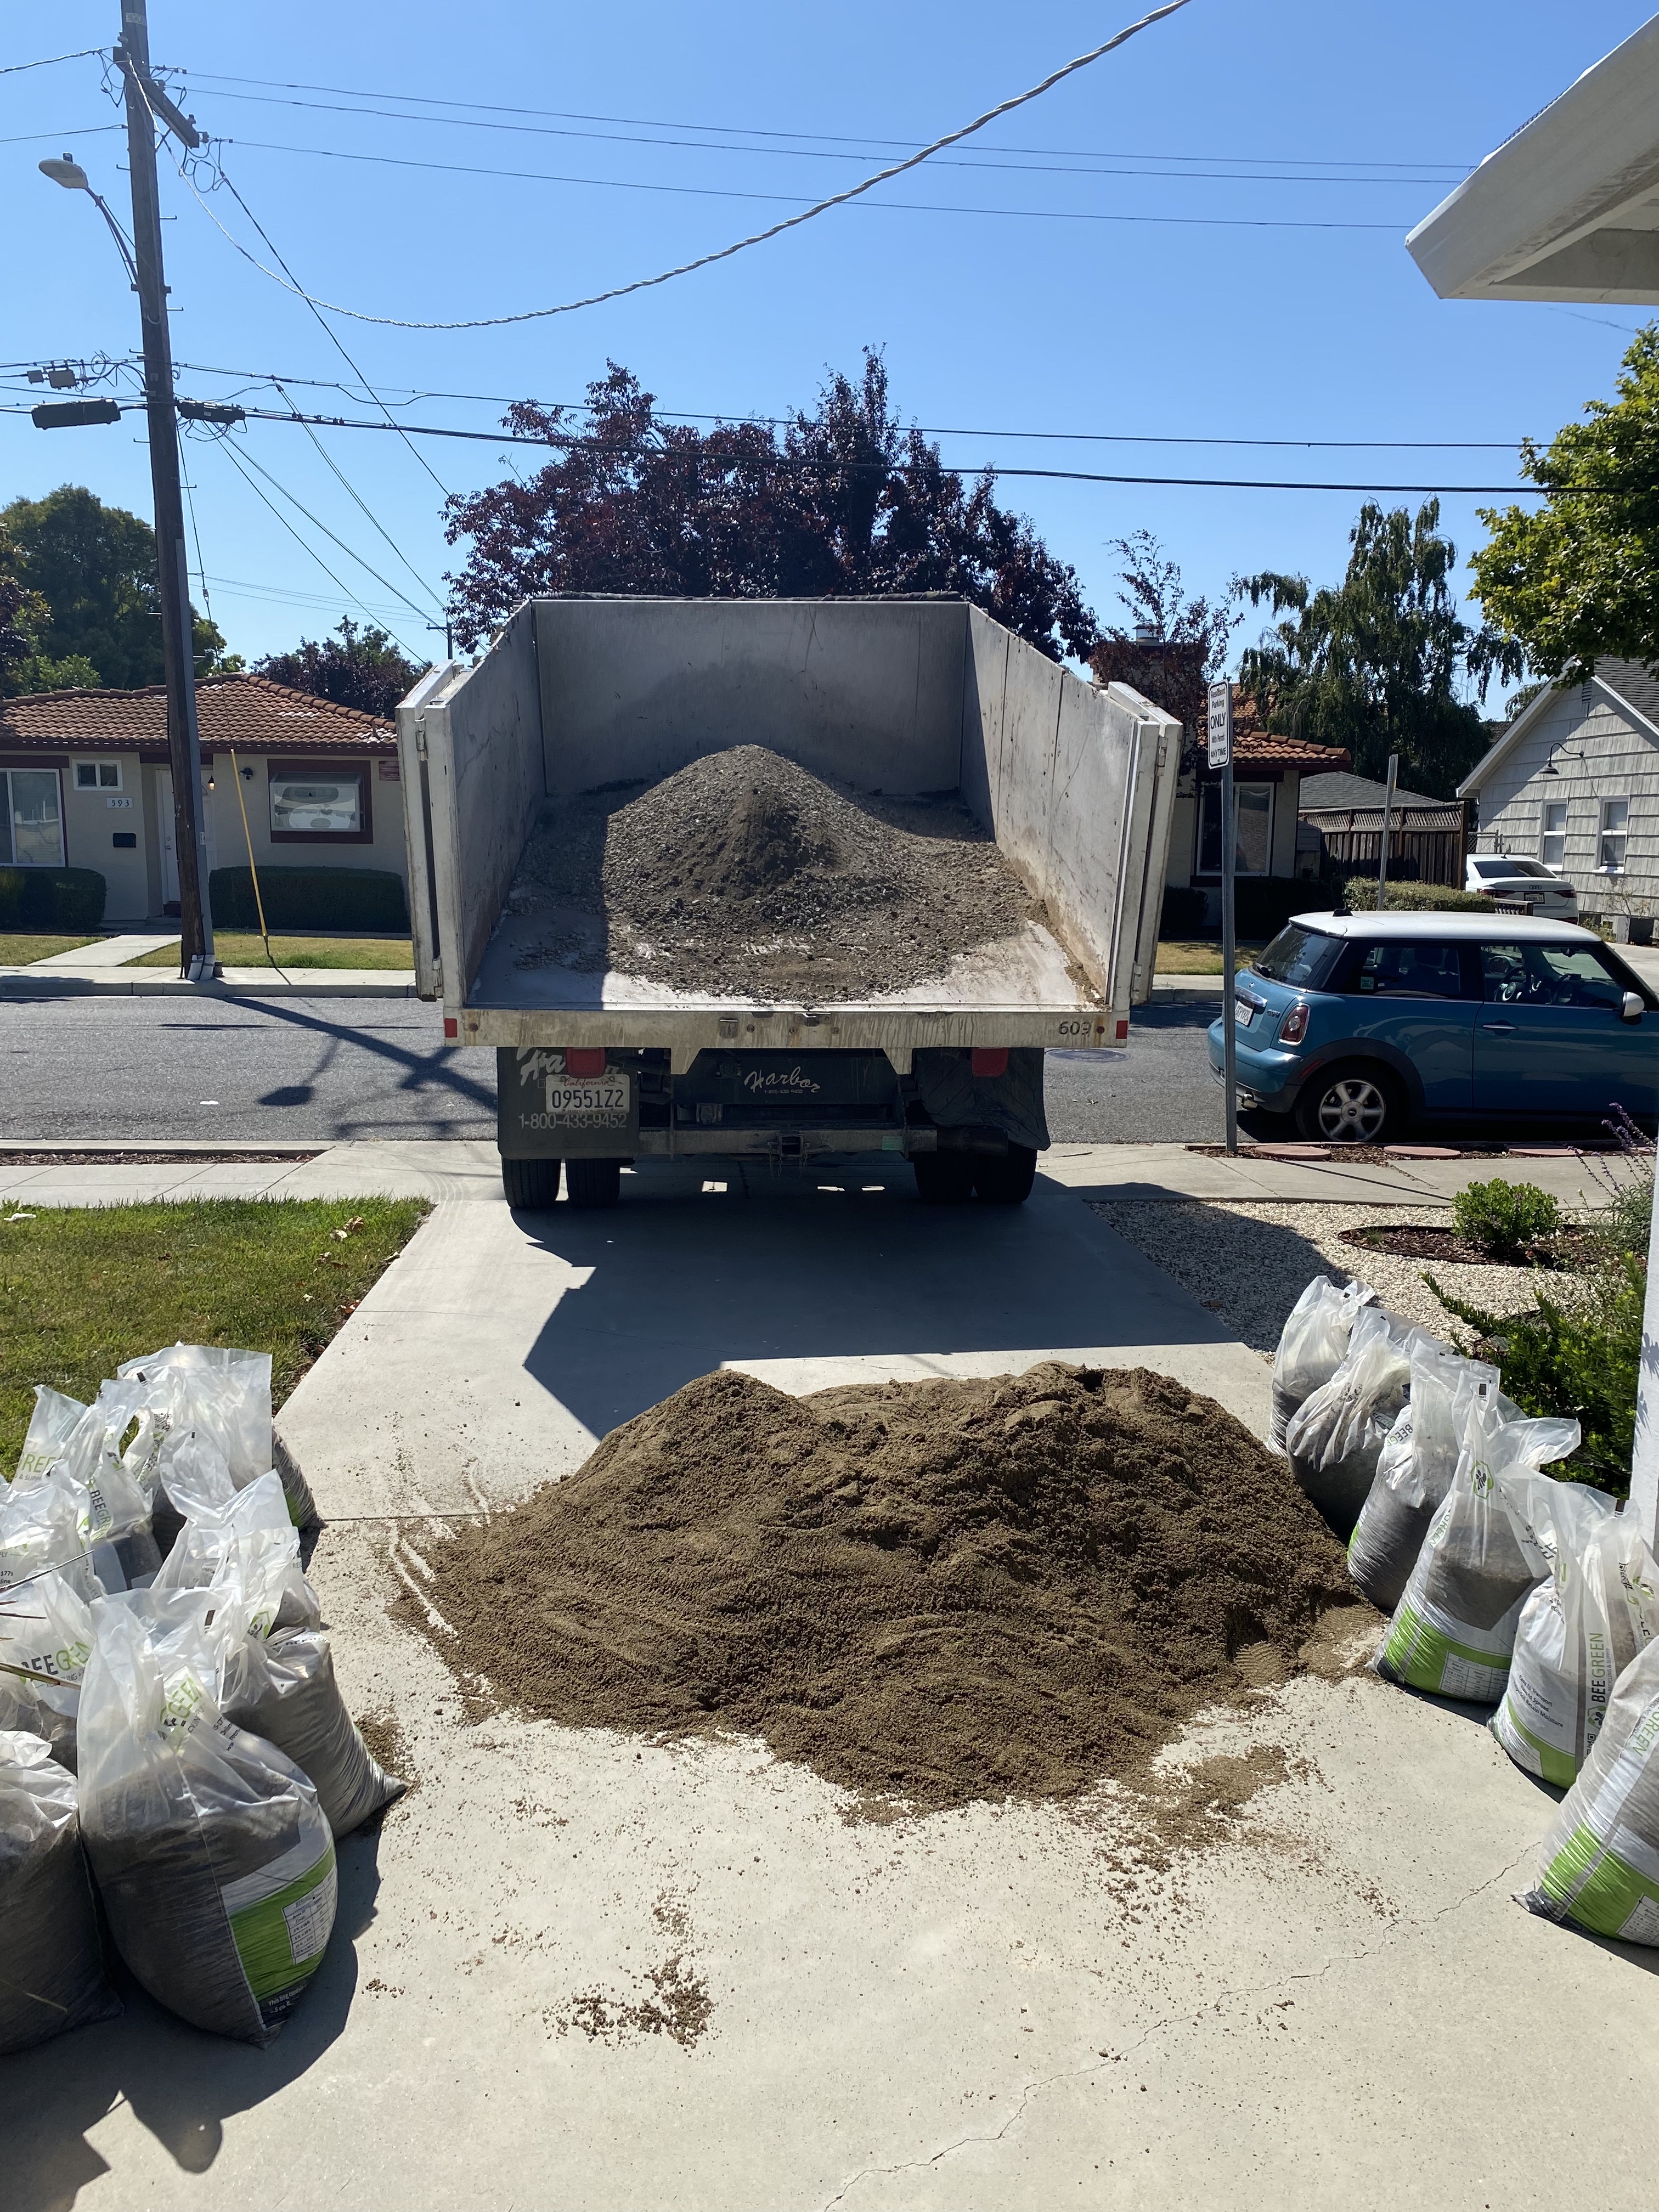
I ordered some more gravel base and sand from my new favorite local sustainable company, Bee Green. They dropped off 1 cubic yards (3,000 pounds) of gravel and 0.5 cubic yards (1,500 pounds) of sand on our driveway.
I carted the gravel into the geo cell, filling it with 3″. The next day, I rented a compactor from Home Depot, compacted the gravel, added 1″ of sand, then compacted the sand.

7. Placing Patio Pavers
I ordered porcelain pavers from Home Depot. I wanted something durable and low maintenance and learned that porcelain fulfilled both criteria. I chose 2′ x 2′ dimensions in a light color that would minimize heat absorption. The pavers were by far the most expensive part of the project at 63% of total costs.
The pavers were a pain in the ass to install. Each one weighed about 40 pounds and were hard to hold. I spent 14 hours placing all 35. I had to continuously check the grading to make sure it slightly sloped away from the house.
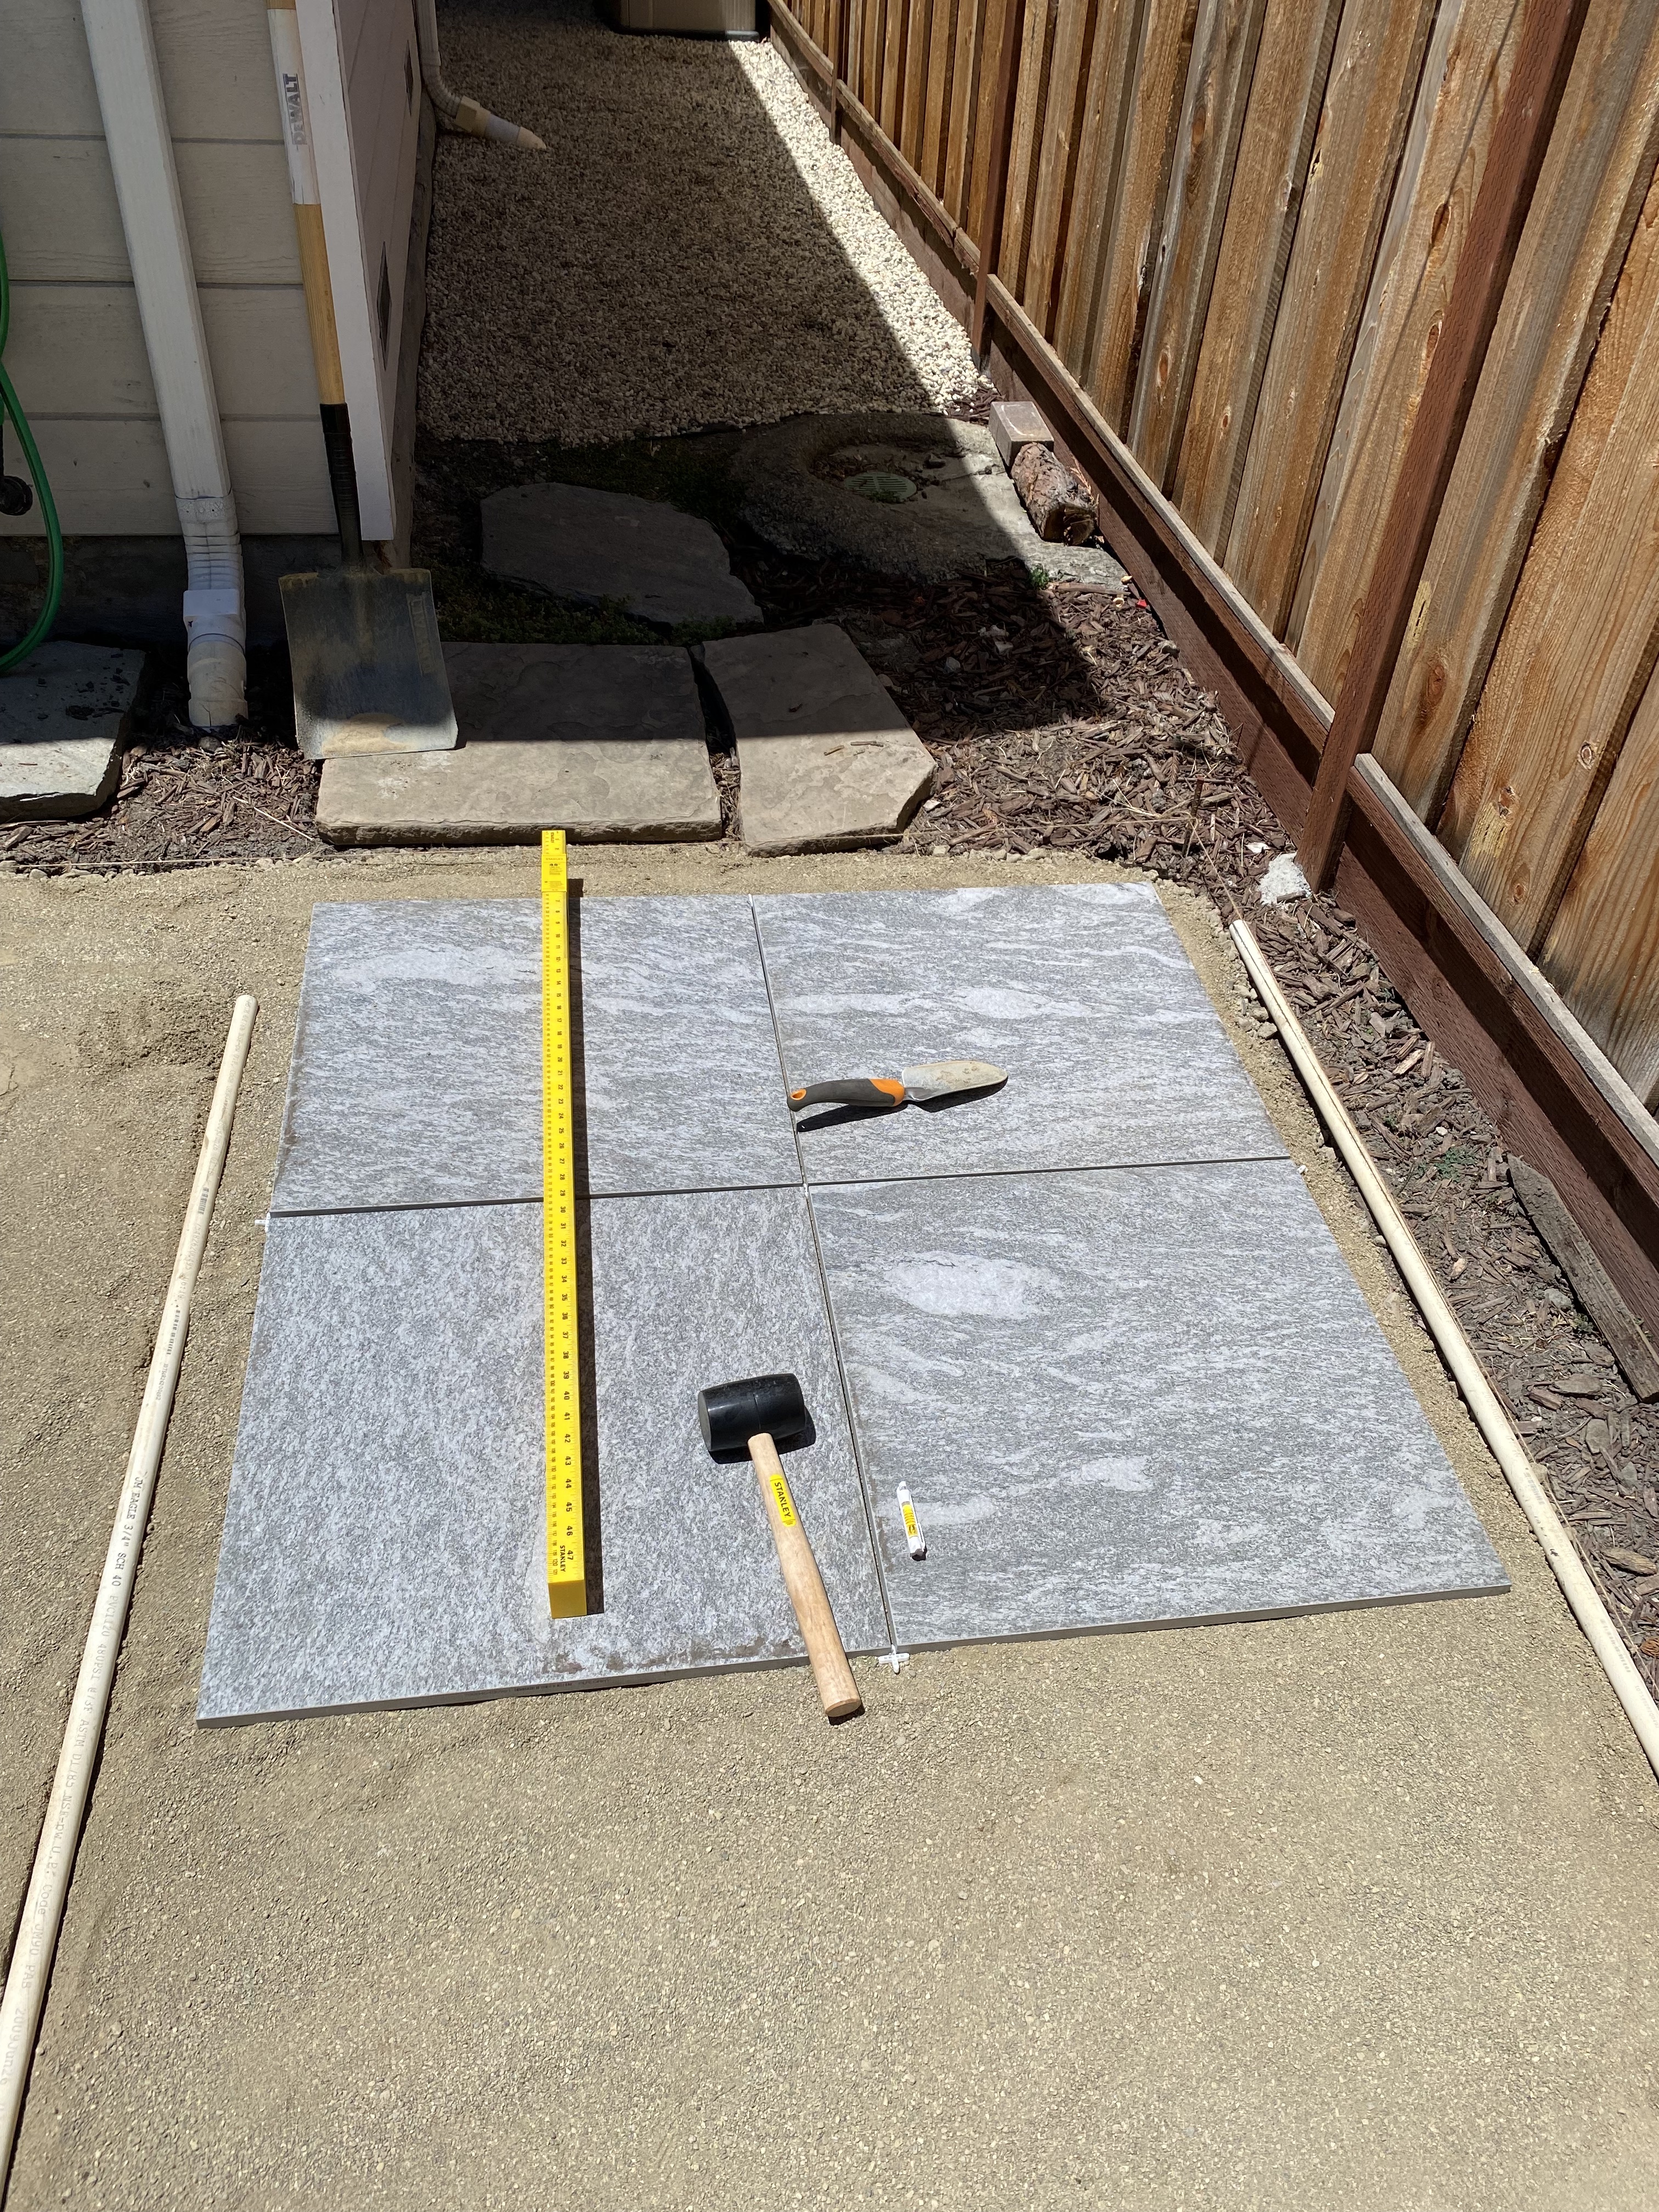
After placing each paver, I put in spacers that maintained the right distance between each paver.
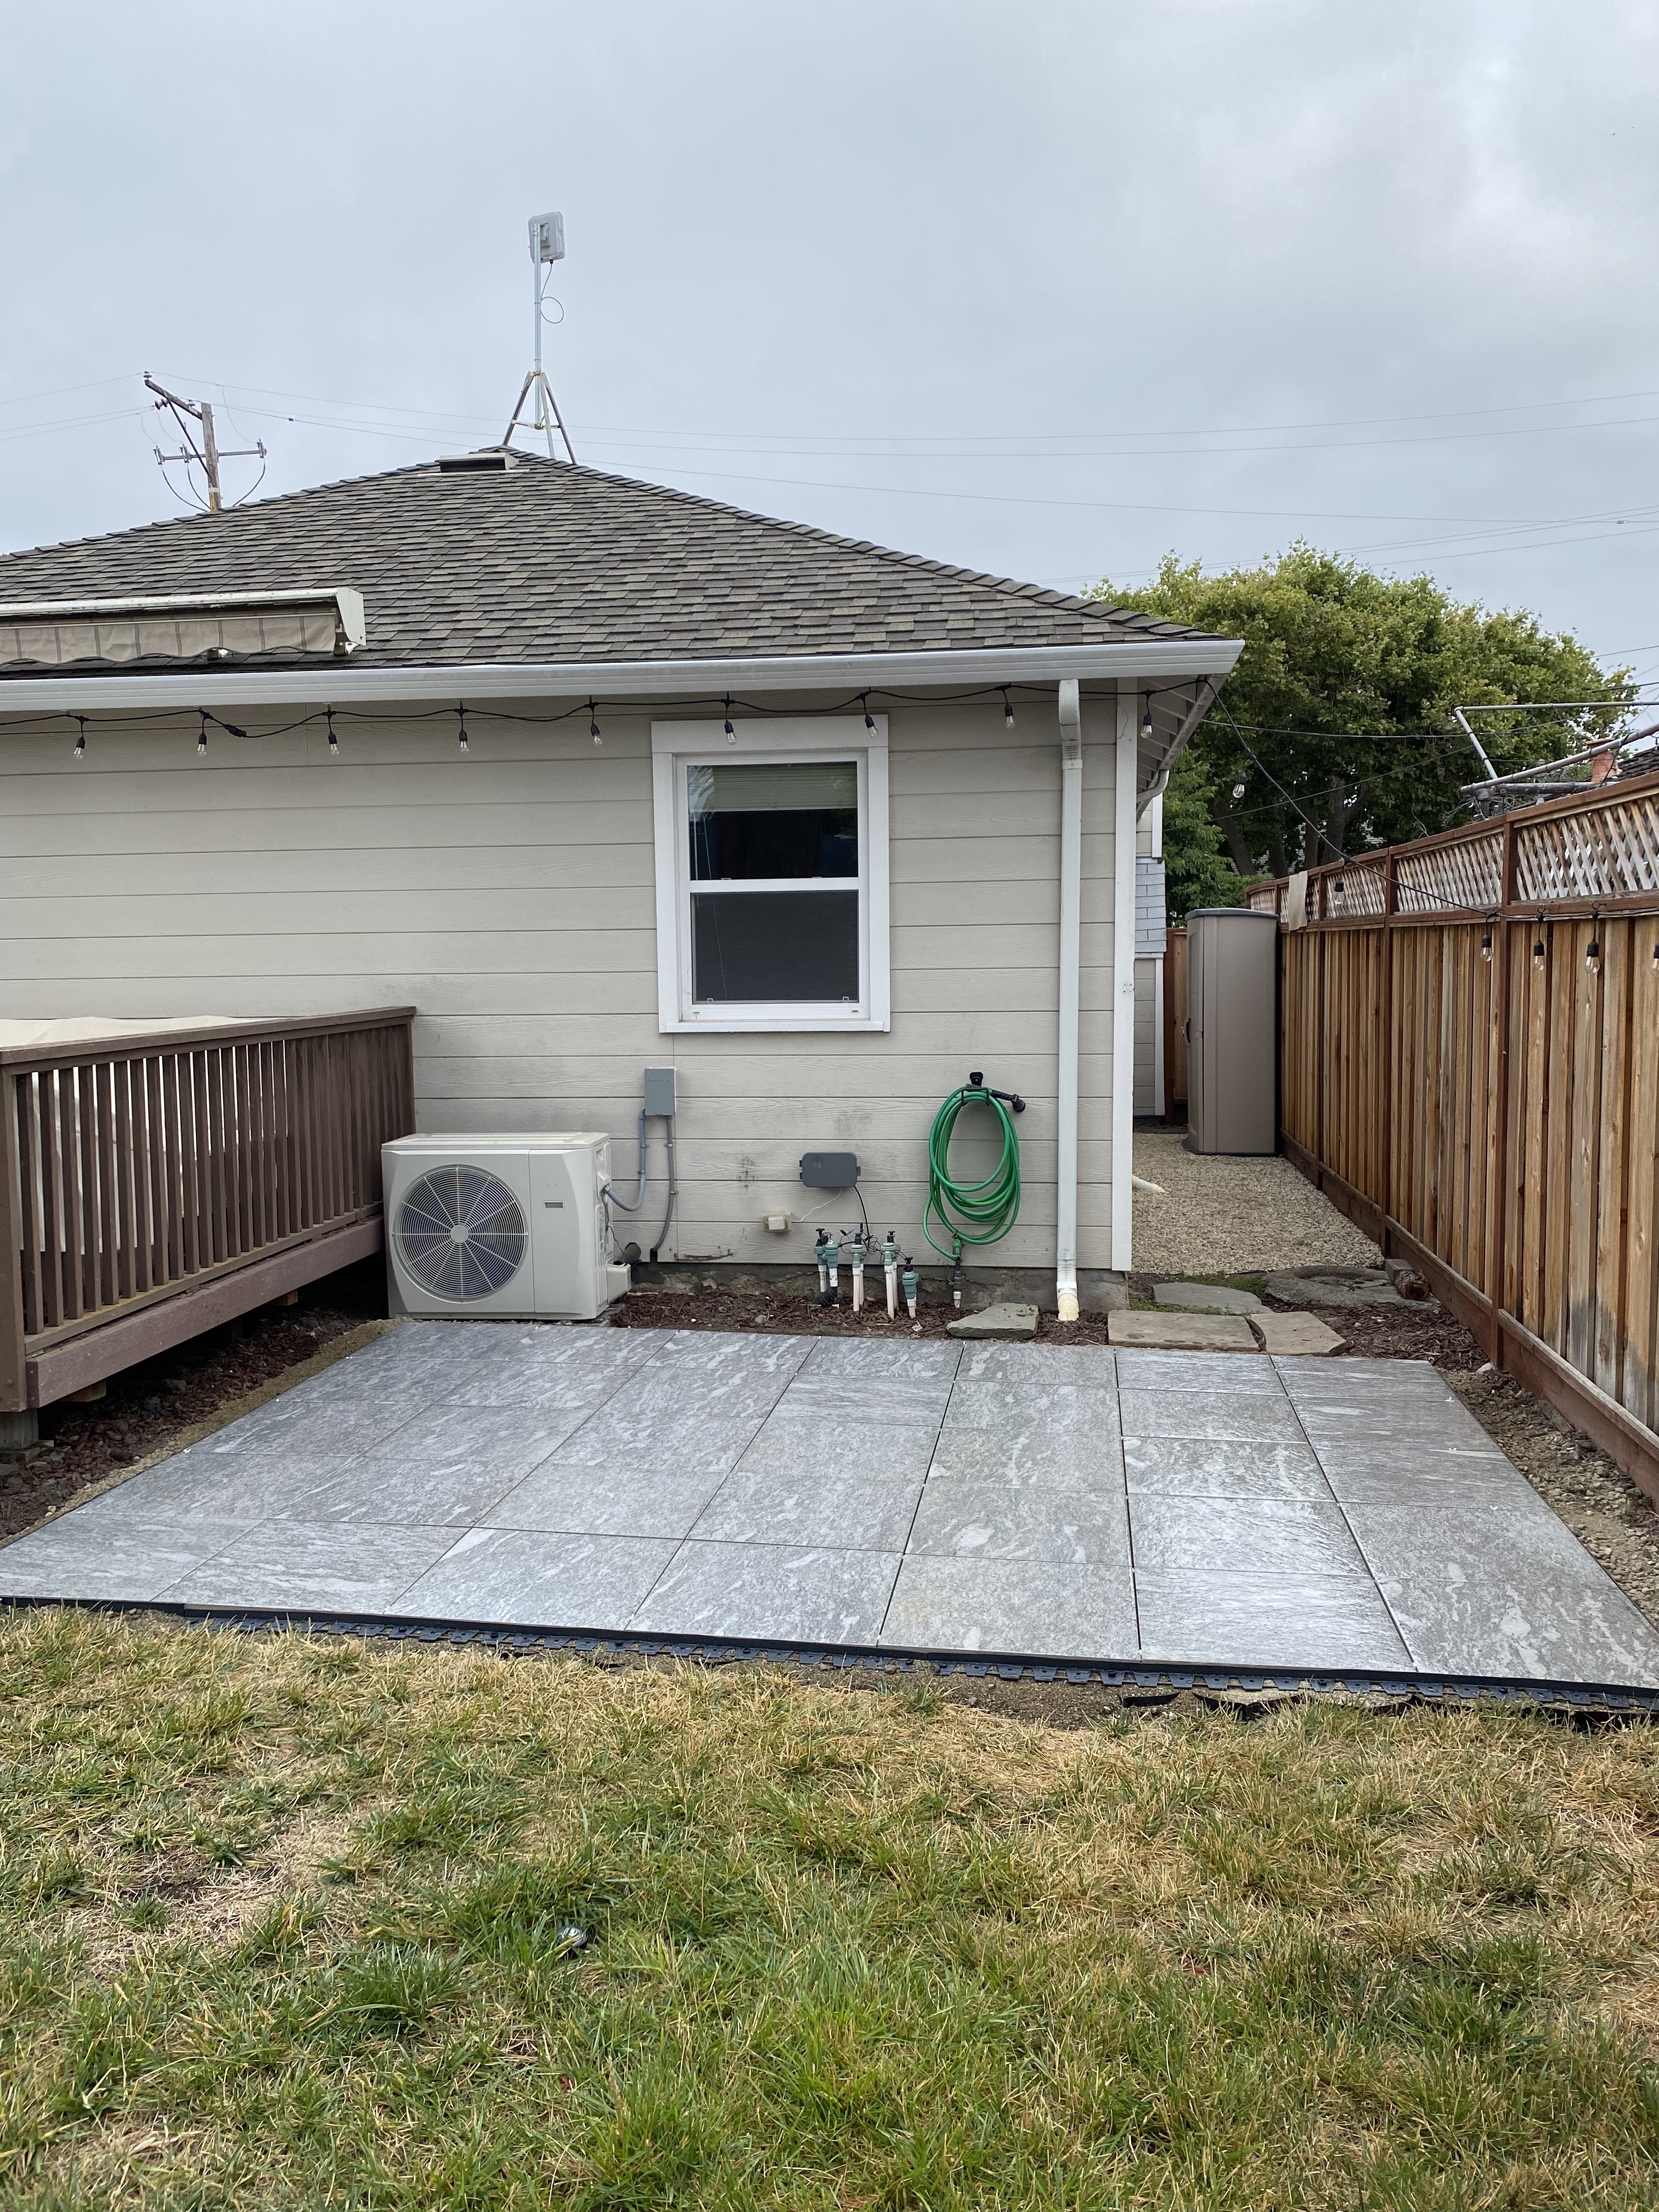
I was super exhausted, but happy to have placed all pavers down in a single day. This was by far the hardest part of the project. It was as exhausting as digging dirt, with the added meticulousness of ensuring the patio was even and properly leveled.
8. Edging
Even though the patio was in place, it could still shift over time due to being on sand and gravel. I installed no-dig edging around the perimeter.
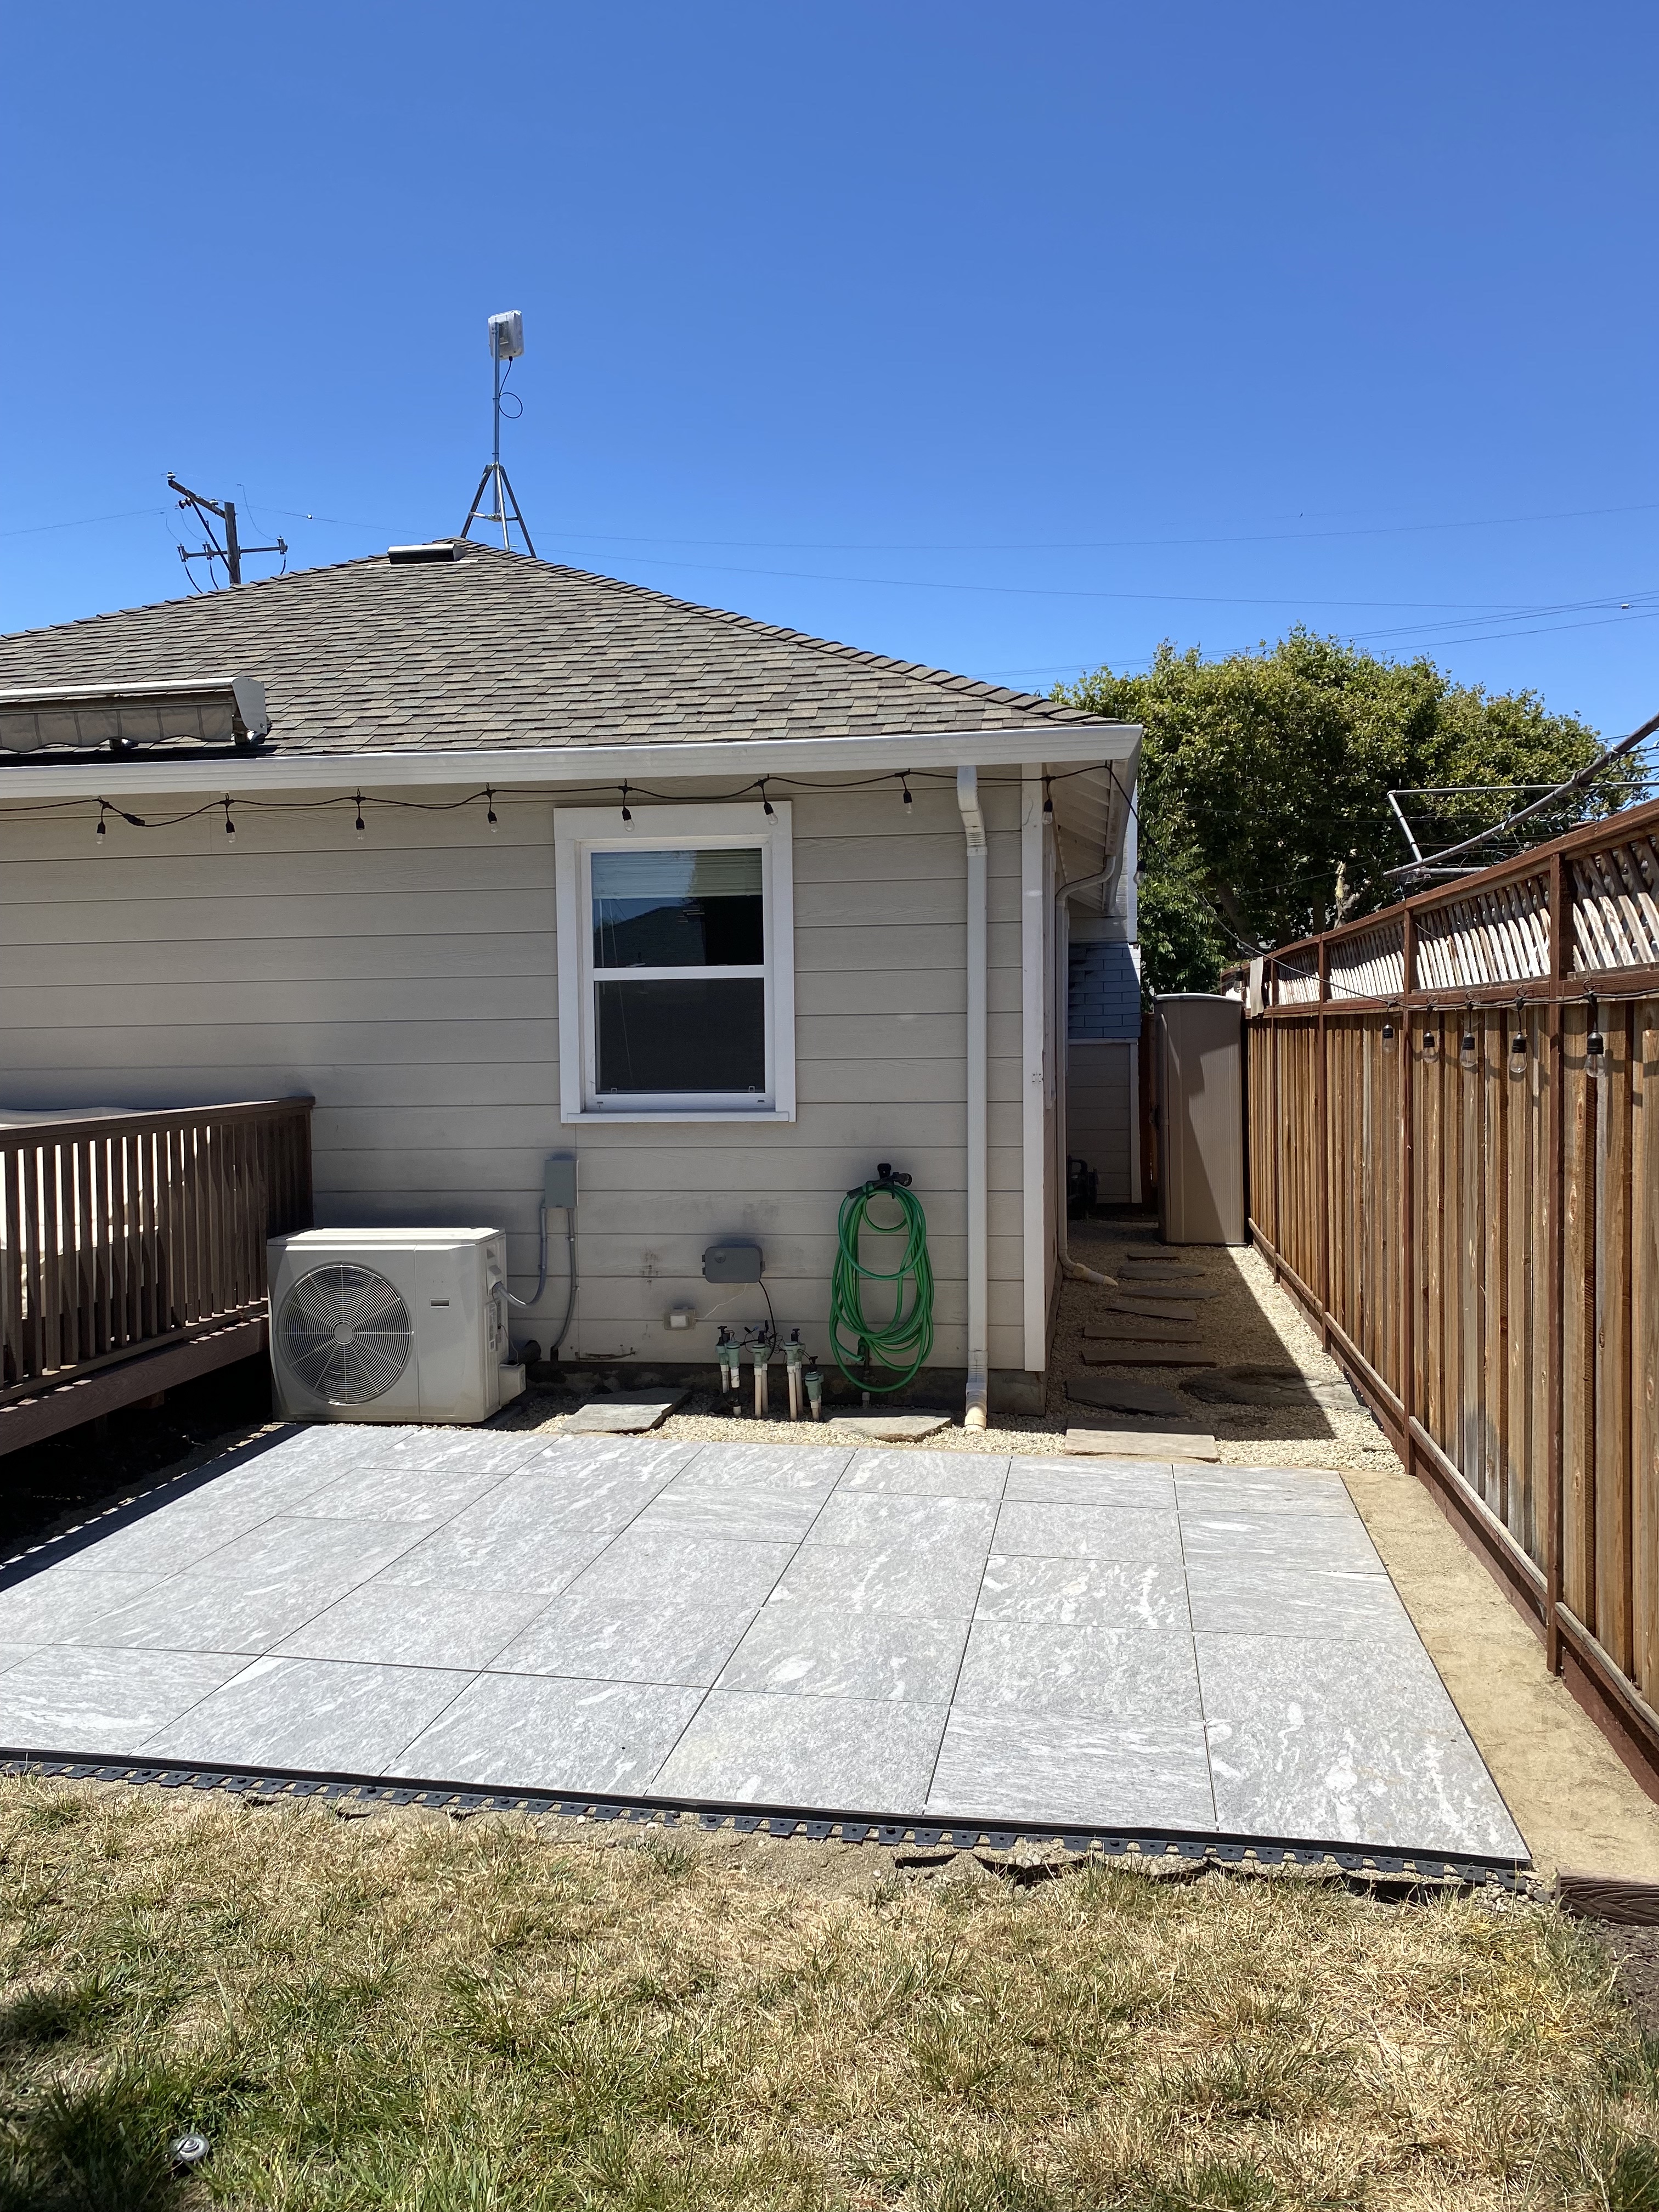
I then filled the perimeter with the excess sand and moved a bunch of the stepping stones to the side yard as a walking path to the shed.
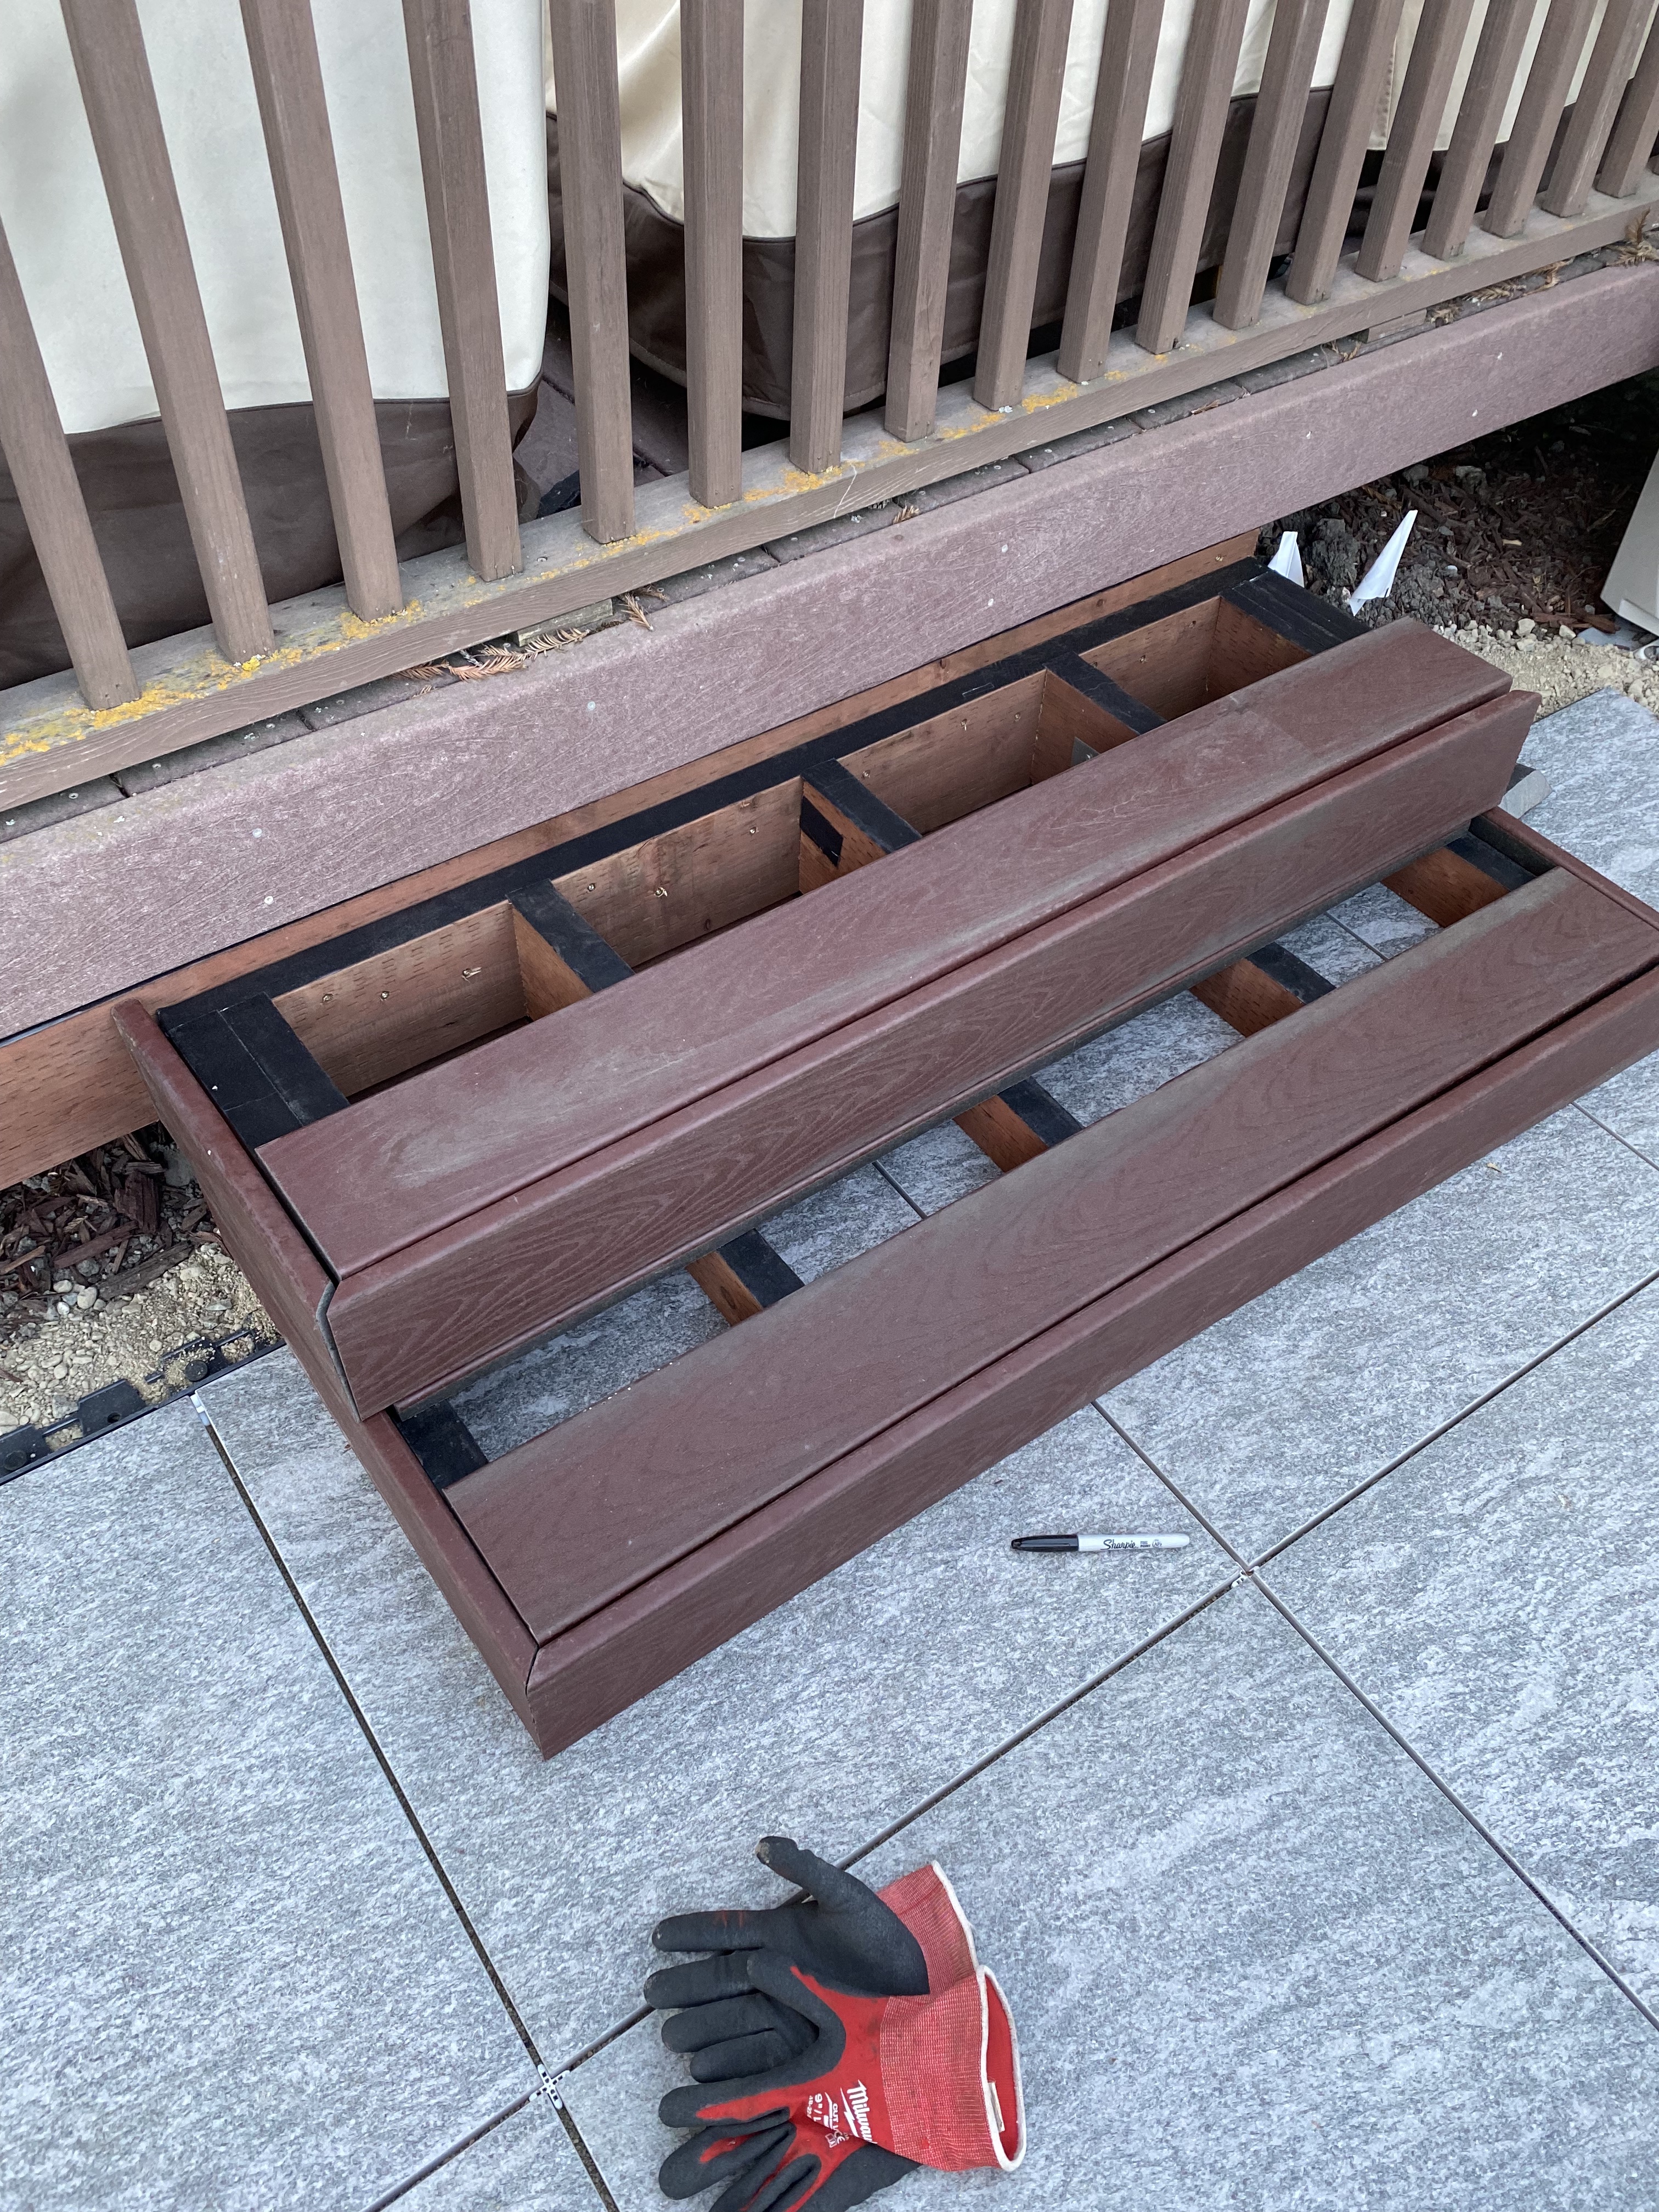
10. Deck Frame
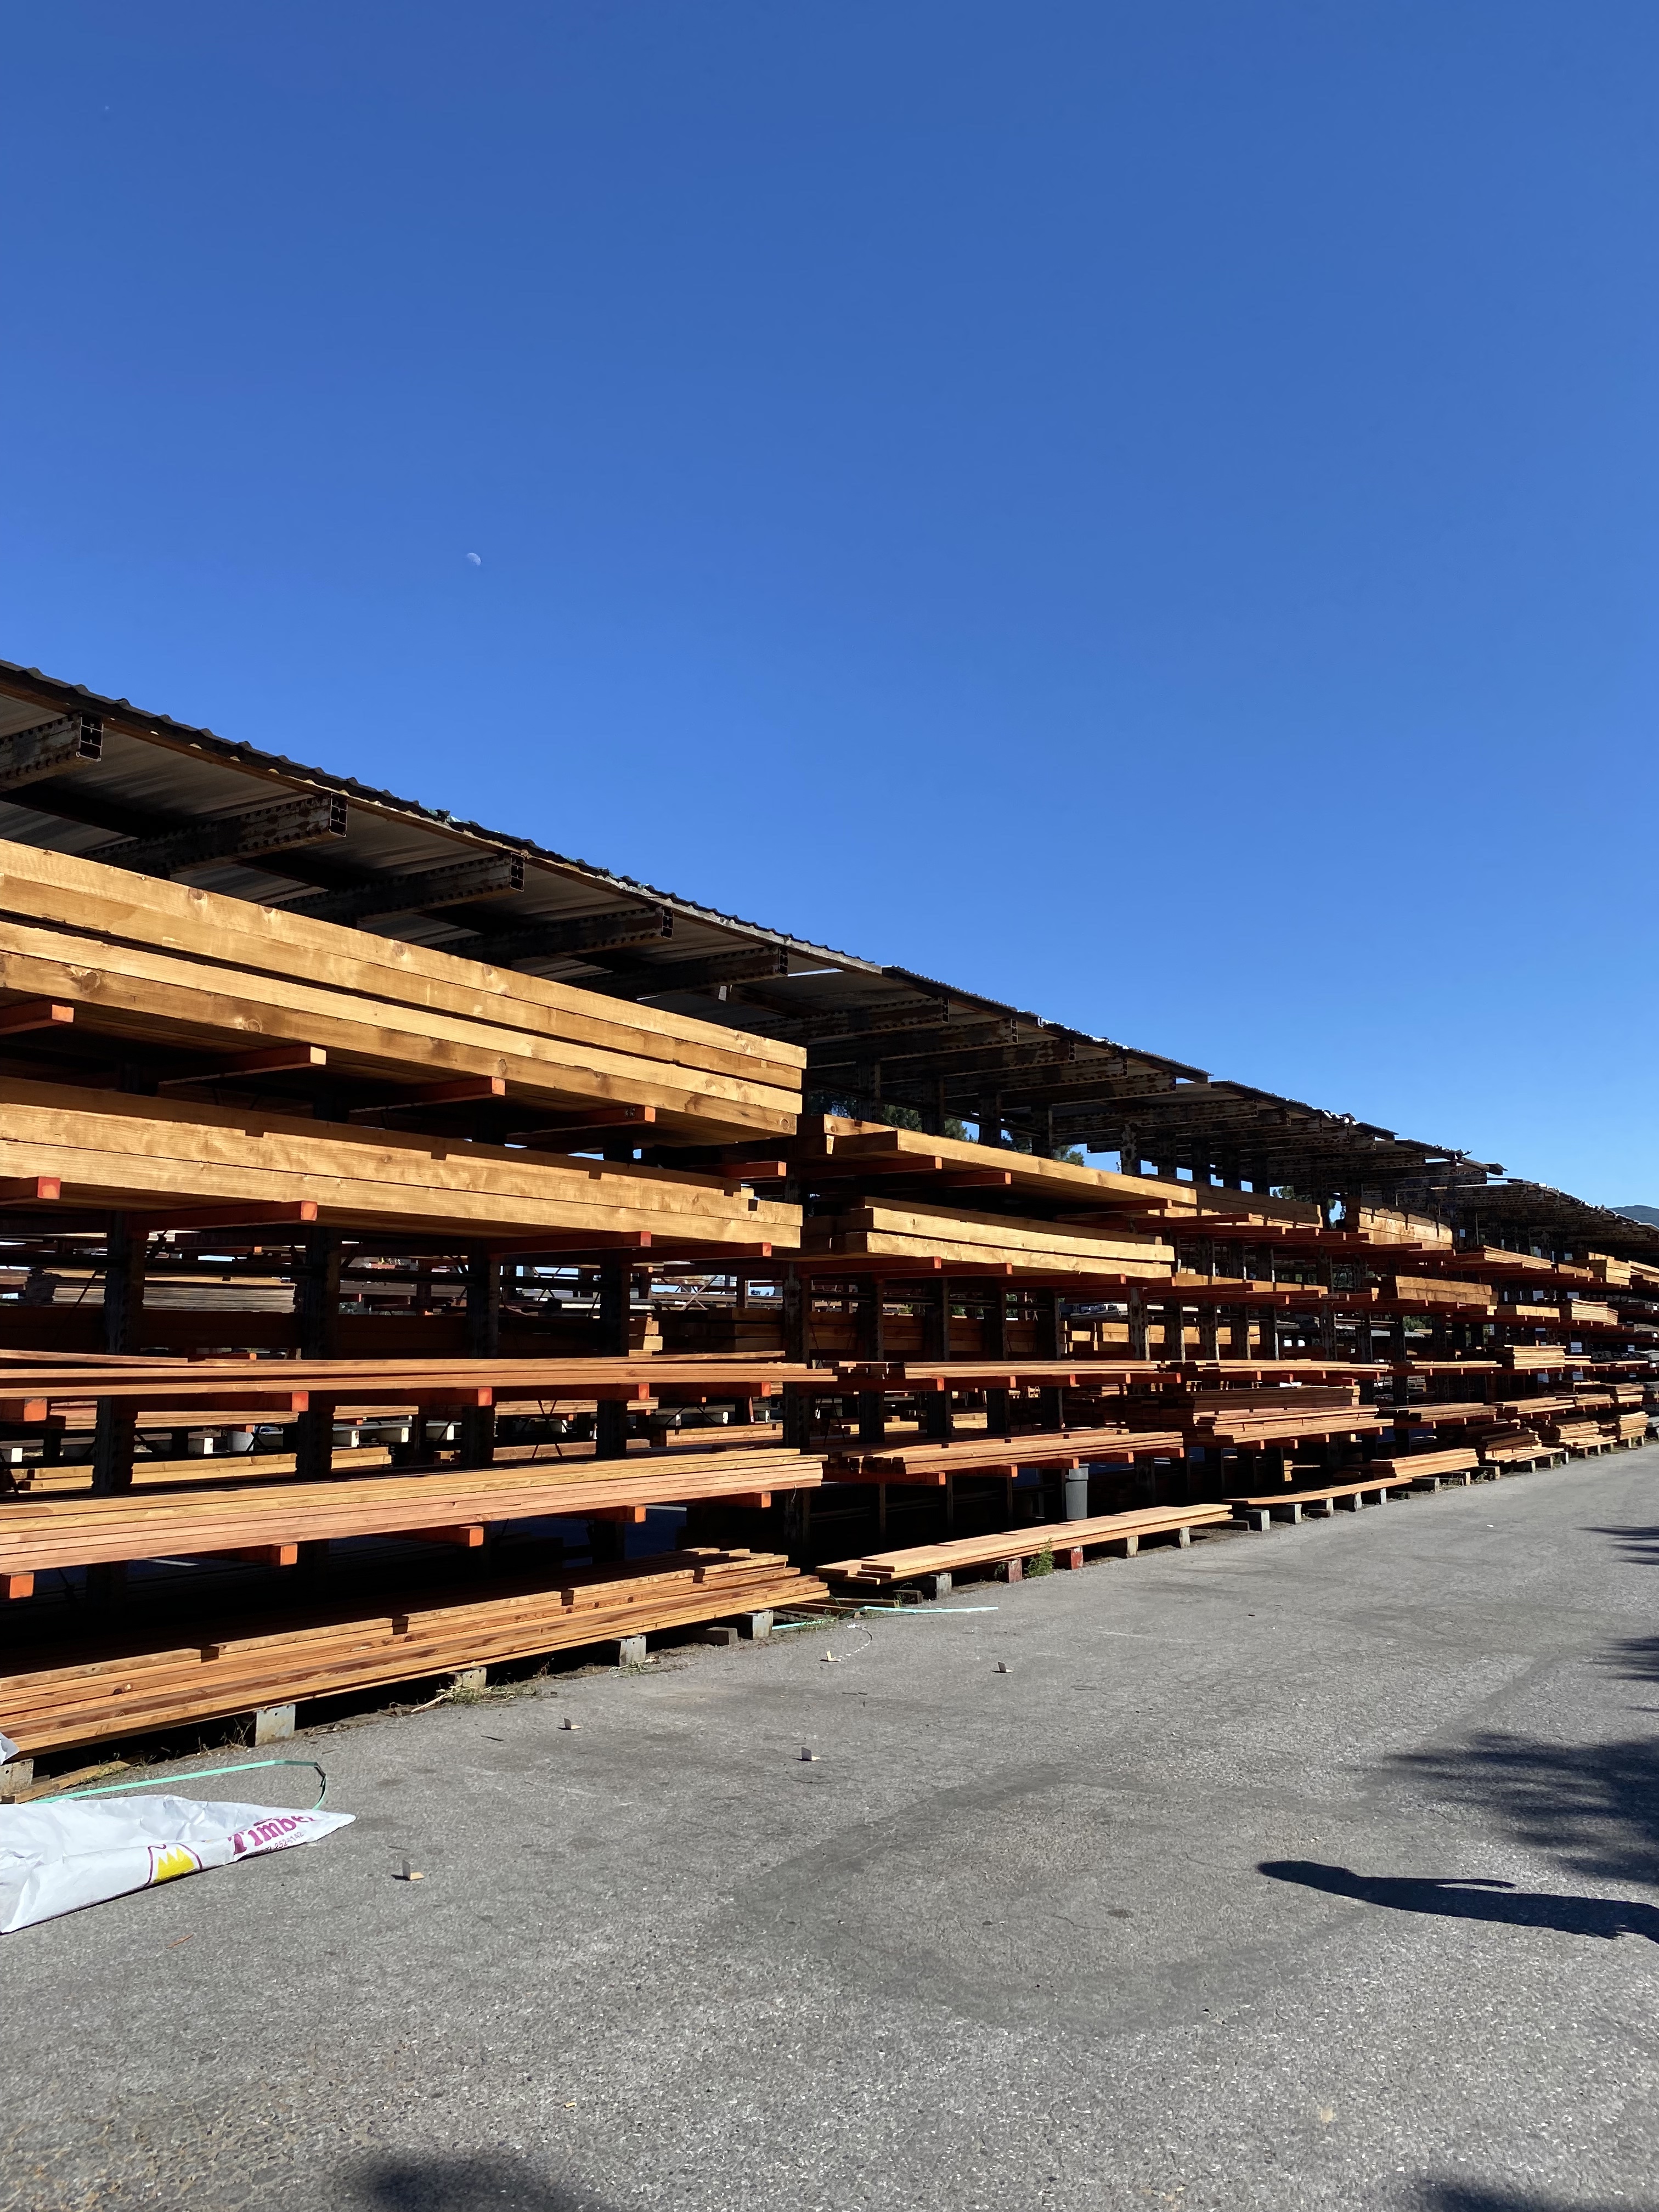
The hard part was over. Now the real fun came. I had to build two deck steps that would lead from the patio to the deck. I bought six 8′ pressure treated wood and deck nails to construct the frame.
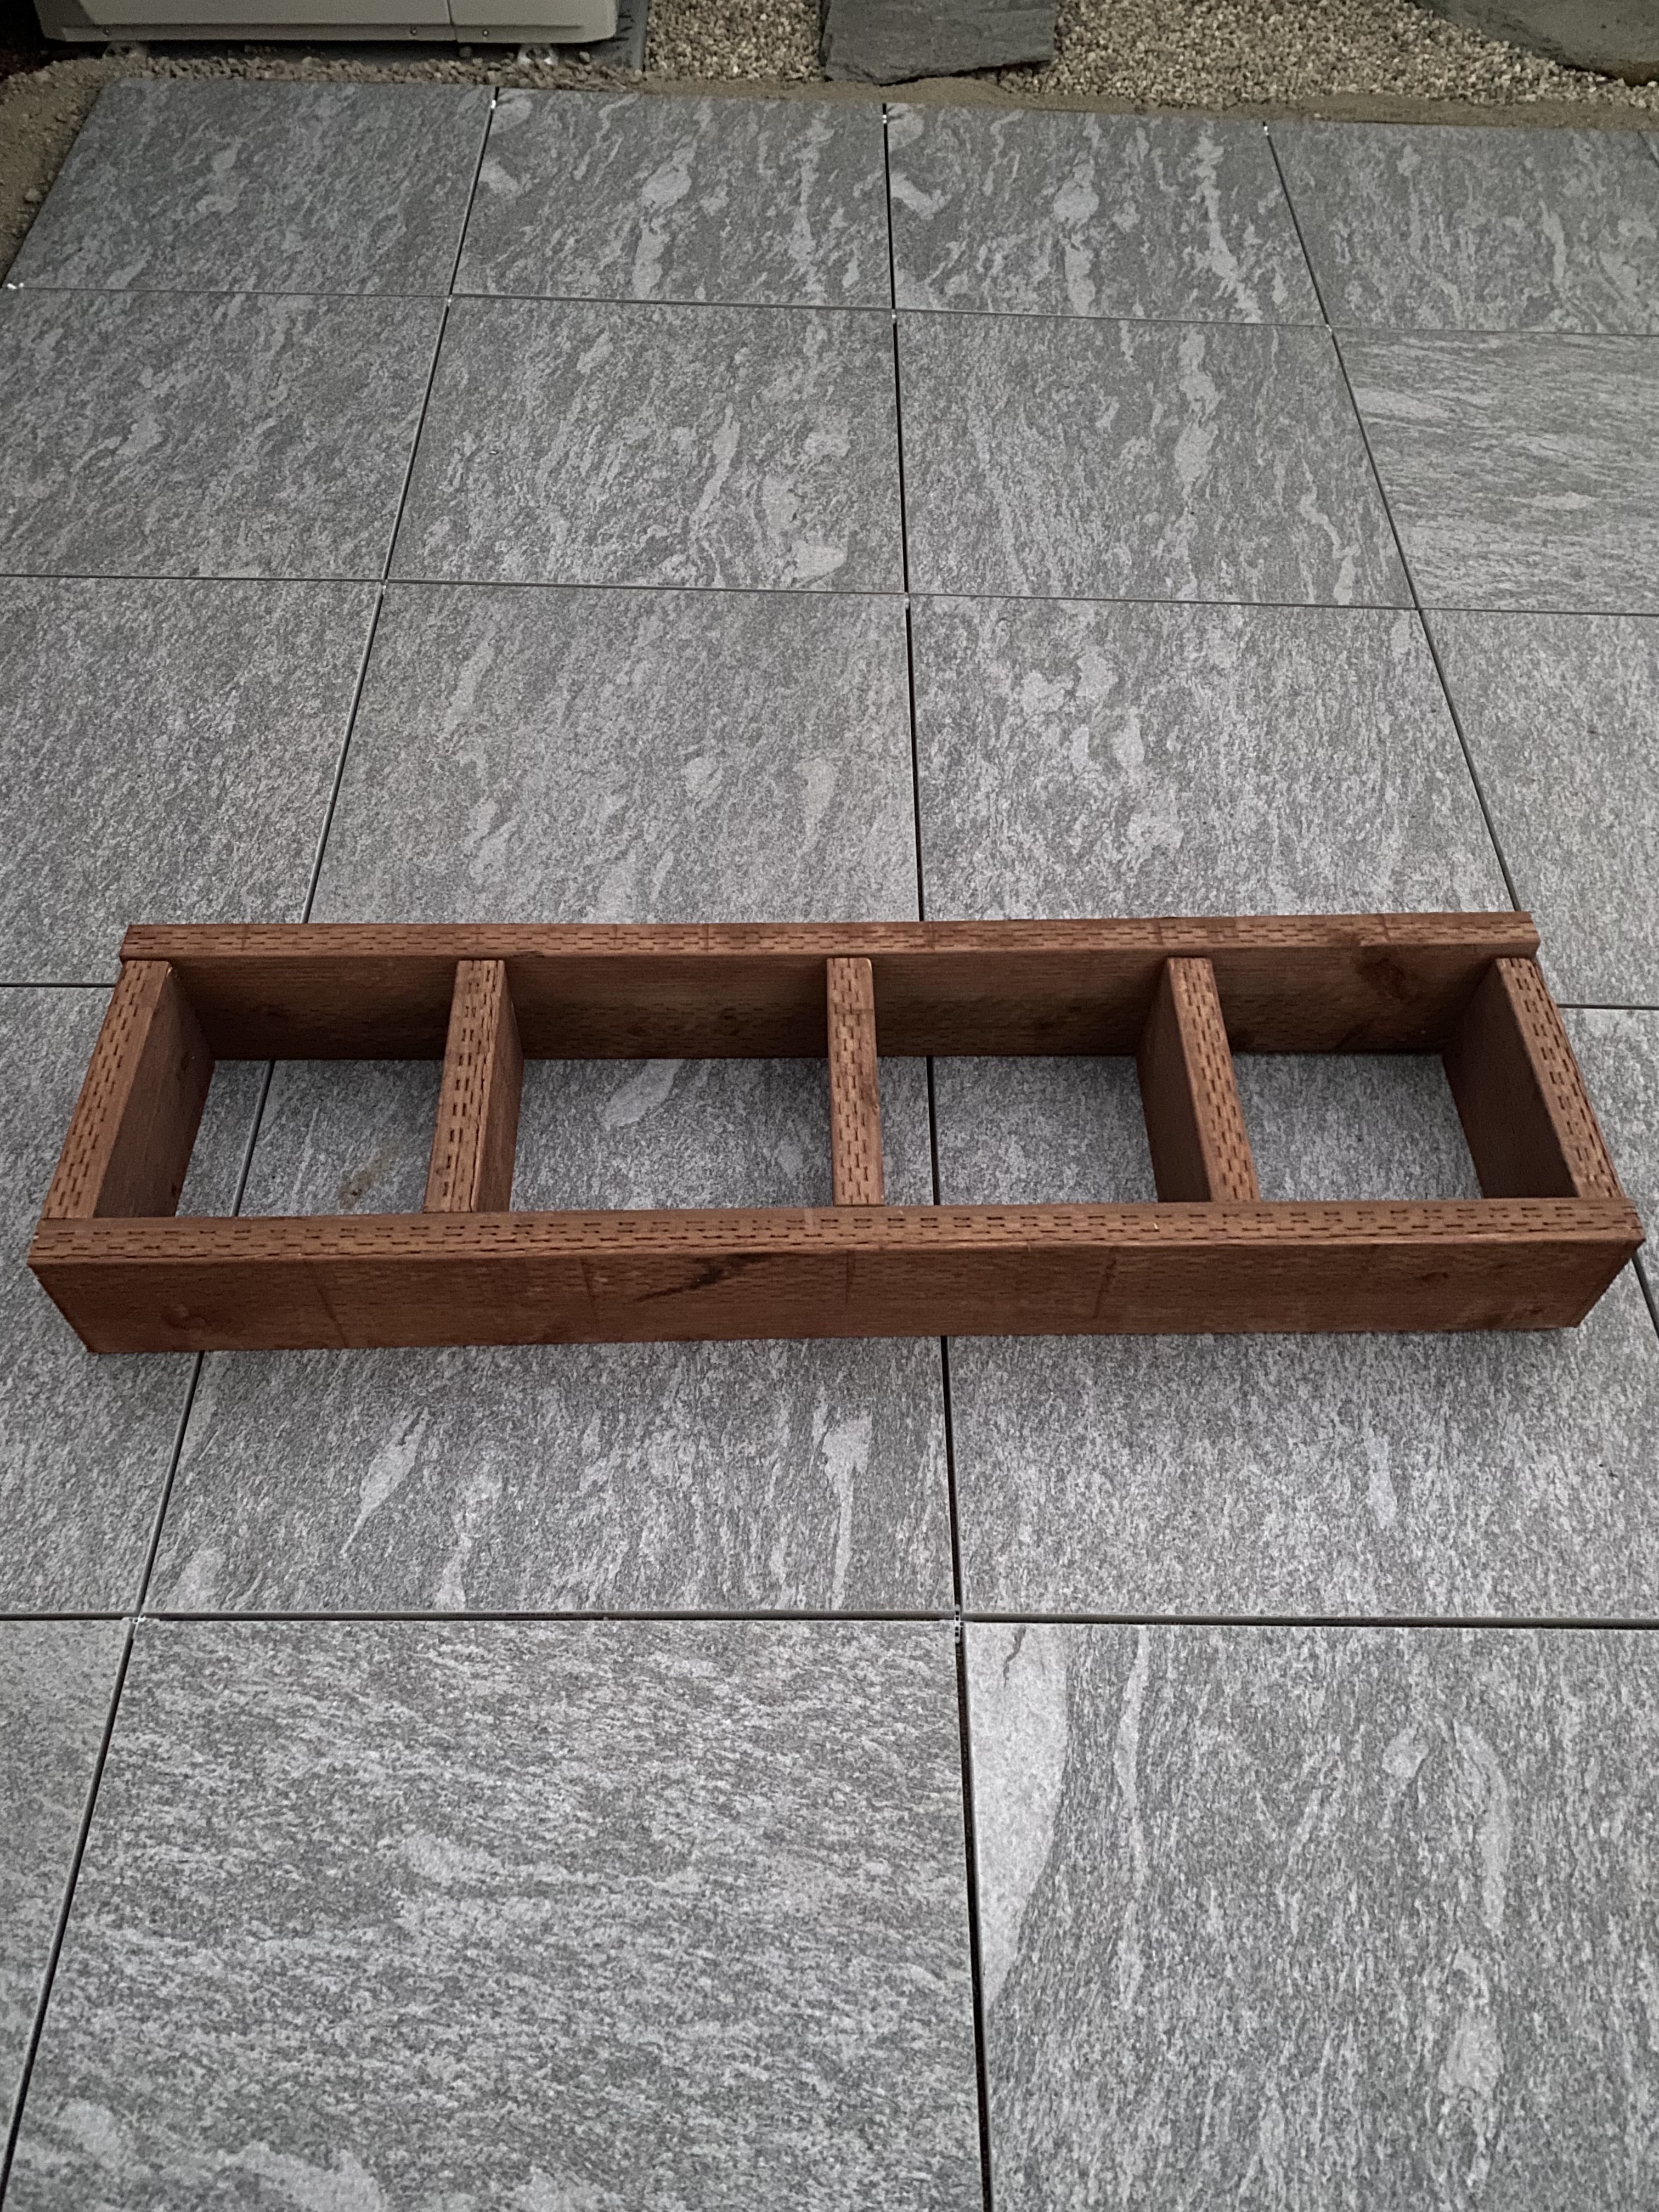
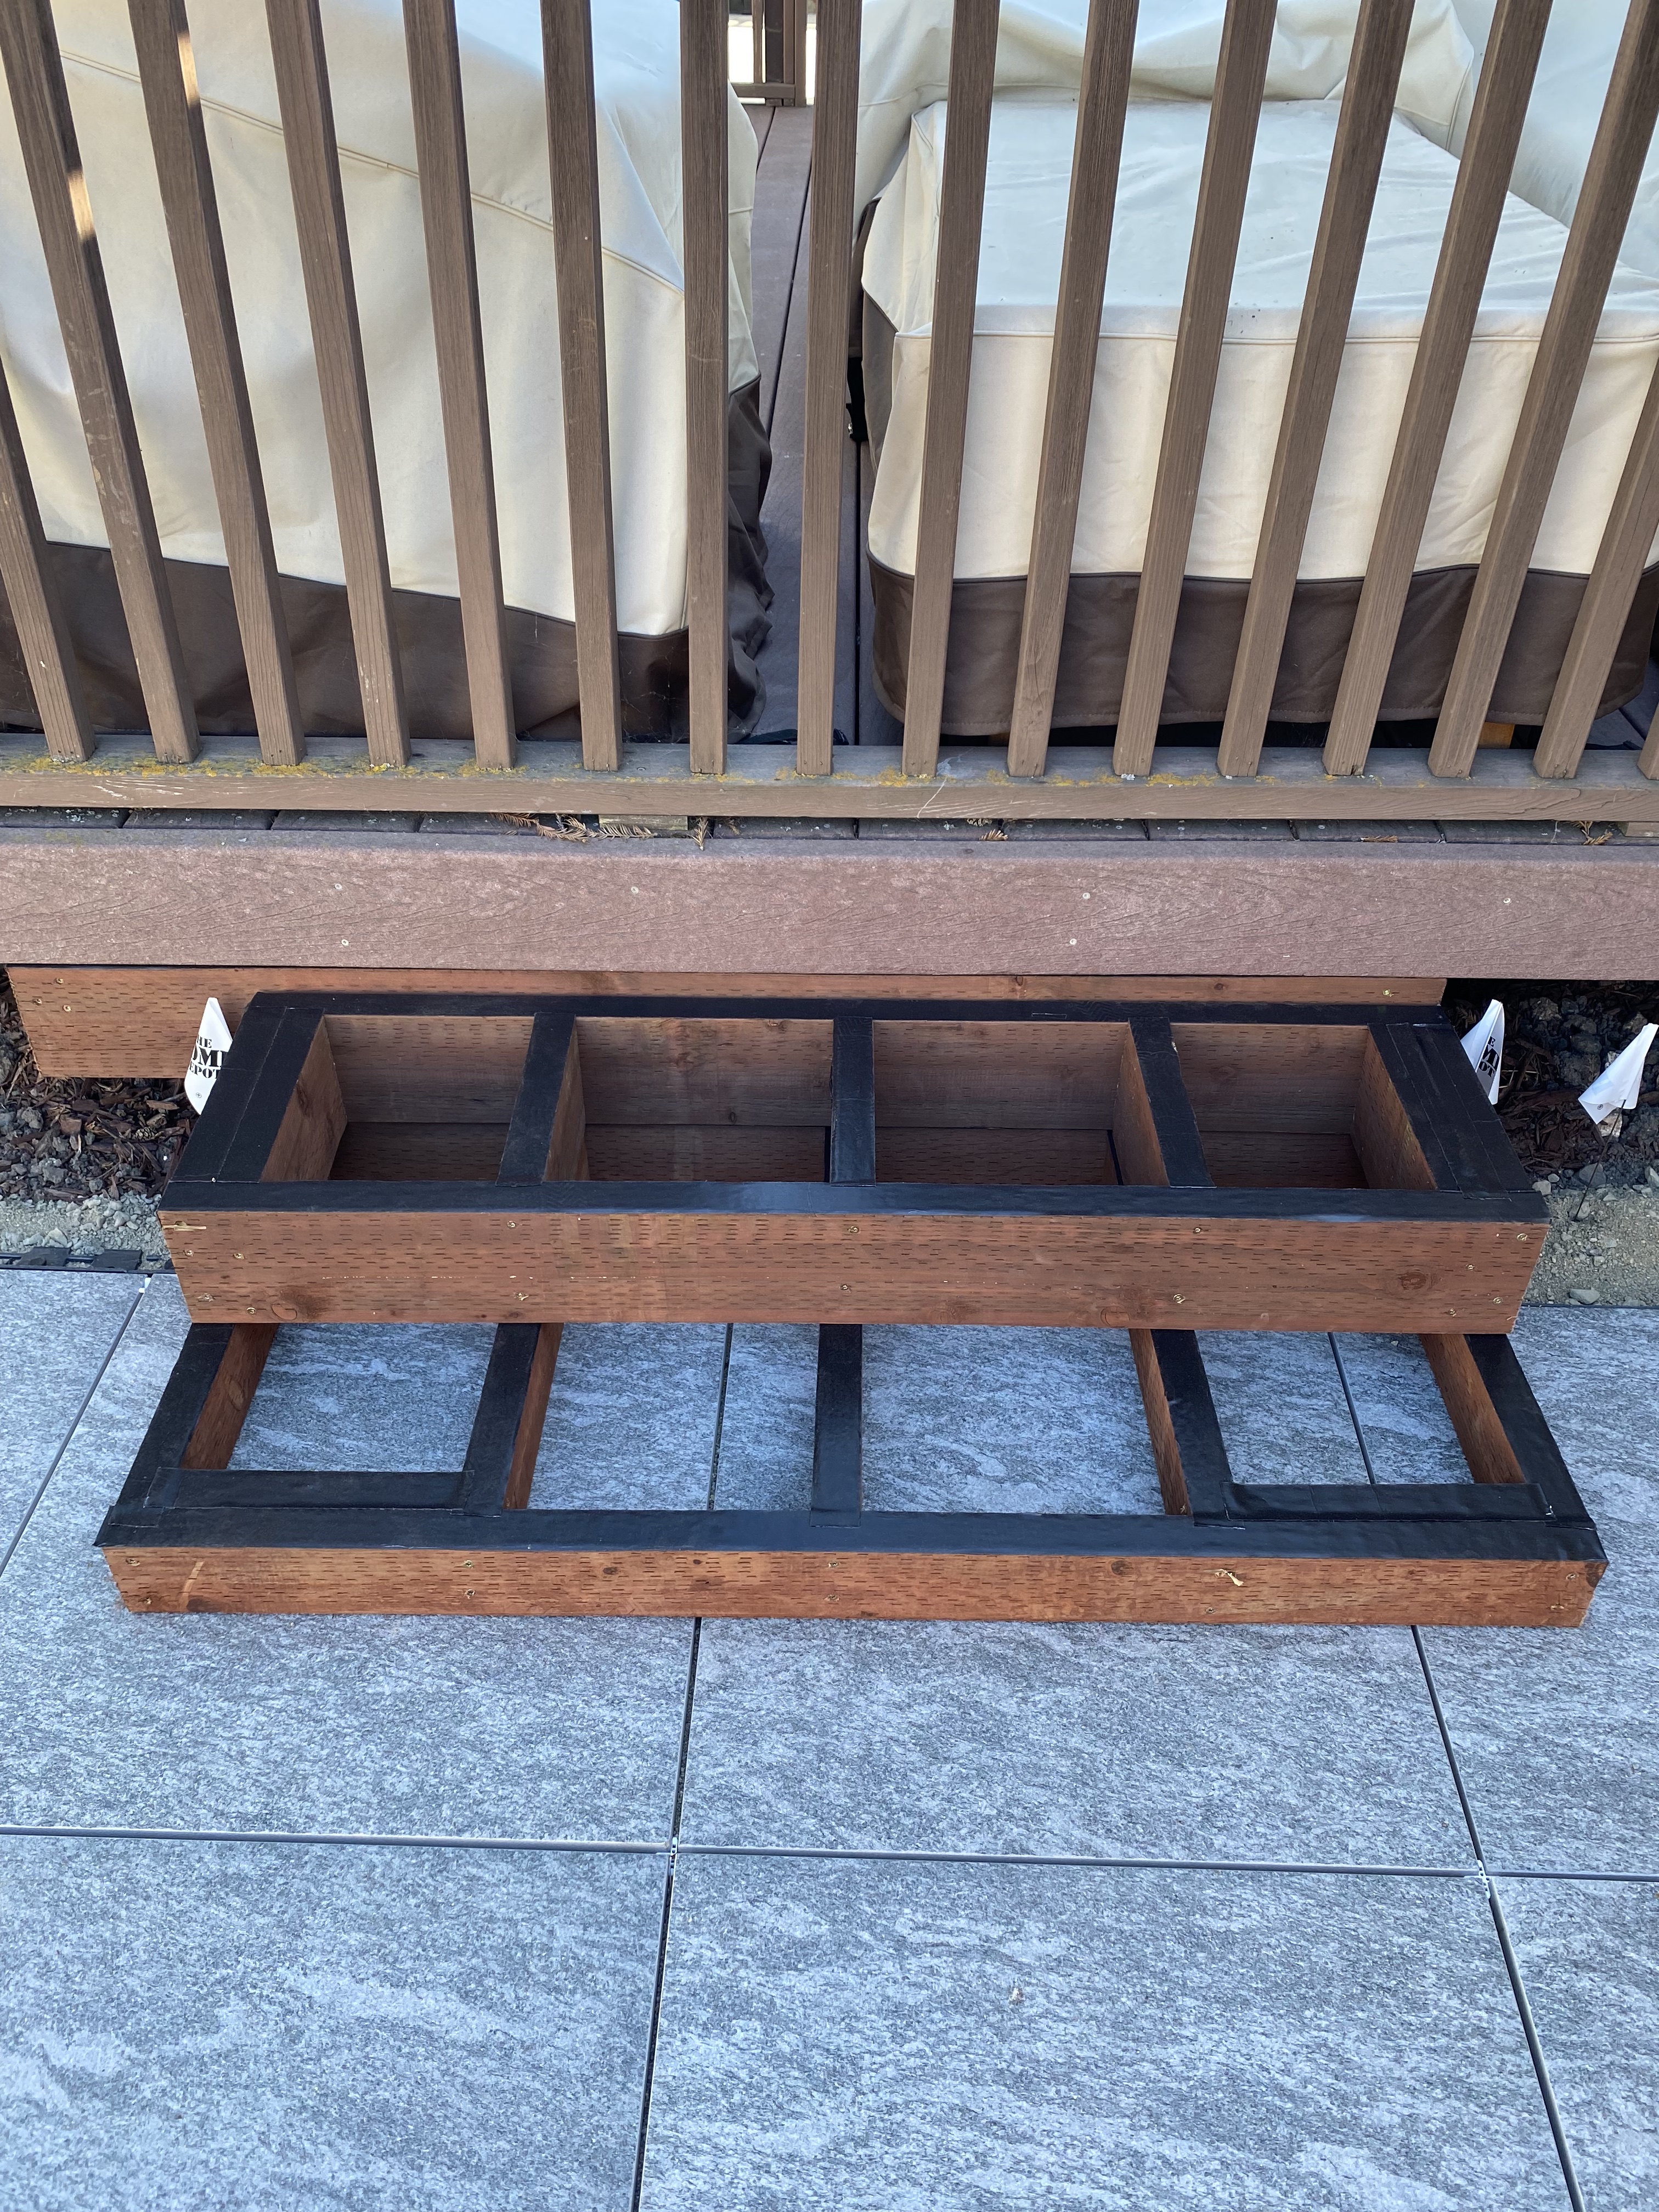
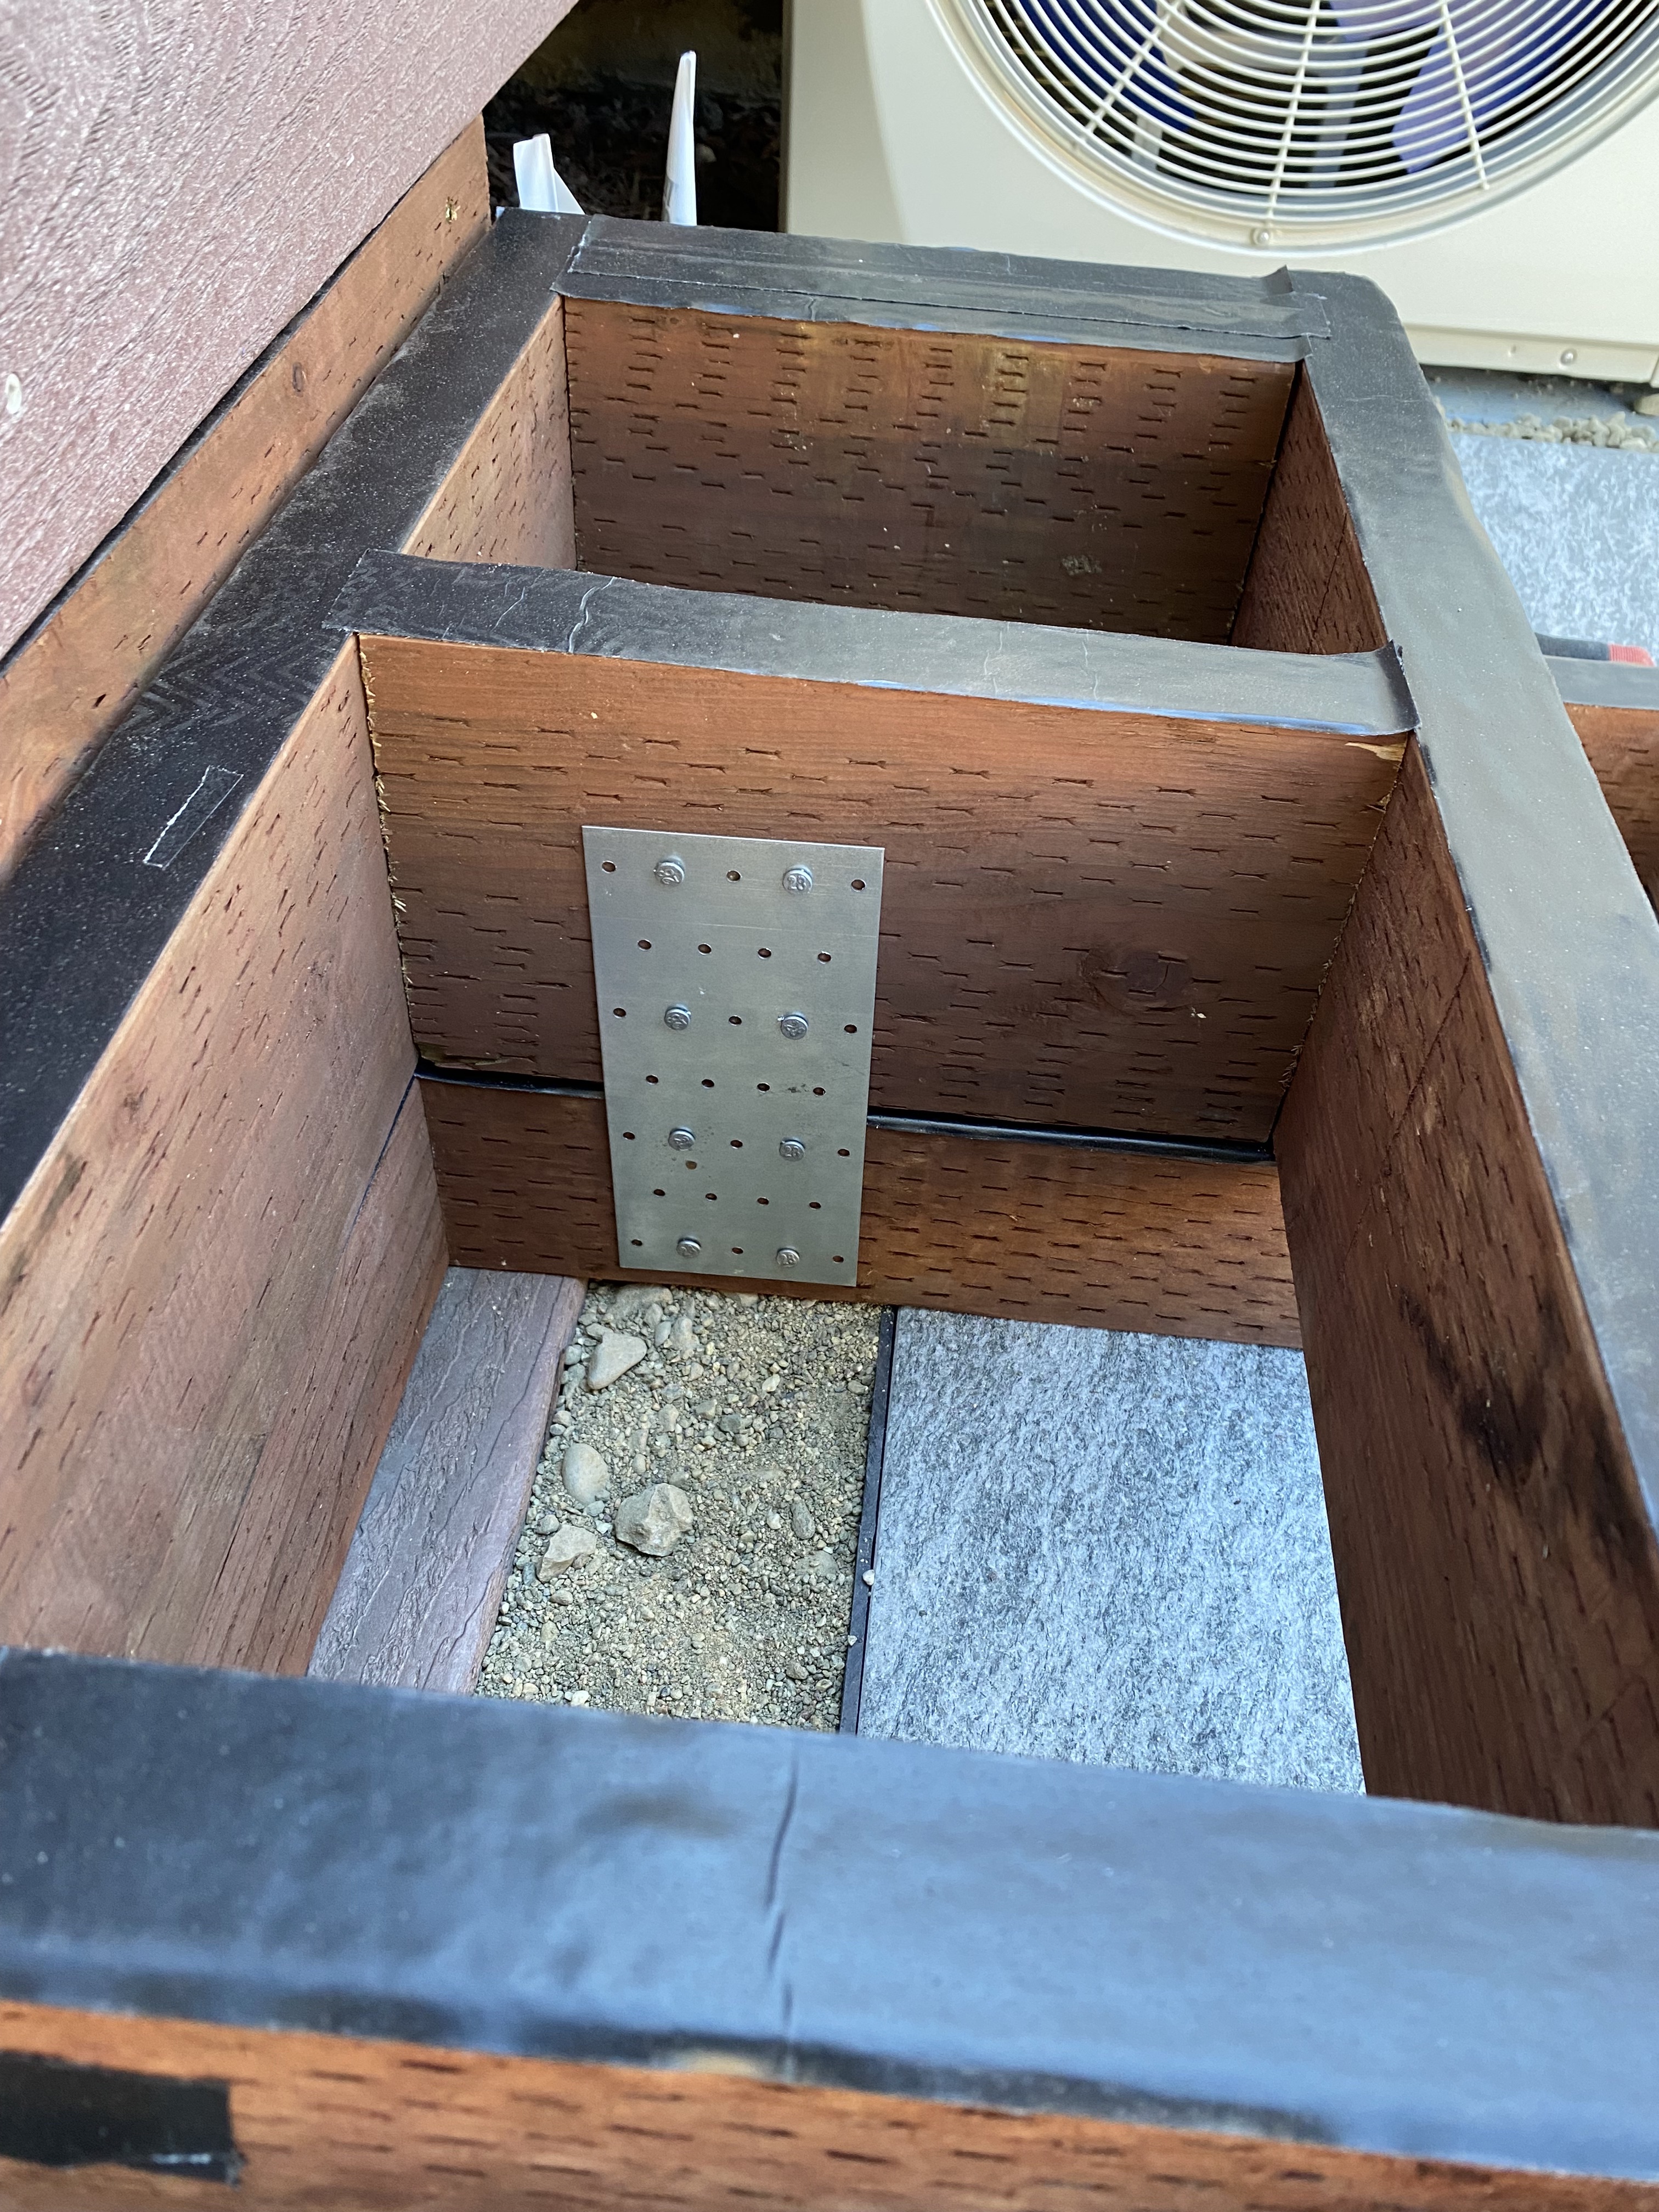
I used a circular saw to cut the wood up, then screwed them together with an impact driver. I then applied an adhesive membrane to the top of the frame. Doing so prevents water from accumulating on the wood and promoting rot. I then bolted the two frames together with two stainless steel plates.
I then bolted the frame to the bottom of the deck, making sure to compact the gravel and sand underneath to create a stable foundation.
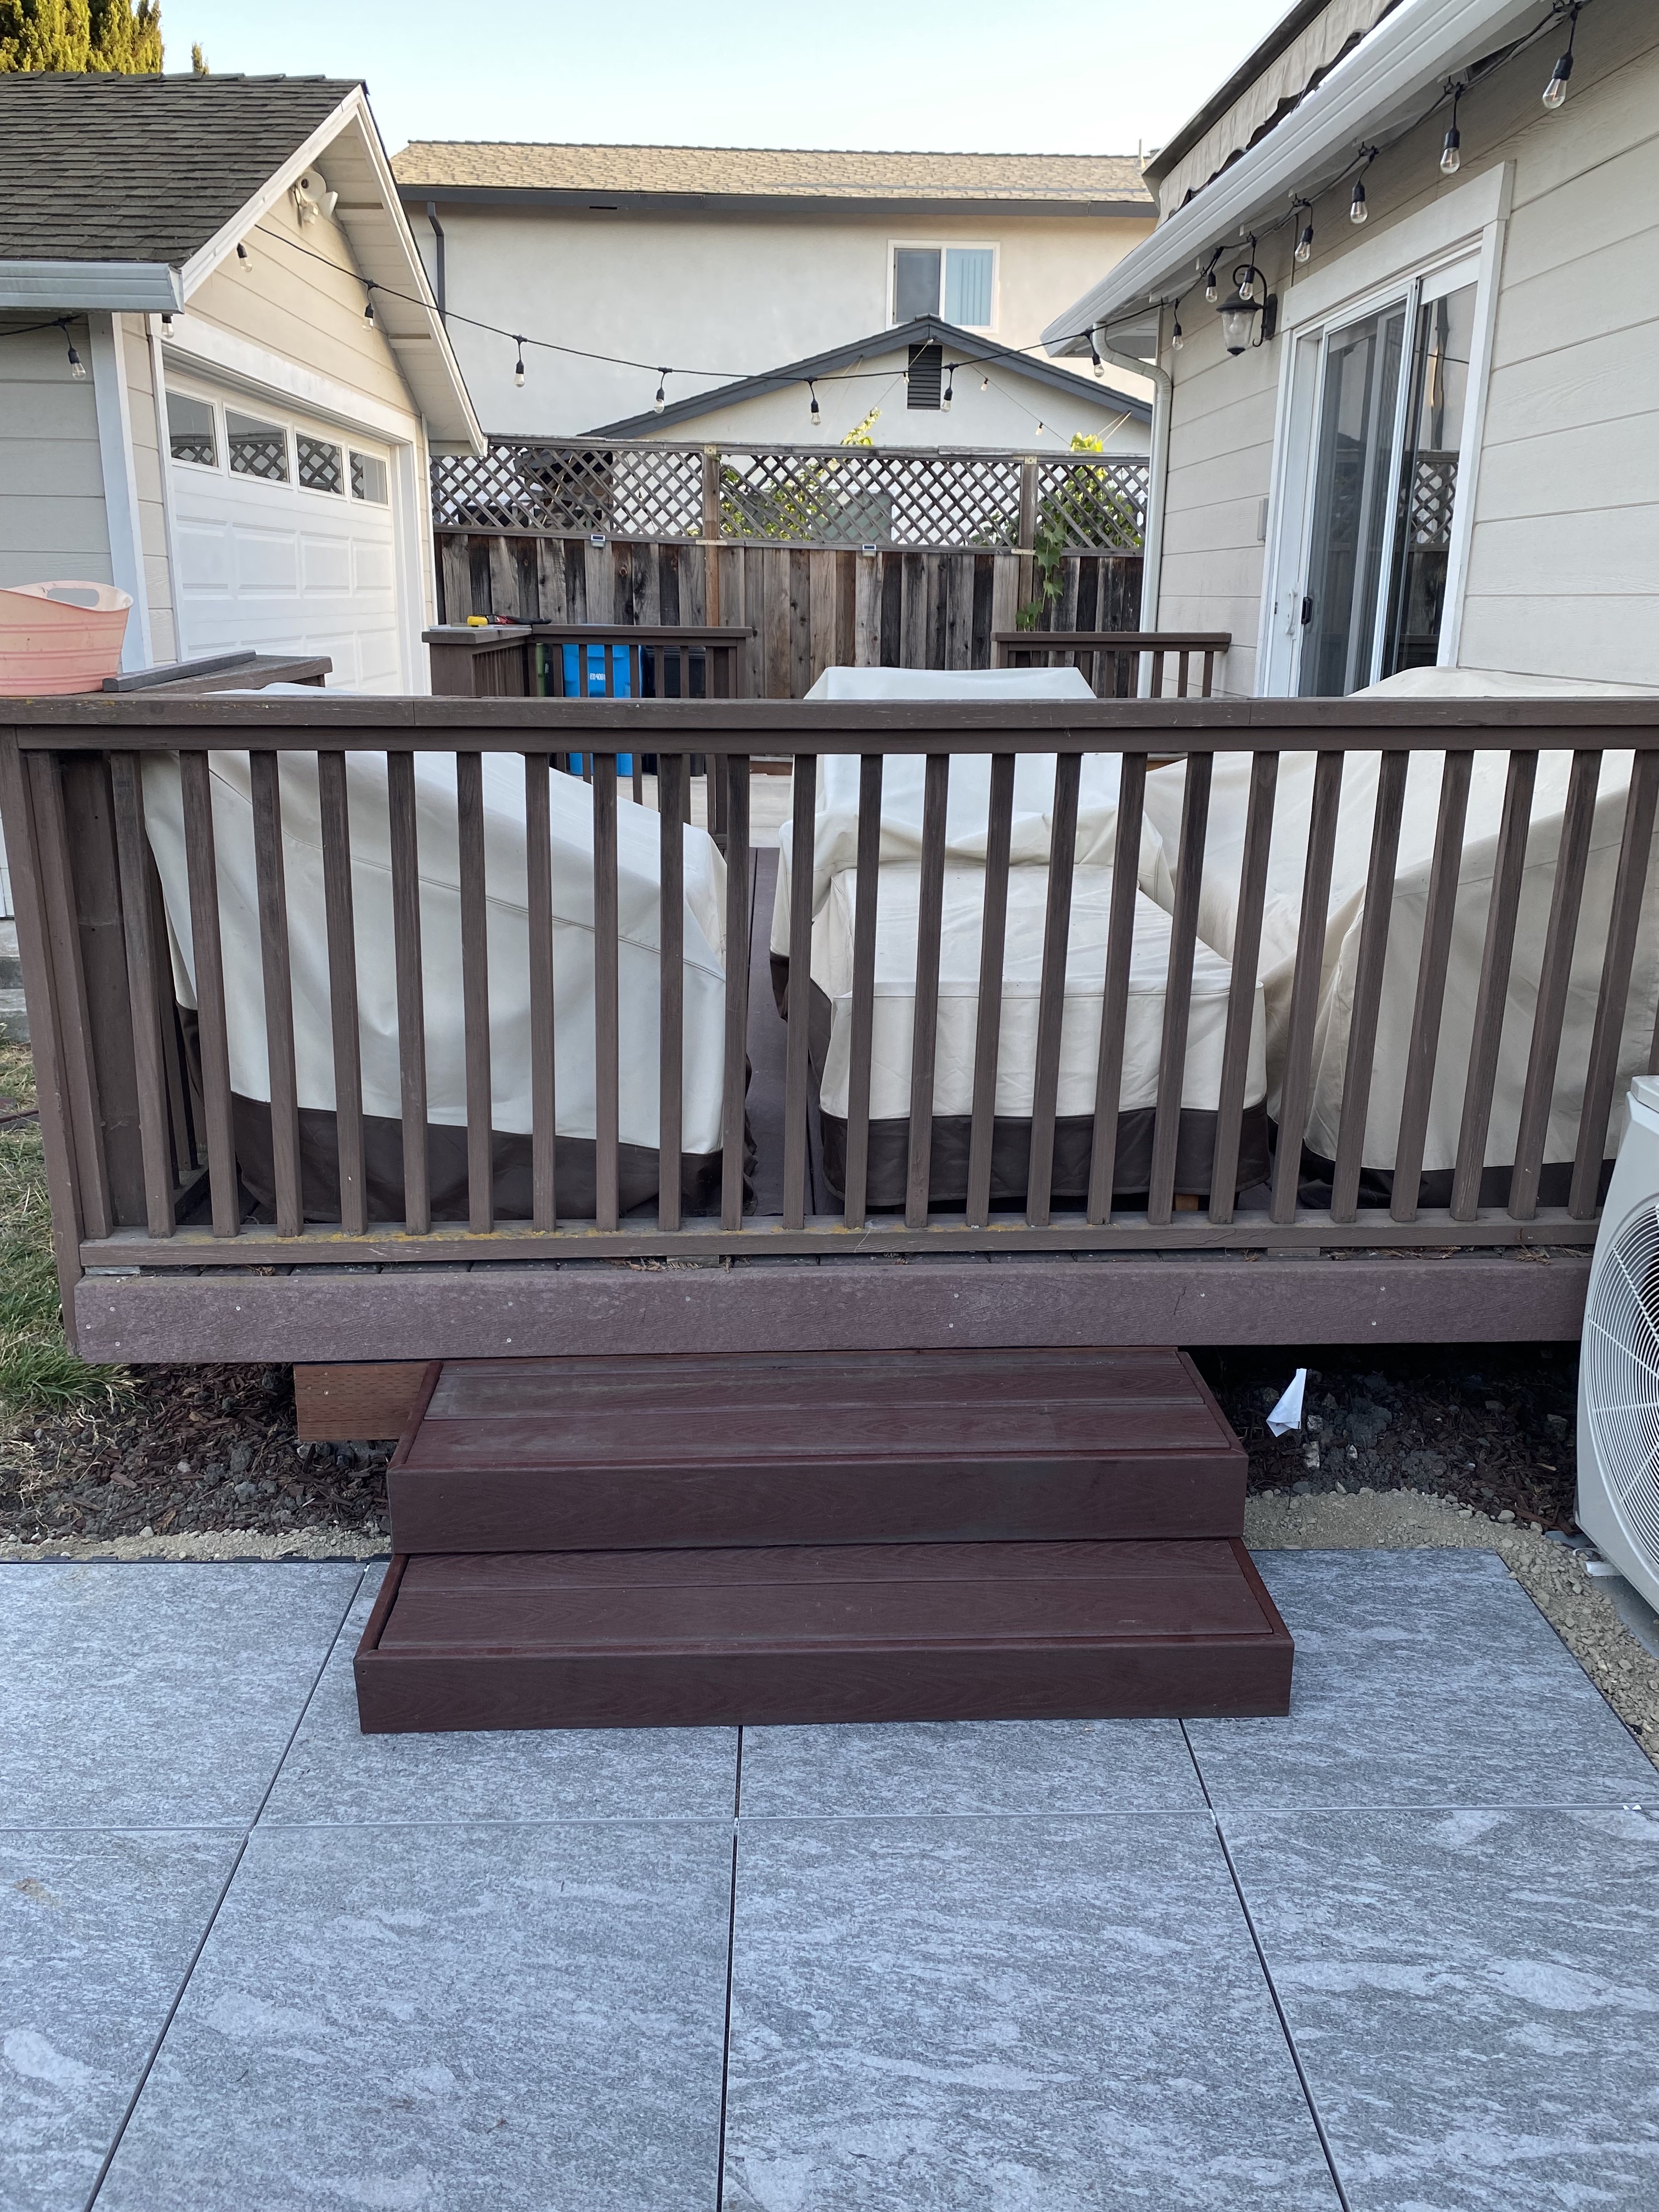
11. Deck Boards
Through a discovery process, which is a fancy word of asking Reddit, I learned that our existing decking material was Trex composite decking. Trex’s customer care team informed me that the deck boards we had were discontinued in 2014 but pointed me to a comparable product. I found a lumber yard called Economy Lumber that sold the Trex Select Madeira boards that I wanted.
I bought two 16′ boards, and the workers gladly cut the boards in half so that it would (barely) fit in my car.
I then used the saw and spent hours on hours cutting the boards to precision. I did not enjoy that process since I was covered up in personal protective equipment up the wazoo: N95 mask, foggy safety goggles, and noise canceling headphones. There was a lot (read: A LOT) of sawdust.
Alas, I finished cutting everything. I’m not too ashamed to admit that I accidentally sawed off part of the deck rails (not pictured) since I did a few cuts on the rail itself. I used the impact driver to screw the boards onto the frame.
12. Deck Rails
I used the circular saw to cut off the deck rail. This had been one of the tasks I dreaded the most since I had limited knowledge of deck rails. I was pleasantly shocked to find that the process of removing the deck rail took… 2 minutes. It was by far the easiest, and most satisfying, part of the process. It just came right off.
I sanded down the area that I sawed off to prevent splinters.
And that was it! Project virtually complete.
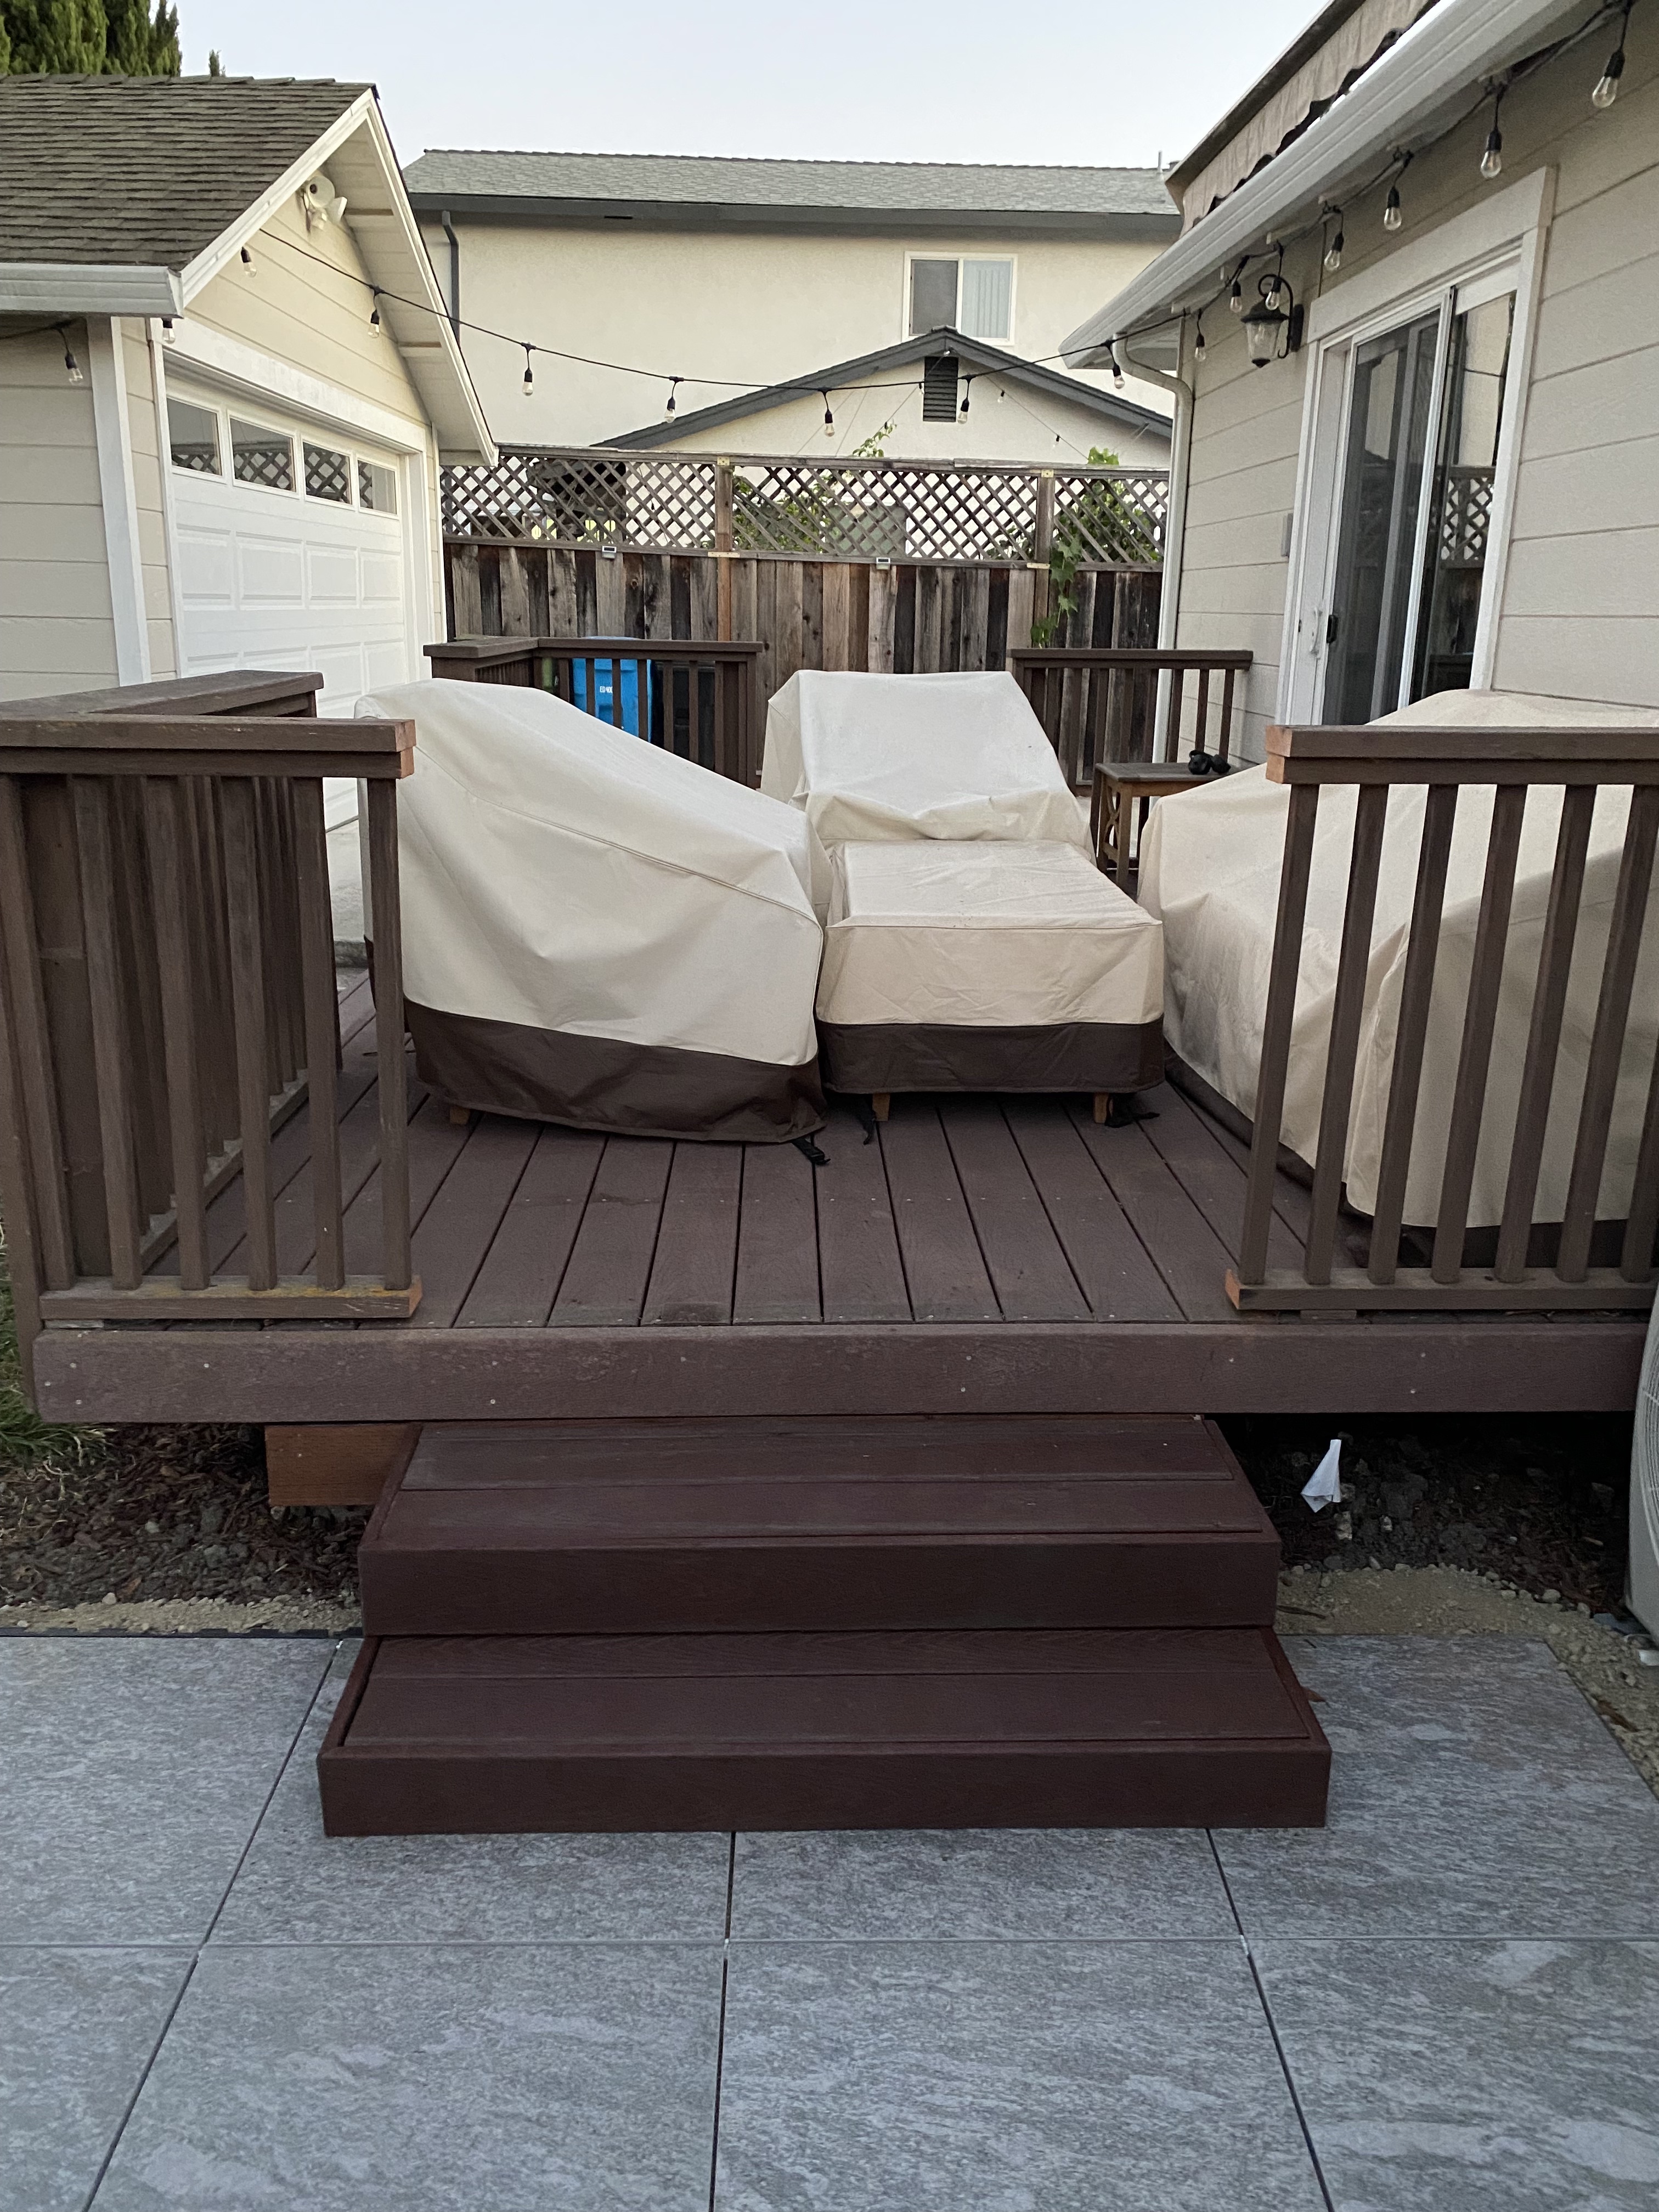
13. Furniture and finishing touches
Bonita’s cousin was kind enough to gift us their patio furniture. They had coincidentally bought new furniture, so we happily took it off their hands. We rented a truck to pick up the furniture.

That’s pretty much it. I still have to cover up the air conditioning condenser with a privacy fence. I also haven’t covered the edging and excess geo cell just yet. Planning to use some composite edging to cleanly divide the grass from the patio, then fill it with the leftover sand.
Project Costs
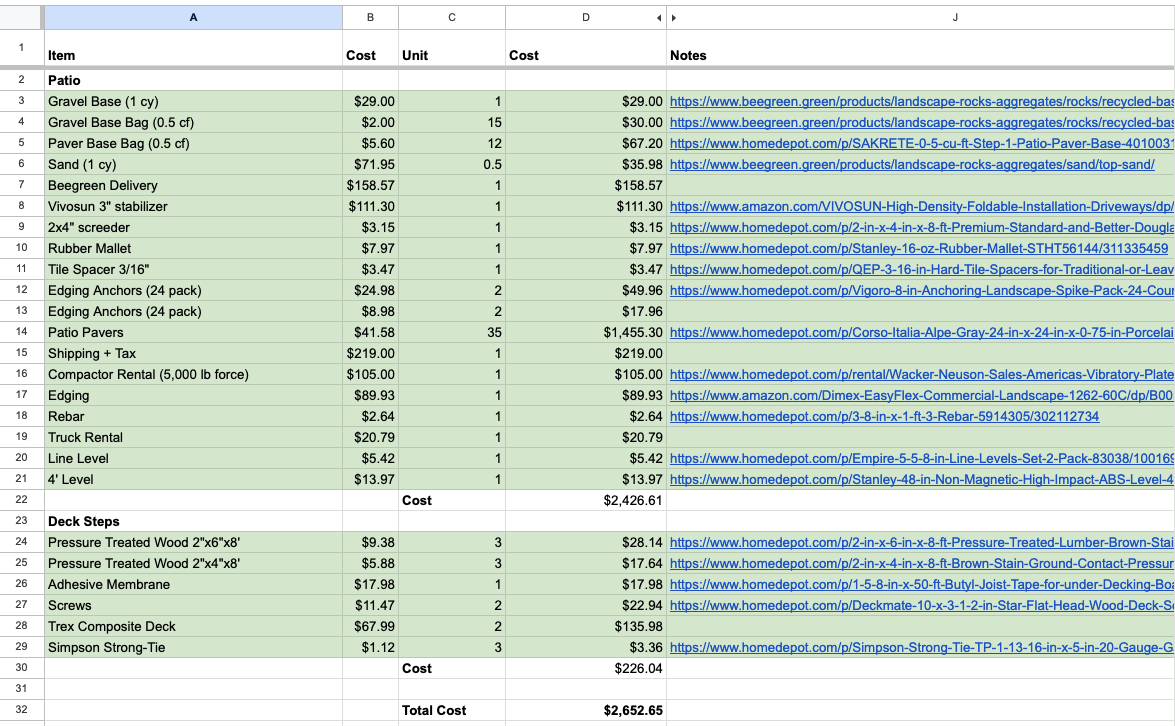
The project cost was $2,652.65.
I made a lot of mistakes along the way, which if avoided would have saved both time and money. Edging anchors were bought from Home Depot, and I didn’t realize until later that Amazon sells them for a fraction of the cost – a $50 difference. I also didn’t order enough gravel directly from Bee Green. This caused me to spend an extra $52.70 by buying them 15 additional bags from Home Depot. At 50 pounds each, it was exhausting to carry them. It would have been possible to complete the project at about $2,500.
I’m overall pleased with the experience and found the process to be really enjoyable. We plan to use the space often!
Special thanks to:
- Allen for helping dig grass for a couple of hours
- Michael for the landscape fabric
- Daniel for lending the circular saw and impact driver
- Dominique and Khaled for the patio furniture
- Wifey for the unconditional support along the way

3 thoughts on “Back Yard Patio”